DIY Farmhouse Vanity Makeover
VIDEO:
In this project, I makeover a vanity at my parents’ house. They have a house built in the 1950’s and it has somewhat of a country style, so this farmhouse look will be perfect for them. Be sure to watch the video and follow along below with how I did it:
BACKGROUND:
My dad has redone pretty much every inch of their house in the past 35 years. This house, built in the mid 1950’s, has had a lot of work done to it, but it is still a great house and one where I spent a ton of time growing up. Years ago, it had a 2-car carport and my dad and I worked on nights and weekends for 2 years to enclose that and make it a large mother-in-law type suite with a double sink vanity, full walk-in closet and separate shower/toilet room. It’s really nice, but has largely not been touched since we finished it many years ago. It was time for an update, but my dad really didn’t want to change anything.
The compromise? No painting walls or cabinets and no drywall/patch work. Hmmm…ok, I can work with that. Follow the steps below to see what all we did.
TOOLS & MATERIALS: (affiliate links)
Vanity Lights: https://amzn.to/3RqXEcX
Faucets: https://amzn.to/3HwQxLu
Track Saw: https://amzn.to/3wXLVZH
Sander: https://amzn.to/3DACFyB
SurfPrep Sander: https://www.surfprepsanding.com?aff=130
Speed Square: https://amzn.to/3X5kurE
LIGHT PREP:
Before we traveled back to see my folks in Mississippi to hang out and work on this project, I needed to prepare some things. This hickory board will be used later behind the lights my mom chose. I flattened it, added a chamfer as an edge treatment and packed it in the car.

Here’s a little tip: when you swap out your router bits, give the collet a few taps with the wrench and get all of that sawdust that has settled in there out. It can cause your bit to slip, so it’s just a good idea to get it out of there.

This board is hickory, and if you’ve never worked with it before, it’s very dense. Very dense. Because of that, I went pretty slow with the router and took multiple, shallow passes off. That way, I could get a nice, clean chamfer on the front edge of this board. You’ll see a bit more about this board later in the project.

THE OLD VANITY:
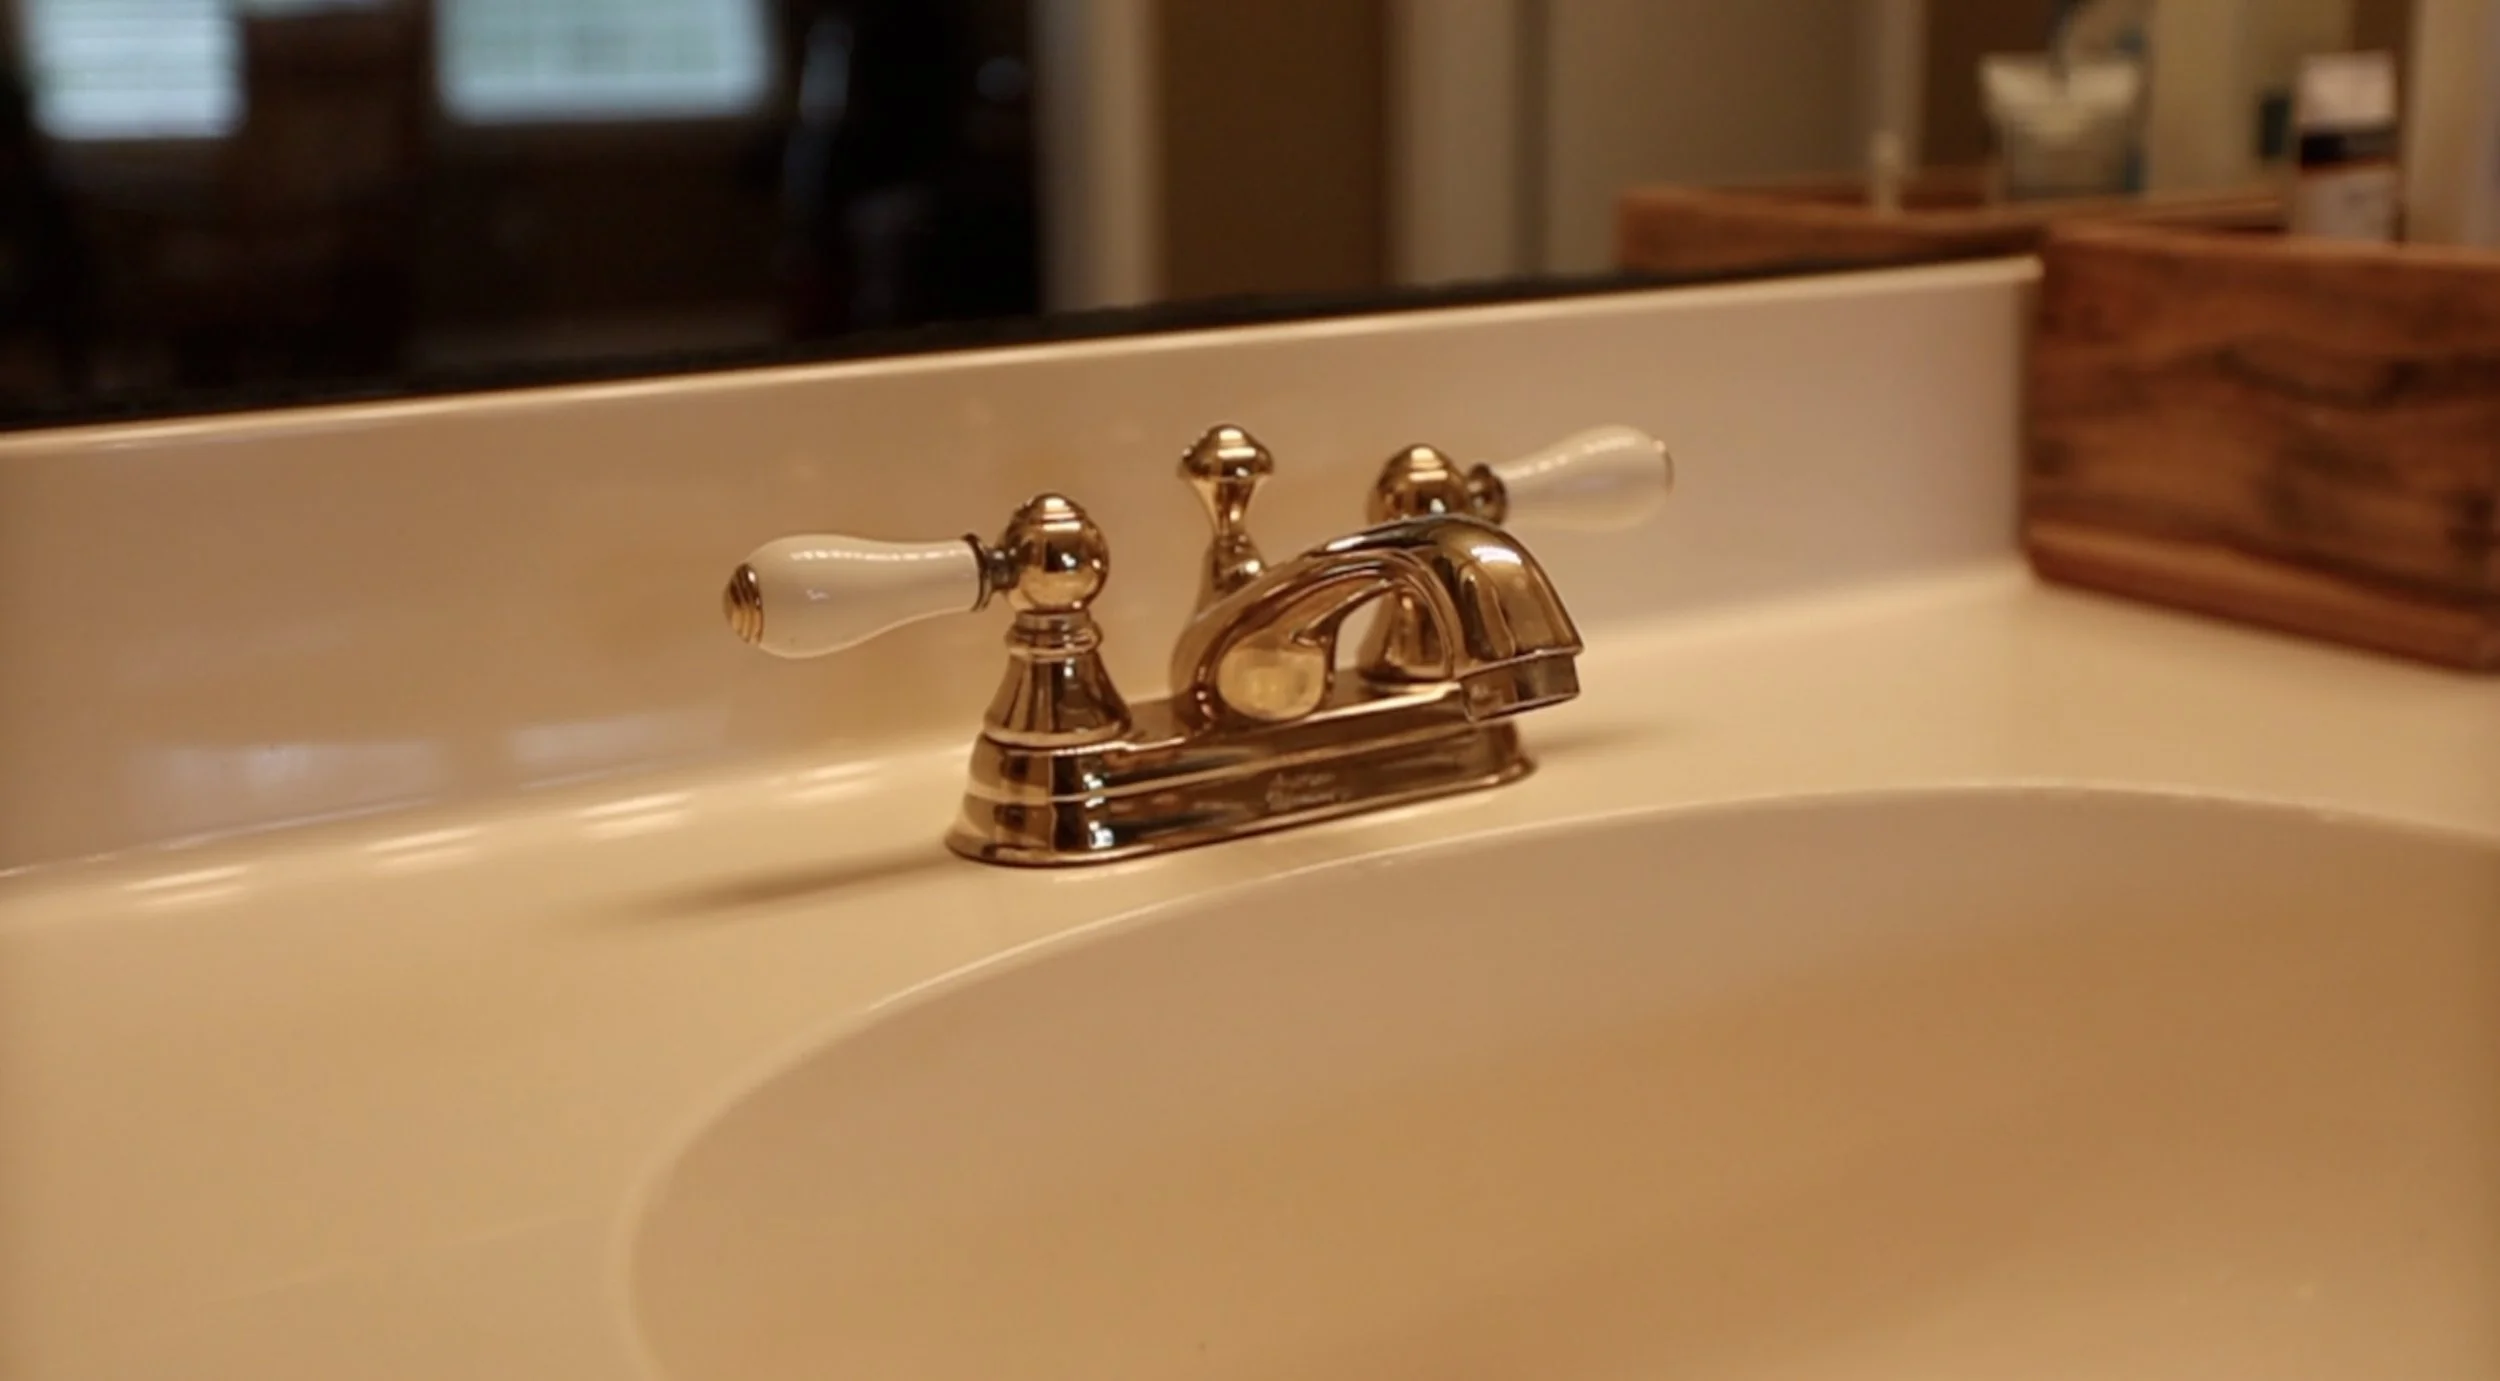
Here’s the old vanity. It still doesn’t look that bad, but it’s pretty dated. I mean, the 90’s called and they want their light bar back. That light bar is going, the sinks are getting updated, all of the hardware and even the mirror will get a facelift.
I know gold finishes are kind of in again, but not this kind. This is that 90’s, really super shiny brass looking stuff. I’m not sure I ever liked it very much, but they liked it at the time. I kept telling my dad, if you got 28 years out of this stuff before having to upgrade it, I’d say you got your money’s worth!


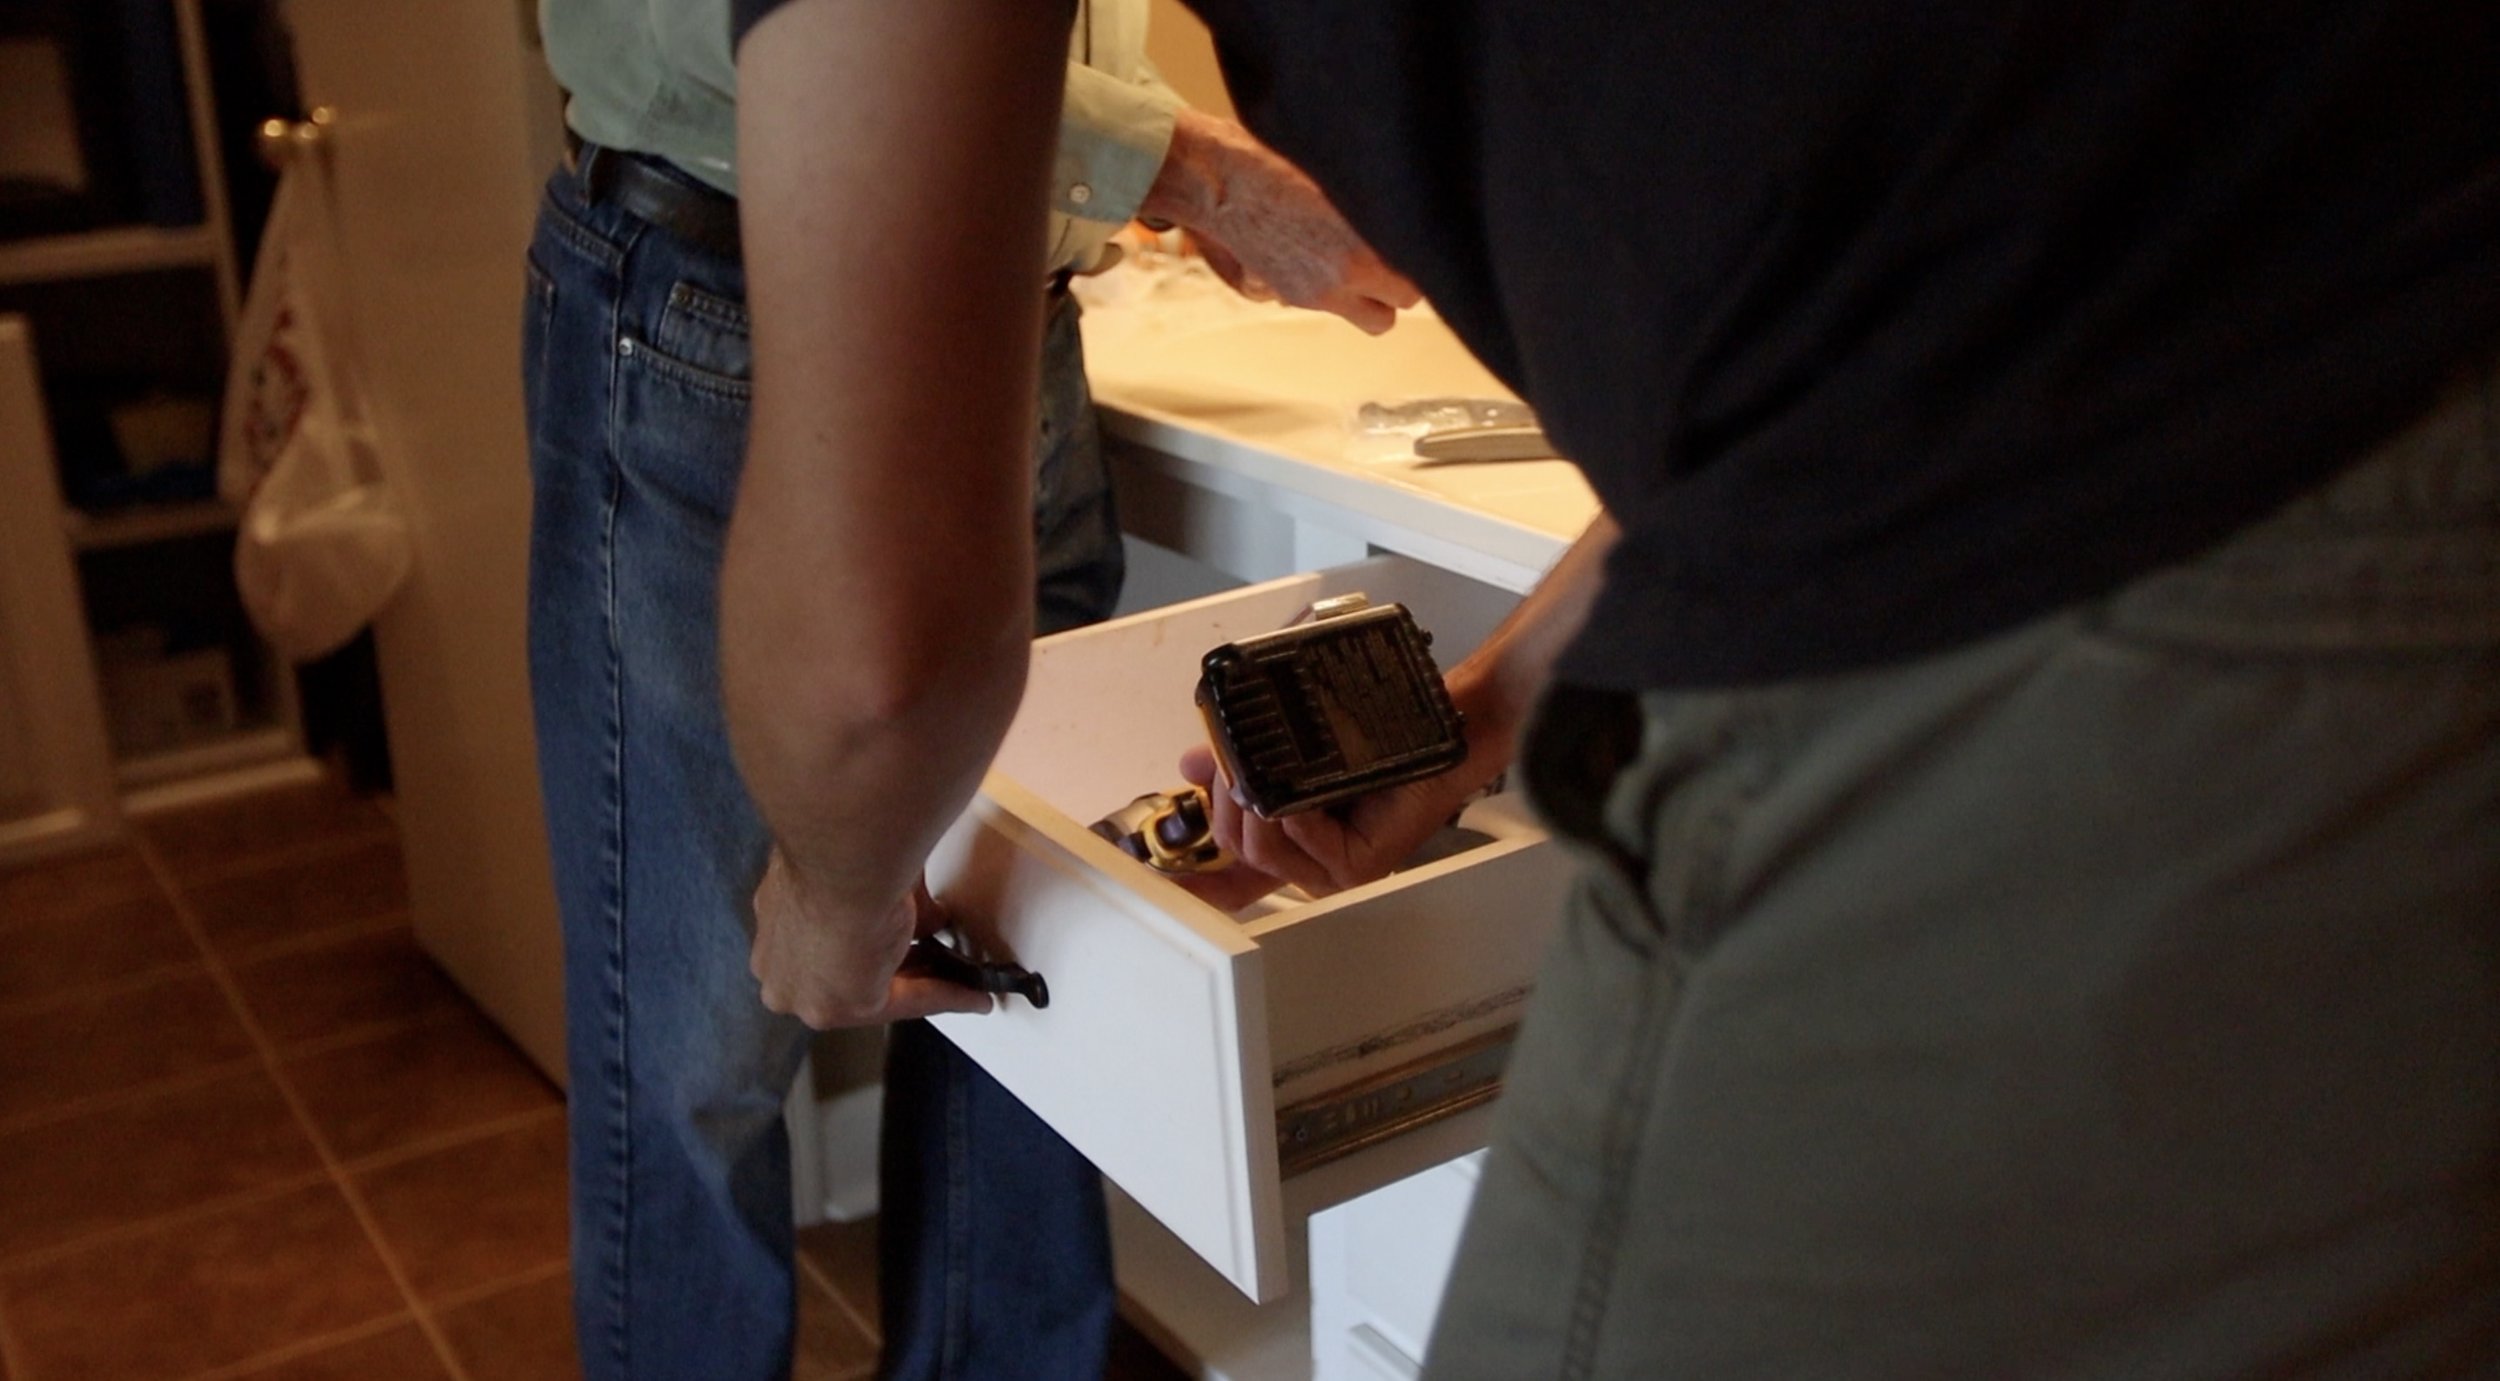
REMOVING CABINET DOORS & DRAWER PULLS:
Since we were changing out the hardware on these cabinets anyway, and swapping hinges, it just made sense to take the cabinet doors off and get them out of the way. That made it easier to access the pipes below the sinks anyway.


REMOVING THE LIGHTS:
This 90’s light bar needed to go. The way these are held in is pretty simple. You remove the bulbs. Then, you can pull off the faux housings that were around the bulb sockets. They’re just friction fit on there. Then, you can pull off the entire shiny cover. Then, there are only a few screws holding the actual plate to the wall. Fish the wires for the lights out from in the bracket and you’re good to go!


MIRROR TREATMENT:
When my dad installed this almost wall-to-wall mirror, he used some type of adhesive and the mirror was REALLY stuck up there. Since pulling the mirror off would likely pull off a huge part of the drywall behind it (and remember, we didn’t want to do any drywall or patching work), we decided to go a different route.
I was given some old barn wood that was rough-hewn by a circular sawmill. Those marks and the patina it had made it pretty unique. I had two long pieces of this stuff, which was enough for 4 sides of the mirror to frame it.
This barn wood had all different thicknesses and widths, so we needed a way to accommodate that. My dad had a table saw, but he doesn’t have a planer or jointer, so we couldn’t do much dimensioning of the wood.
We didn’t want to do so much to the front of these boards, since we wanted to keep those rough-sawn marks on them. I used my tracksaw setup on a mobile work station outside and I ripped one straight edge on all of the boards. Then, I measured over 4”, made a mark, put the rail back on that mark, and ripped them all again with the tracksaw. Now, we have all 4” wide parallel boards.


I used a basic handheld metal detector to make sure there were no nails or stray pieces of metal before making my cuts. Also, I cut the pieces to rough length before doing all of the track saw work so they were more managable.


PREPARING THE BOARDS:
As I mentioned, we didn’t have a planer, so we couldn’t really bring what would be the back side of these boards to be parallel in thickness to the front sides. So, the solution was to take this massive disc grinder with something like 40 grit sandpaper on it, and grinding down some of the high spots. I was using a straight edge to check in between each grinding session to make sure it was flattening out. It didn’t need to be perfect, but pretty flat. You’ll see in a little bit why it will be important for the back of these boards to sit as flat as possible.


Then, I just used a palm sander to lightly sand the fronts of the boards to smooth them out a bit and clean off any grime and dirt. For this same reason, I brushed them off after all of this sanding.

There were a few voids that had junk in them, so I just took an old ice pick and cleaned them out.

FINISHING THE MIRROR BOARDS:
For the finish on the mirror frame, remember I mentioned wanting to keep the rough-sawn marks on the fronts of these boards? Here’s why. I did this treatment on the bathroom shelf I made for their guest bathroom a couple of years ago and my mom loved it!
Ideally, I would use some flat white paint (I don’t prefer the glossy stuff), but we couldn’t find any at the time, so glossy white it is. I spray some down in the grooves on the front of these boards, not worrying about full coverage. If it looks a little splotchy and weathered, that’s good. That’s what we’re going for.


Before spraying on a clear finish, I cut the boards to final length and then gave them a light sanding, removing some of the white paint from the very tops of the boards, leaving white down in the grooves left from the sawmill.


Since these boards will frame a mirror in a bathroom, I wanted to protect them with a couple of coats of a clear finish. I went with General Finishes High Performance water based poly in satin so it would not yellow these old boards at all. I buffed in between coats with a brown paper bag to remove the paint nibs and leave a smooth finish.

REUSING HINGES:
At the last minute, my dad decided he didn’t want to mess with new hinges for these cabinet doors. So, we cleaned the current ones, found an oil-rubbed bronze paint that matched the new faucets and painted a couple of coats on the hinges. Then, I screwed all of the screws into a box and sprayed the same paint on the screws so they would match.


WORKING ON THE SINKS:
We didn’t want to replace the countertops in this bathroom or the sinks, so we had to be pretty careful getting the old faucets out without damaging them. That would normally not be a big deal, but after 28 years, the drain in one of these sinks had really corroded and didn’t want to be replaced. We ended up cutting it out with a sawzall.
We also replaced the water feed lines while we were at it with better ones.


The new faucets were surprisingly easy to install after the fight we had getting those old ones out.

My dad had some plumber’s putty, a substance that is kind of like play-doh when wet. Then, you spread it out on a drain, it dries and seals the drain. Well, the can of the stuff he had was old and dried out, so we just tried to use some caulk. We should have probably just gone to the store to buy some more plumber’s putty since this caulking method worked, but we messed with it for a couple of days before it actually did work.

INSTALLING THE LIGHTS:
Next, it was time to turn our sights to the lights. (nice rhyme) Remember the hickory board I prepared in my shop and took with me to their house? It was finally time to get it toward its final resting place.
In a previous step, I sprayed a clear finish on the hickory board when I sprayed the boards that would frame the mirror. You know, two birds, one stone.
The lights my mom picked out were actually all separate lights, not a couple of kits with multiple fixtures on them. Because of that, I needed to route a groove in the back of the board to accept the wires for each light.
If you’ve never used a router in some very dense wood like hickory, you want to take very shallow passes and do multiple passes. Trying to take too big of a bite with the router bit all at once just will not go well, and it will want to jump around.
I did a little bit of layout on the hickory board after we knew where the light fixtures will be. Then, I took it outside, drilled some through holes in the board and then started routing.

Before we could know where to mount the lights, we needed to find the exact center point of the new faucets…but up above. We used an old-school plumb bob for this and it worked great.


Once the groove was routed in the back of the piece of hickory, we brought it back inside to secure the wires. We were just using some leftover wire that was rated to handle what we needed, so we had a little bit of work to get it in place. I put hot glue in around the wires to hold it in place.
Here’s a tip when using hot glue. If you have one of these sprayable cans of air for dusting off your keyboard, turn it upside down and shoot it at the hot glue a couple of times. The chemical in this can gets very cold and actually sprays a liquid that evaporates very quickly when it is upside down. It will cause the hot glue to cool much faster, therefore holding your stuff almost instantly.


After running all of the wire and connecting it to the main power source, I secured the hickory board into the studs we had marked. There was no getting back behind this board once we had it up, which is why we took so much time with the hot glue earlier. It was a little more work, but when it came to this step, it paid off.
Then, we could just connect each light fixture and put the covers on after everything was hooked up.


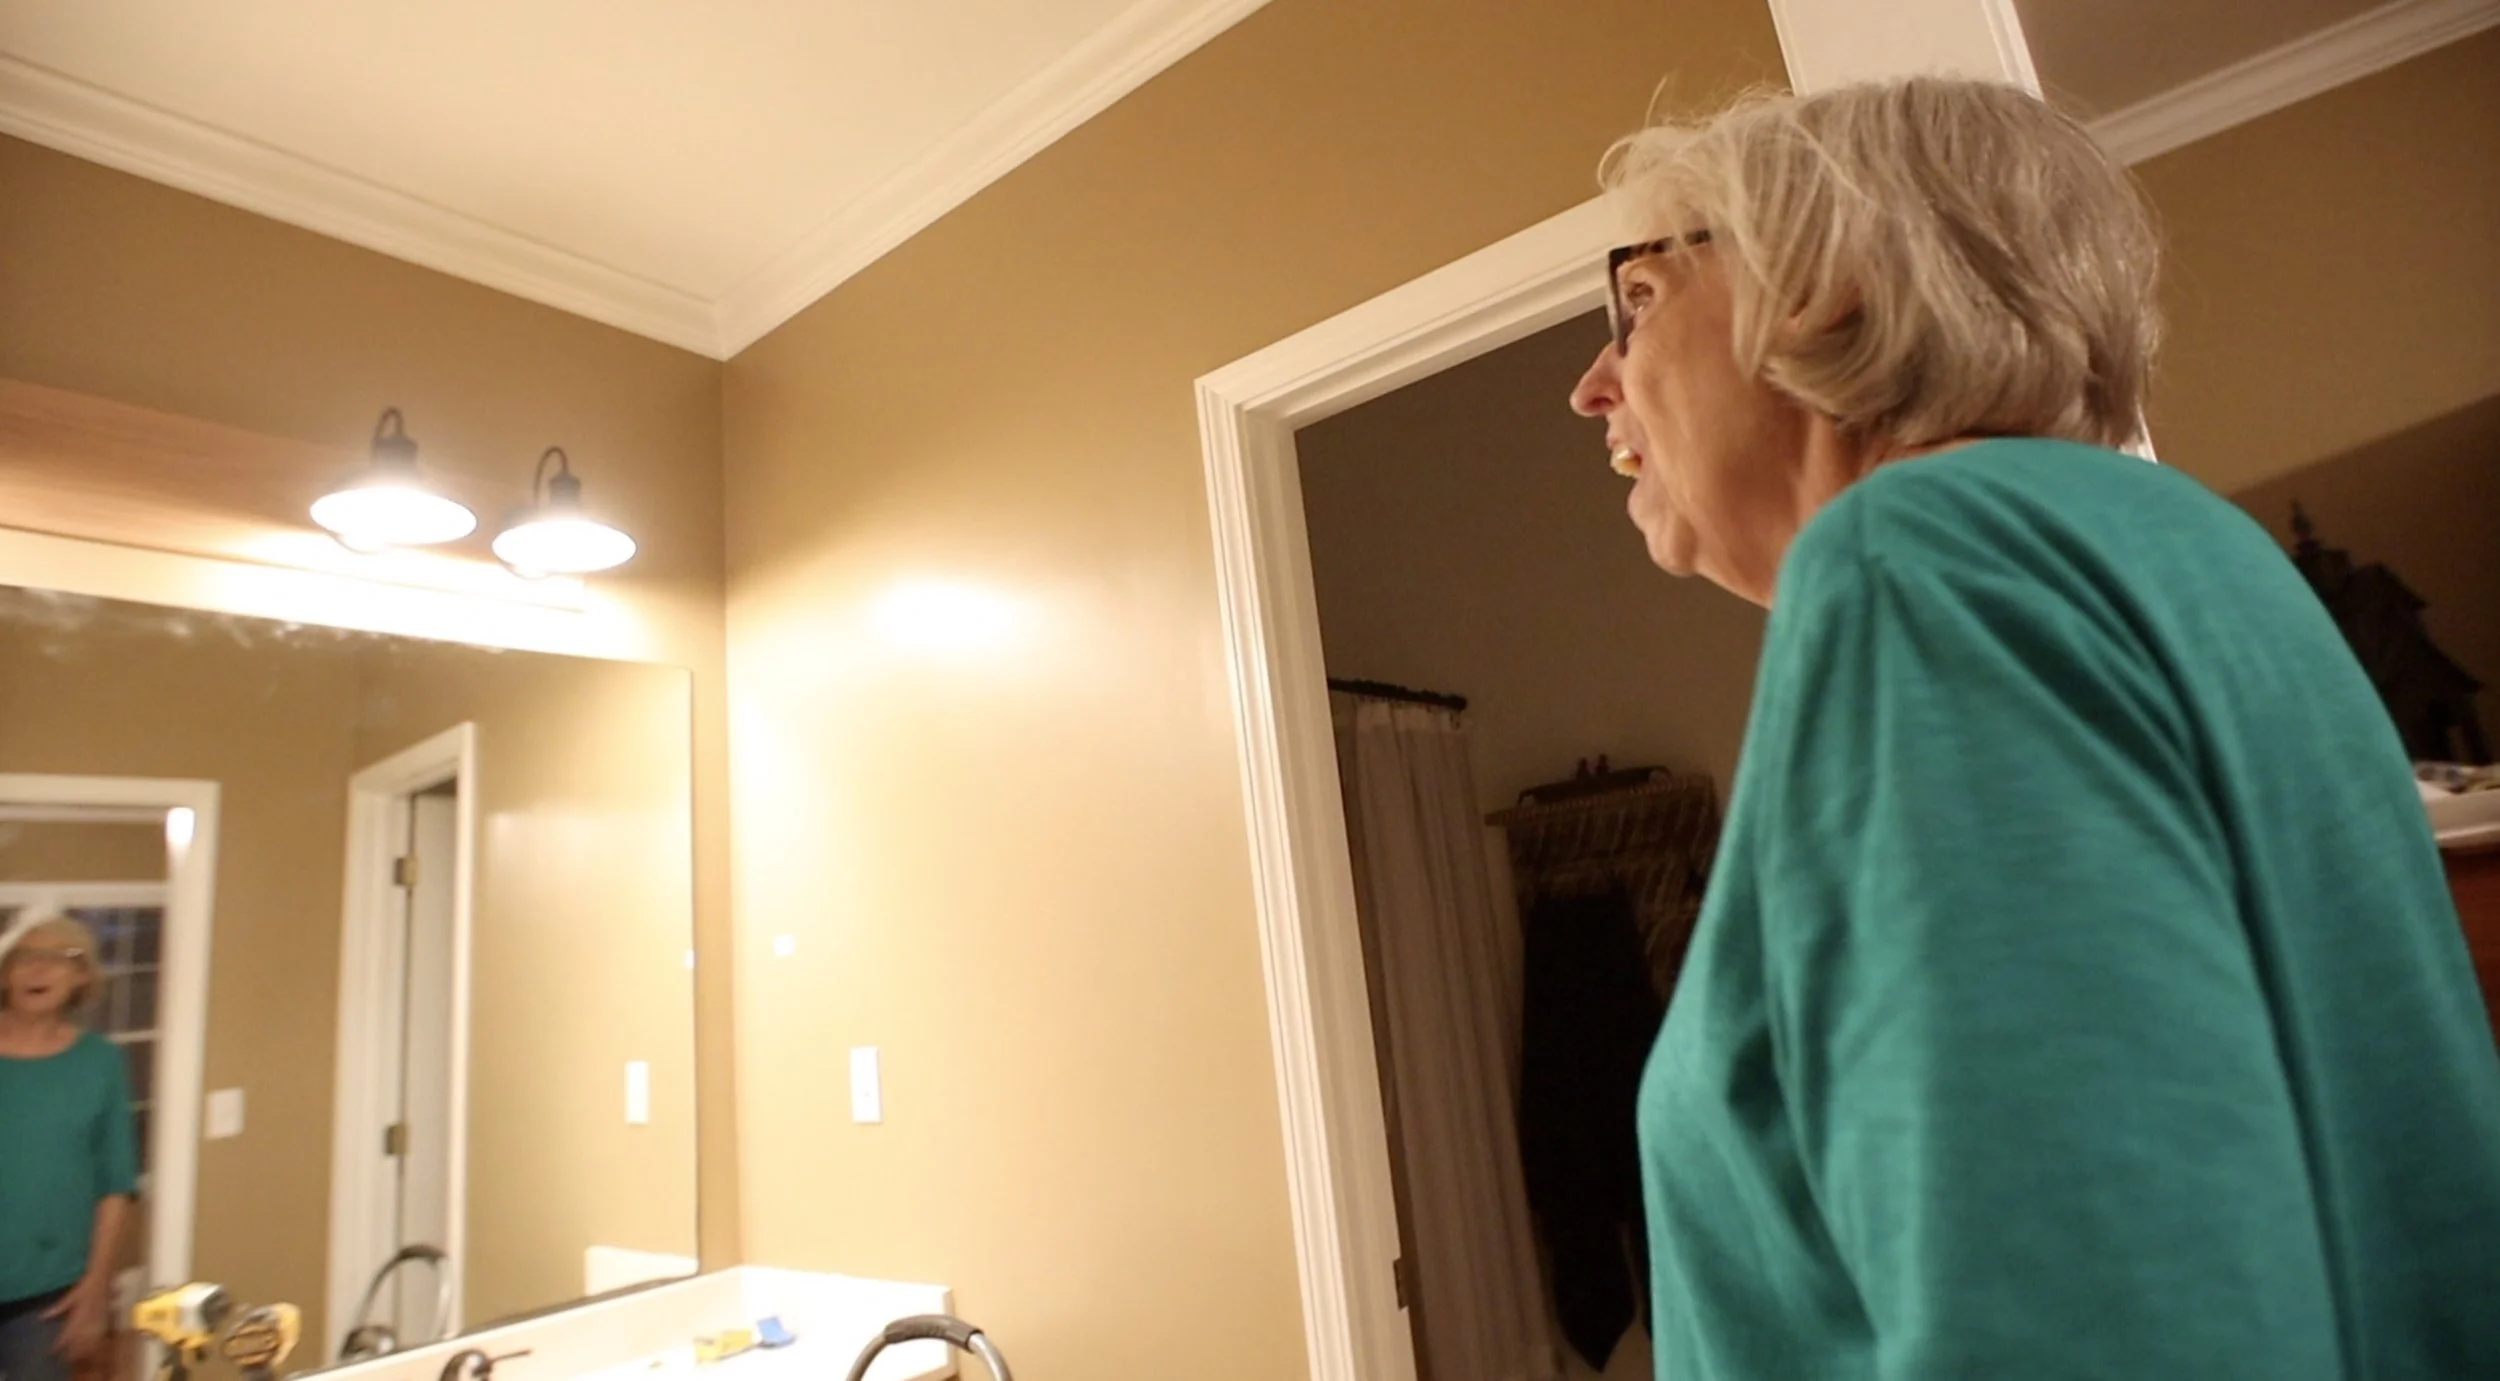
This next part was fun for me…I asked my mom to come in and see all of the light fixtures up for the first time and working. (we turned the power back on when we were done with the wiring.) She loved the new lights with the hickory board as a backer.
FRAMING THE MIRROR:
This mirror was really stuck on the wall. My dad had used some strong adhesive to install the mirror, and if we would have pulled it down to put up something small over each sink, we would have taken a good bit of the drywall with it. Since one stipulation of this renovation was no drywall work, I went another route. My younger brother had some success on a different project with only using adhesive and not securing boards to a stud. Well, there was not a good way to secure these old boards to studs, so we went that route.
I glopped on some construction adhesive that specifically said it worked well with glass and mirrors, and it said it completely set up in 30 seconds.
We would apply the adhesive in large globs rather than just a thin string of it to overcome any variance in the flatness of the back of the boards. That way, we could push on the boards and “settle” the globs to have better contact overall.
We just went one piece at a time, starting with the bottom ledger board, holding it for over twice what they said the time was. Plus, we waited even longer before we would add the next piece, just to be sure it was set up and having the best bond with the mirror.
Eventually, we would add the sides, and then the top board. These were heavy, so we wanted to go slowly and make sure they were cured. They held just fine.


TOWEL HOLDERS:
My mom wanted some new towel holders also, and I had some hooks she liked, so I made some new ones for her.
I removed the old, brass loop-style towel holders and the brackets underneath.
I had a few pieces of the mirror frame boards left over and cut a couple of pieces from those. They already had the same treatment as the mirror, so that worked well. I drilled out a few holes to mount them to the walls, and then those holes would be covered by the hook hardware.
If you’ve ever used some of those tiny decorative screws that come with hardware, you might have had issues getting them to go in. They’re pretty flimsy, so you need to pre-drill the hole for them, and then use some wax to aid in driving them in. That makes it less likely they’ll strip out. If you don’t have any paste wax handy (and I didn’t at their place) grab a candle and swipe the screw threads on that a little bit. (Just use the bottom of the candle so your mom doesn’t get mad about you messing up her candle.)
Then, I just drove in those little screws by hand so I would not strip out the heads.


REINSTALLING HARDWARE & FINISHING TOUCHES:
It was finally time to reinstall all of the drawer pulls, cabinet pulls, hinges and just put the finishing touches on everything.
At the last minute, my dad decided to swap out the door knobs doing to the shower room and the walk-in closet so they would match the faucets and new hardware, so I swapped those out quickly.


THE BATHROOM VANITY MAKEOVER IS COMPLETE!
It was quite the journey, but I really think it turned out great! For not doing any painting of cabinets or walls, and not doing any drywall work, I think we made it turn into something very renewed and fresh looking. Most of all, my mom loves it!
I’d love to know what you think. Do you like how it turned out? Drop me a comment below. Also, if you haven’t already, be sure to watch the video.
I’ll see you on the next project!


