How to Make a Modern Pallet Wood Bench
VIDEO
We received some old barnwood from my wife's grandparents not too long ago, and I didn't really know what to build with it. Well, a project came to mind and it ended up being the perfect use for this material that easily dates back more than 100 years. Watch the video of how I made it:
BACKGROUND
I always like when I see people use old barn wood in projects. I know, this look can be overdone at times, but I still think there is something very cool about a rustic piece of furniture. I don't know that I want every piece that I own to look that weathered, but I do like it some.
We have a front porch, and then we have what we call our "side porch." Many times, this is called a "friend entry." I don't know if this is a Southern thing (I'm in Mississippi) or if it is derivative of the French styling, since this is technically French Acadian, but we like it. It is a smaller, more intimate entrance to the house that we, and most of our guests use. We wanted to have a bench on this side porch so we could watch the kids ride their bikes in the cul de sack down the hill. We can see them from the front porch, but the bench on the front porch is right in front of the baby's window, and often the older kids are out there while he is napping.
TOOLS & MATERIALS
STEPS
I started off by going through the pallets I had, seeing which would have the longest boards. We wanted this bench to be as close to 4 feet wide as possible, because that seemed like a size that would look nice on the friend entry.
I have broken down pallets in a few different ways. Choose whichever way is best for you and the project:
- Hammer and crowbar: this ends up splitting way too many of the boards, and you lose a lot of material.
- Circular saw: cut on either side of the stretchers, then using a crowbar to pry the center one apart. You do lose a little more material this way, but not much. The only bad thing about this is if you have some nice, intact ends on the boards with the cool nail holes. If that is a look you are going for, this method is probably not for you. It eliminates the nail holes at each end.
- Reciprocating saw: use a wood and metal blade in this saw to actually cut through the nails with the blade parallel to the top boards. It shakes you to death, and it is quite loud, but it yields the most intact boards that I have found. Plus, it is pretty easy then to just use a nail punch and get the leftover nail heads out of the boards.


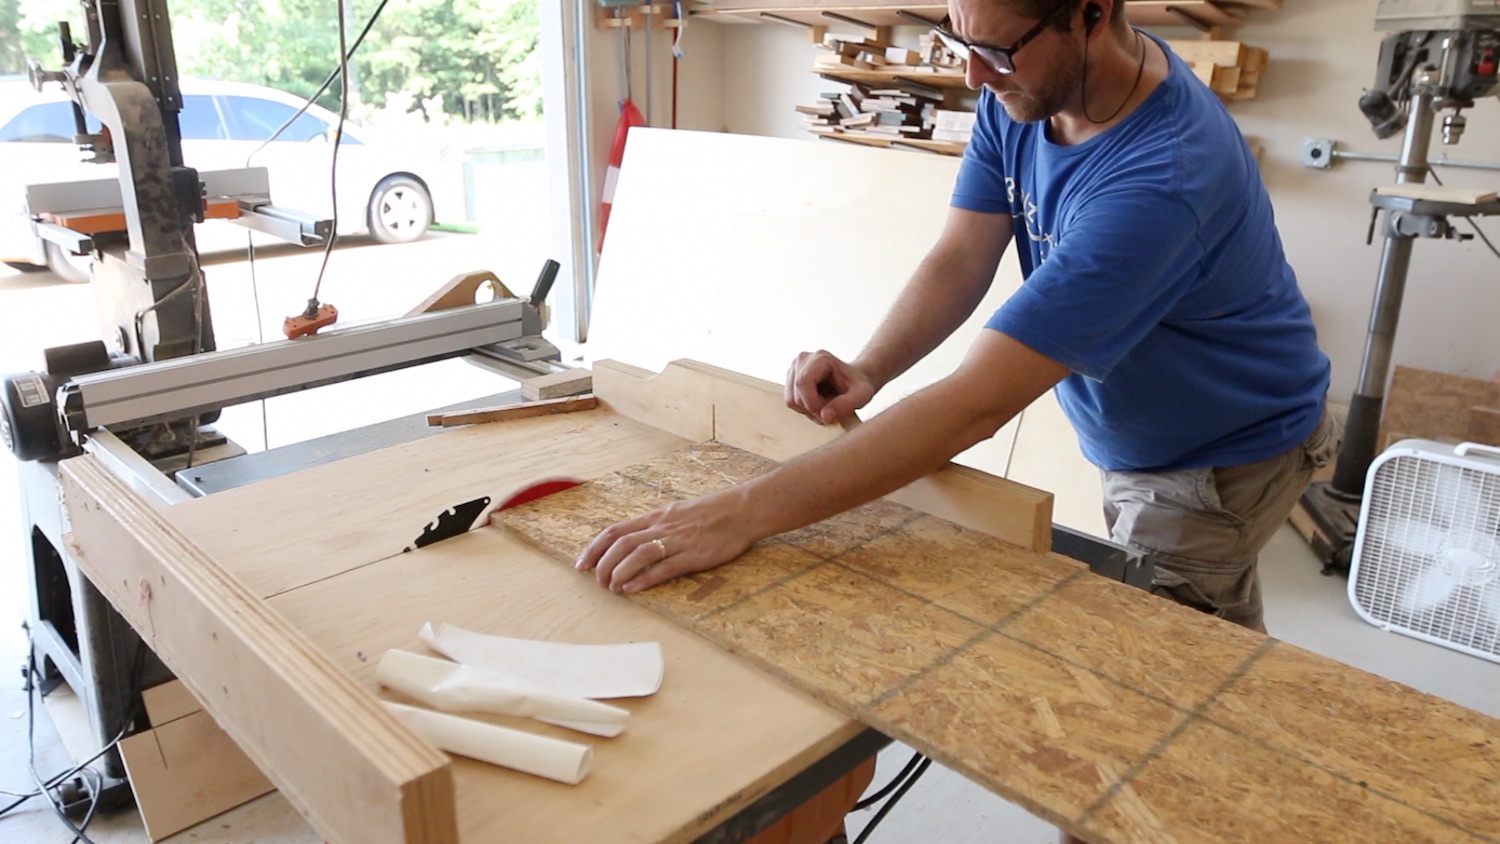
After removing all of the nails in the pallet wood, I got out my jointing jig for the table saw and ripped a straight edge on all of the pallet wood. Then, I could flip the boards around and put that newly straight edge against the table saw fence, and cut the other side to be parallel. I wanted a few different sizes for the pallet wood top, so I made multiple widths.


I cut a piece of scrap 1/2" OSB to the overall size I wanted the bench to be, and then started gluing and nailing down the pallet wood in the pattern I envisioned. It is pretty easy to do it as you go like this, because you don't usually have to cut things to exact lengths. Just let the pallet wood overhang the edges and you can trim it all flush later. Just be sure not to put nails very close to the edge so you're not sawing through a nail.
I started laying out the design for the pallet wood that I wanted. I envisioned it being a modern design, using some perpendicular lines, as well as some 45 degree angles. I used the OSB as the substrate, and I just glued and nailed down the pallet wood to it.


After that was dry, I used my circular saw and the table saw to clean up the edges of the bench top.

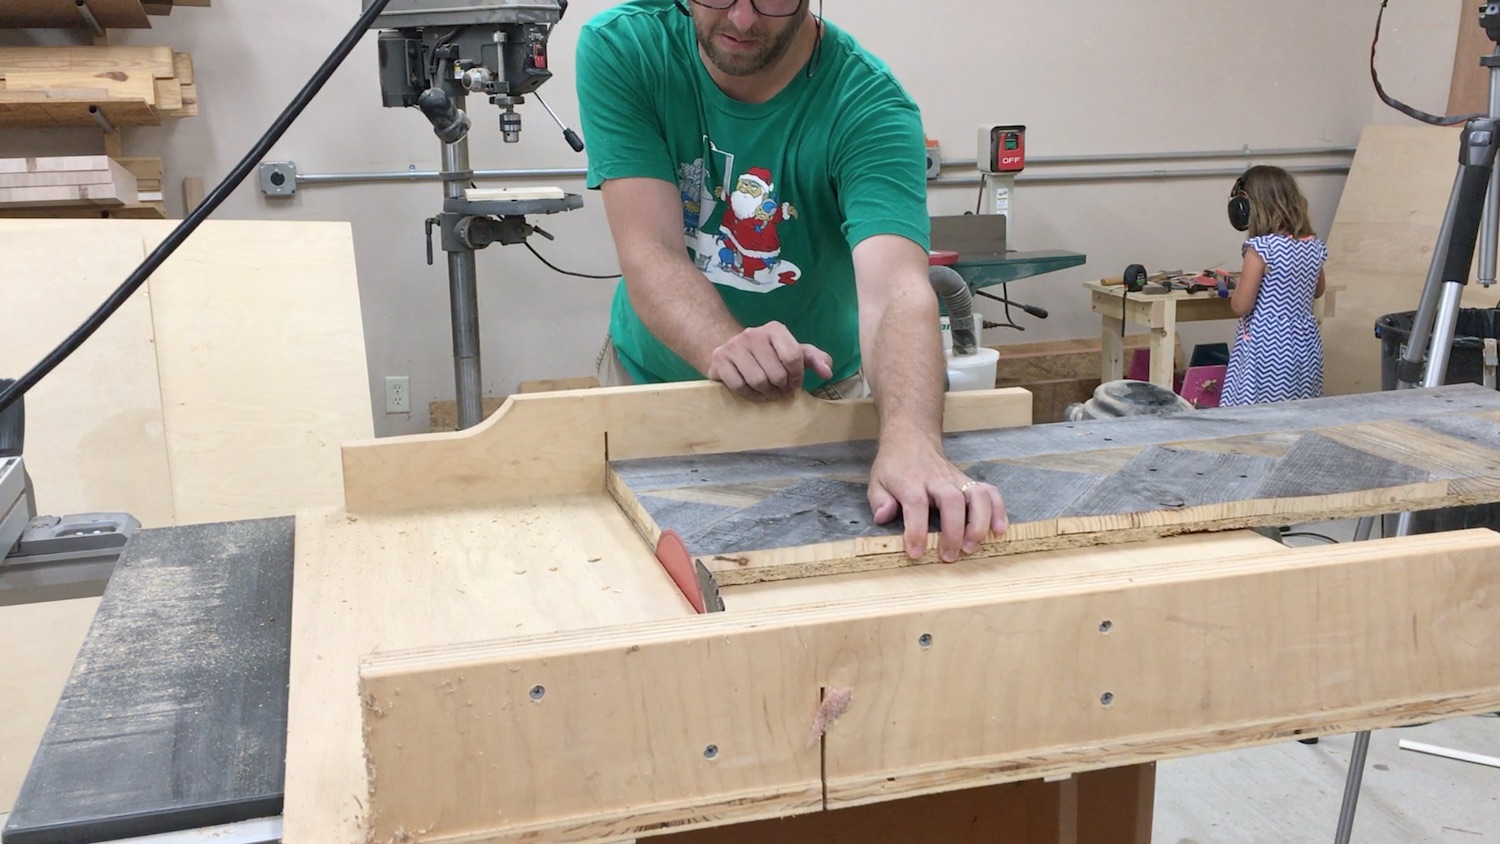
The top ended up being 42" wide, so I didn't want it to have a chance to sag. I twas a little less stable than I had hoped, so I built a quick frame out of a single 2x4. I used some pocket holes to join the frame together. Then, I just attached it to the OSB substrate with a few screws. This helped a tremendous amount to make the bench feel substantial.


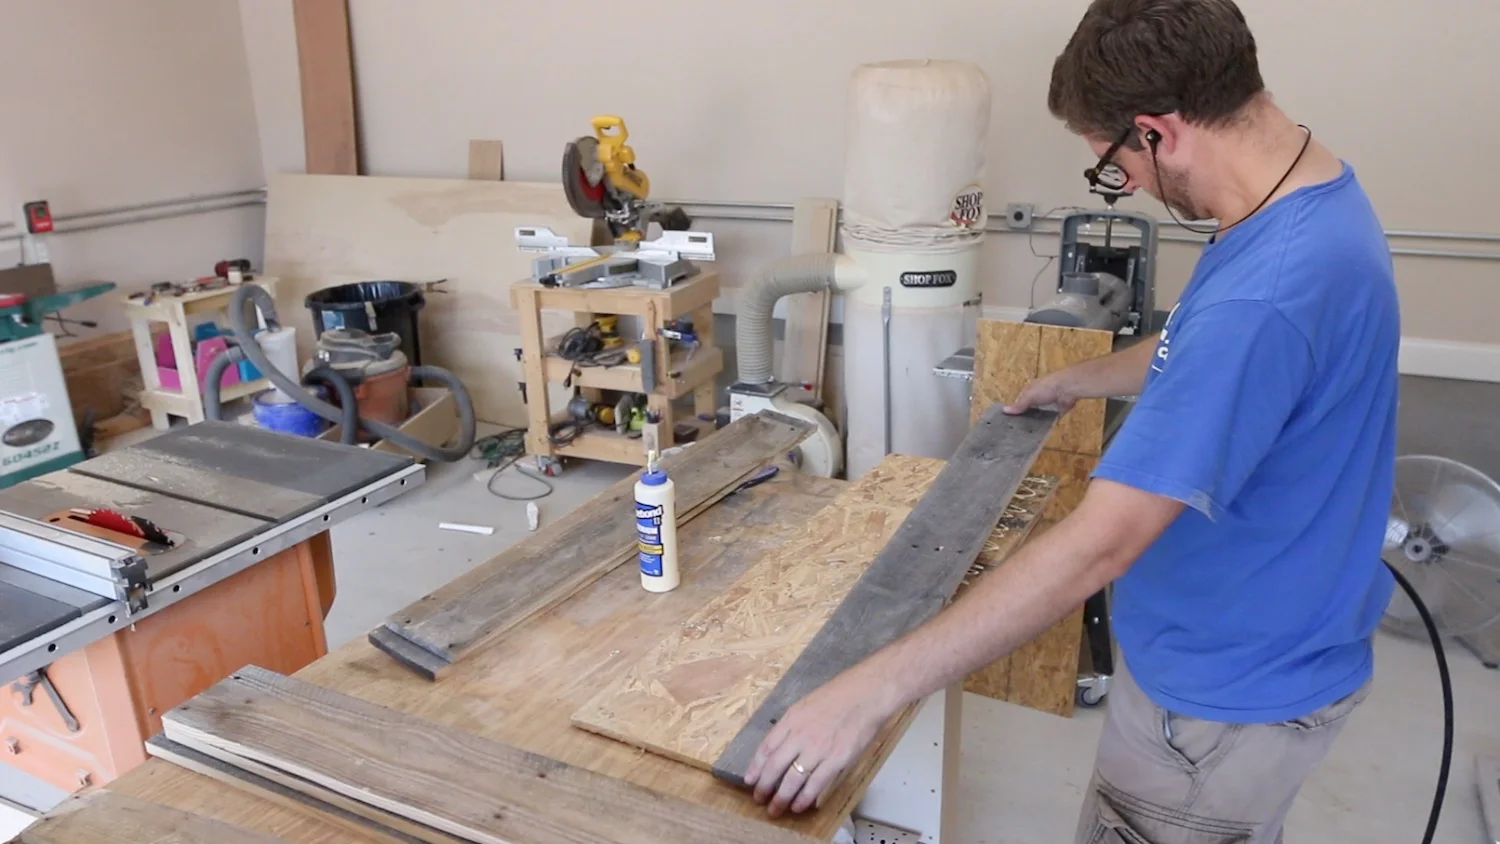
I had some old barn wood lying around that we were given by my wife's grandparents. It was on some land that their parents owned, so it was quite old...over 100 years. I really didn't have a project in mind to use it on, but this one seemed fitting. It was pretty rotted out, so it was not too much good for anything other than decoration. I ended up using it for the apron on this bench.


A few of the gaps were quite large, since this material was so warped, so I used some sawdust mixed with glue to fill in some of them. I was careful not to sand too much. I didn't want to take this nice patina off of the old, barn wood.


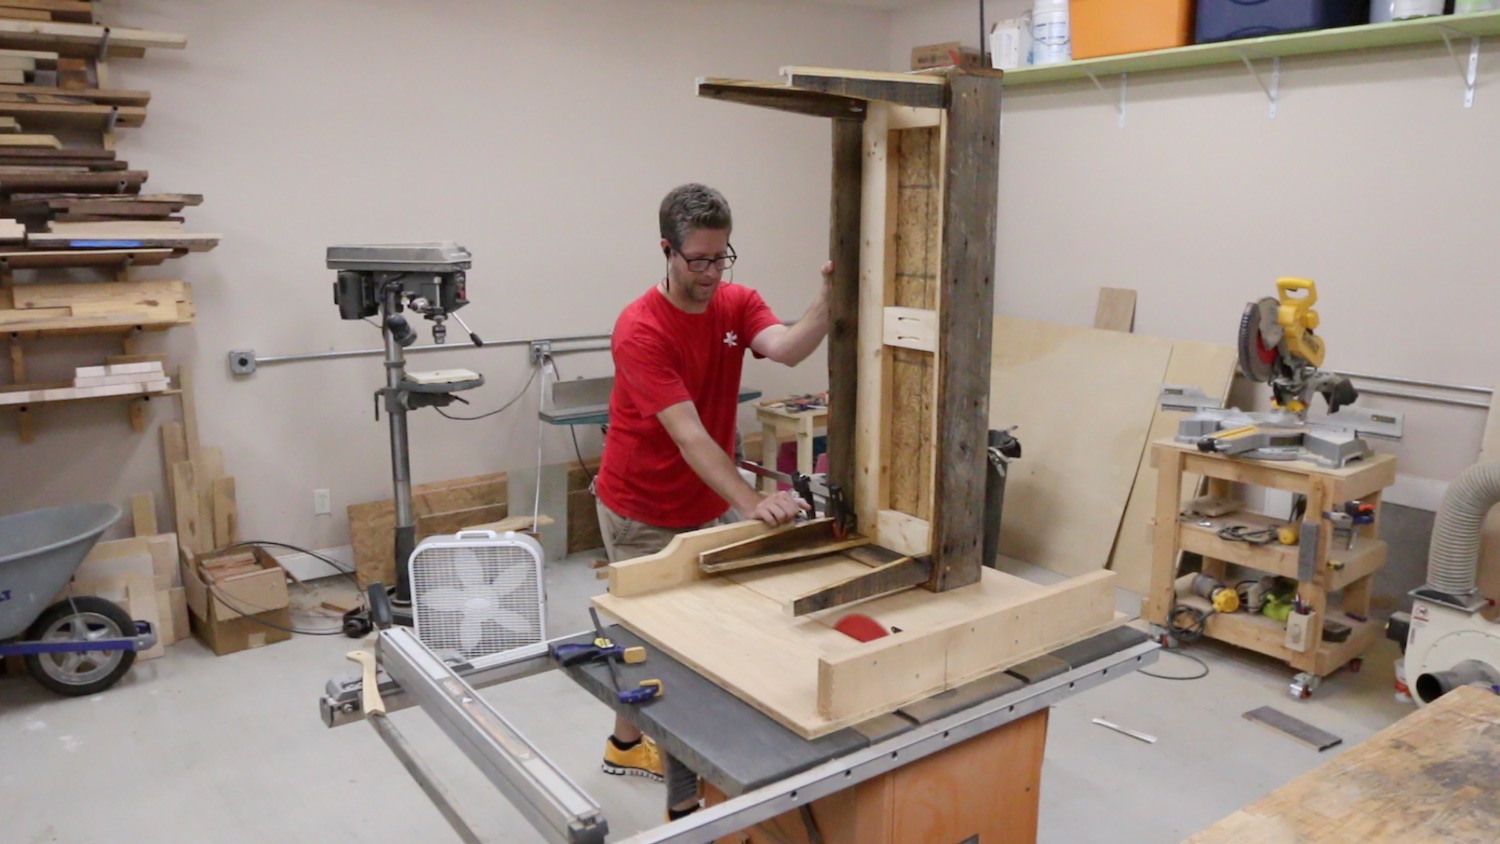
For the legs, I used some more of the pallet wood. I wanted them to have some strength, so I used a method where you assemble an L shaped leg. To do this, you must rip all of one side of the leg, measure the thickness of your material, and then rip that amount off of the other sides. That way, when you put them together, they are both the same width. This worked out perfectly.

Then, I give it a more modern look, I drew a taper on the legs, which I cut out on the bandsaw. Sometimes, I worry about the bandsaw marks. This time, I did not. I think I sanded a few of them out, but it was not that important, since this was a pallet wood project anyway.


To attach the legs, I had originally thought I would just screw into the apron boards. Since these were so warped, and it just didn't feel stable enough, I decided to use some pocket holes to secure the legs into the 2x4 frame.


Even after all of that, I felt the legs needed something else to be really secure. I decided to measure down and mark a spot that I could drill through the apron and the legs, from all sides. Then, I would put in some dowels so that it would hold it all securely. This worked quite well and gave the project a nice design also.


The last thing to do was to put on some finish. I just used some regular polyurethane in a semi-gloss sheen. I brushed it on pretty thickly with a chip brush. This old wood really soaked up the finish. In total, I put two coats of it on, sanding with 320 grit inbetween.

This is the point at which I realized I messed up. I made the bench too tall. We wanted the bench to end up being about 18" from the ground to the sitting surface, which was what a chair we have is. We liked that height, but by the time time I added the 2x4 frame, and you added the pallet wood thickness as well as the substrate, the bench was closer to 21" high. I put a stop block on the table saw sled and figured out a way to put the bench on it, secure it with clamps and cut off some of the legs. This seemed to work quite well, and I'm glad I shortened it.


We have already been enjoying this bench for a couple of weeks. Do you have a porch that needs a bench? Why not build this one?