Modern Wine Rack
VIDEO
I was commissioned to build some sort of wine rack that would sit on a counter top. The one I made was made from black walnut and had some hard maple accents. Watch the video to see just how I made it:
BACKGROUND
When the client approached me about building a wine rack for their counter top, they had a few requirements:
- walnut
- certain height to fit under cabinets
- certain max width
- hold stemless wine glasses
- hold at least 5 bottles of wine
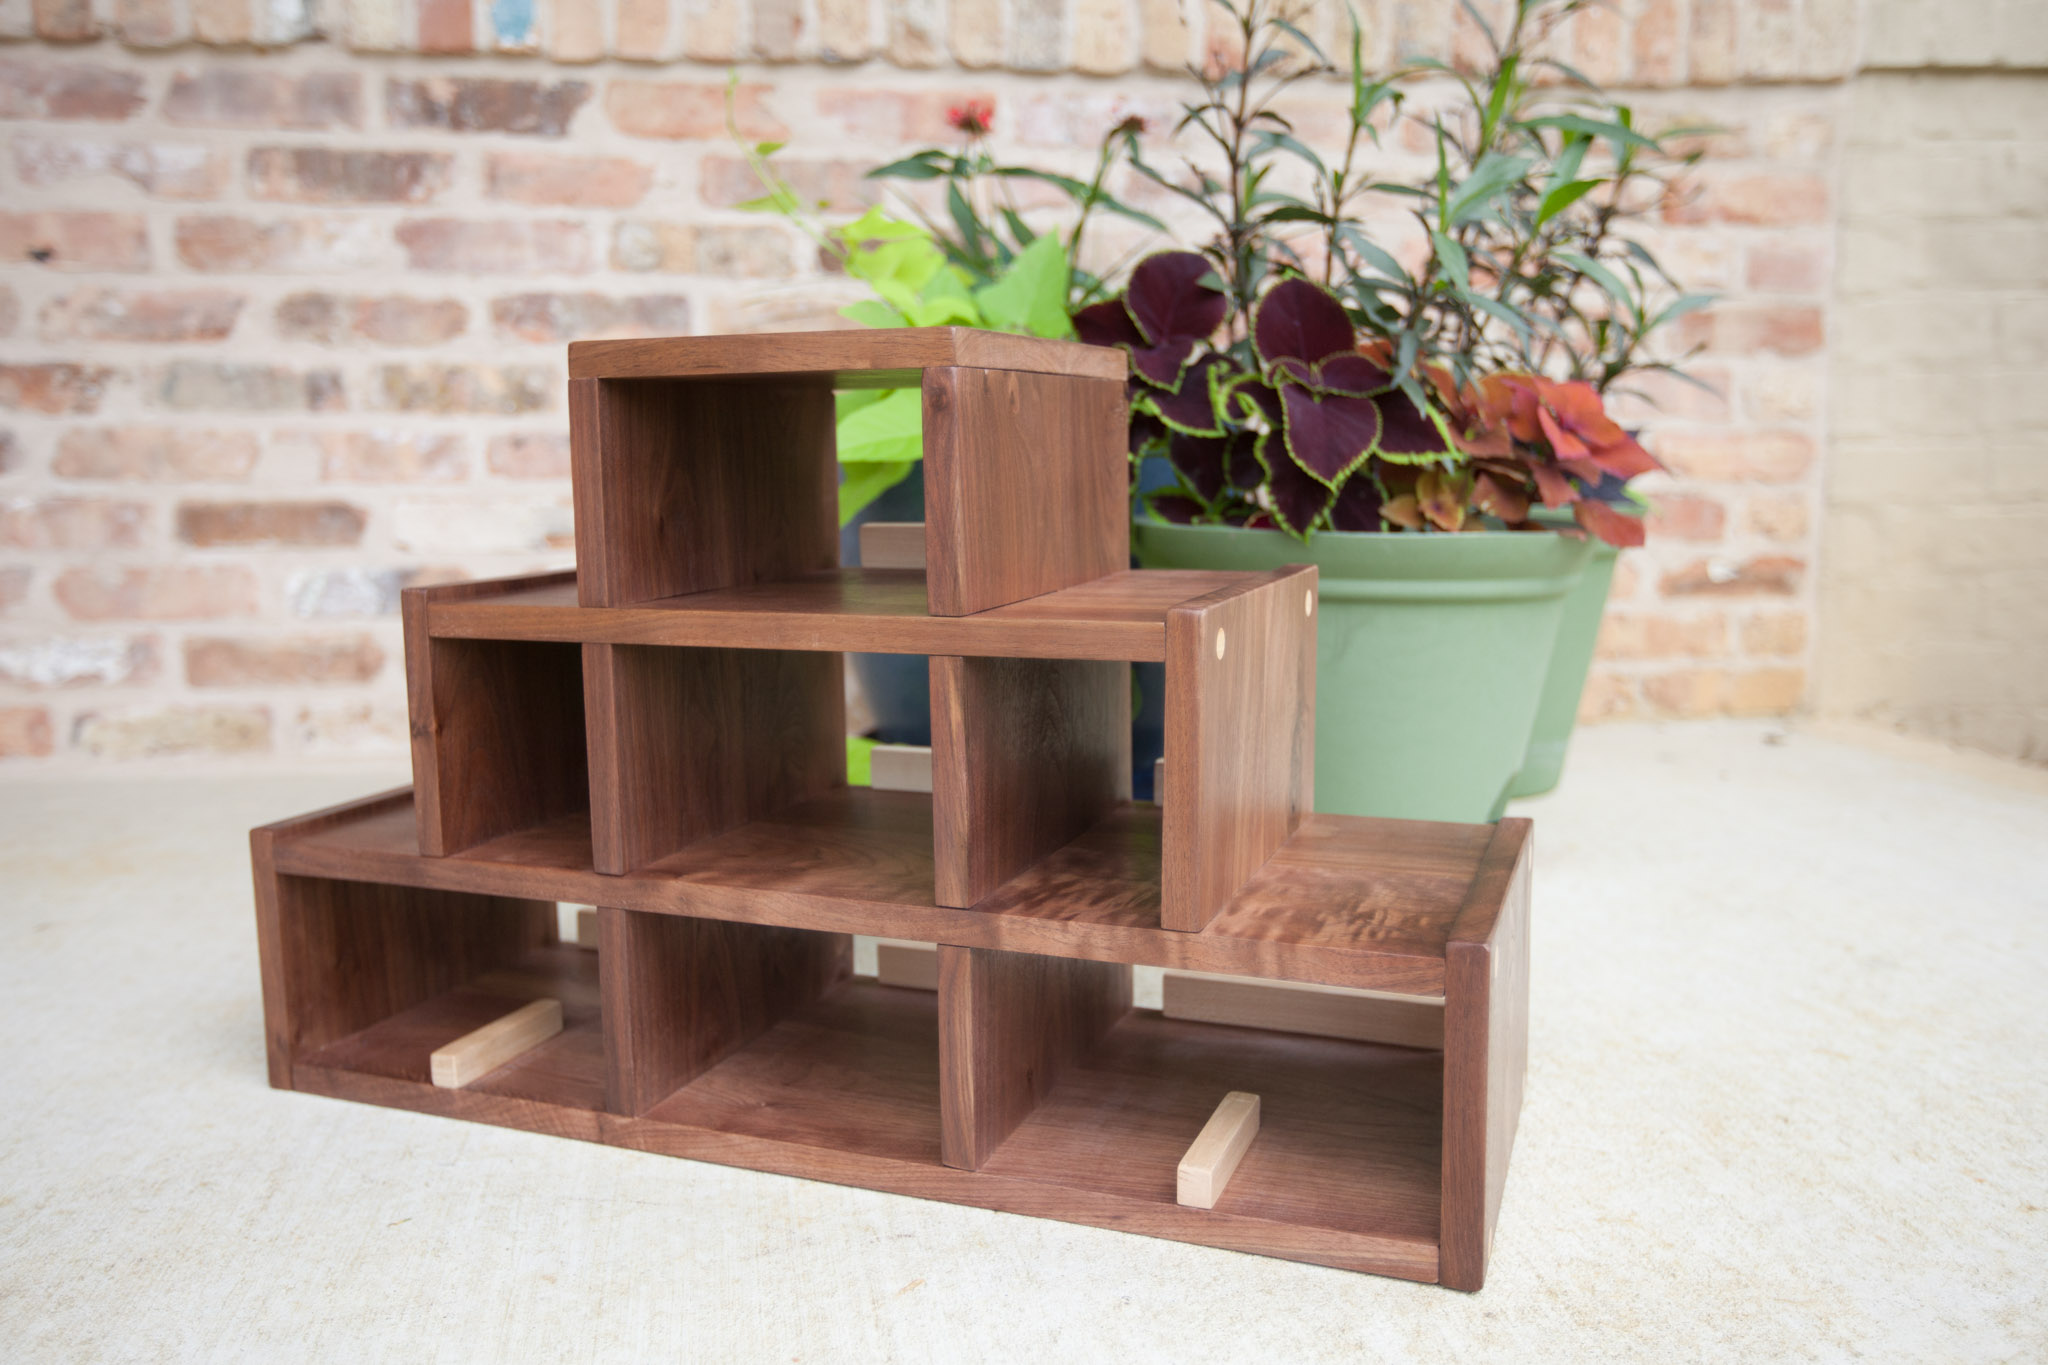
With all of that in mind, I started sketching out a few designs. I went back and forth with the client a few times before they settled on the final design. It has a really nice, modern look to it, and it can hold up to 9 wine bottles, as well as 6 stemless wine glasses.


TOOLS & MATERIALS
Table saw - http://amzn.to/2zlT7jx
Miter saw - http://amzn.to/2ynOXJv
Tape measure - http://amzn.to/2yn0wR2
Bandsaw - http://amzn.to/2zmwE5G
Planer - http://amzn.to/2z6RZiK
Random orbit sander - http://amzn.to/2z8gBHT
Drill & driver - http://amzn.to/2gEUBhb
Drill press - http://amzn.to/2kNKKKm
Dowel plug cutter - http://amzn.to/2gEUF0p
Screws
Dowel plugs
Sandpaper
Wood glue - http://amzn.to/2kOWYCo
STEPS
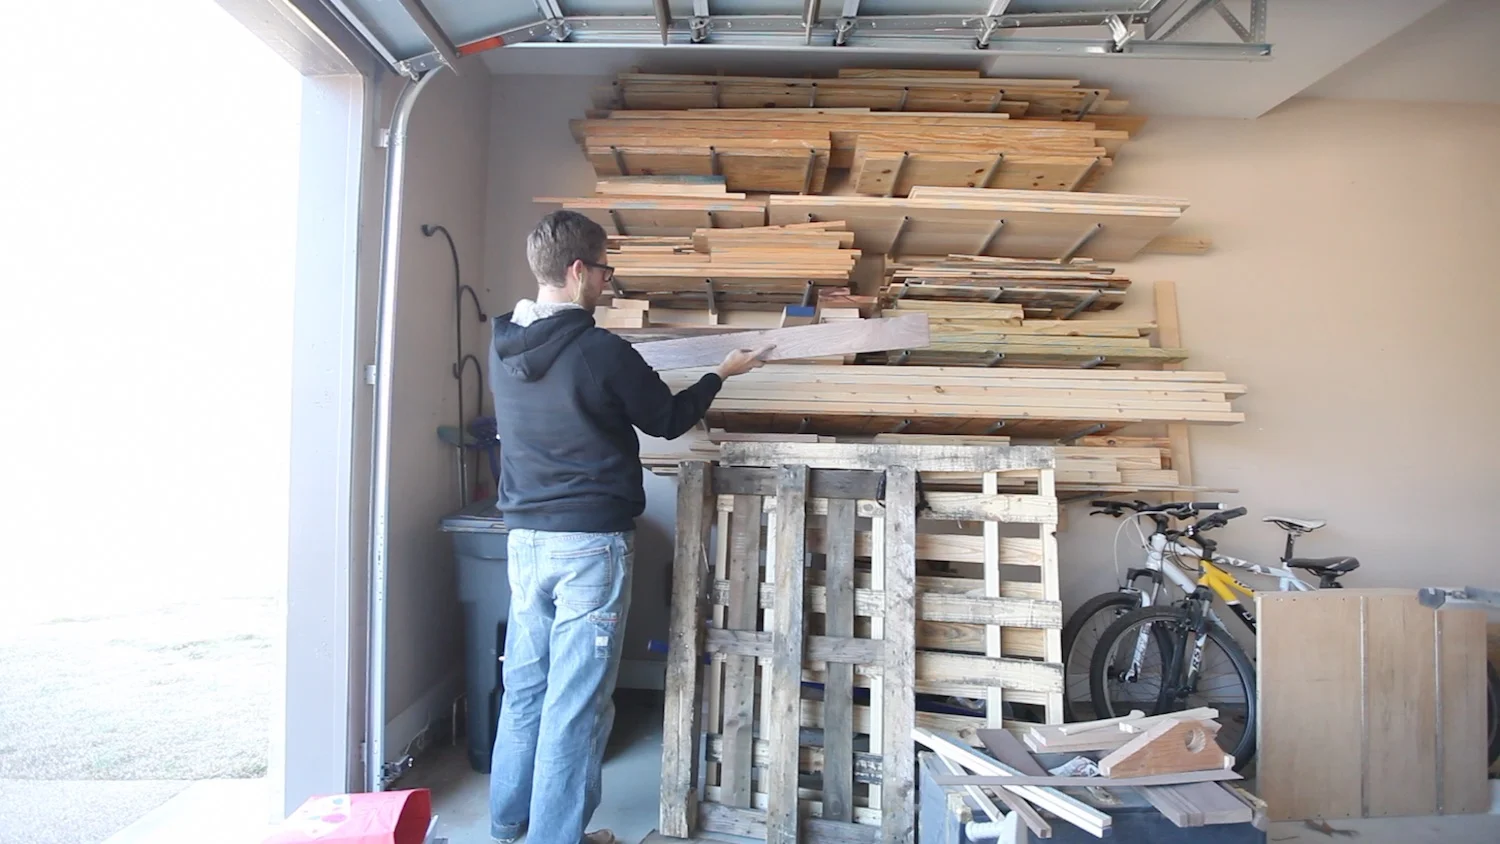
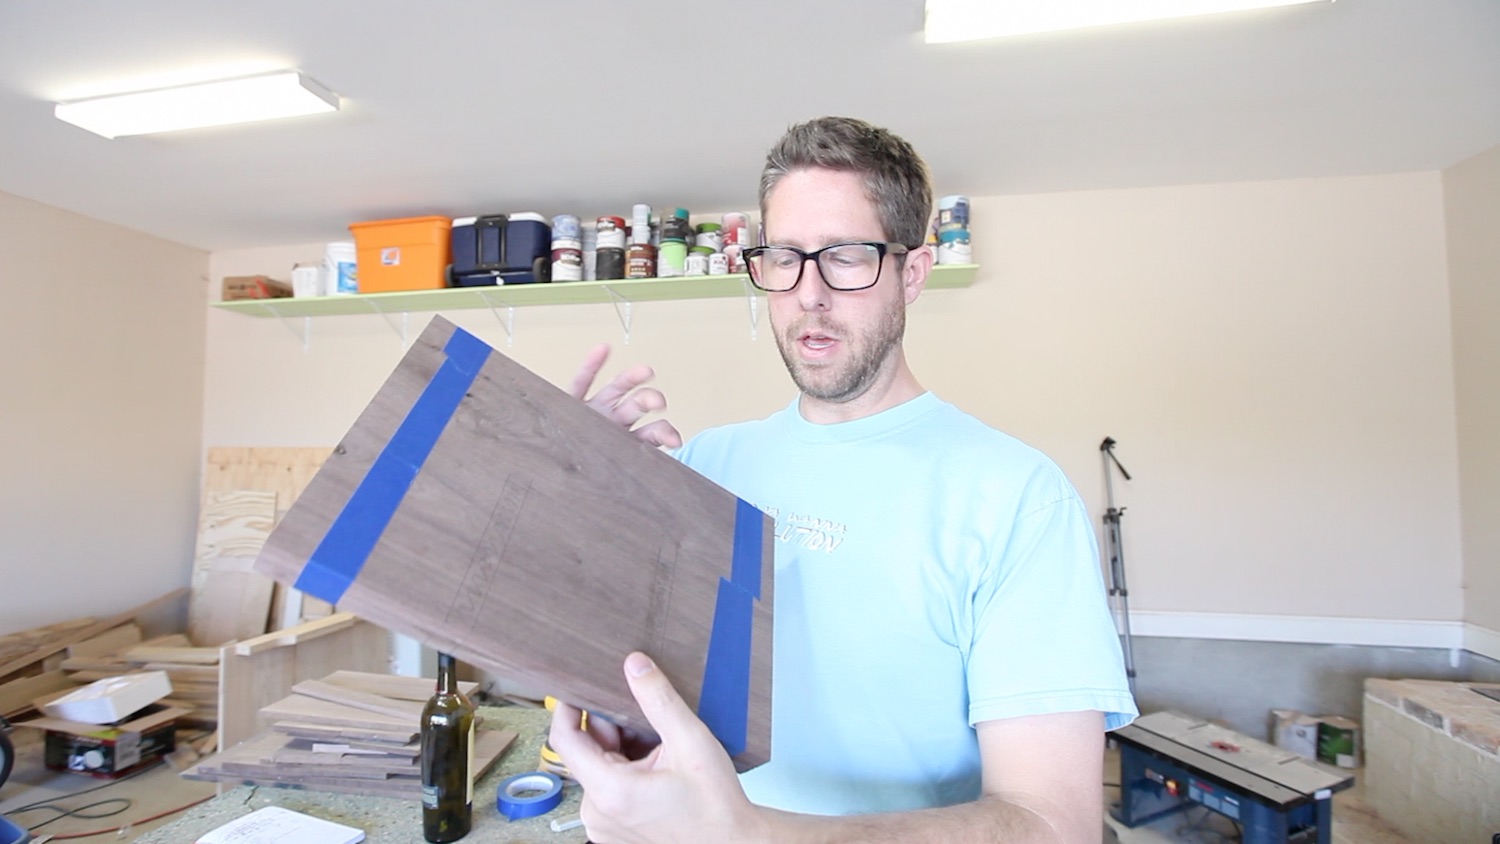
I started off by grabbing some walnut that would work for this project. I used all 4/4 (read four quarter) walnut boards.
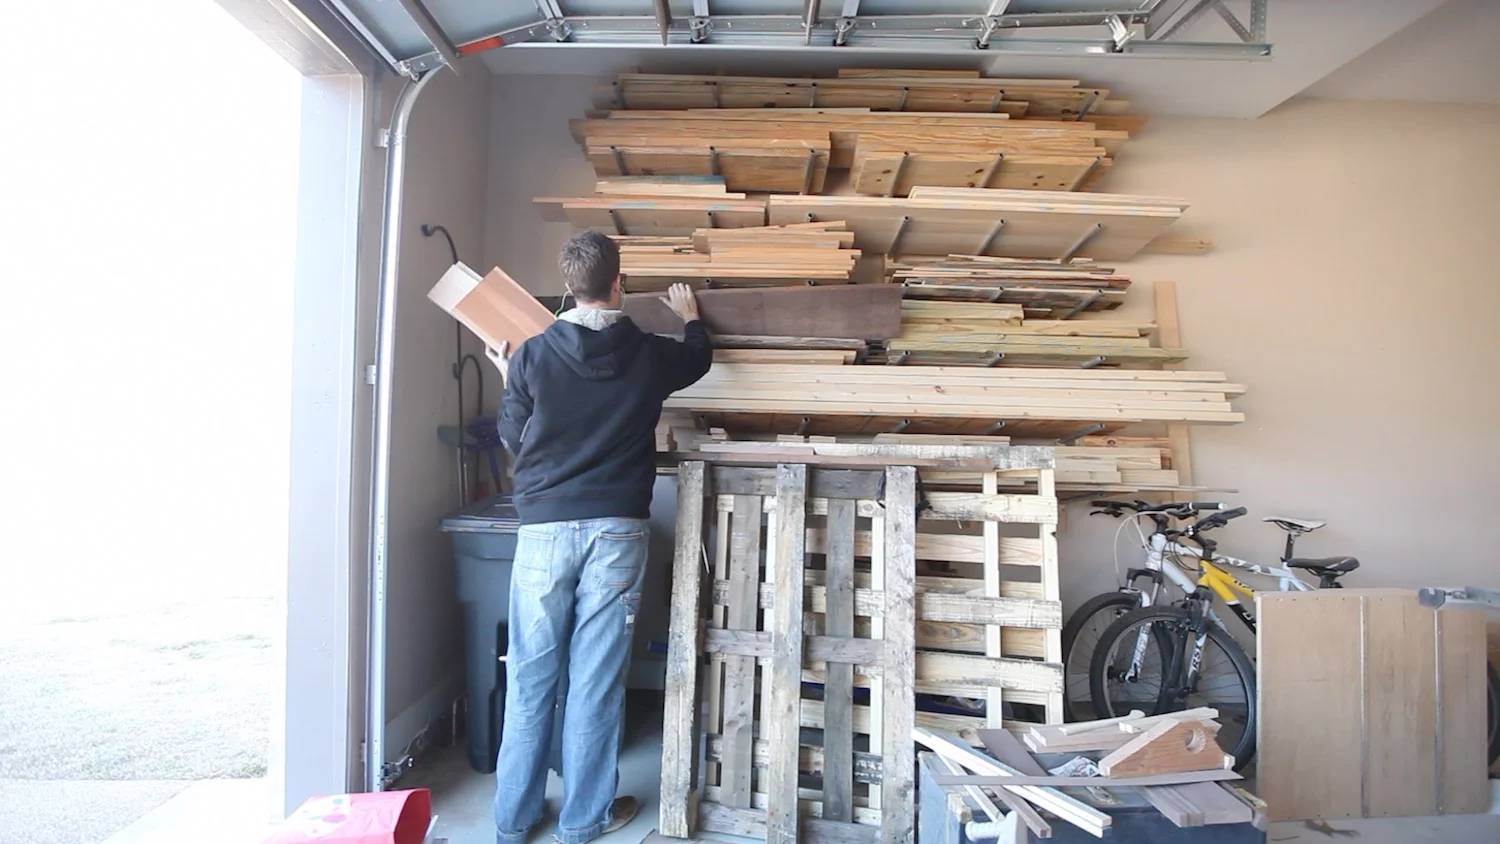
I started laying out all of the pieces that I would need. I just used a piece of regular white chalk for this layout. It works quite well on the walnut.
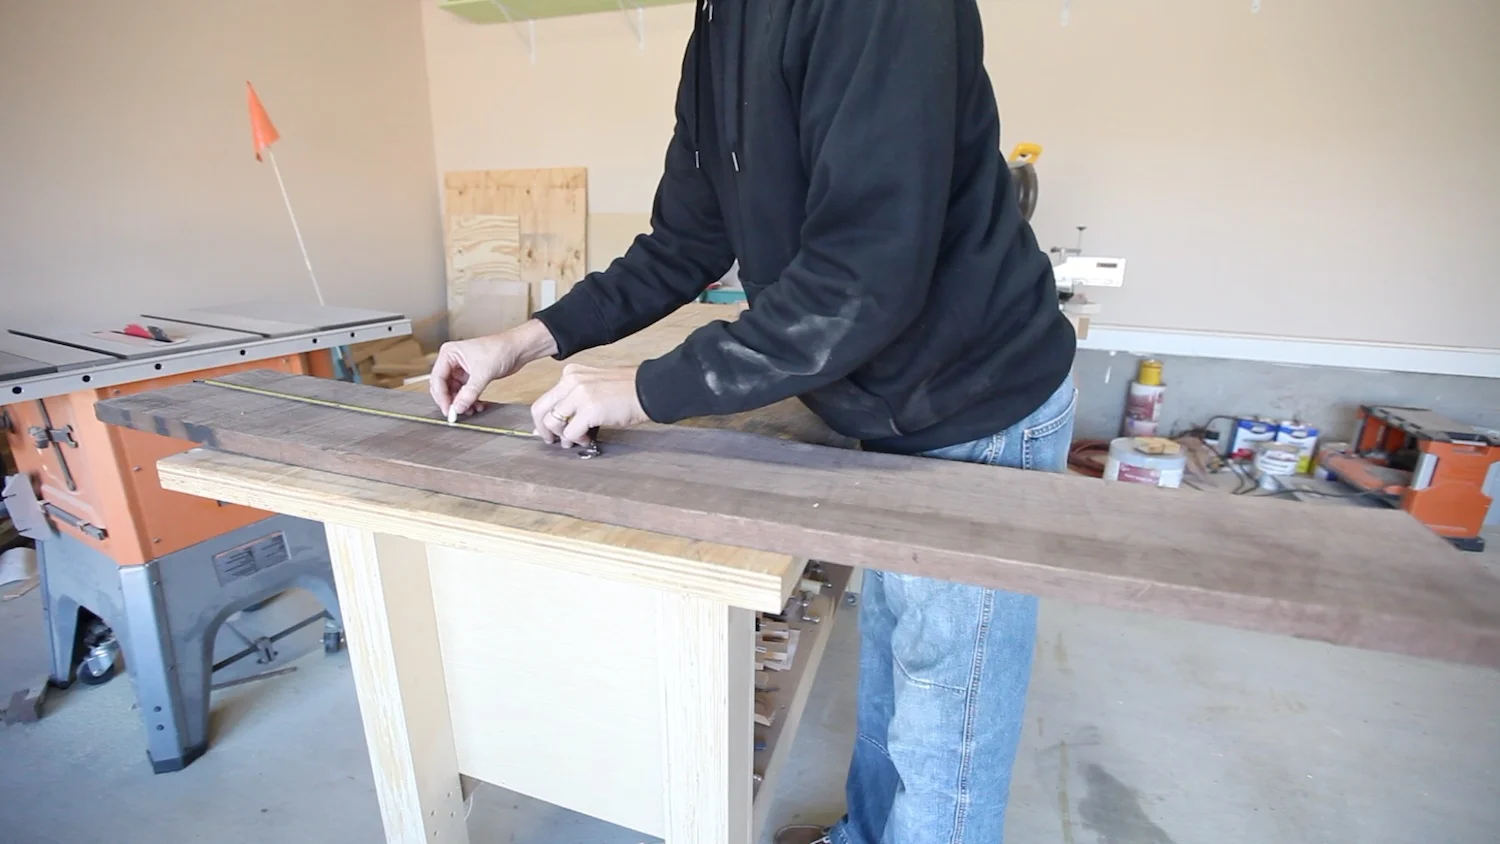
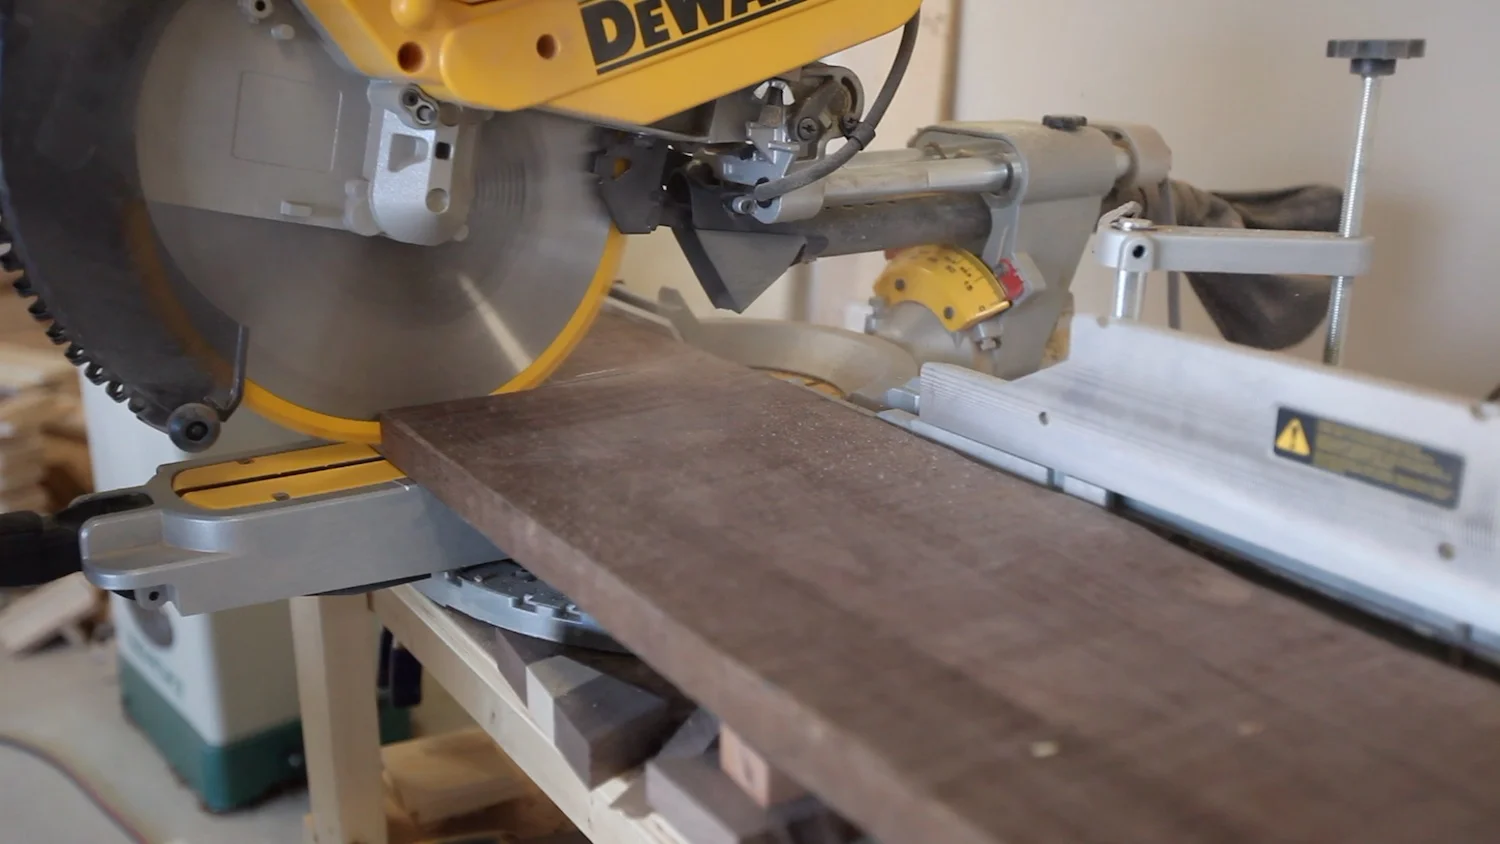
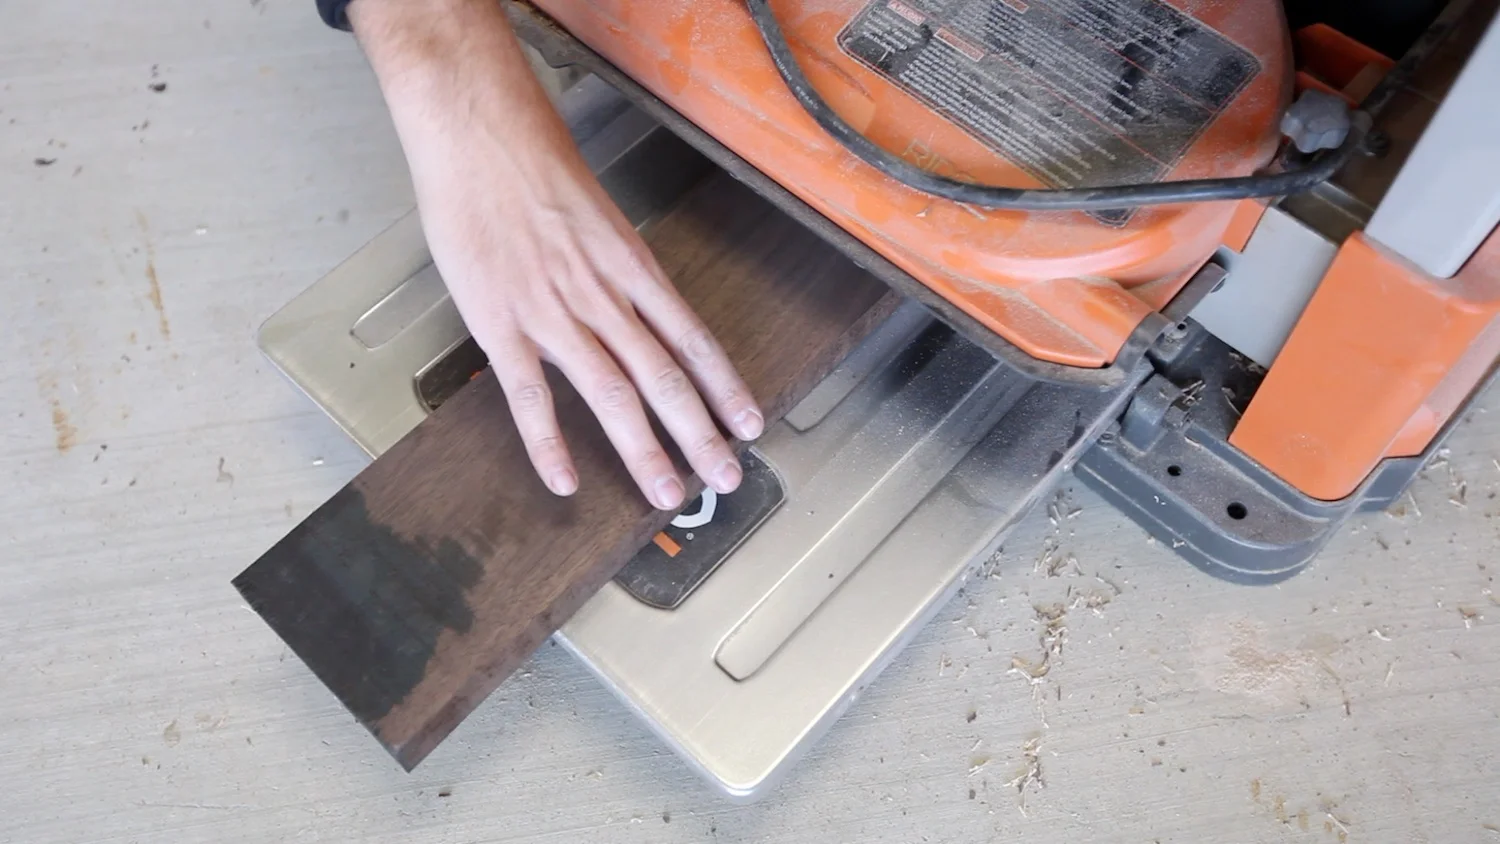
I took them to the miter saw, rough cut them as long as I needed.
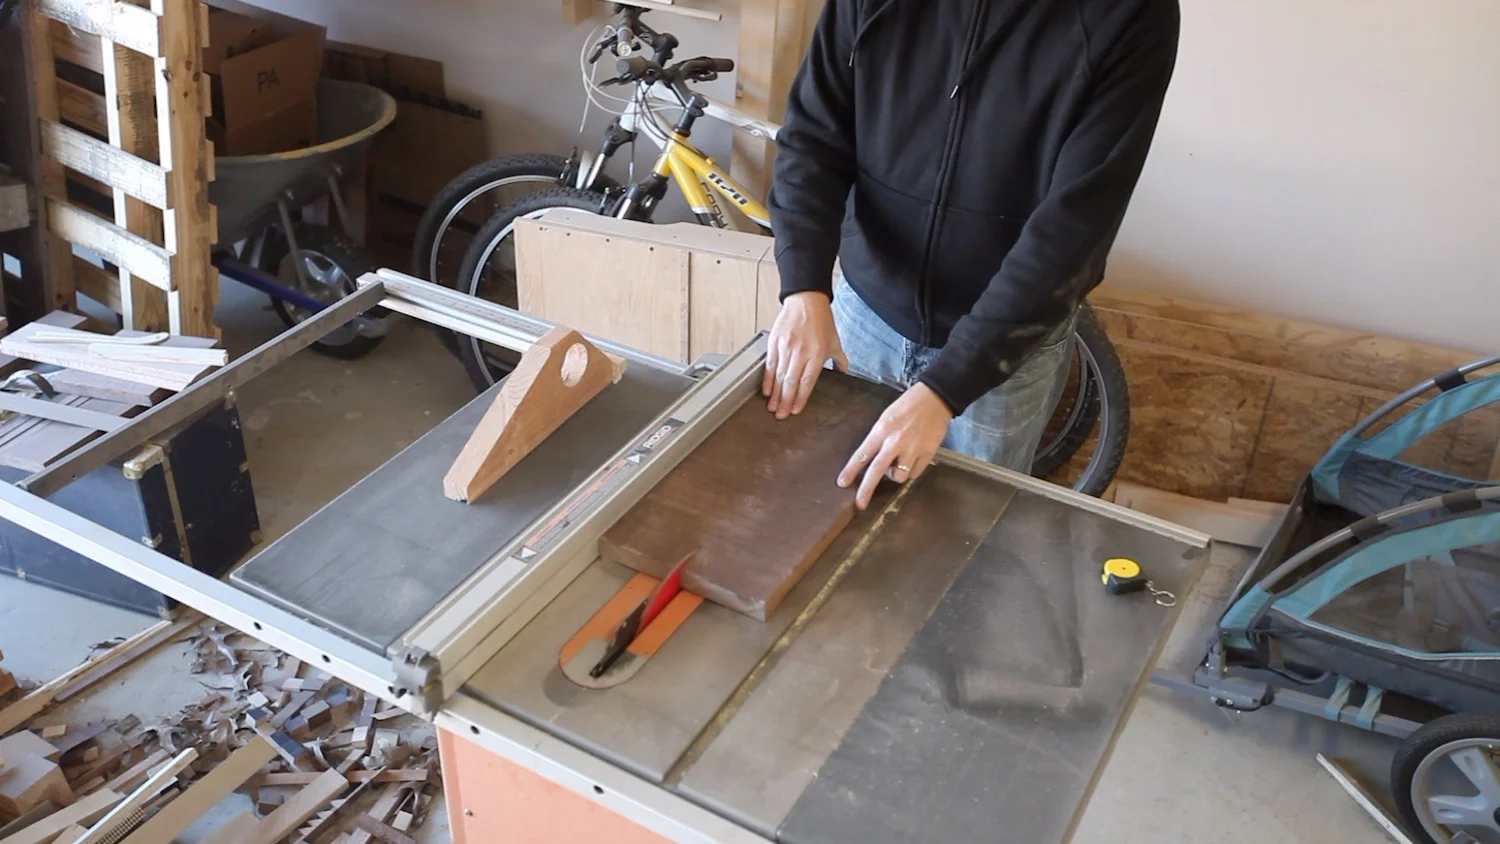
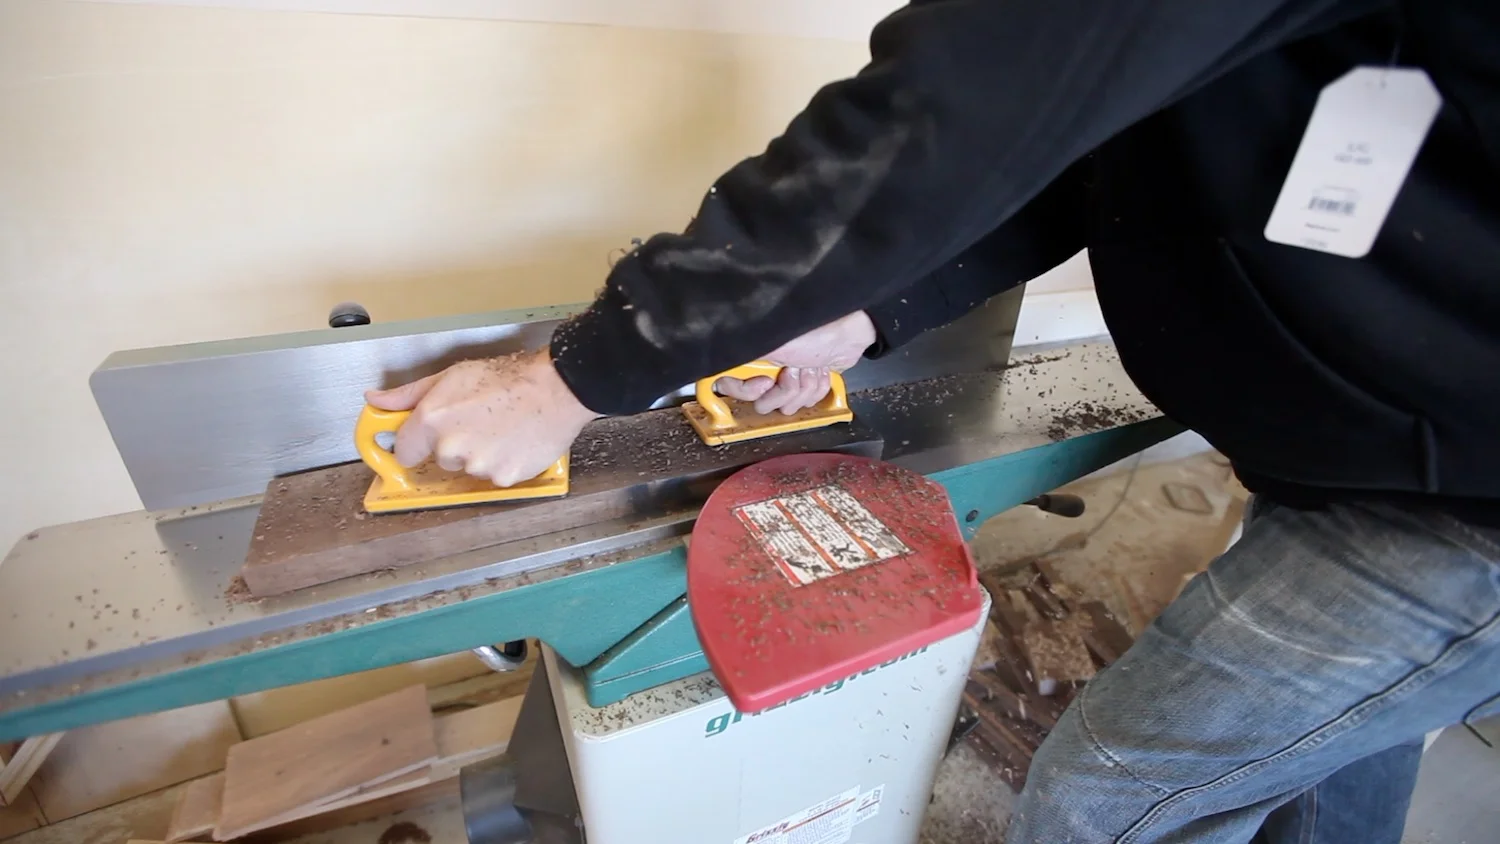
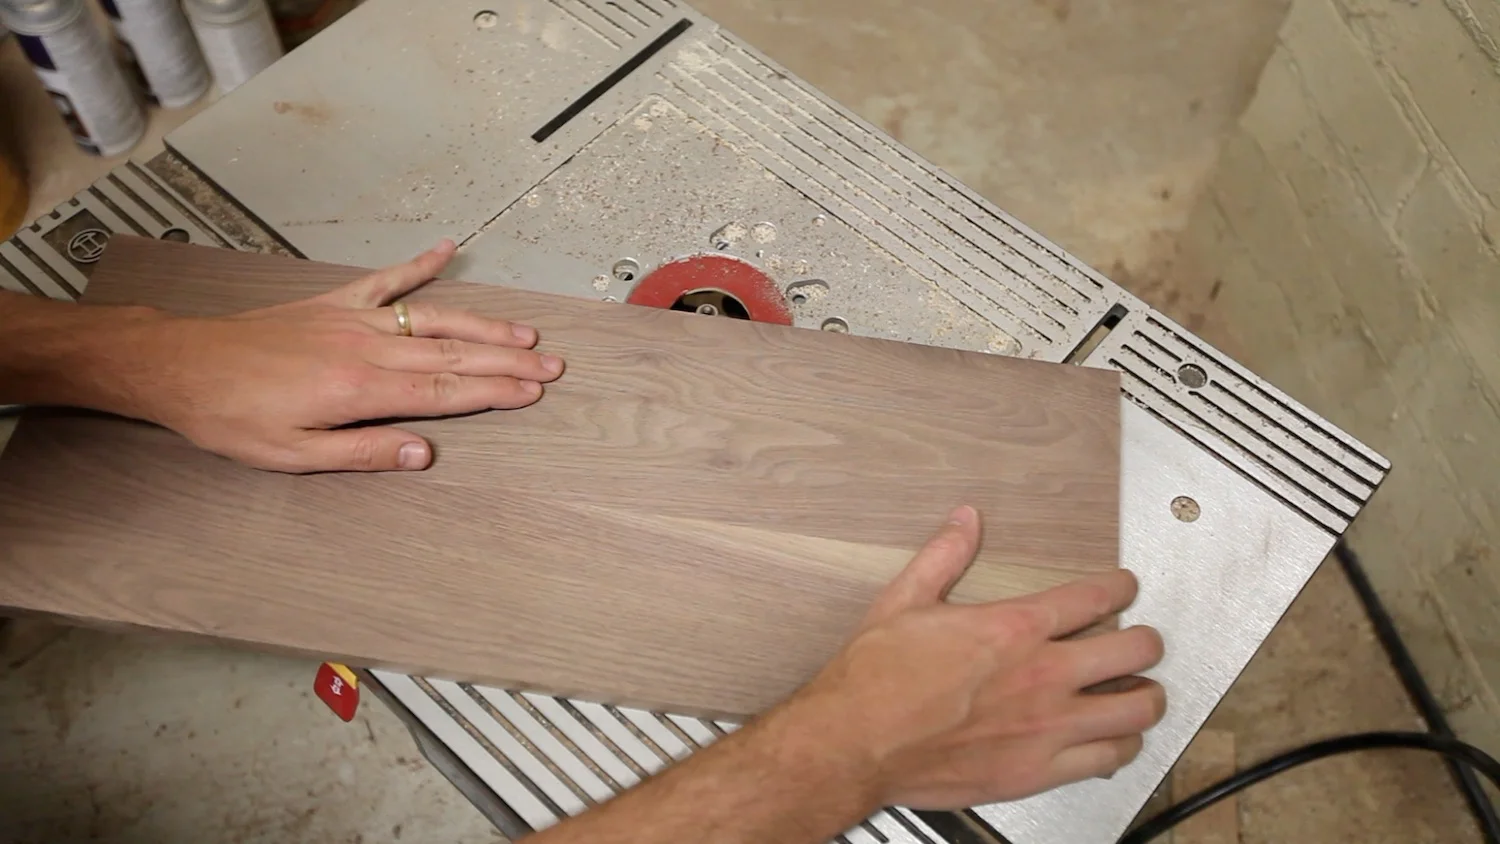
They were too wide for my jointer so I did a quick rip on the table saw.
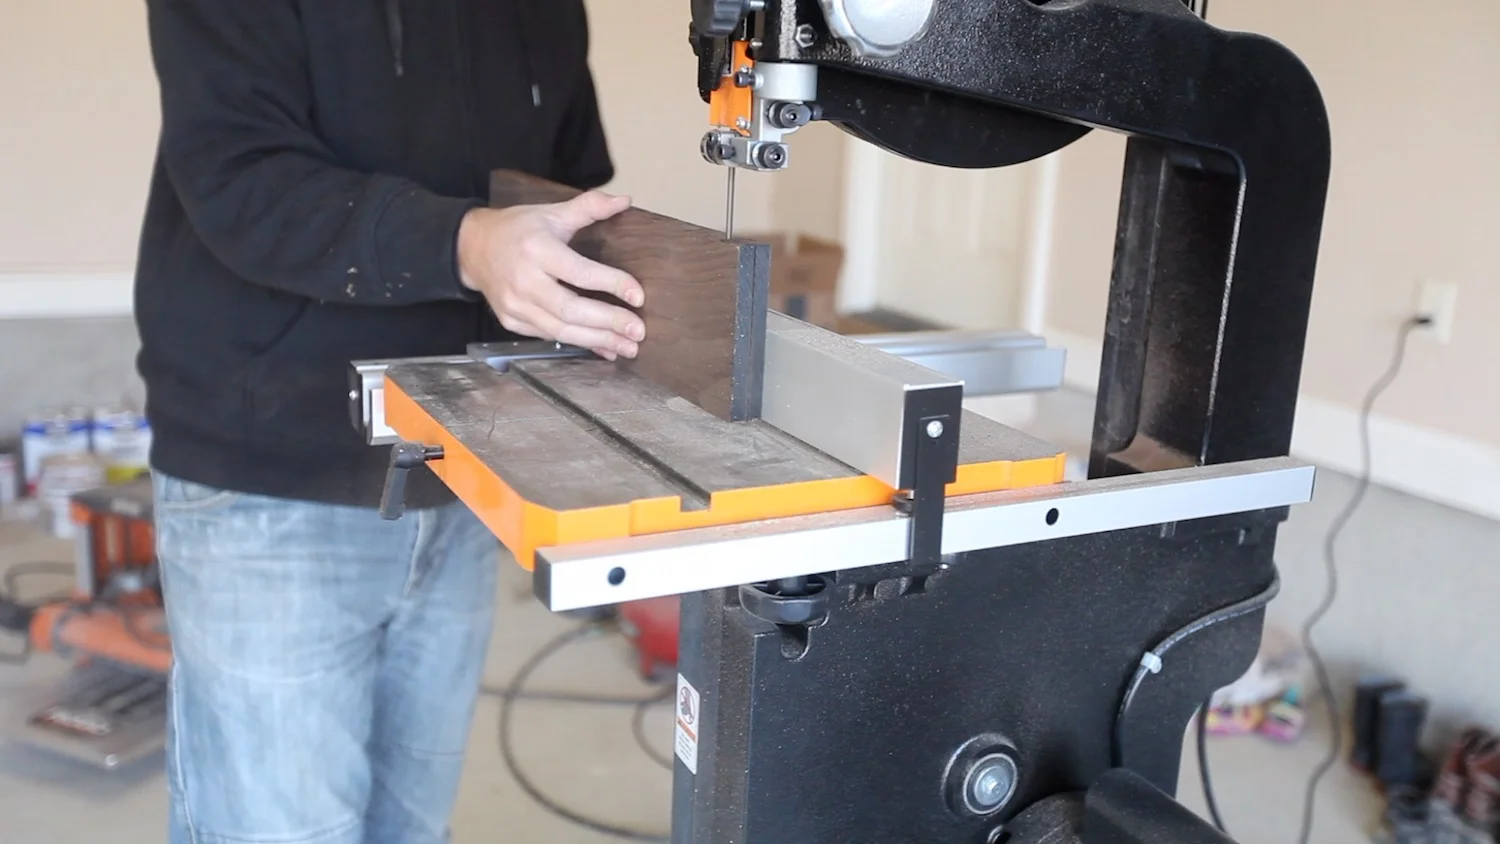
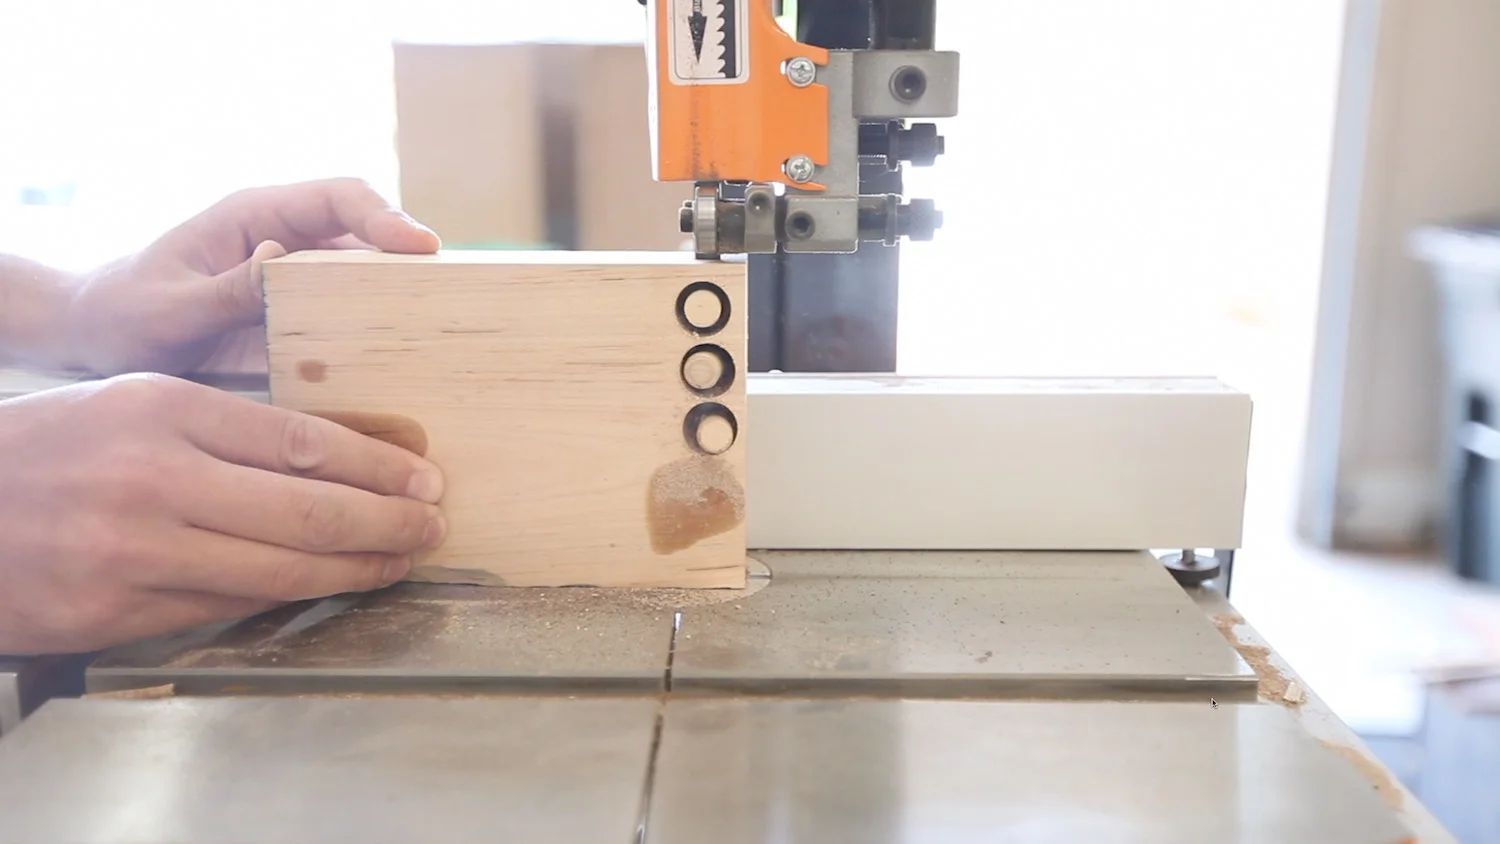
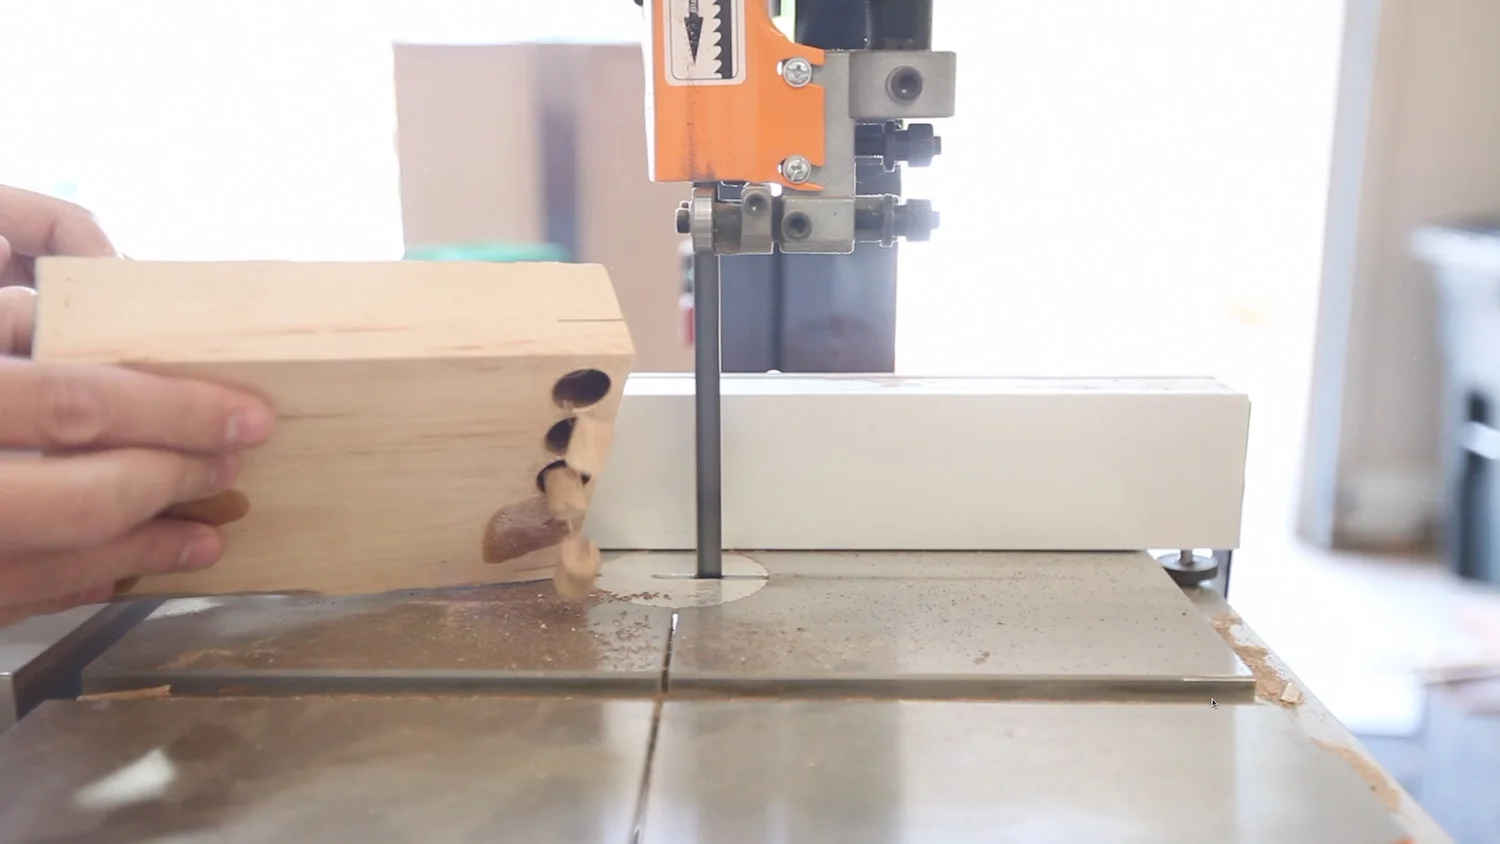
Then, I would get one flat face at the jointer and one flat side. Then, I would take them to the bandsaw to resaw the boards down the middle so I would have two out of that one original board. On some of the boards, this didn't work too well. By the time I did this and then glued them into a panel, the boards were less than 3/8". I felt like that was too thin to use the fasteners and dowel plugs I wanted to use.
After resawing them and planing them to the same thickness, I glued them into panels since none of my boards were wide enough by themselves to work for the wine rack. This wine rack ended up being a little over 9 1/2" deep so I needed that much in width from these boards.

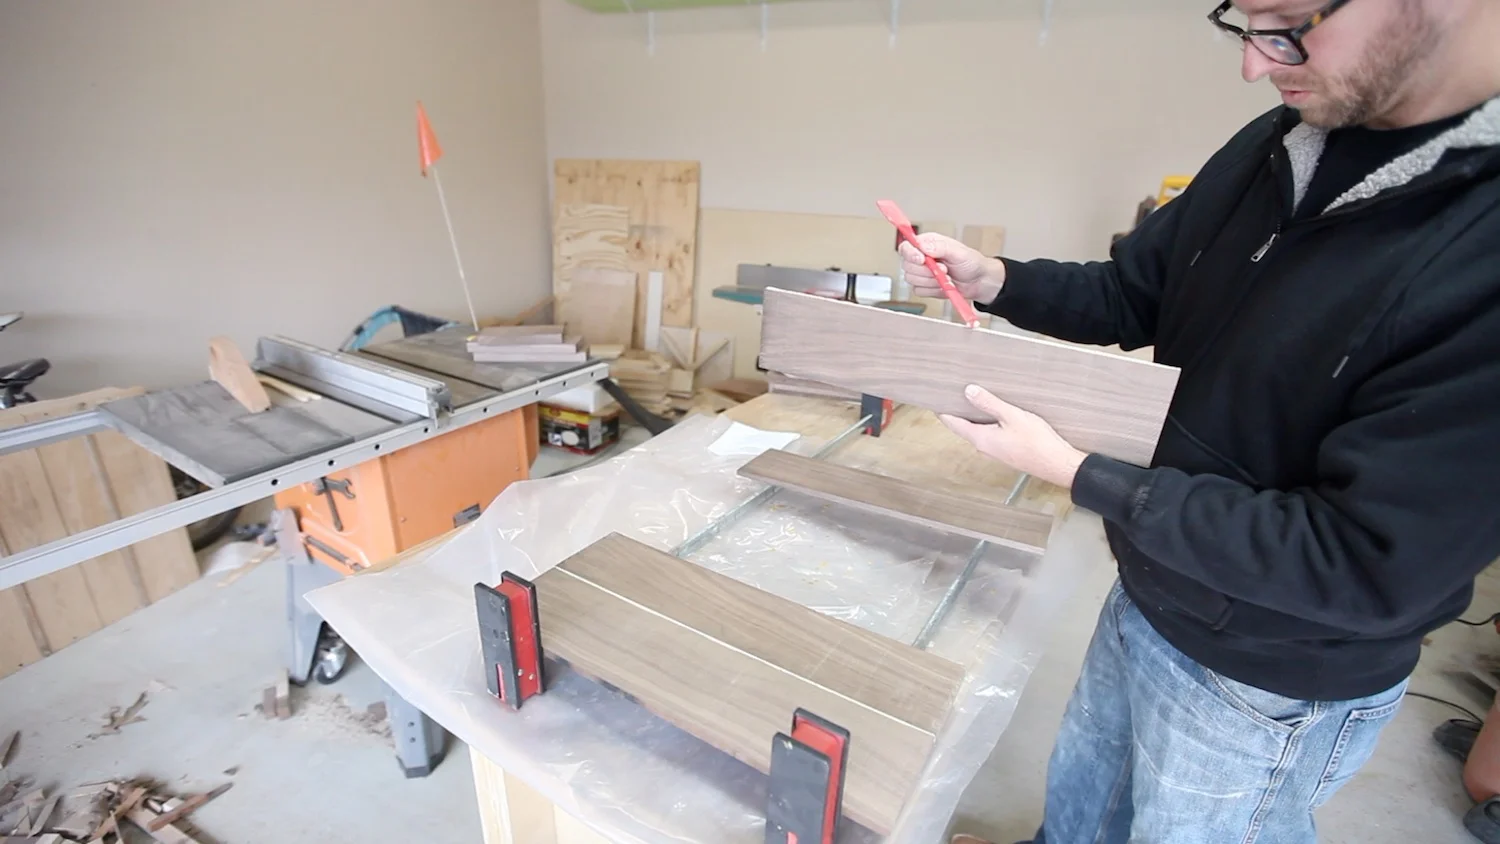
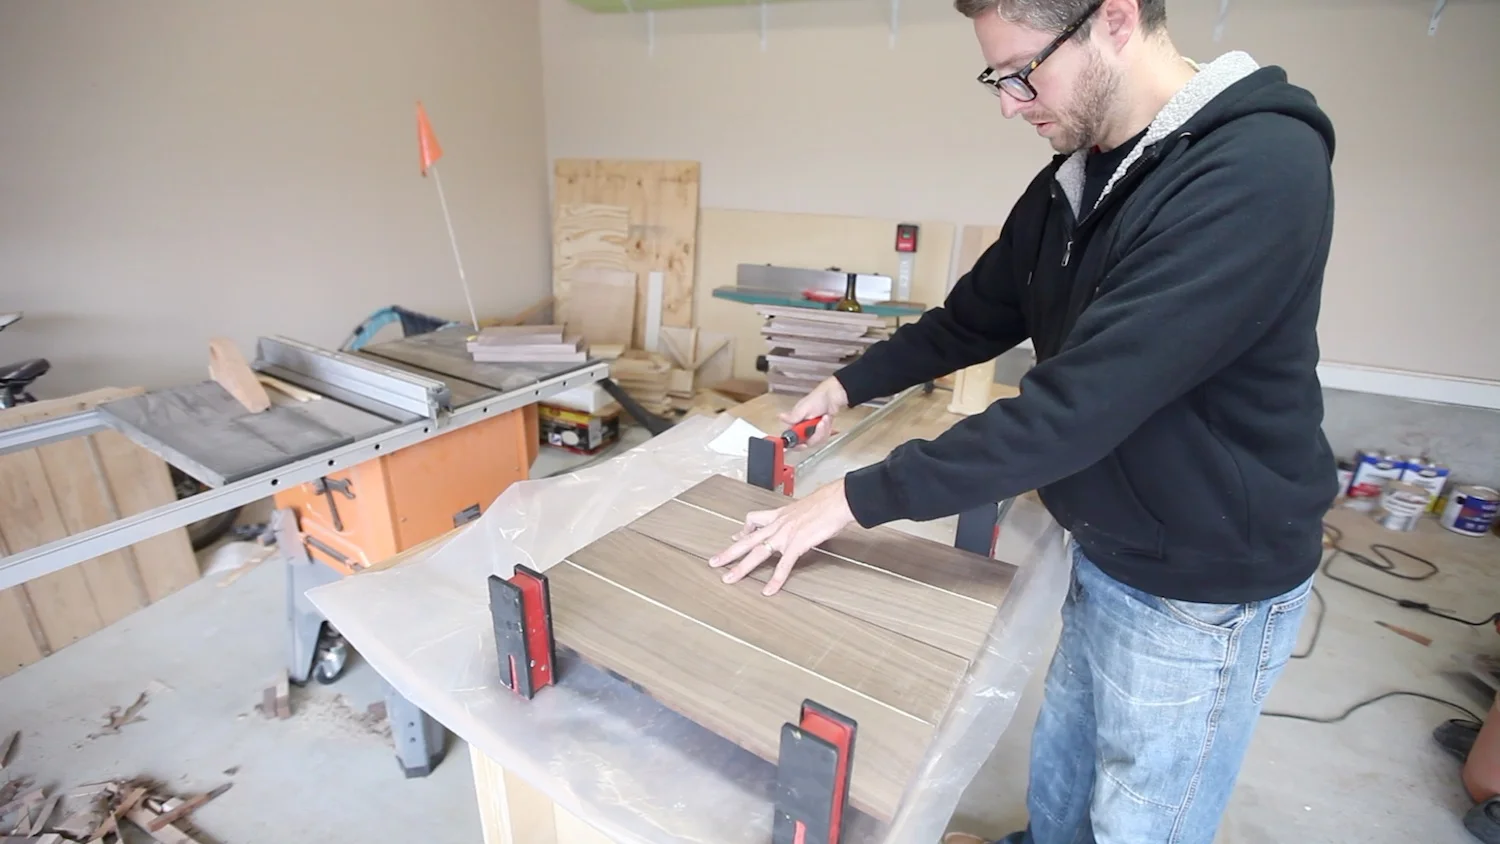
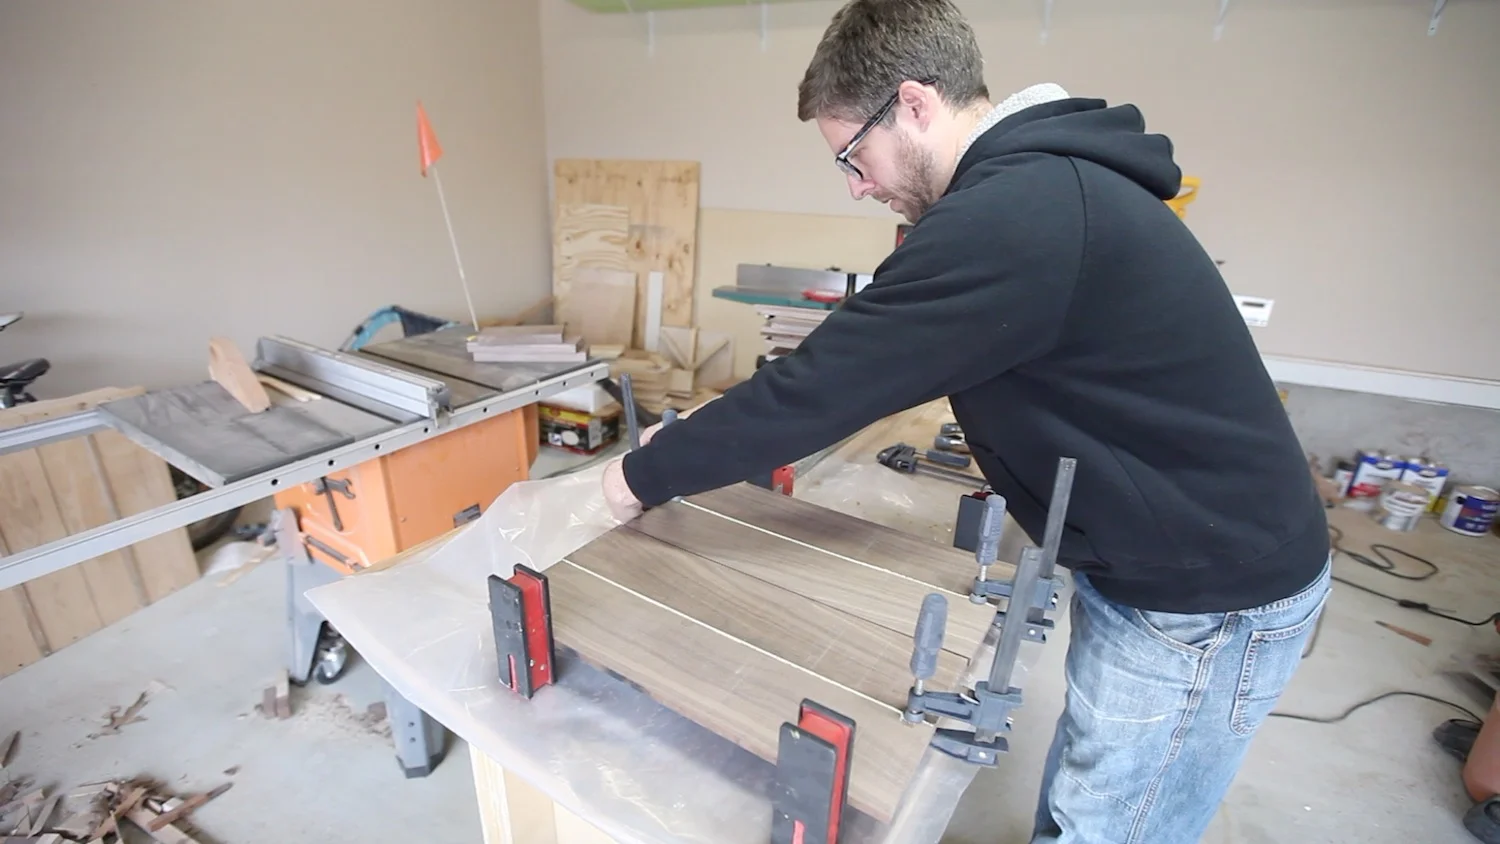
Then, I took them over to the planer to make them all a consistent thickness throughout the entire project. It didn't matter to me what that thickness was necessarily, but just as thick as all of my material would allow and for all of it to be consistent. I think they ended up around 1/2" thick or slightly less after I planed them all.
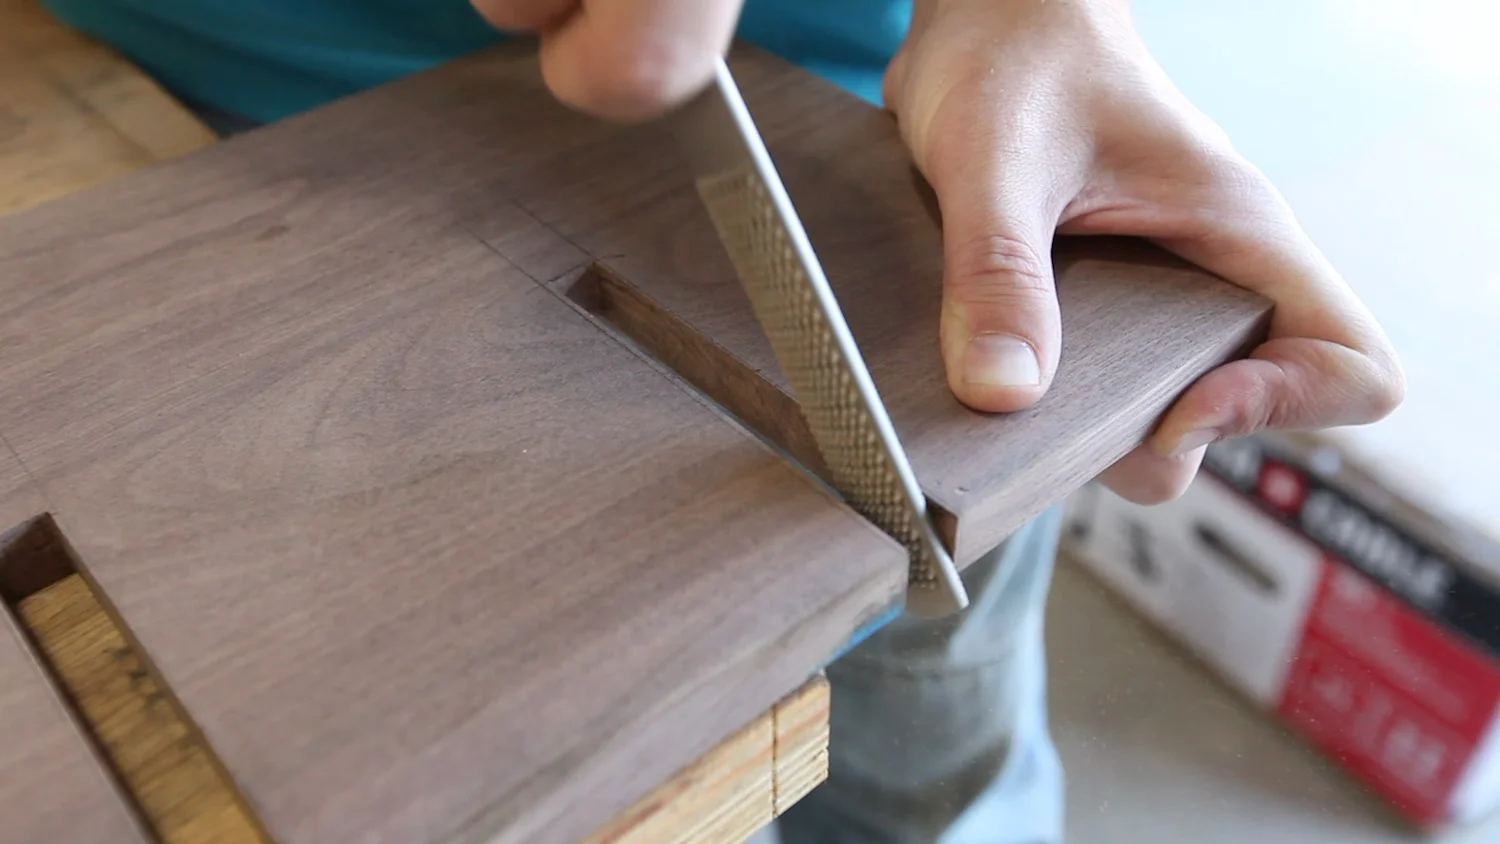
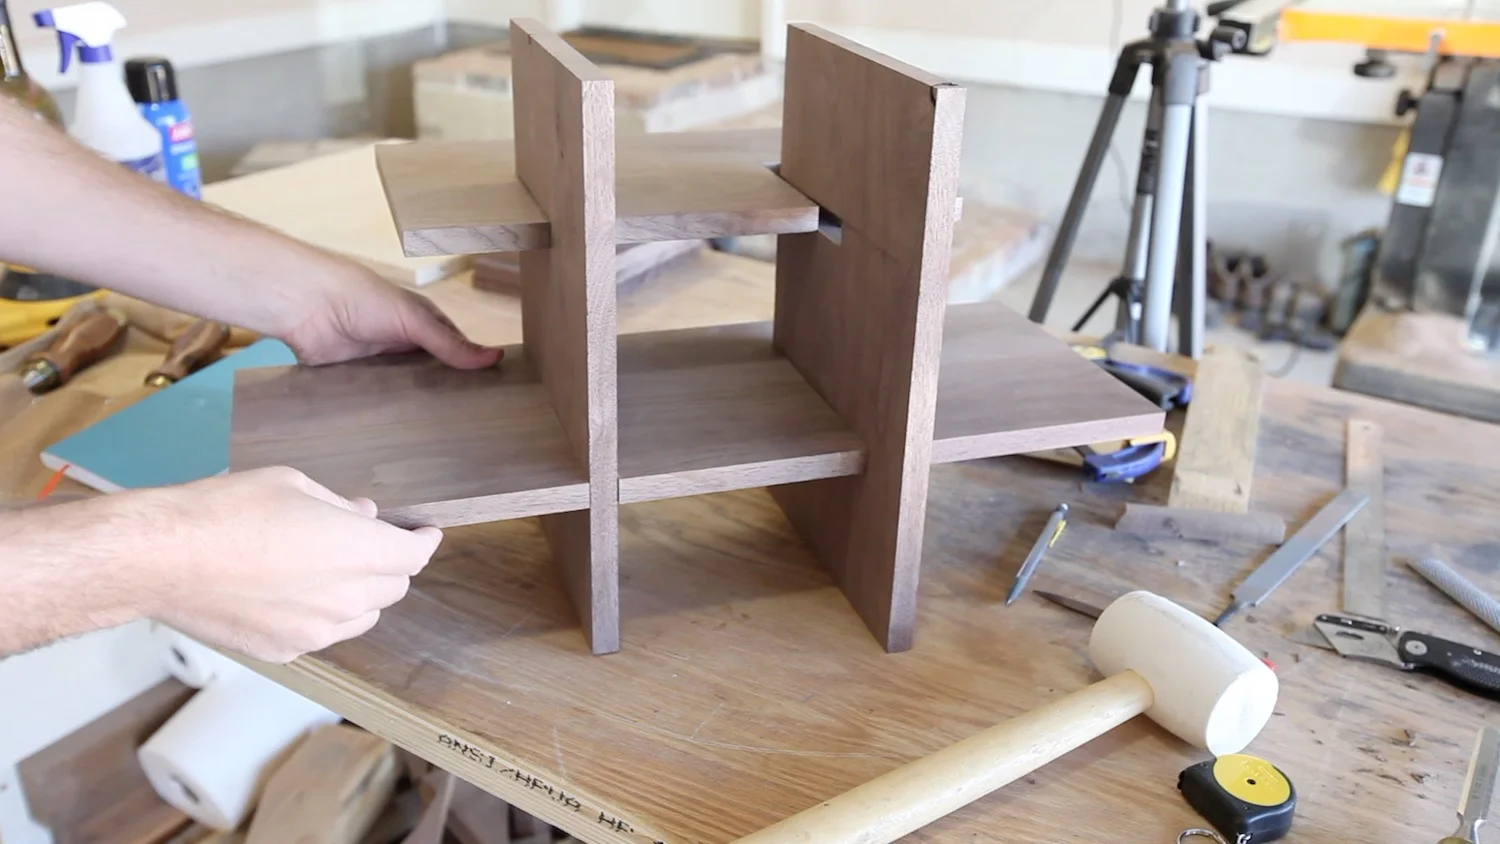
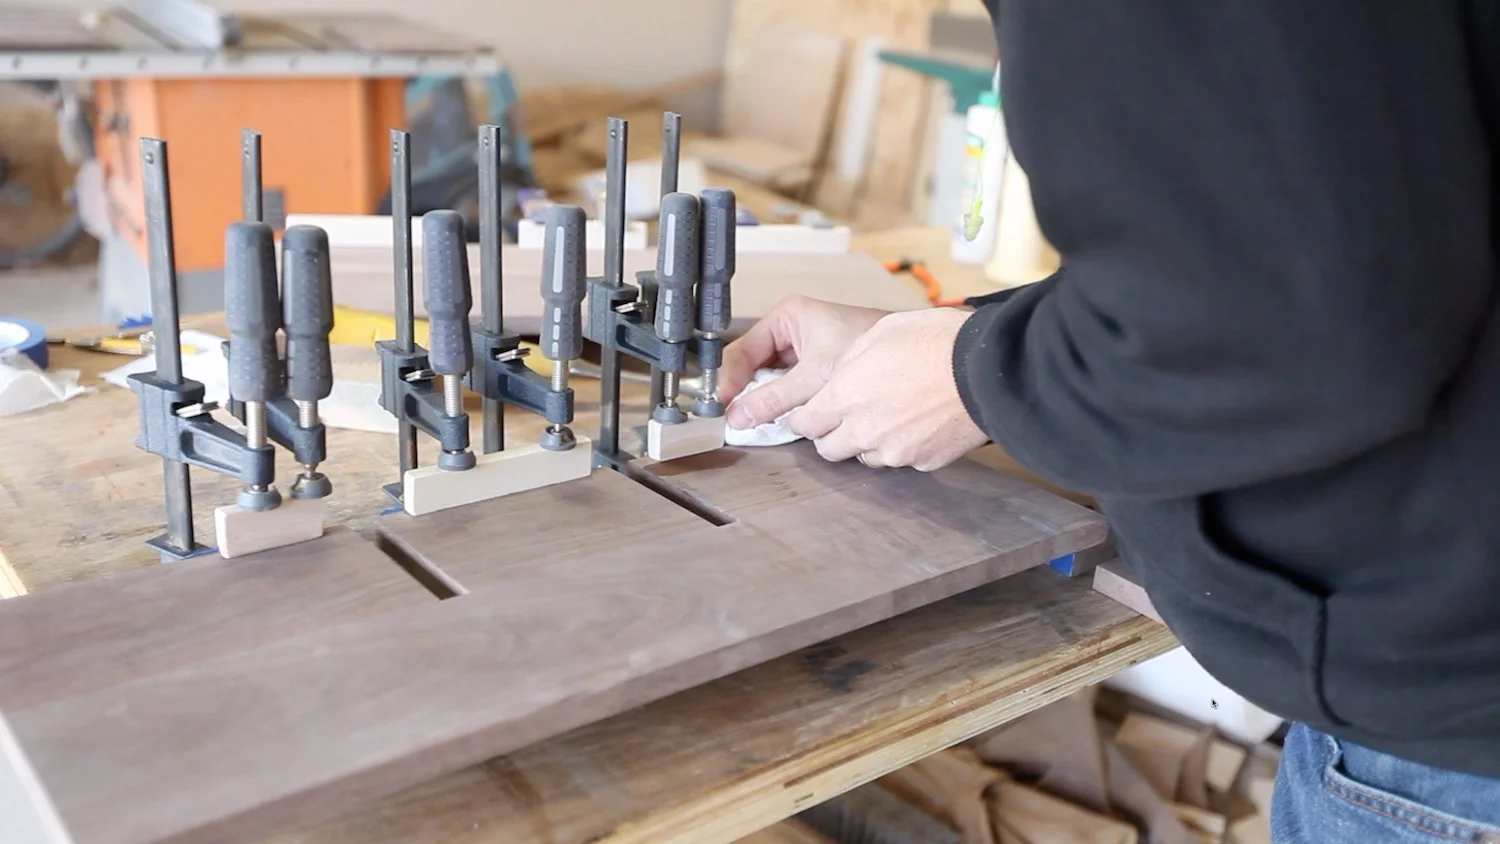
Next came the difficult part: laying out all of the cuts. I probably didn't have to assemble it this way, but I just liked the idea of it. I was basically using half-lap joints to make all of the little sections. The problem comes where the panels are over 9" wide, so the half-lap joint must be half of that, and cut accurately enough to get the boards to go together snug enough to not need glue, but also not too snug. It was difficult...well, for me, at least. I ended up making some of the panels three times because I kept messing them up. The first time I messed them up, I messed up a TON of the boards as I mentioned above. I just made them too thin. The second time, I messed up the two horizontal pieces when I was cutting the half-lap slots in them. On one side, I tried to make some of the cuts on the table saw using the sled, which of course left a rounded cut that extended past my line. Argh! I finally got it right on the third time.
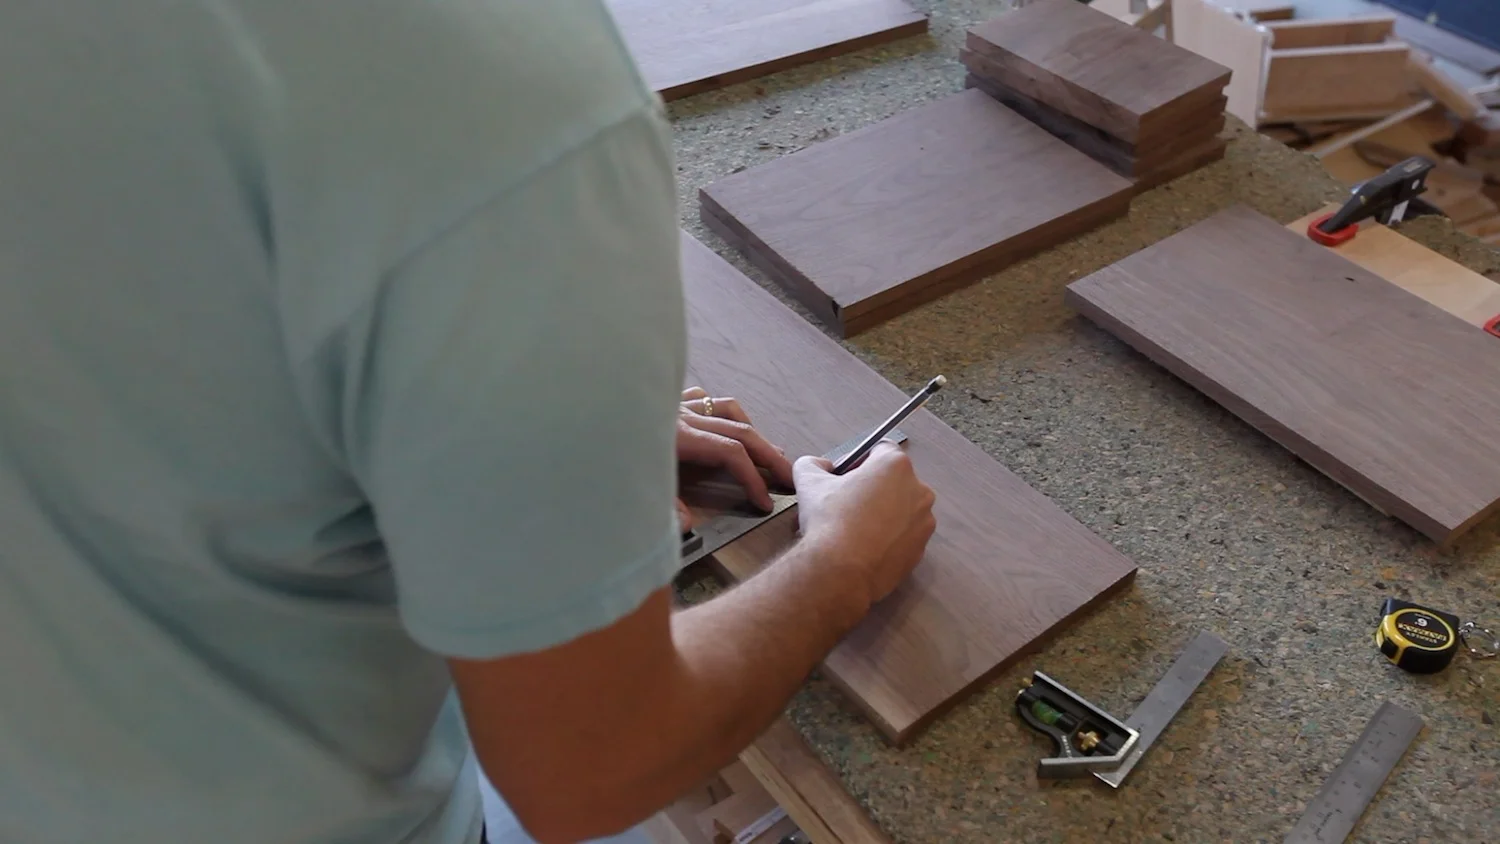

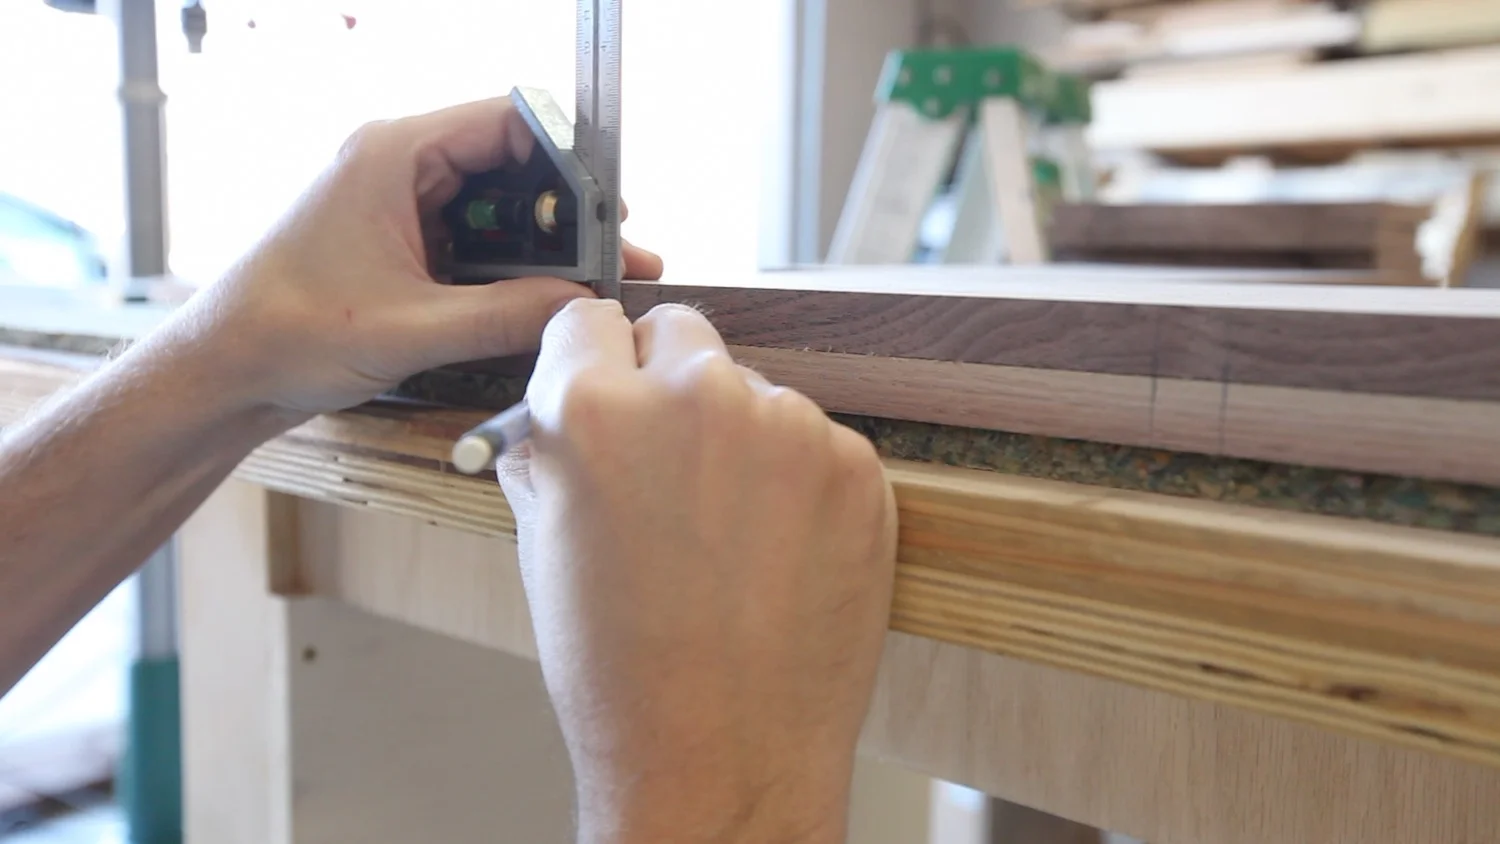
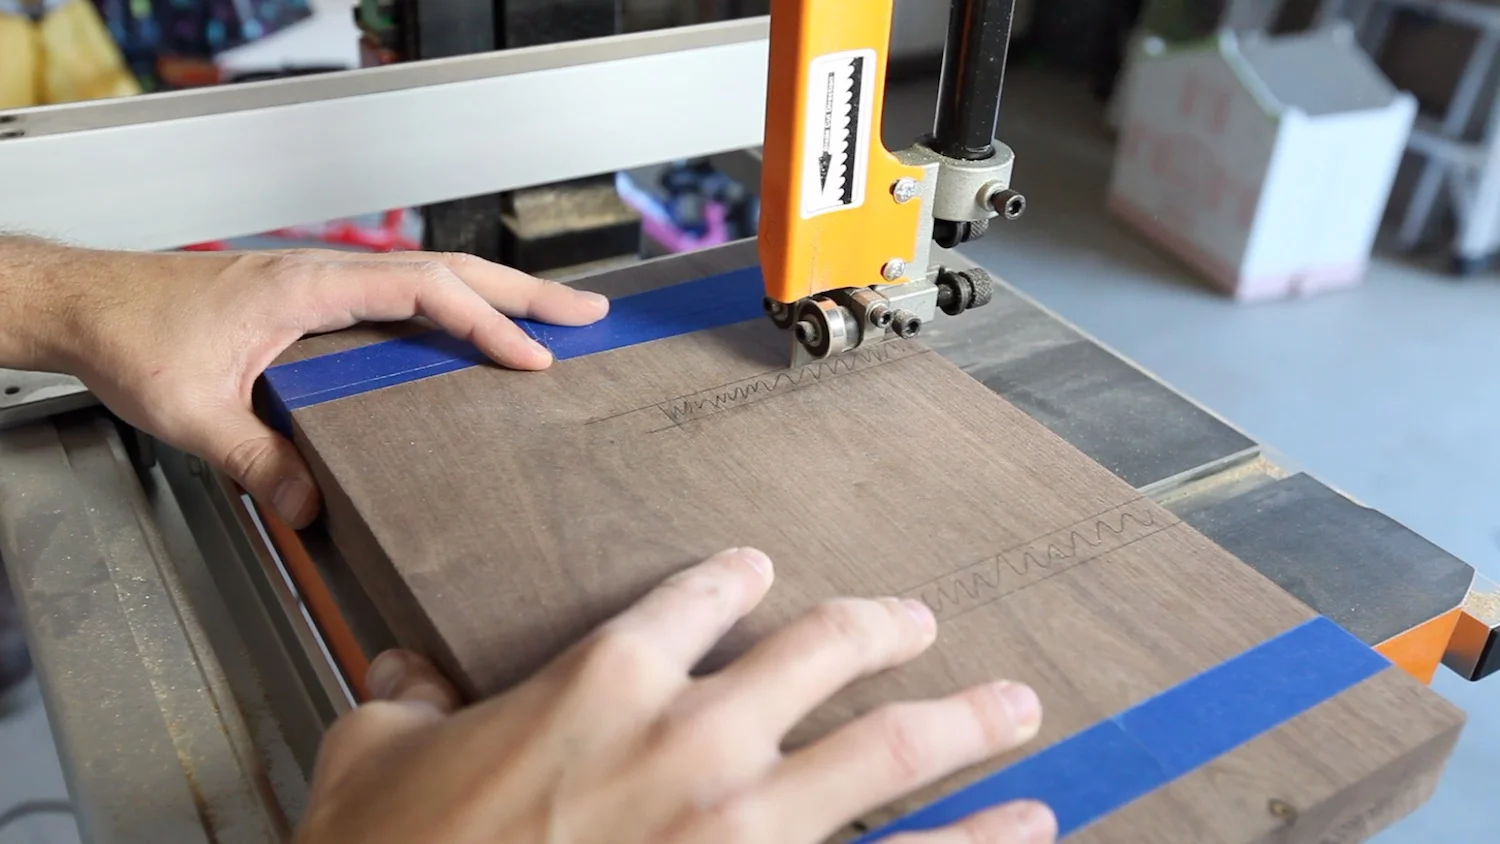
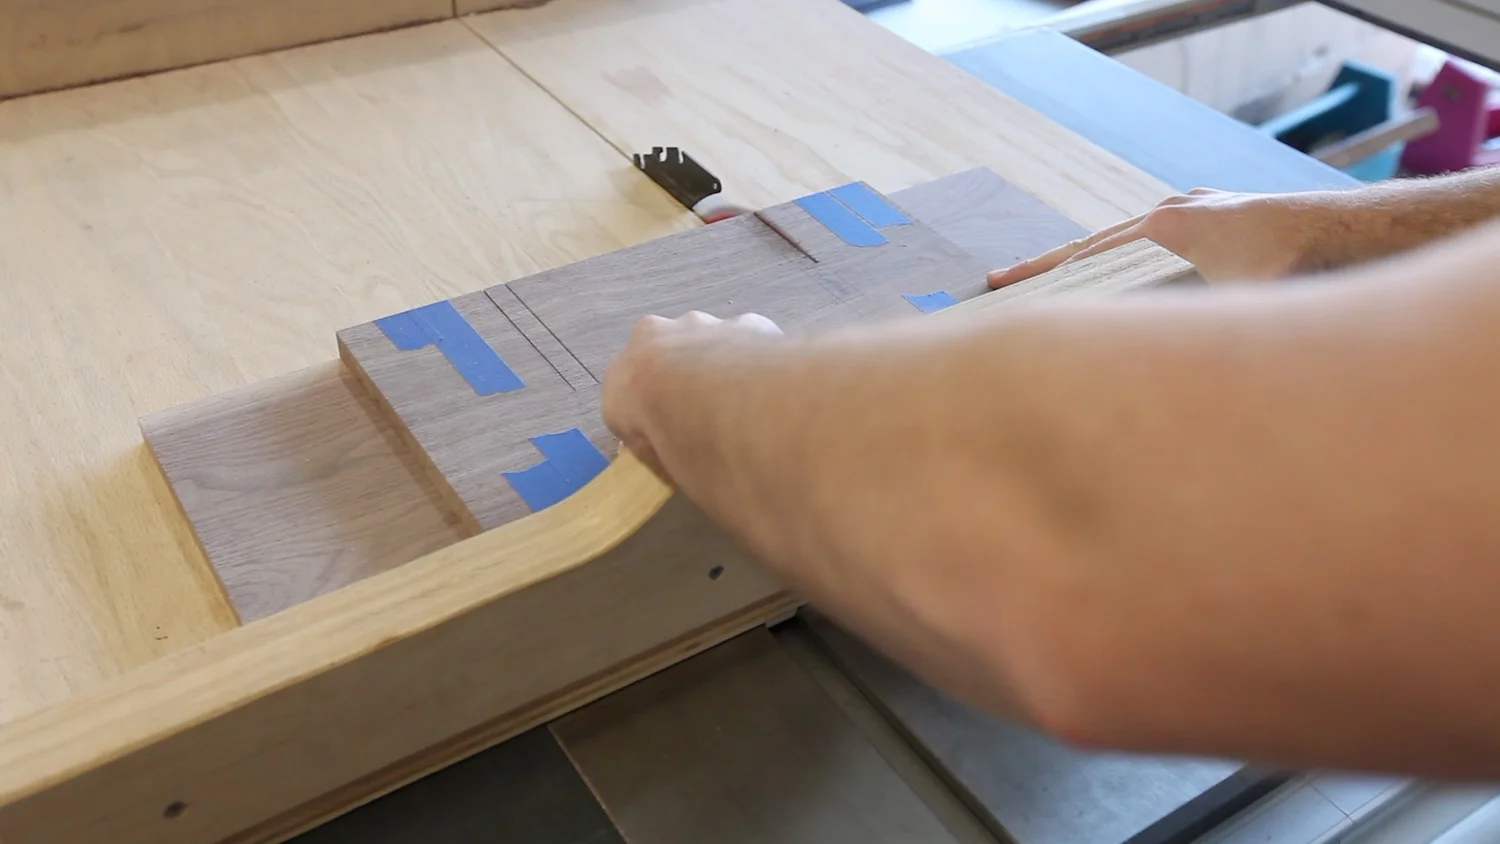
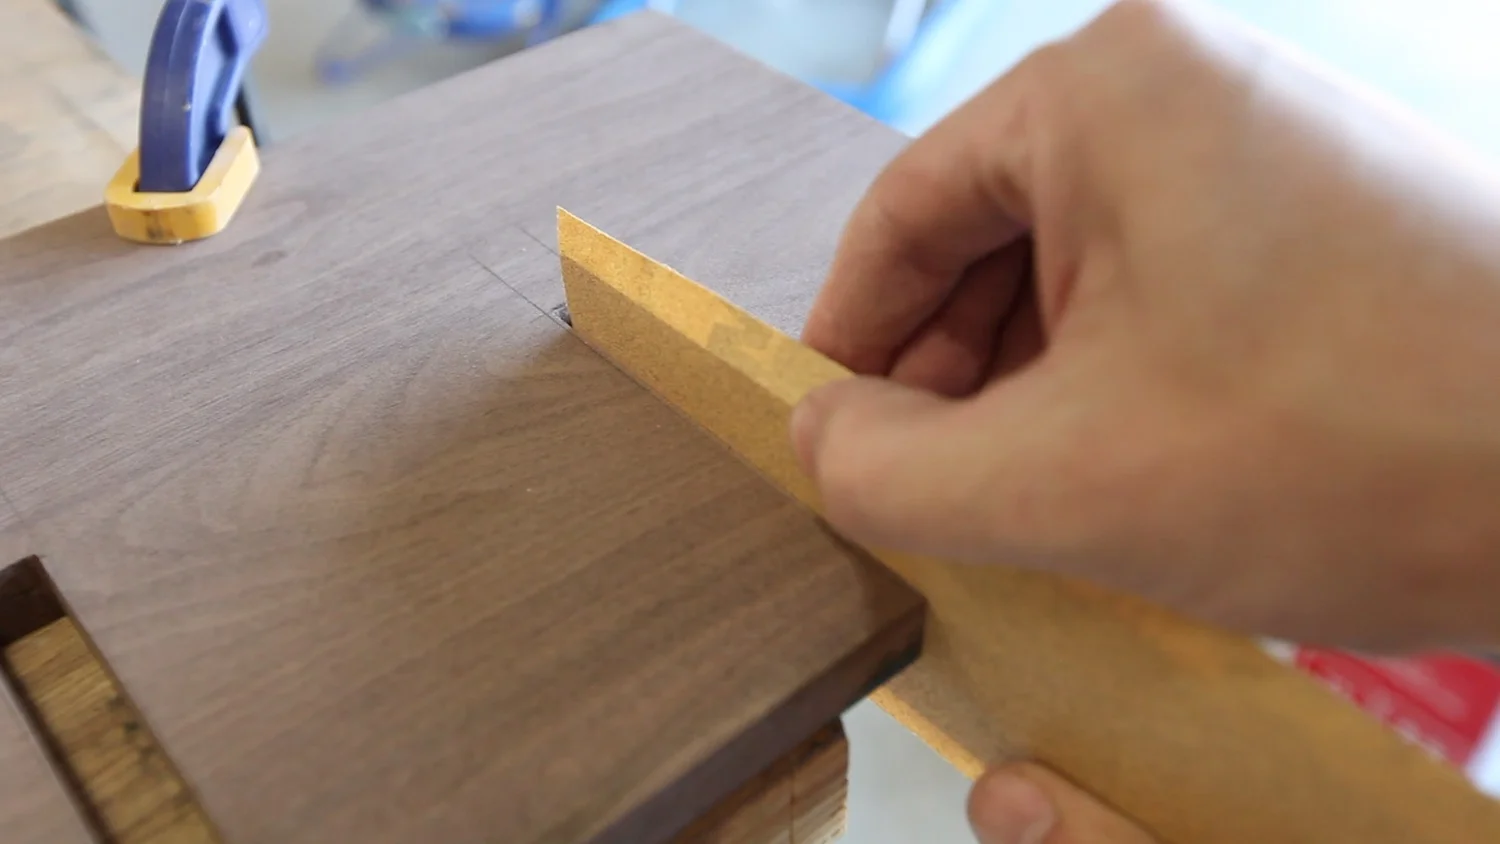
To refine some of the slots, I used rasps and sandpaper.
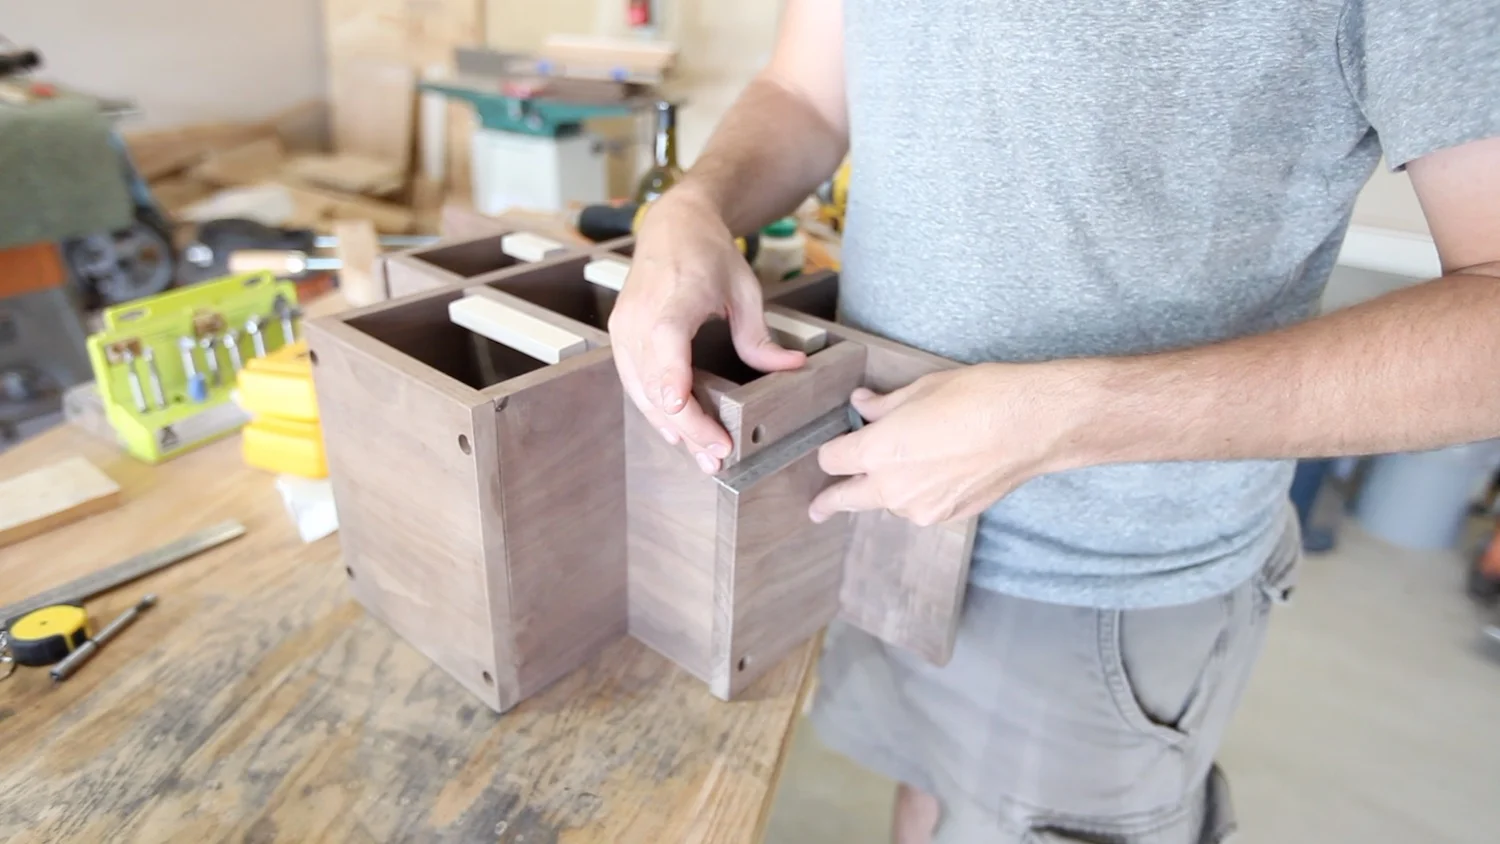
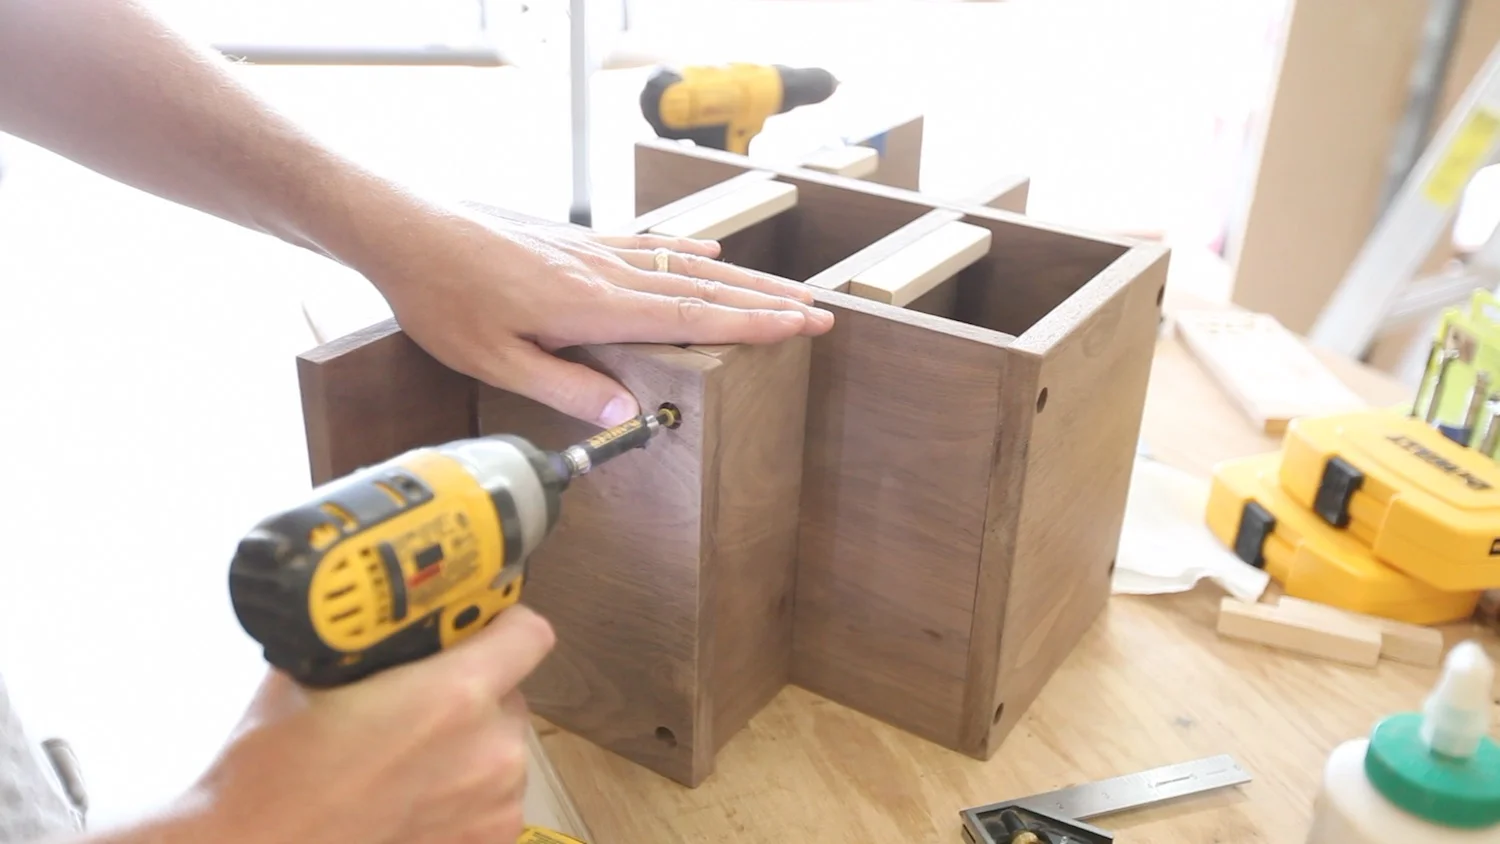
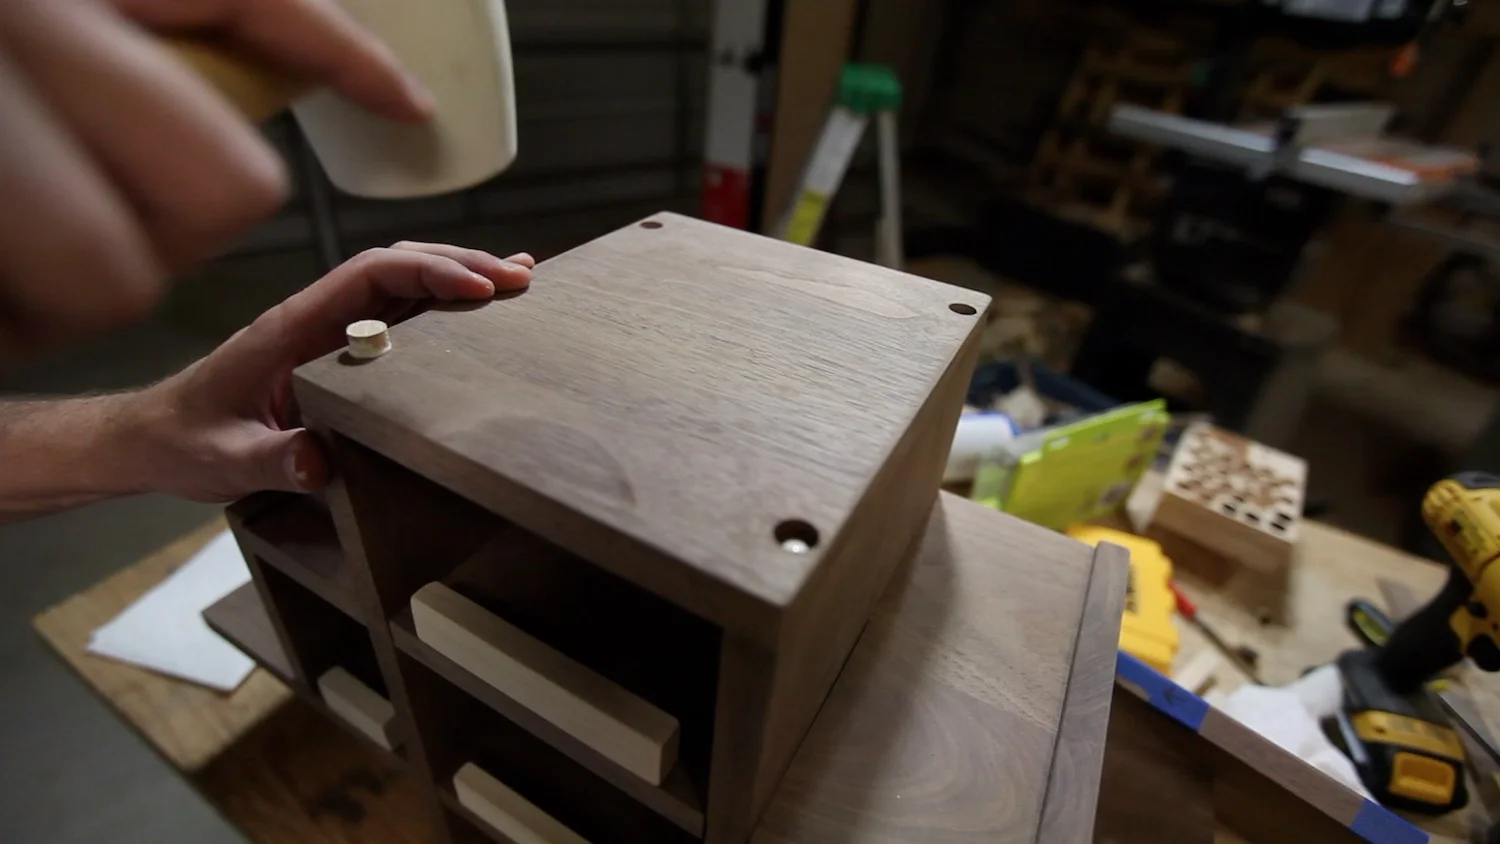
So, the wine rack would have a pyramid look to it. The highest part would be completely flush, but all of the other horizontal surfaces would have slightly protruding vertical pieces. This was because stemless wine glasses were to be stacked there on top, and this gave them a little bit of a lip to stay put. (You can see this in the third picture below this...kind of in the background.) So for the top piece, I just put it all together in a dry assembly, set the top piece in place and marked how wide it needed to be. That way, it was exactly made to fit.
For the very bottom piece, I put a 1/8" roundover on the bottom edges using a router.
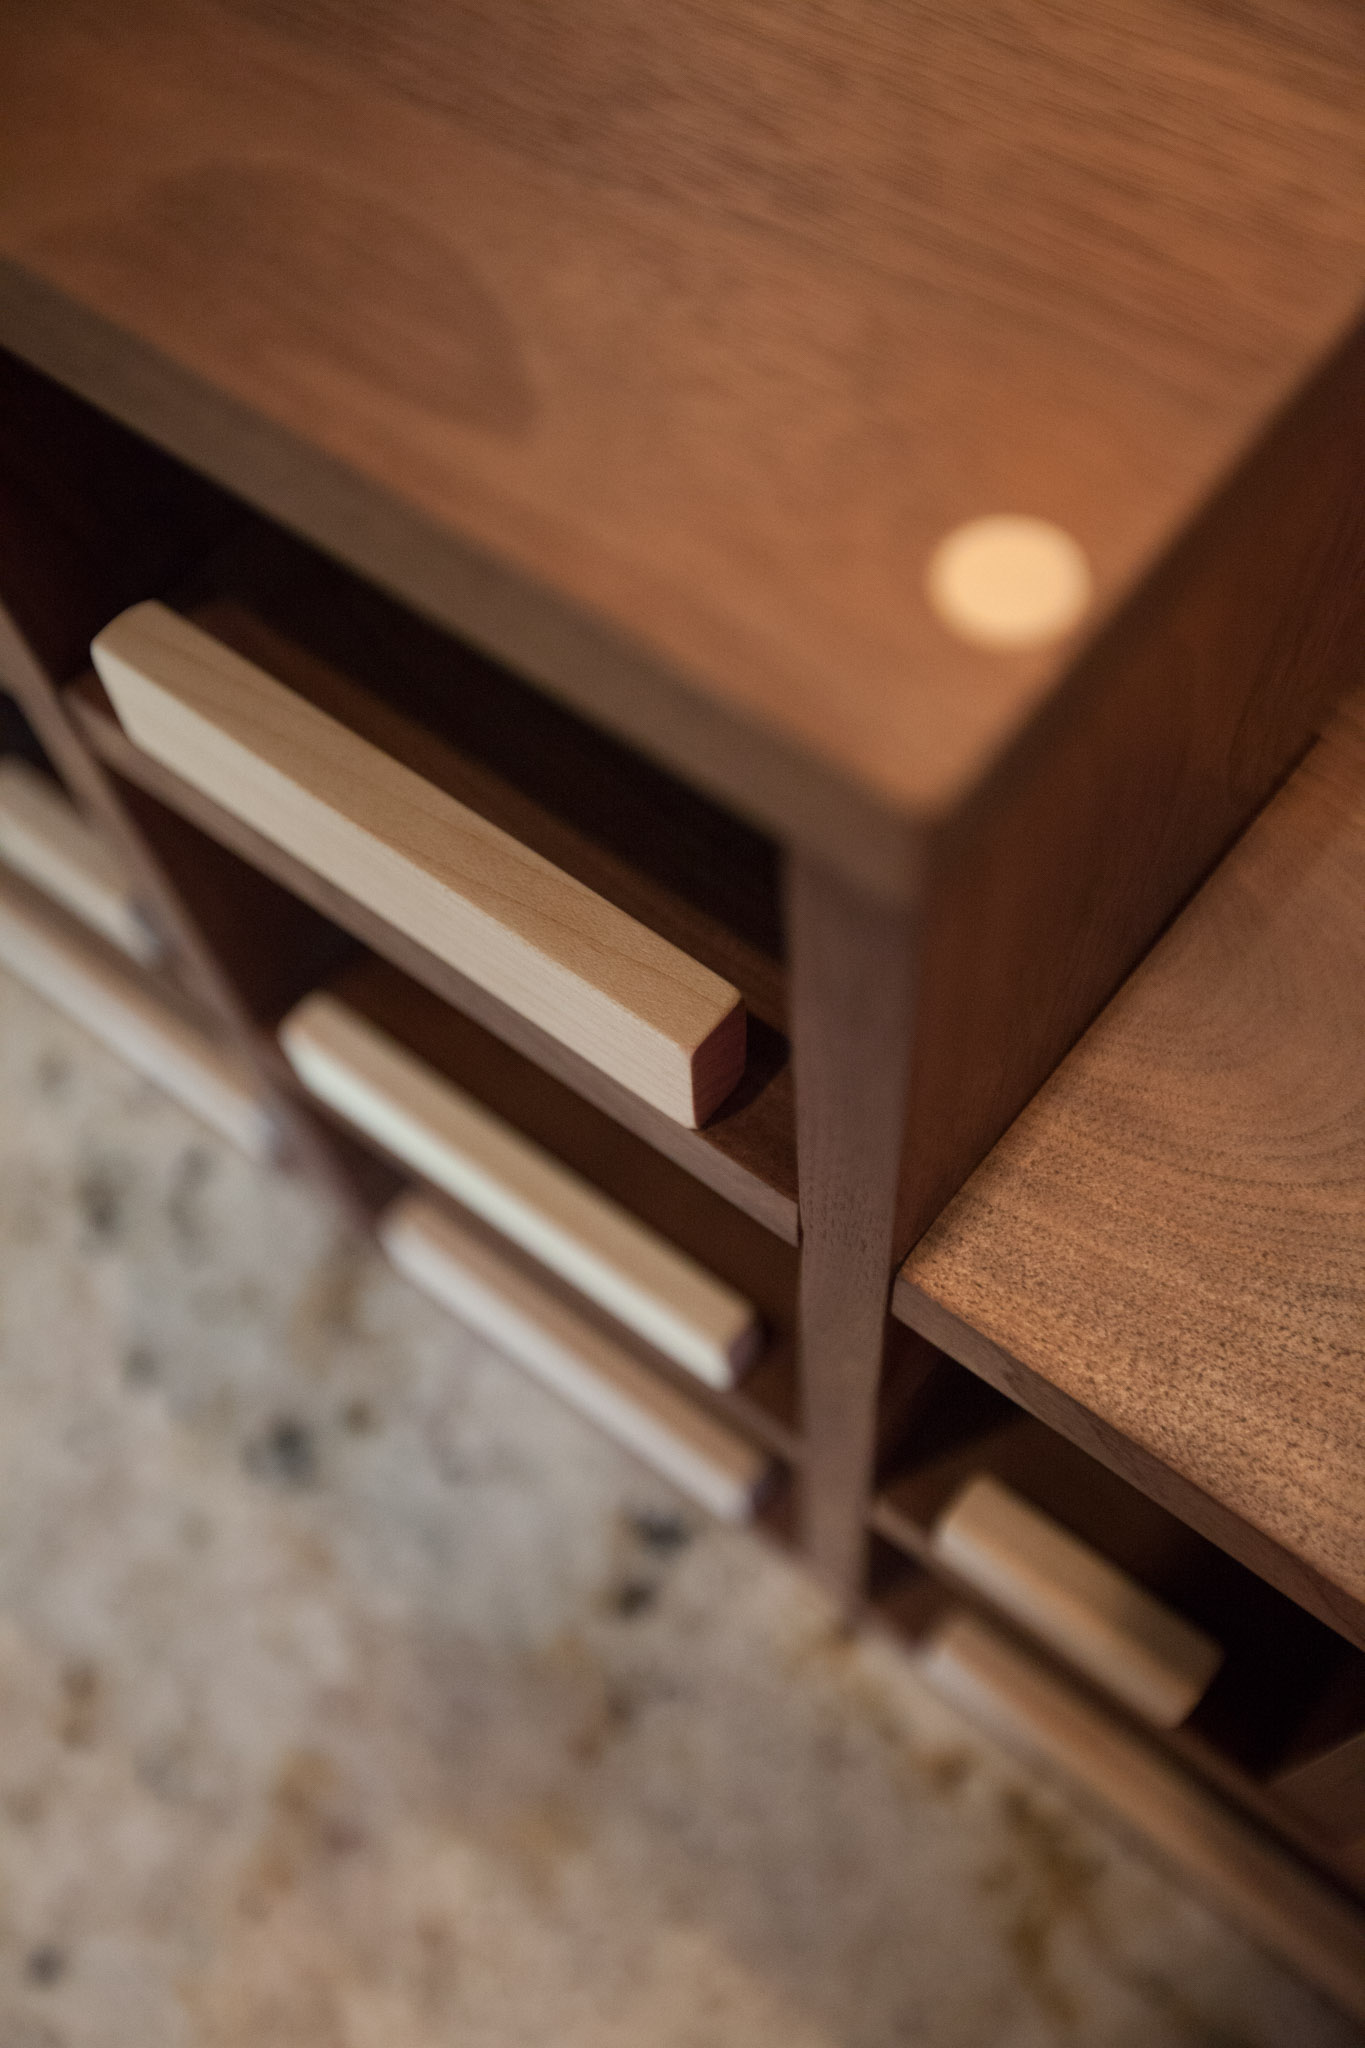
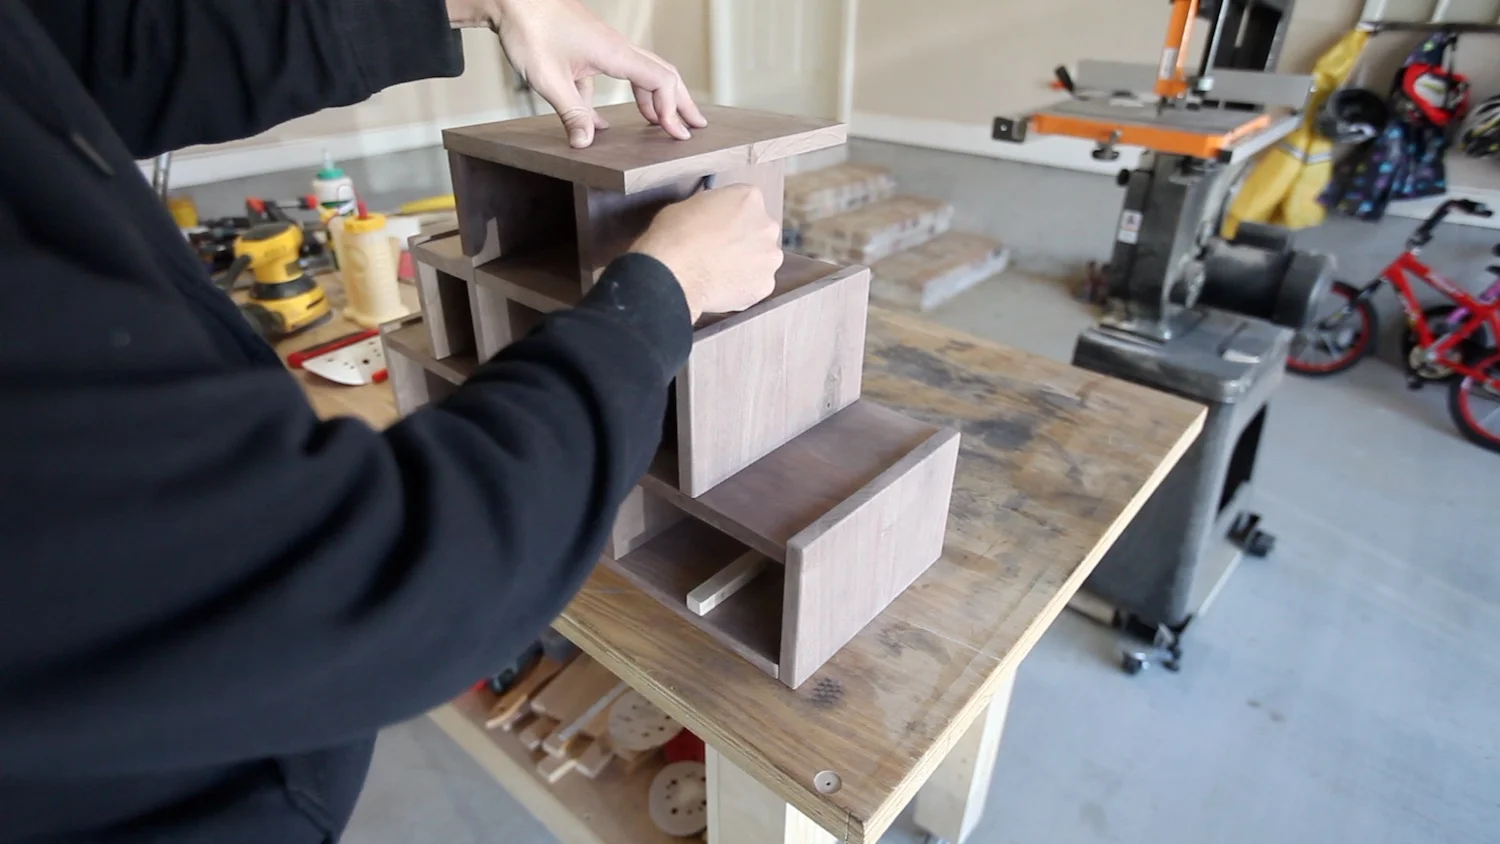
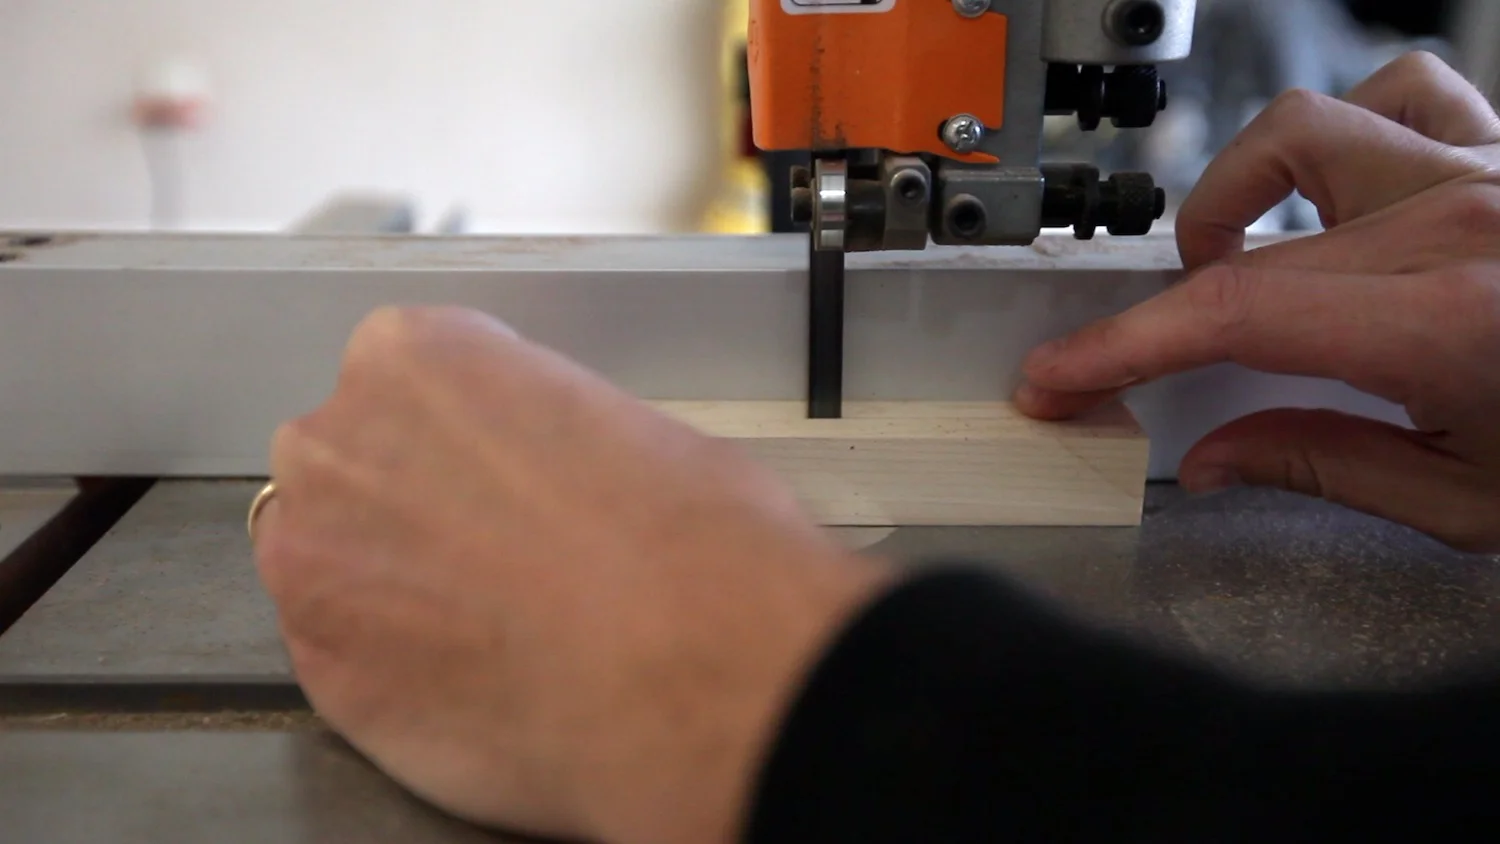
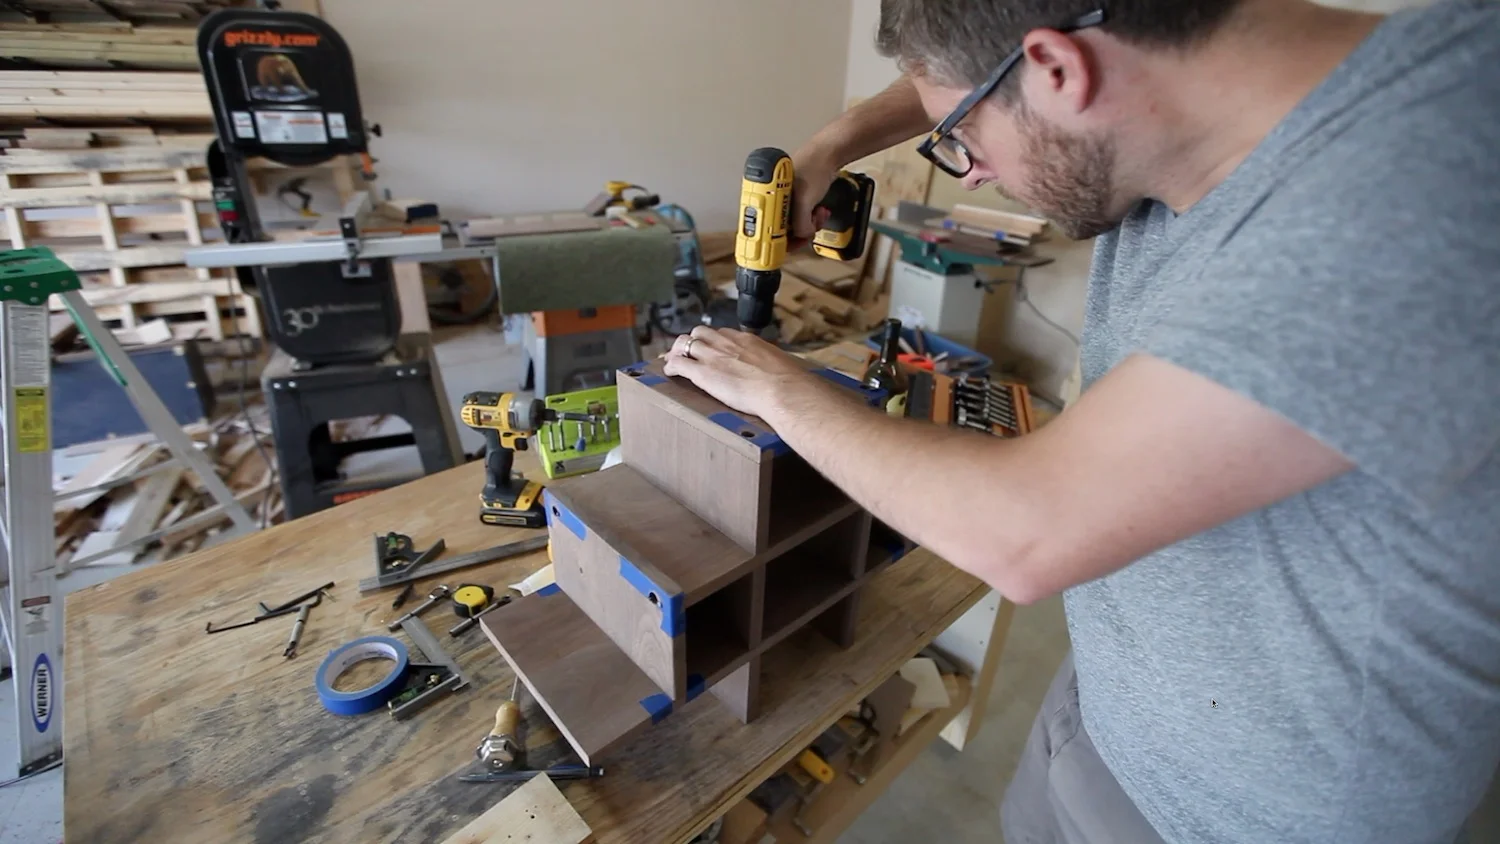
I milled up some small pieces of hard maple so they could be used on the inside of the cabinet as dividers. Also, I put some of these pieces of maple at the back of the compartments so the wine bottles could be sat on them and be stored at a downward angle. This prevents the corks from drying out if the wine is stored for a period of time. For most of these pieces, I only used glue to attach them to the walnut since they were small, and would not have a significant stress on them. NOTE: don't use too much glue here. It is really hard to clean up, and there were a couple of them that I used too much, having to manage the squeeze out.

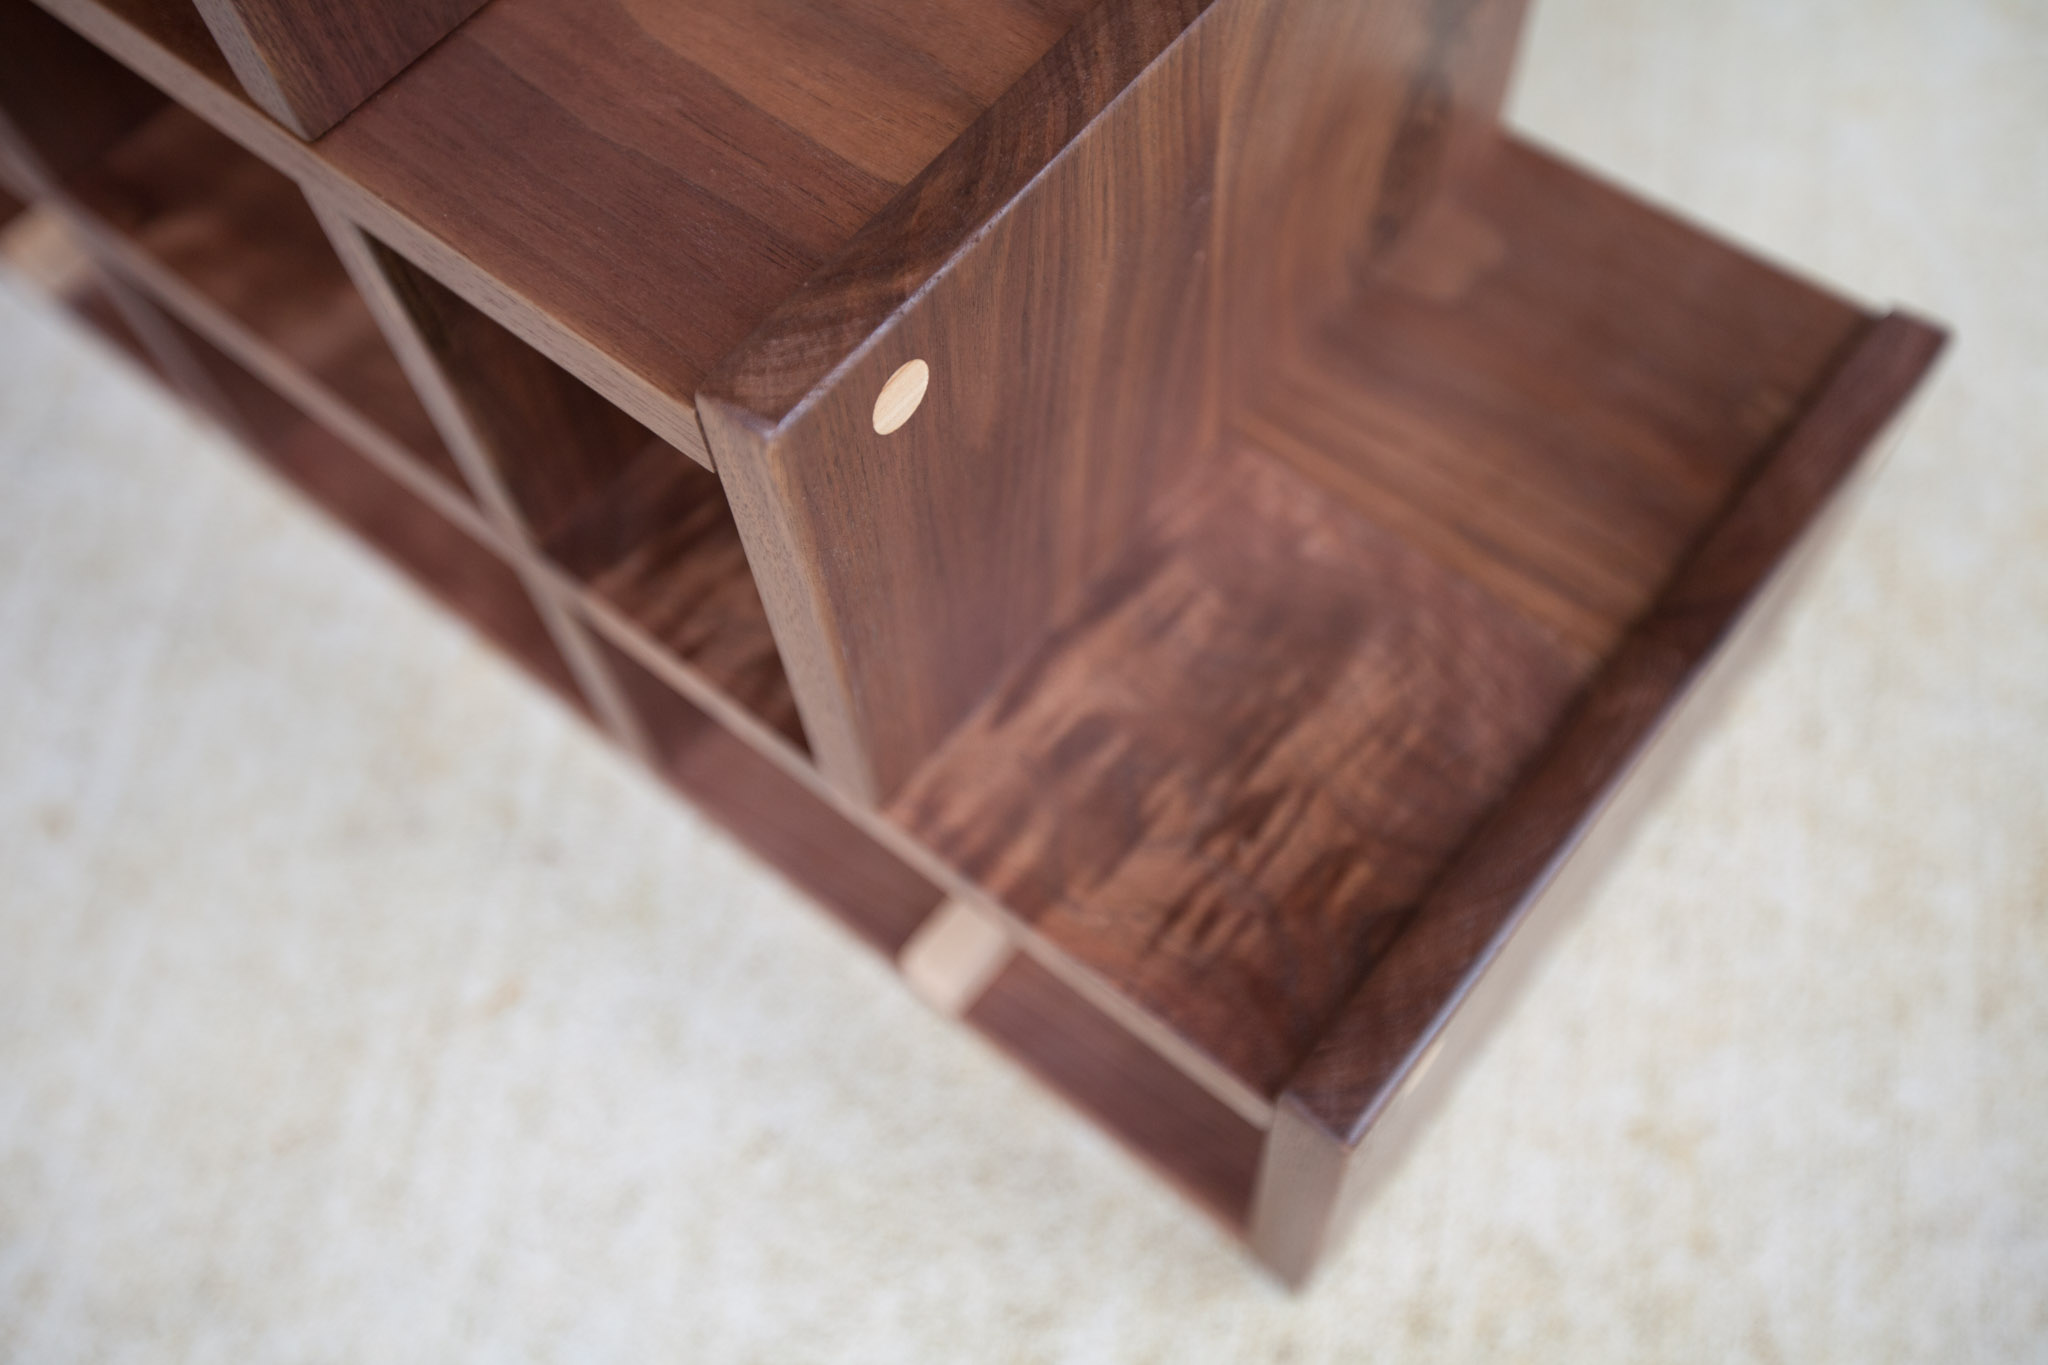
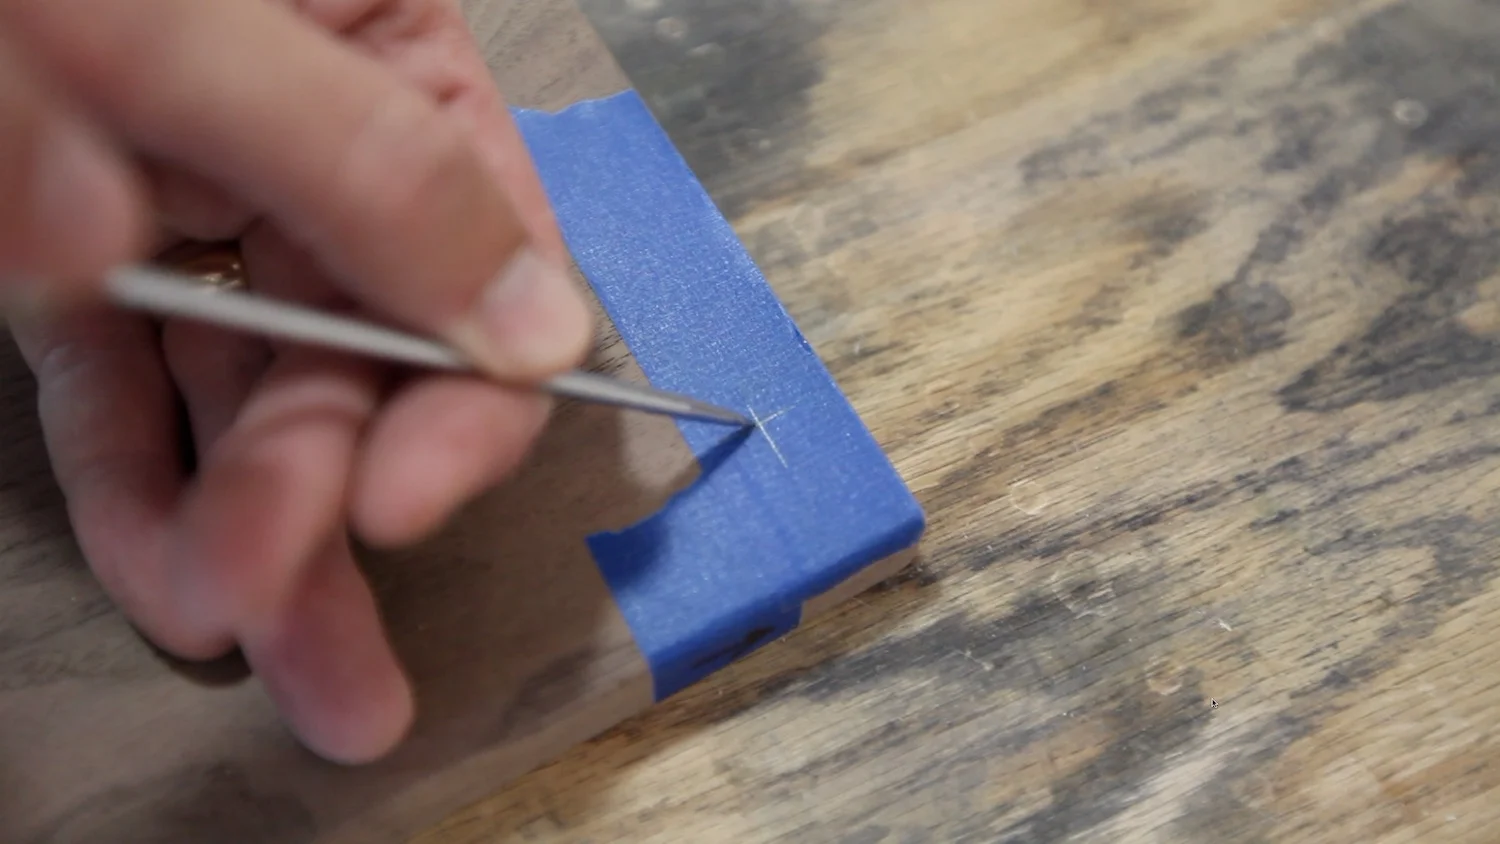
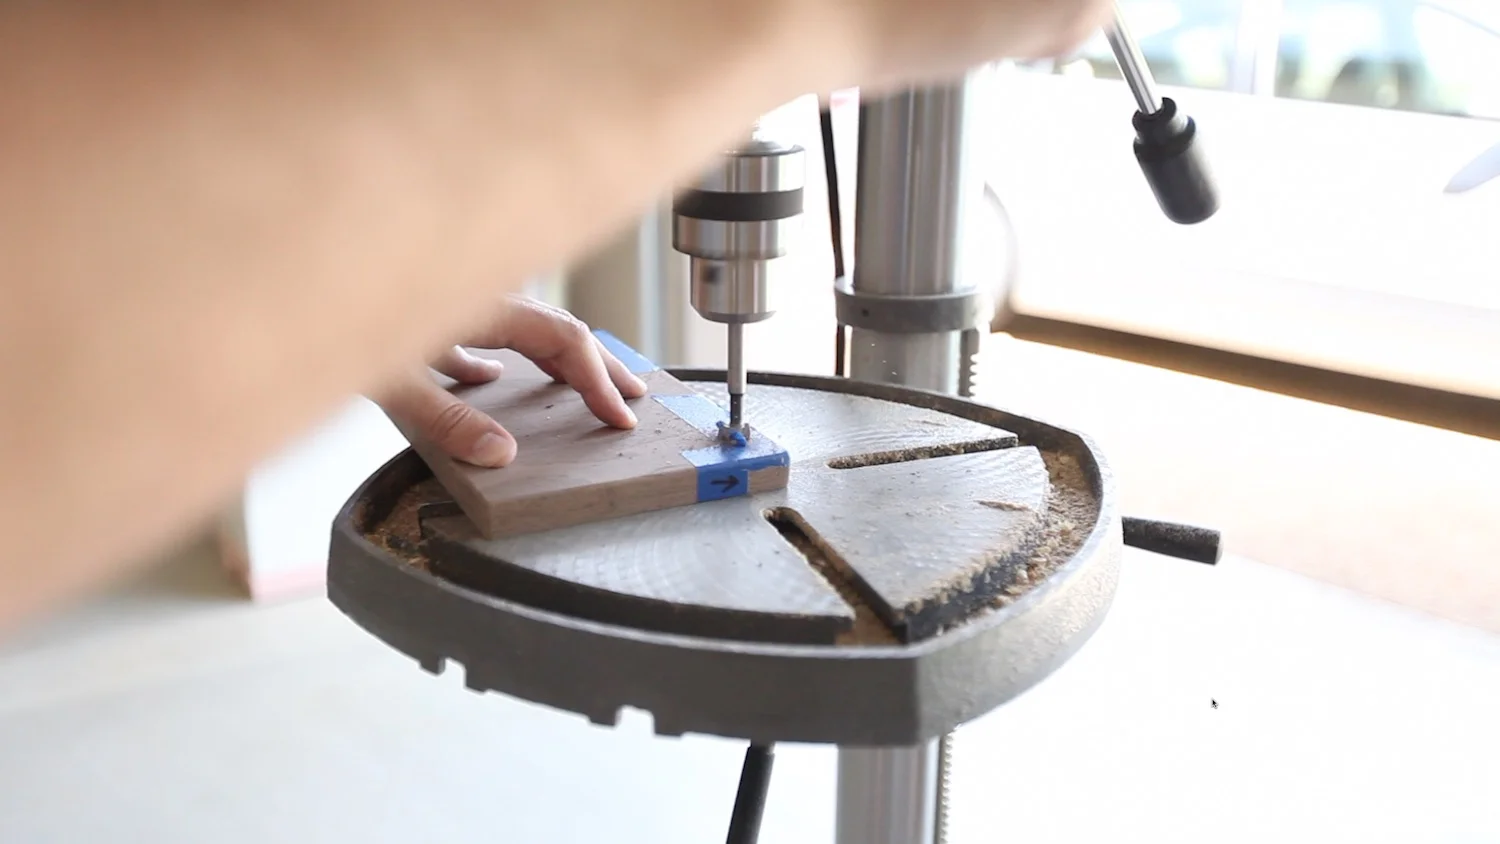
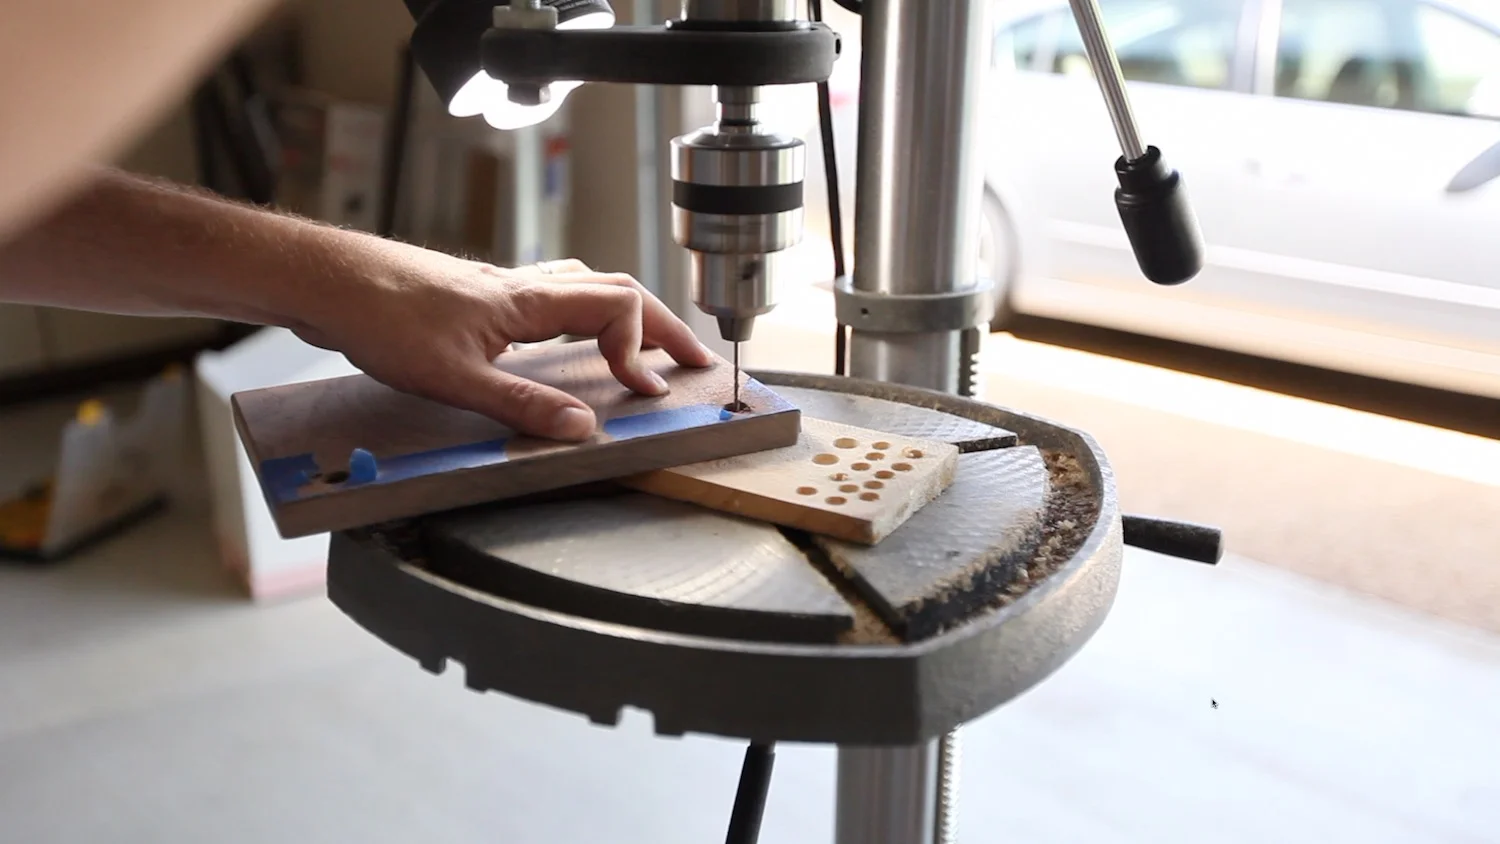
After marking out all of my holes where I would be attaching the sides, top and bottom, I took them over to the drill press and drilled recessed 3/8" holes. I would normally just use a pre-drill and countersink bit that is all-in-one that I have, but it would not have made enough room for the dowel plugs to seat like I wanted.
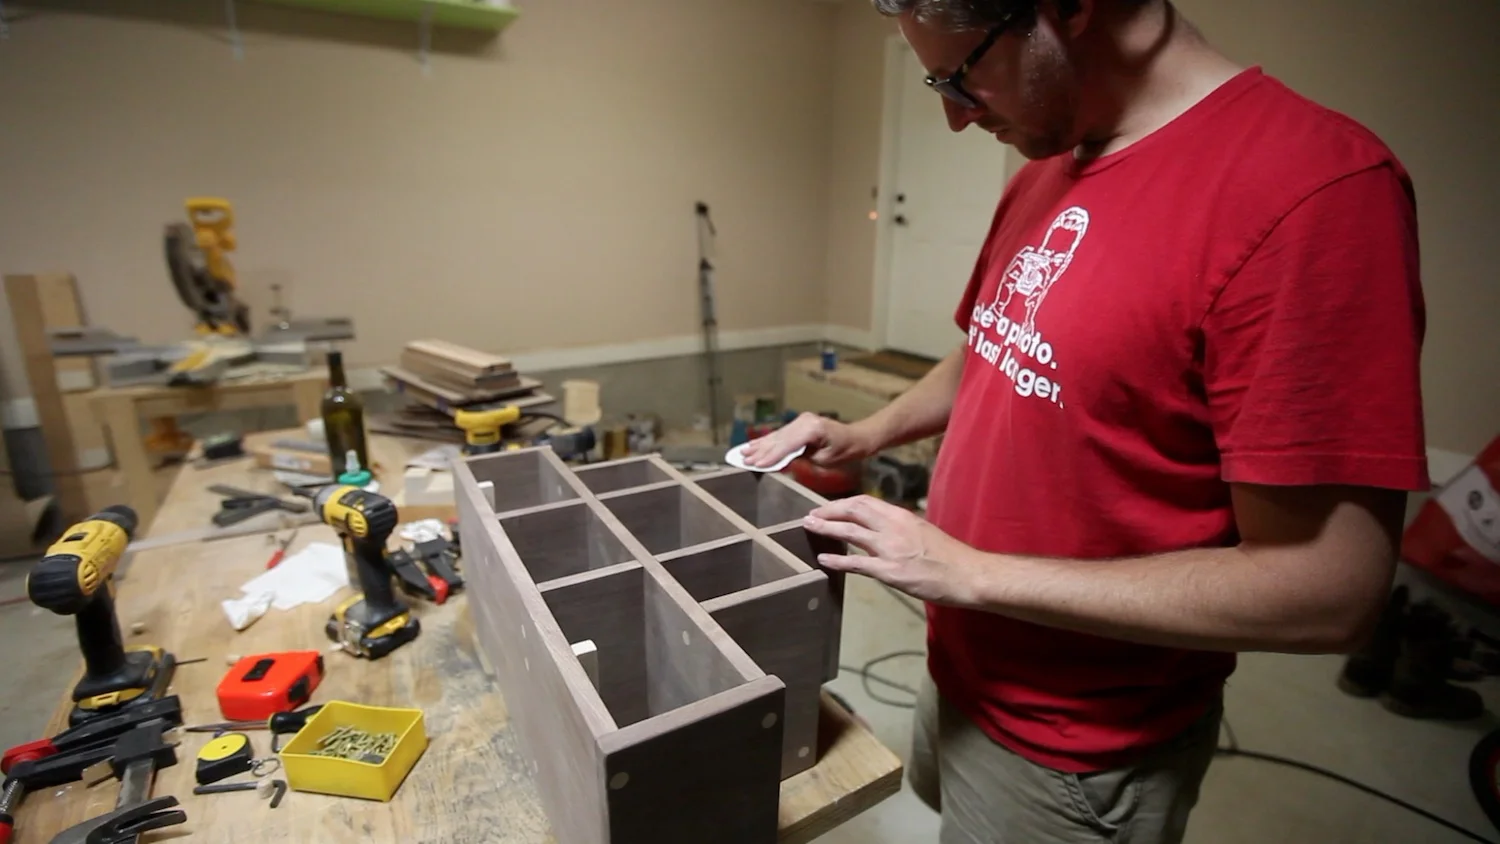
I started assembling everything by putting together the half-lap pieces (picture things going together like a "T"). Then, I added one of the sides, checking for square as I went. I would pre-drill with a small drill bit, so the wood would not split. Then, I would drive in a screw. It was really a puzzle to put this together.
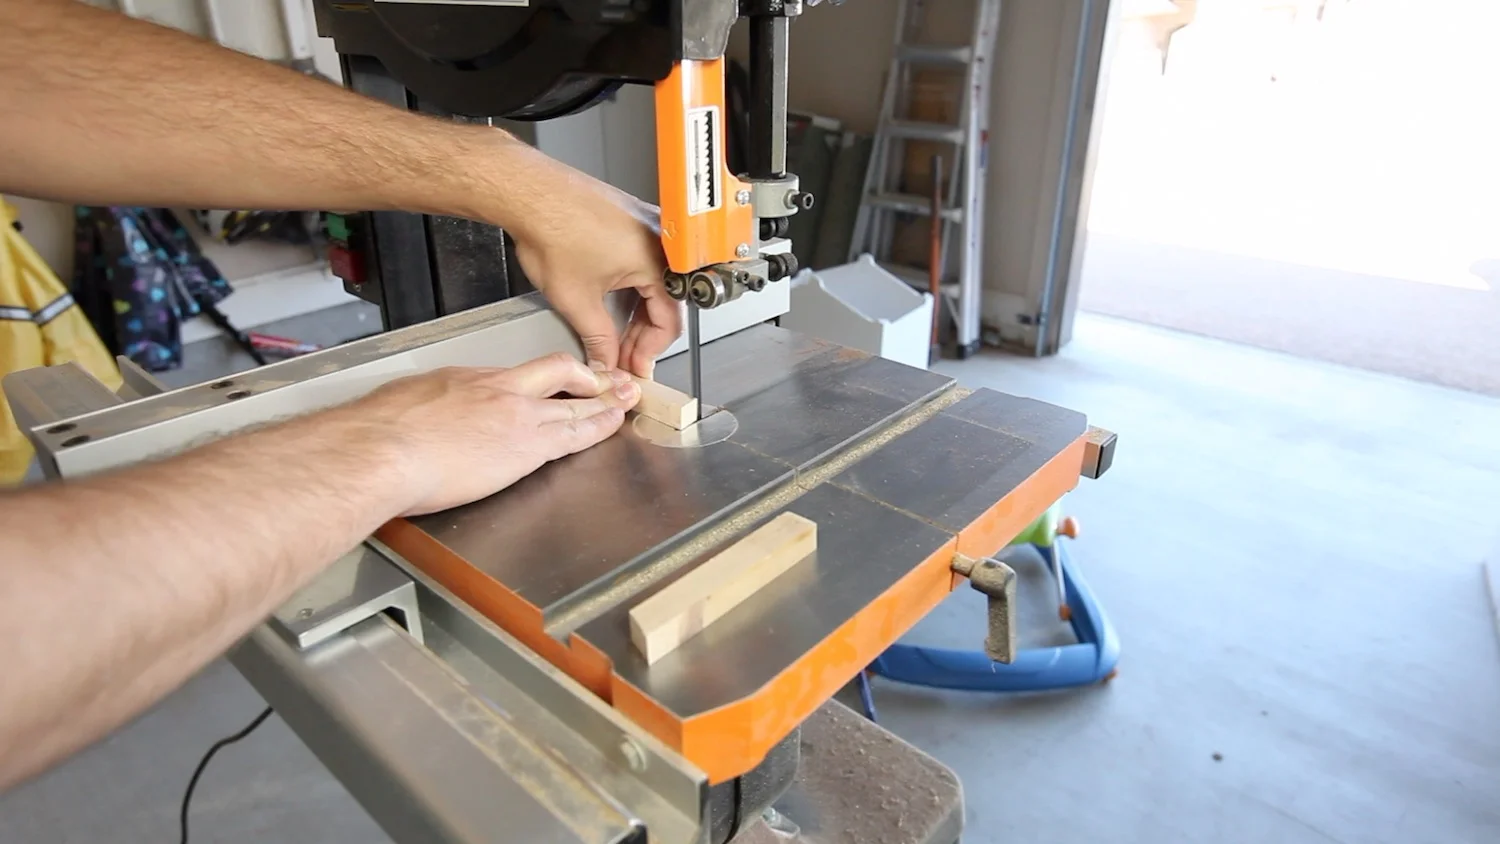
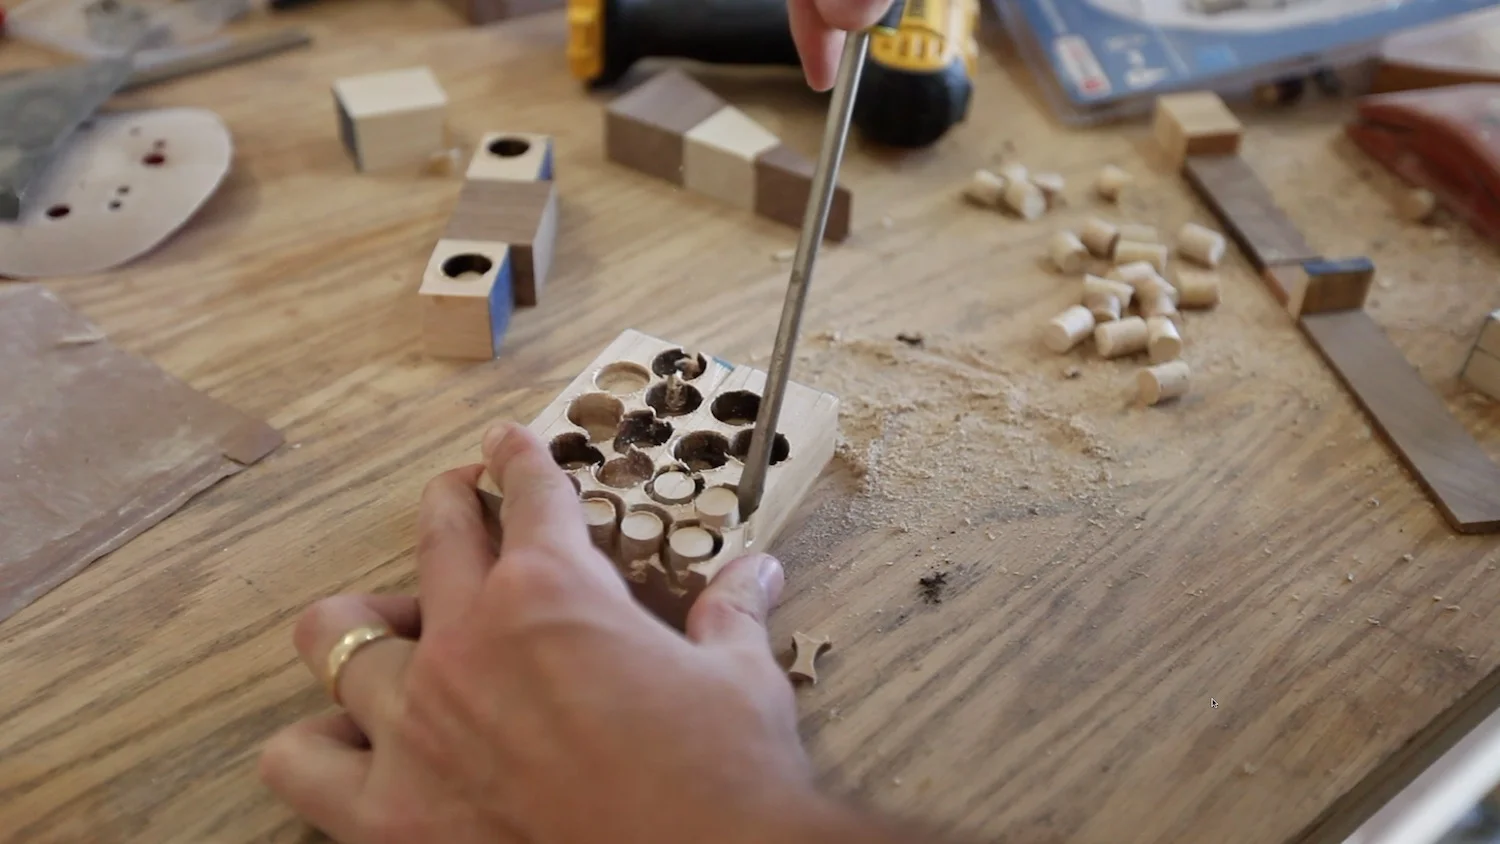
I cut some dowel plugs with my plug cutters, and these are the ones I recommend. I had some trouble with others, and this was about the third set I used. If you have never used dowel plugs before, they are tapered on one end. If you don't have much room in the hole to get them in there for a snug fit, you might have to trip the plugs down a little. The tapered end is typically not large enough to get a snug fit.

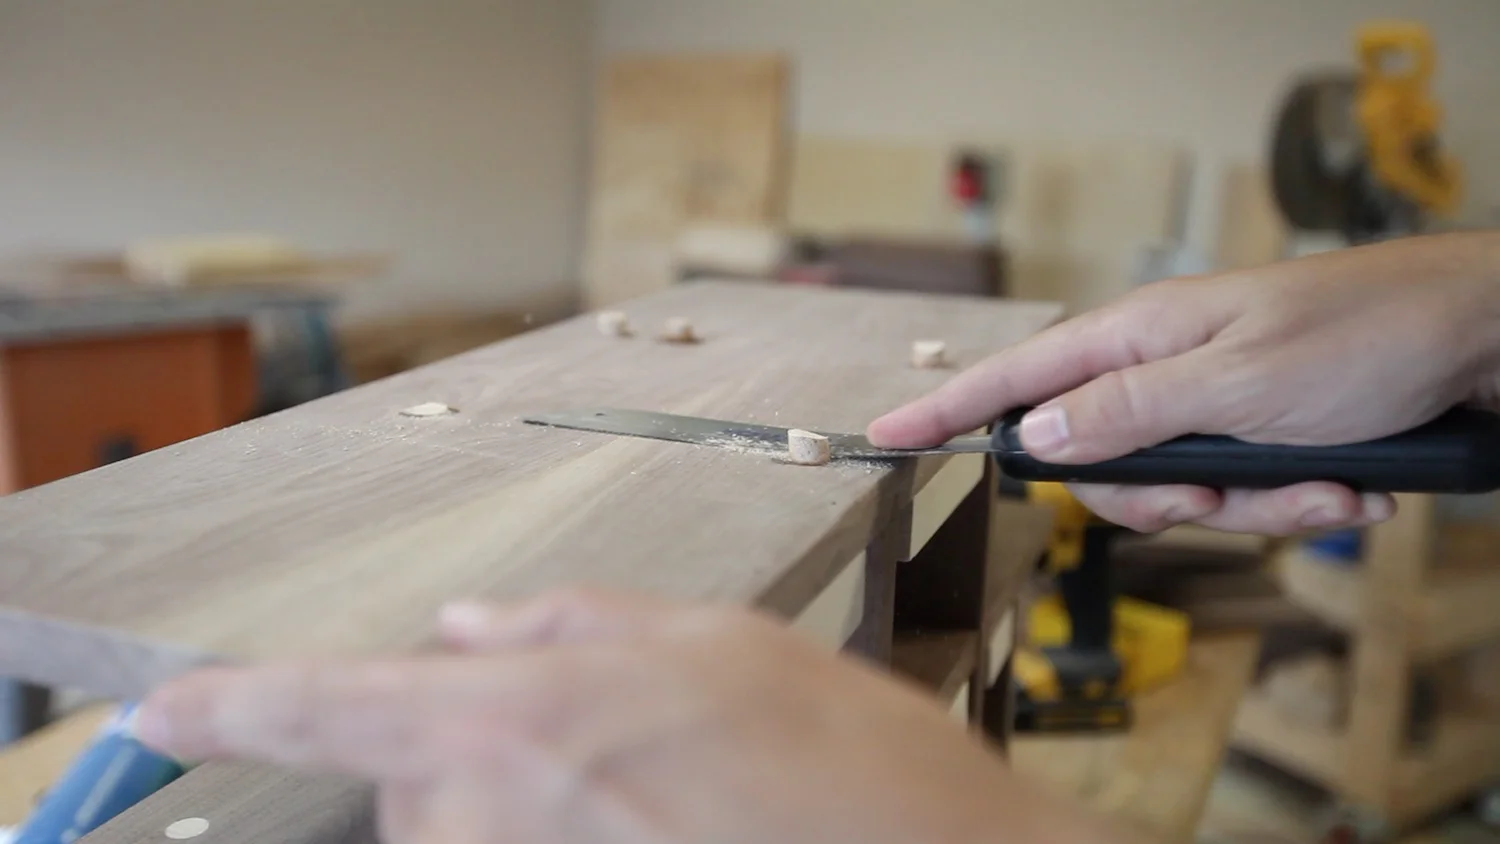
There are two ways to remove the plugs once you cut them. You can use a small, flat screw driver to just kind of pop them out, or you can use the bandsaw to cut right at the depth of the plug, popping it loose from the base.
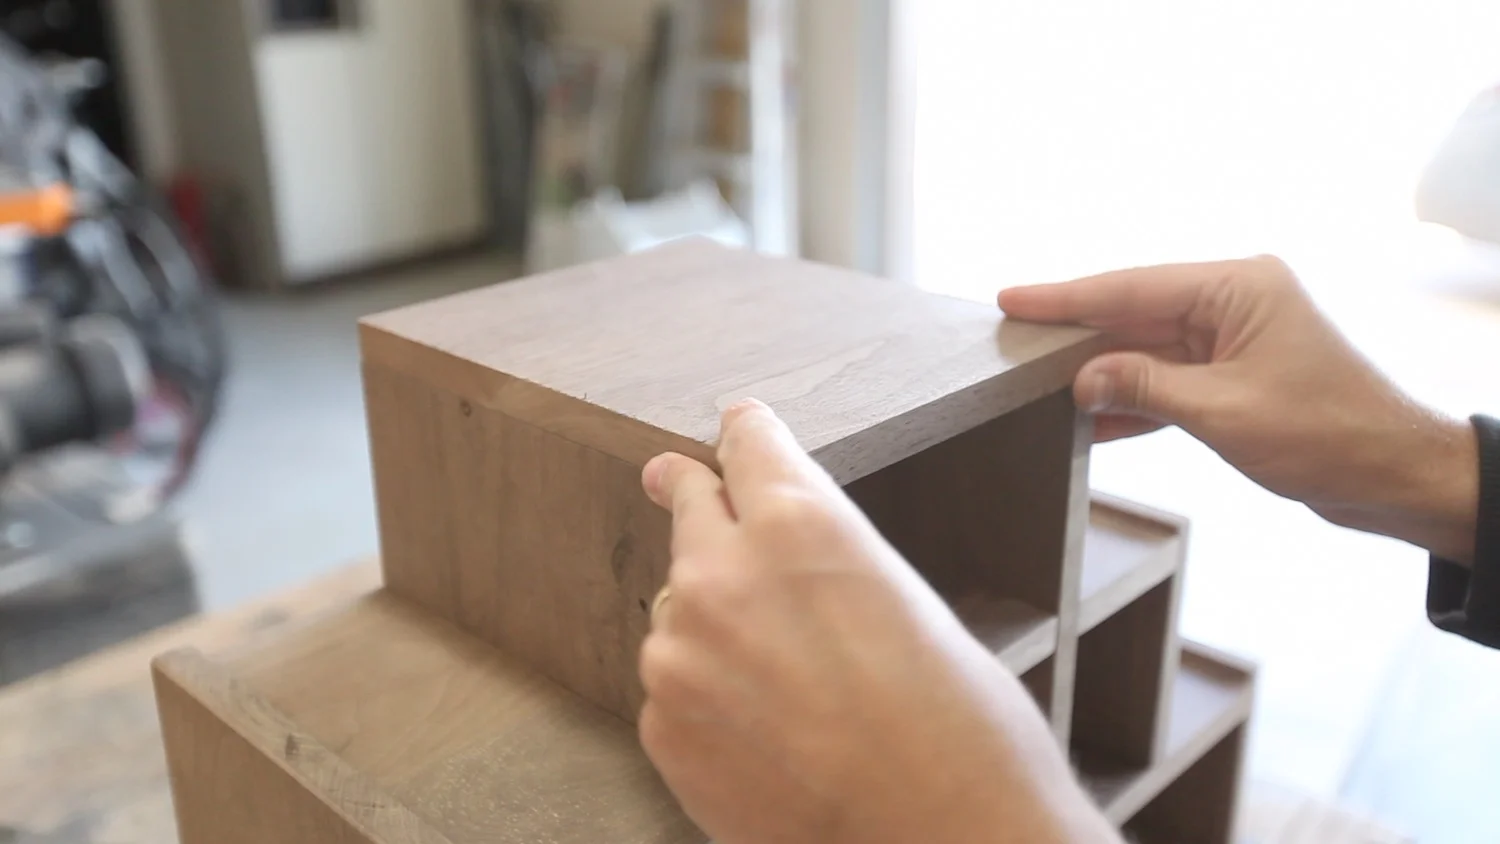
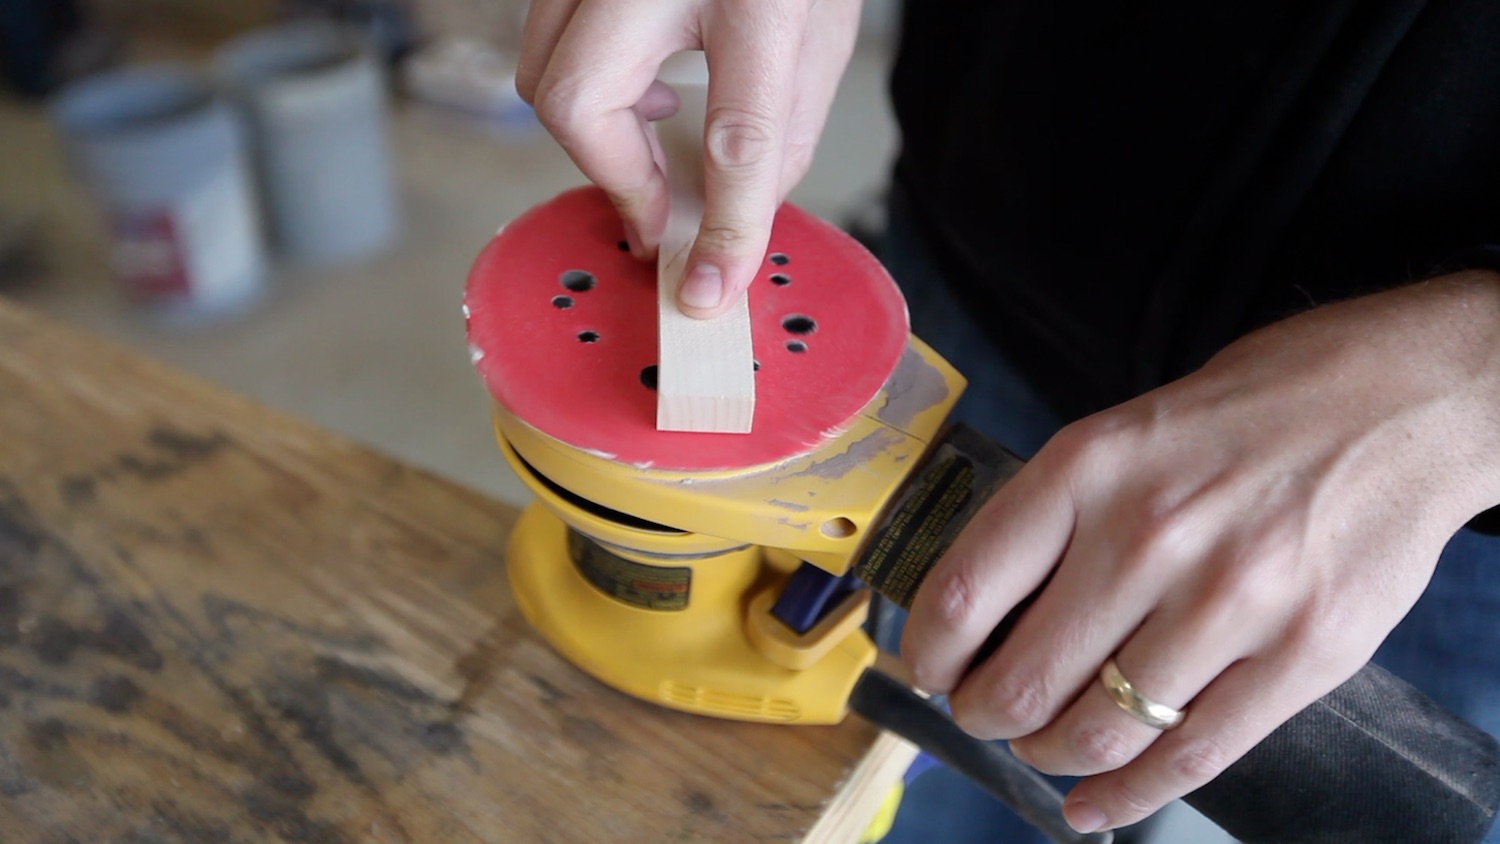
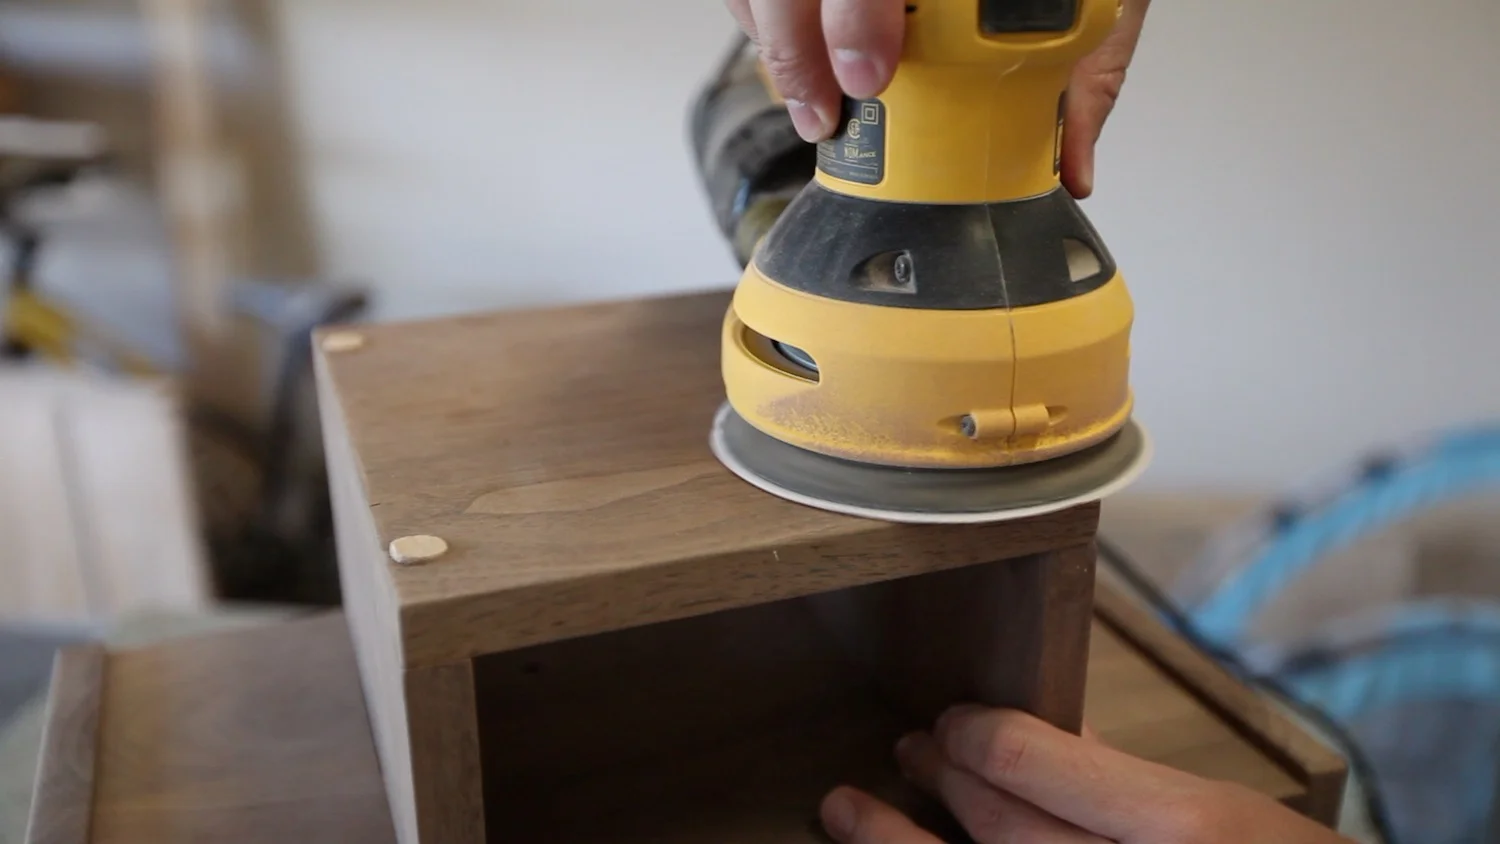
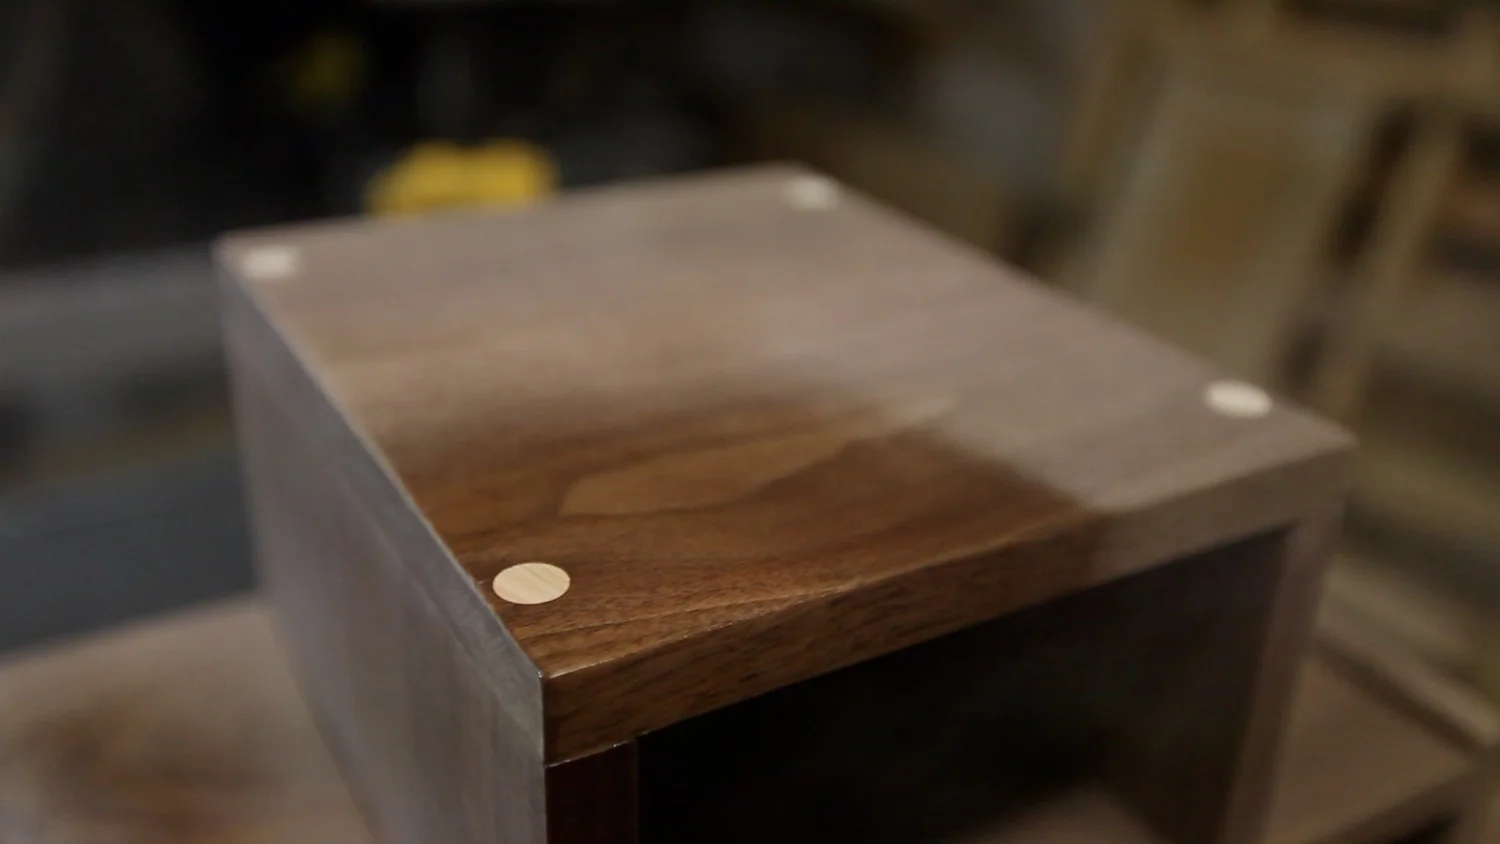
After gluing in the dowel plugs, I flush cut them with a saw. Then, the sanding ensued. I used a random orbit sander to help coax the plugs to be flush with the surfaces. Then, I did a ton of hand sanding! A ton! I should have probably done more before assembling it, but there were just so many corners to sand by hand. I made sure to go with the grain of the wood so no marks would be left.
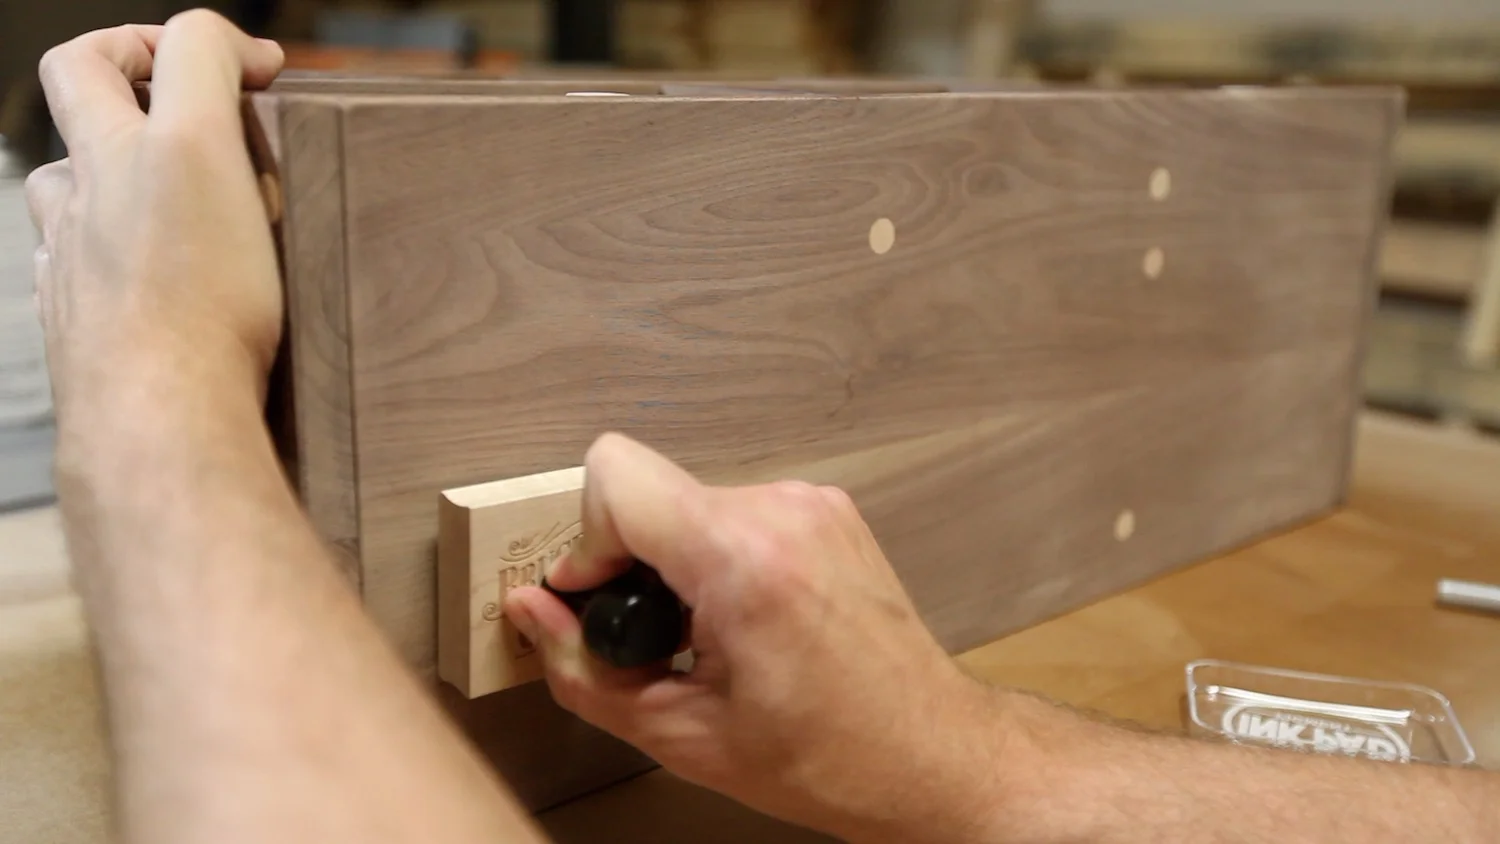
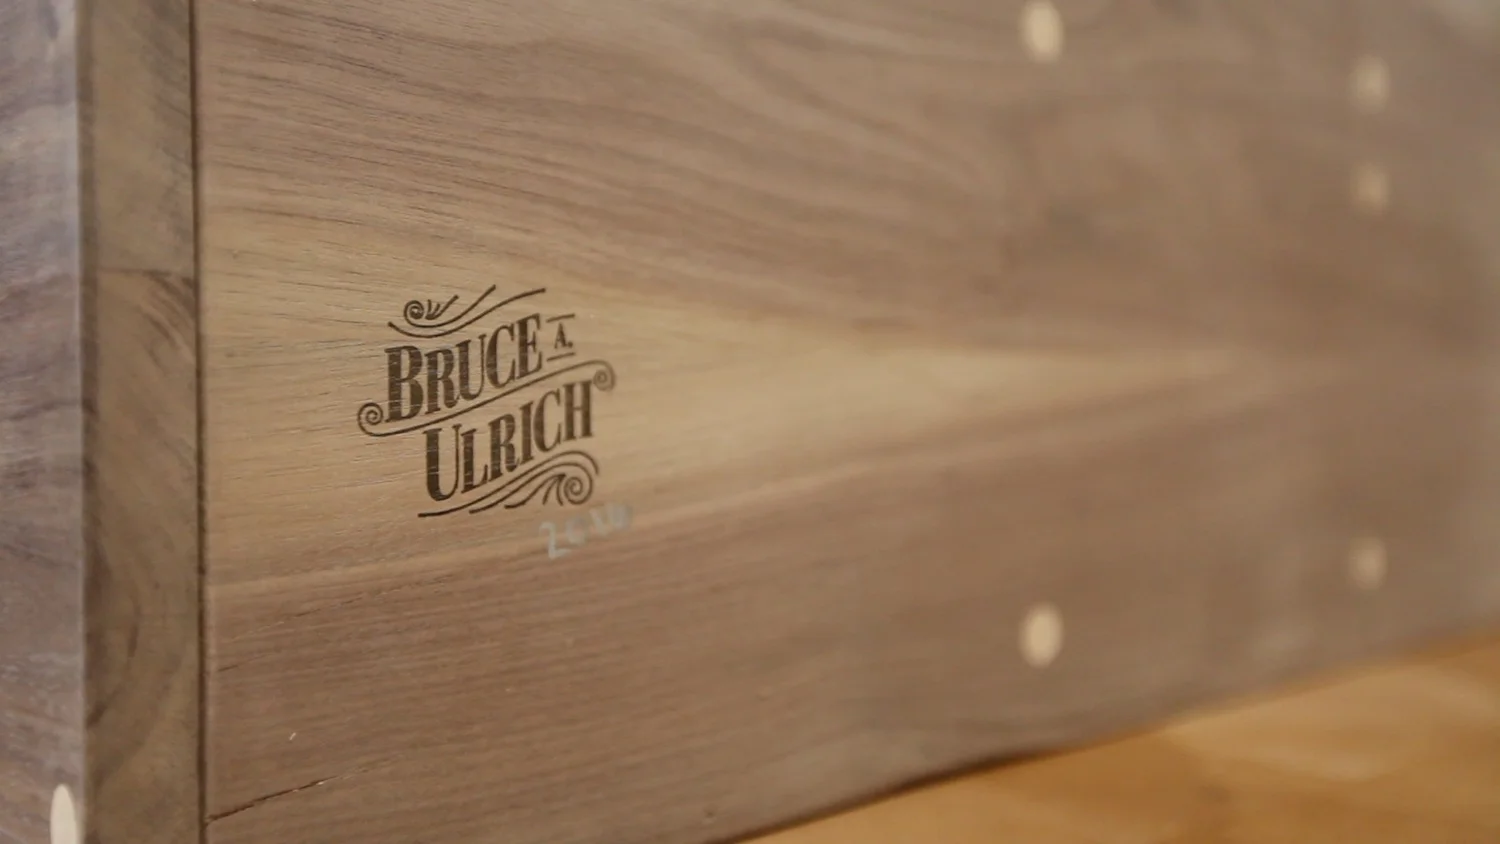
Then, I added my maker's mark to the bottom, and dated it. (Yes, that says 2016...that's when this was completed. I need to get caught up on editing! ha ha.)
I finished everything off with a few coats of satin spray lacquer, sanding between coats with 320 grit sandpaper.
CONCLUSION
I really like how this one turned out. It was really difficult for me to mess up as much as I did and still keep going with it, but I'm sure glad I did. I love the look of it with the maple accents against the dark walnut and the proud vertical parts to hold the glasses.
Let me know what you think in the comments below!