Easy DIY Storage Bins from Scraps
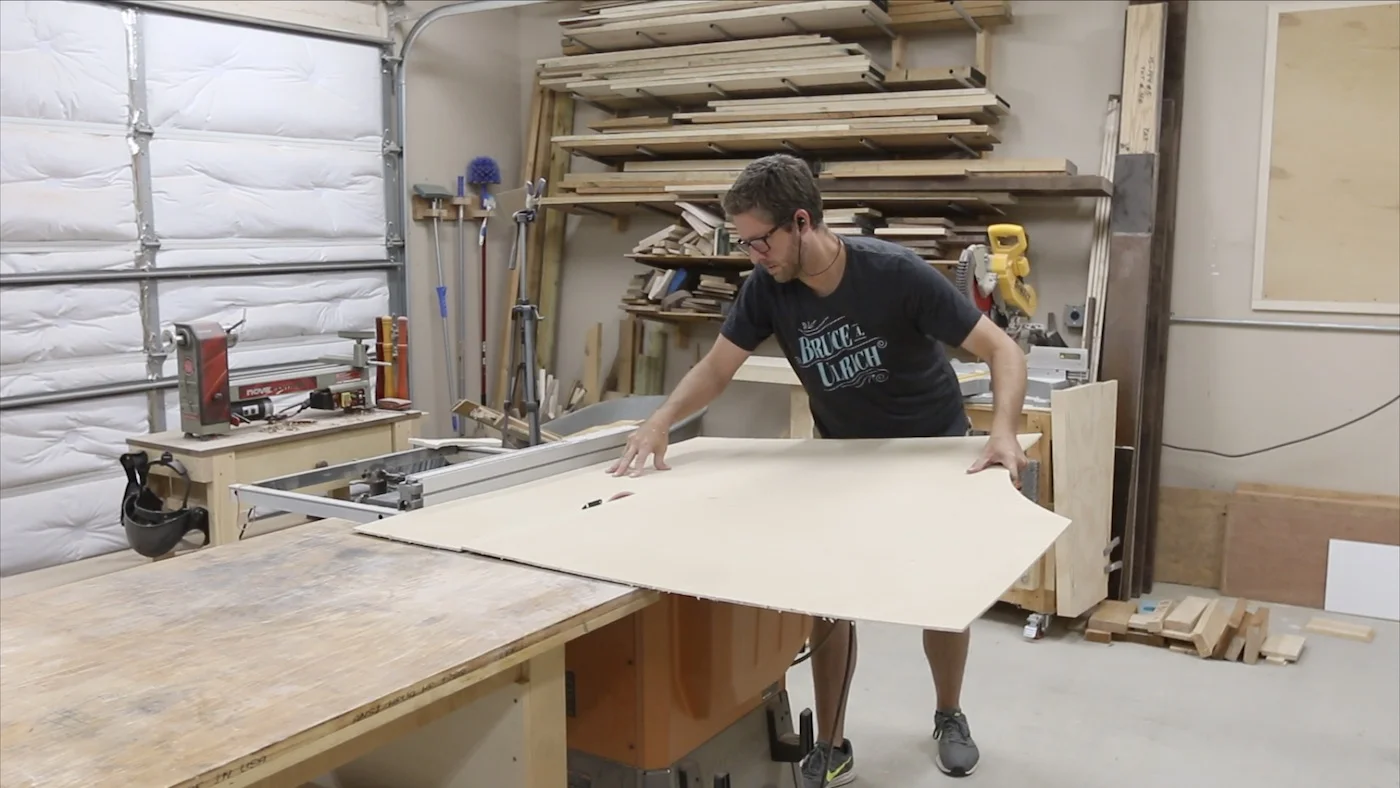
I had some plywood scraps laying around in my shop, and they’ve been kicking around for quite a while, so I decided it was time to make something with them. In this project, I’ll show you how I made some easy DIY storage bins from plywood scraps, and gave them a modern twist with a little paint. Watch the video or follow along below:
TOOLS & MATERIALS
Homeright sprayer - https://amzn.to/2y5yUPI
Table saw - https://amzn.to/2C11FzS
Jigsaw - https://amzn.to/2pIpS6F (I don't have this one, but it is better)
Random orbit sander - https://amzn.to/2C0gR0k
Sandpaper - (Diablo from Home Depot is what I like to use)
Forstner bits - https://amzn.to/2pGFSGn
Nail gun - https://amzn.to/2C191n7
18ga finish nails - https://amzn.to/2pN38CV
Mycolorshot spray paint - (JoAnn Stores)
Water based poly - https://amzn.to/2pN4vl3
Shoe rasp/Combination rasp - https://amzn.to/2C1BNUz
WHY DID WE NEED THESE STORAGE BINS?
A while back, we did a big organizational push in each of the two big kids’ rooms. As with any family or kid, you have to do this periodically, to keep the mess in check. Well, it had gotten out of hand again, so we decided we need more storage, so all of their toys had a home. That way, nothing was just left on the floor at the end of the day.
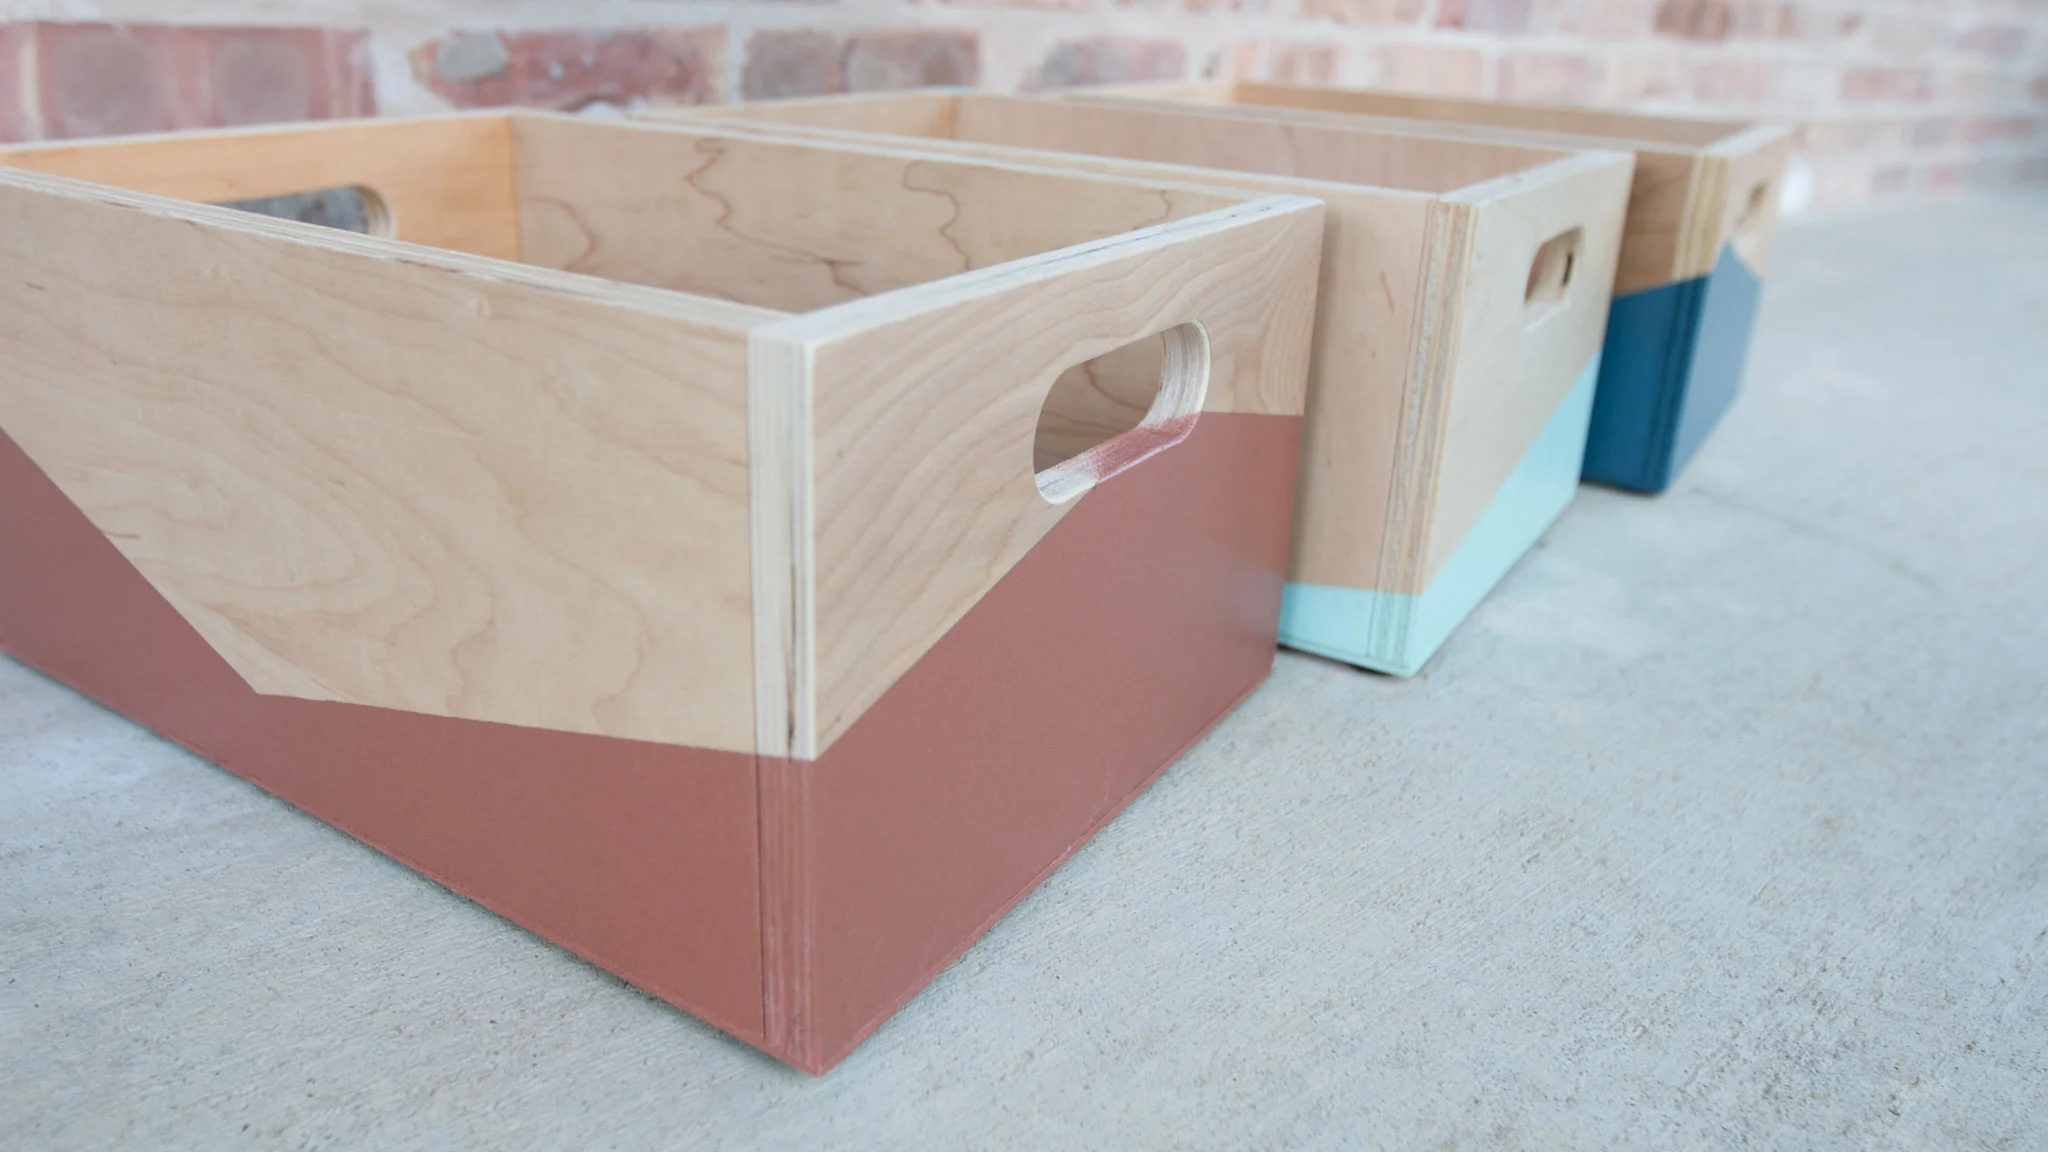
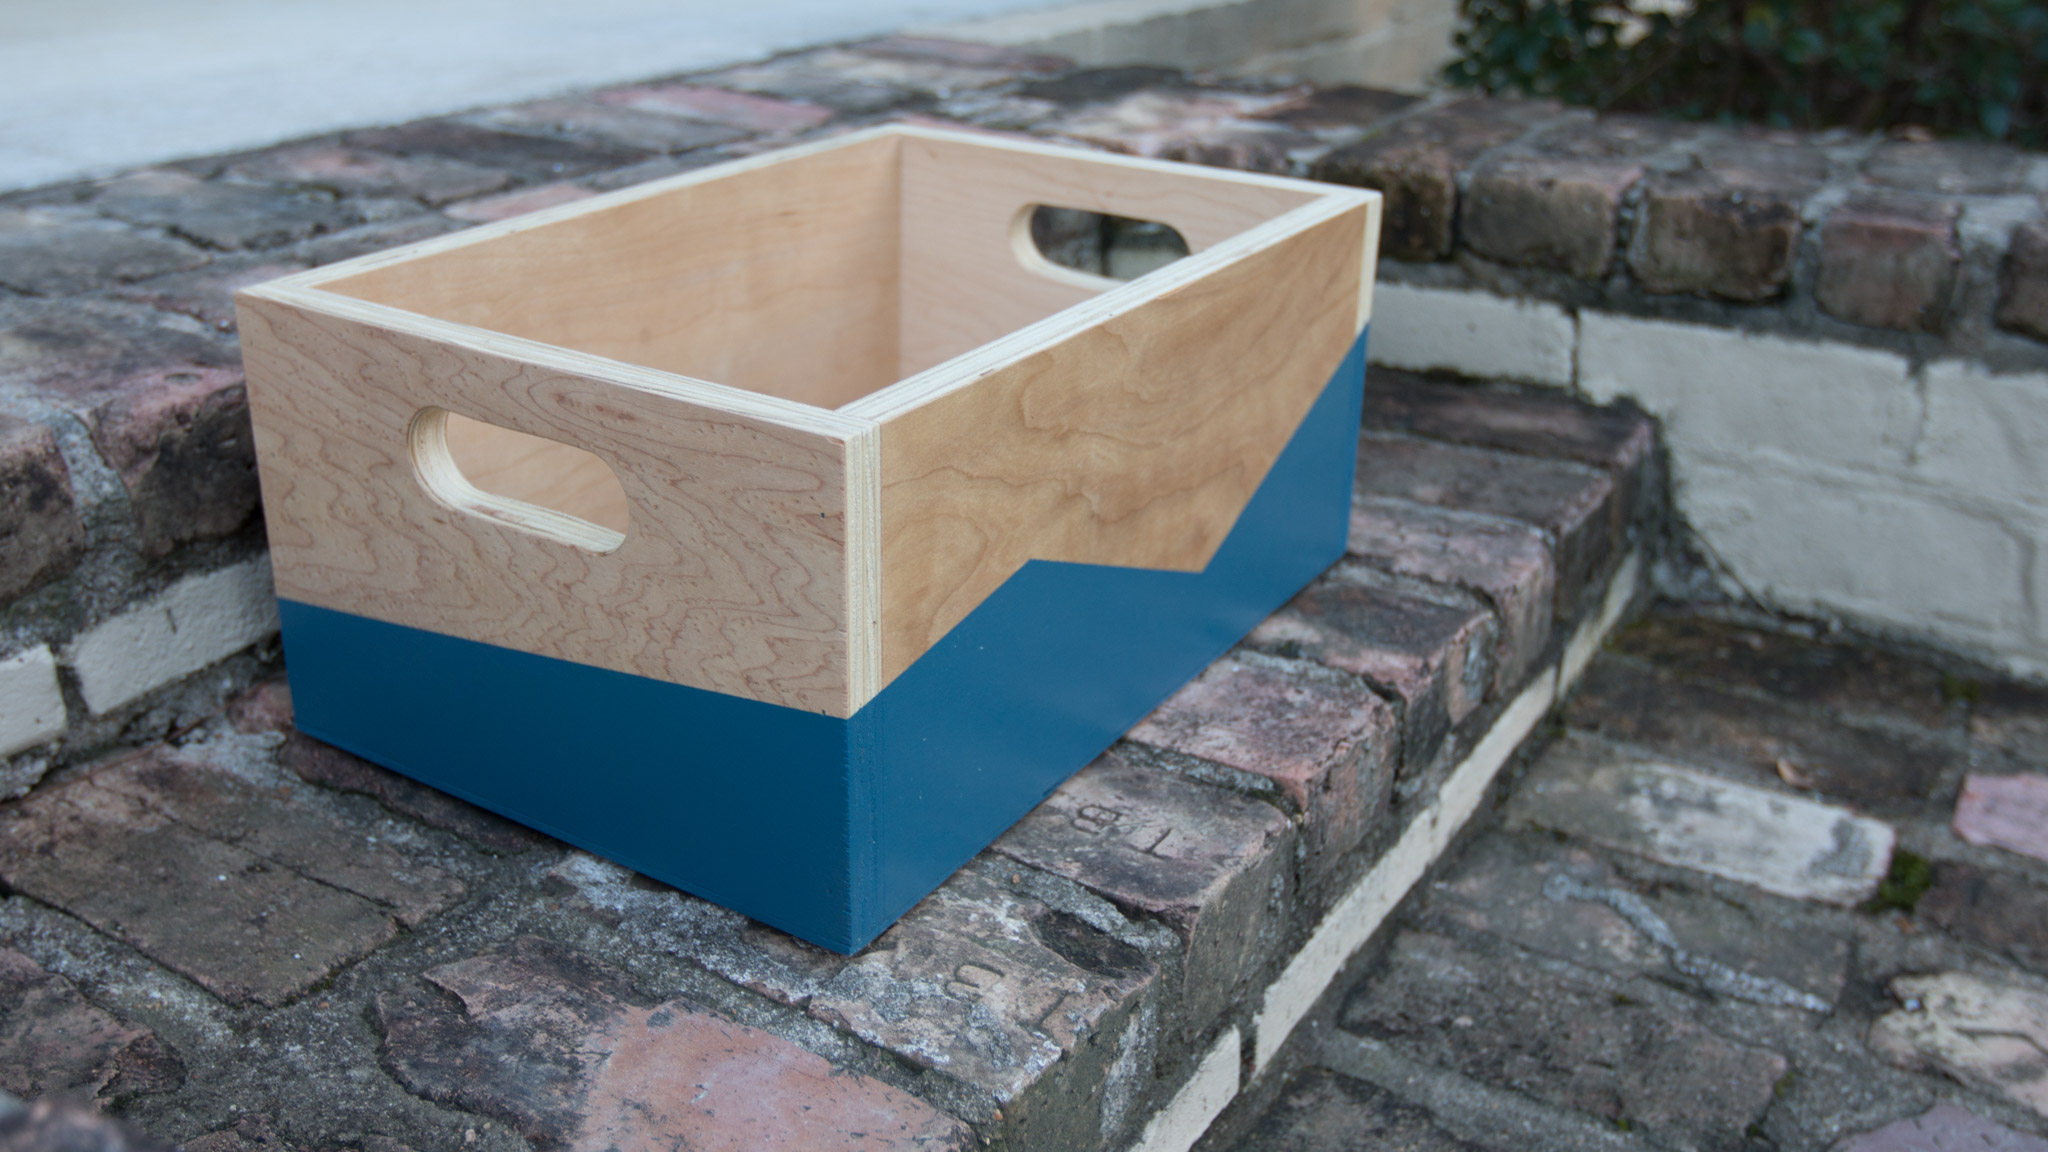
Rather than trying to build another shelf (they already each have a shelf with some bins on there), my wife and I decided to build some bins that could sit on the floor. And I would paint them with kind of a modern style so that they would look nice just sitting out in the open.
STEPS
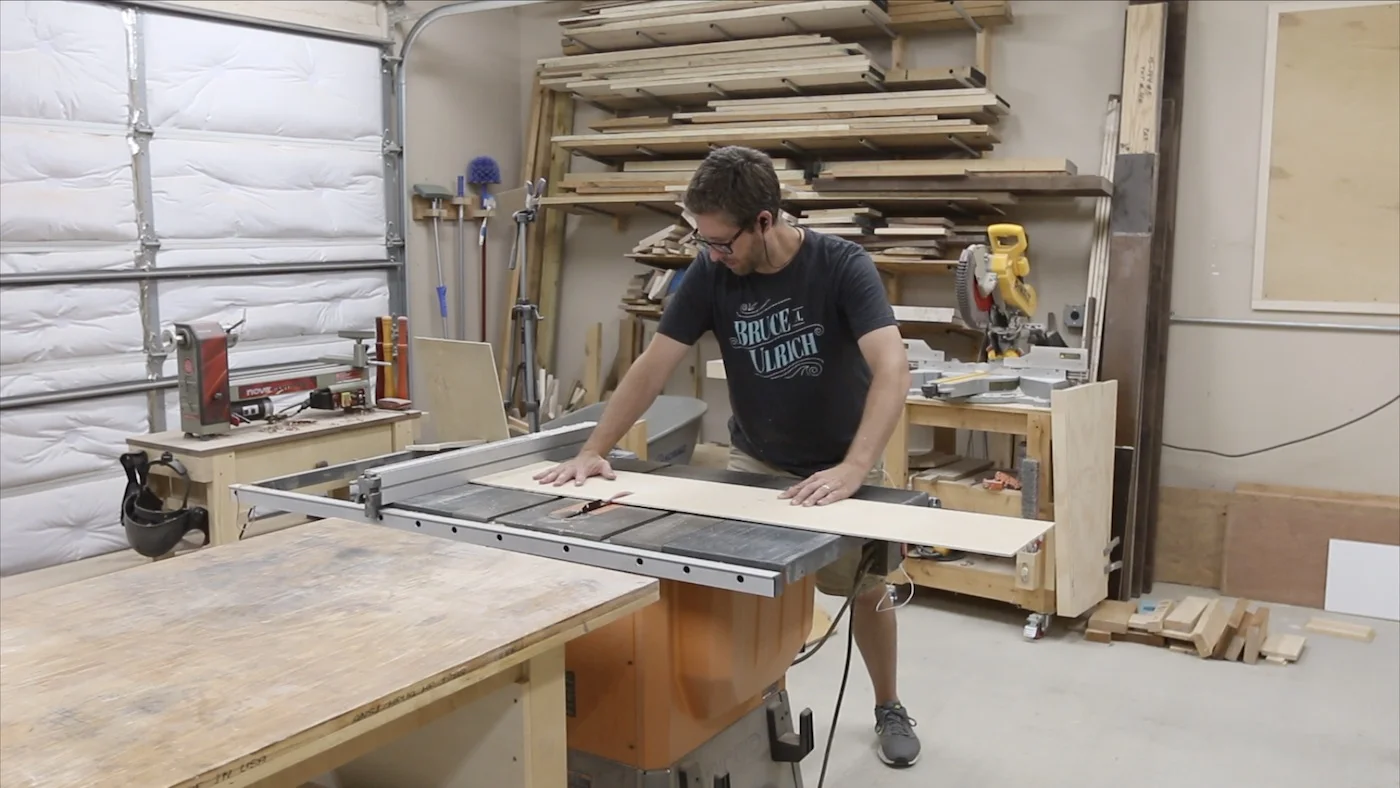
I started out at the table saw with my crosscut sled. I was sure to setup a lot of stops so I could make repeatable cuts. This way, it would not take me much longer to cut out all of the parts for 6 bins, rather than just one. Much of the time it takes in a project is with the setup time, so if you can setup once and do multiple things at the same time, you save a lot of time.
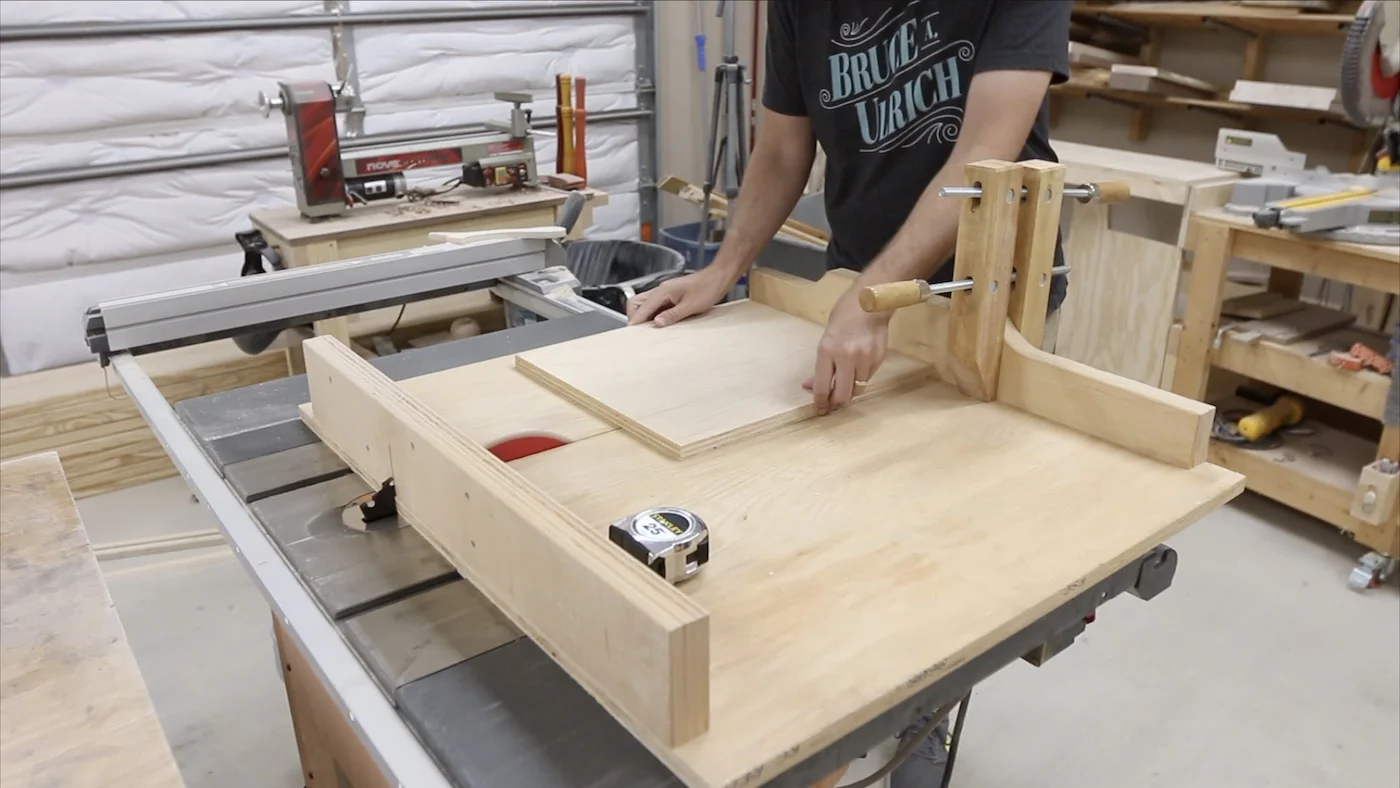
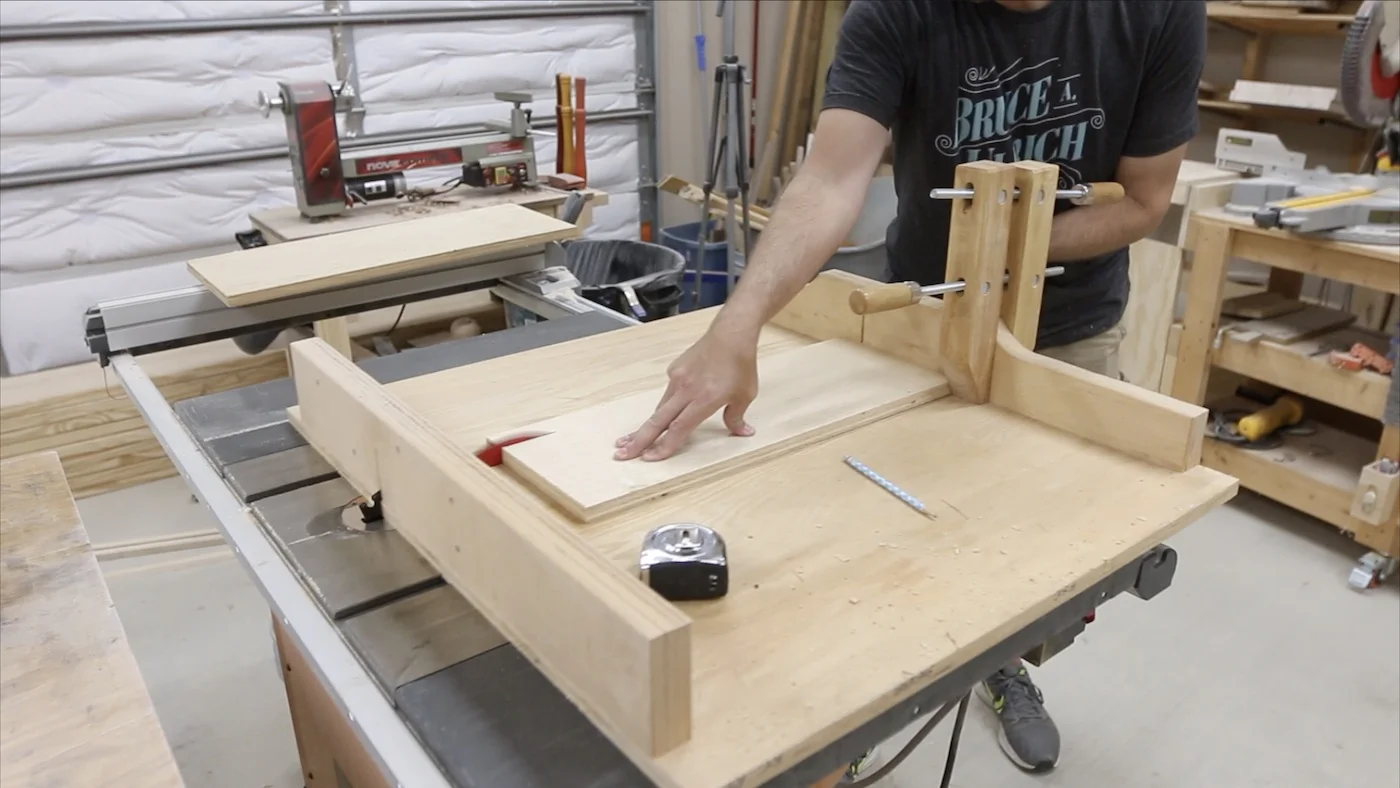
Next, I ripped down some 1/4” plywood for the bottoms of the storage bins. I’m just going to be gluing and using some brad nails to secure all of this, but it should still be plenty strong for what I’m doing.
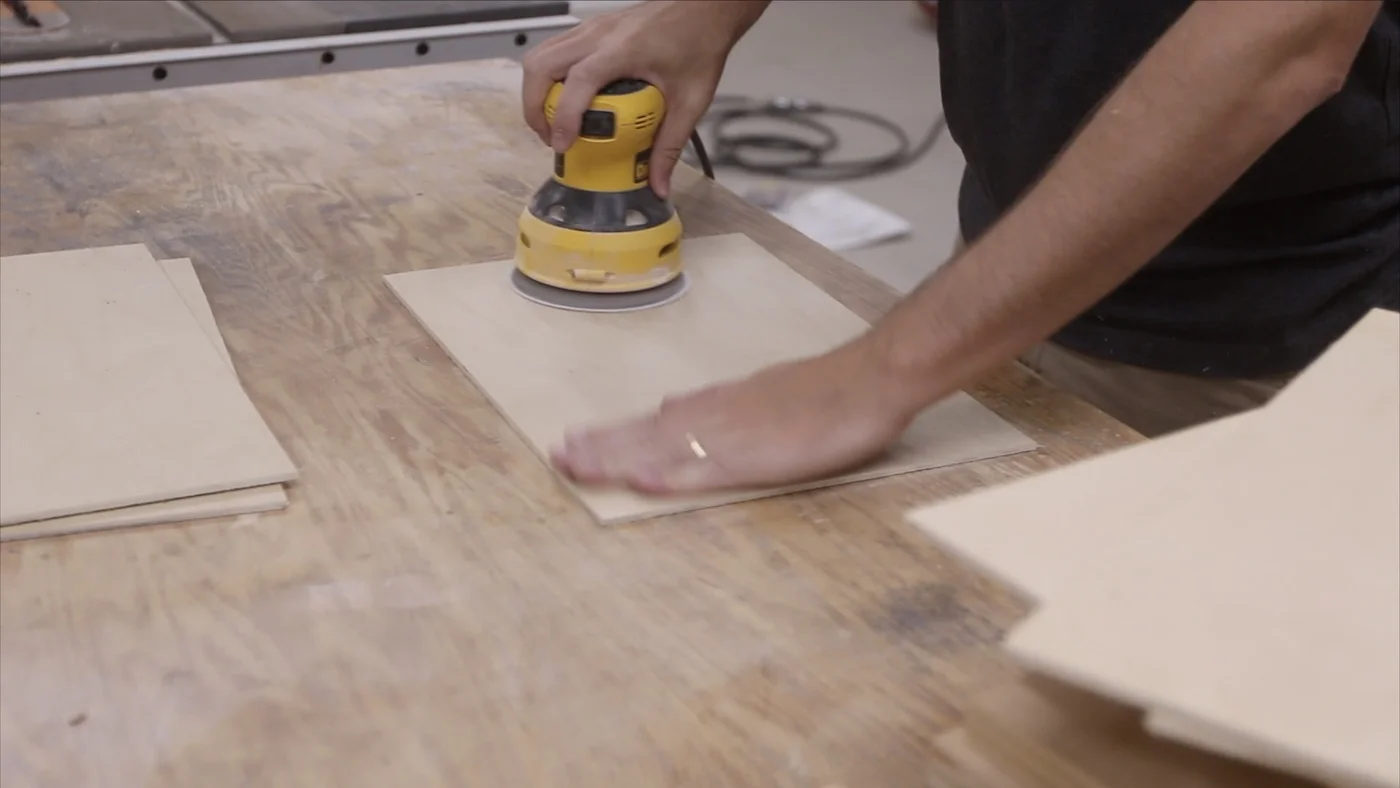
Then, it felt like I sanded for pretty much forever! I sanded both sides of all of the pieces, all four edges, and kind of on the corners too, to get rid of any splinters. each storage bin had a total of 5 pieces that I had to do all of those actions on, so that was a lot of time. Oh well…put on a podcast and get to it!
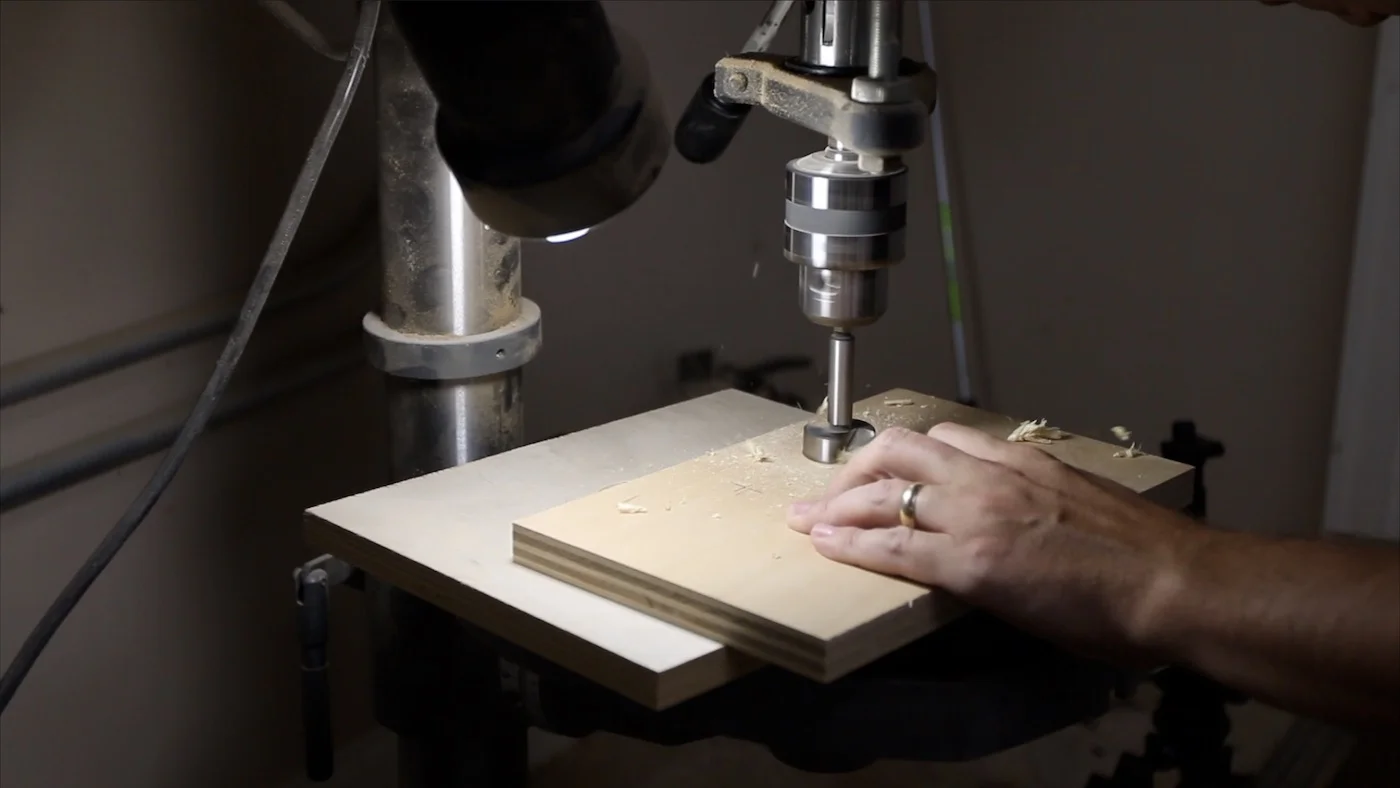
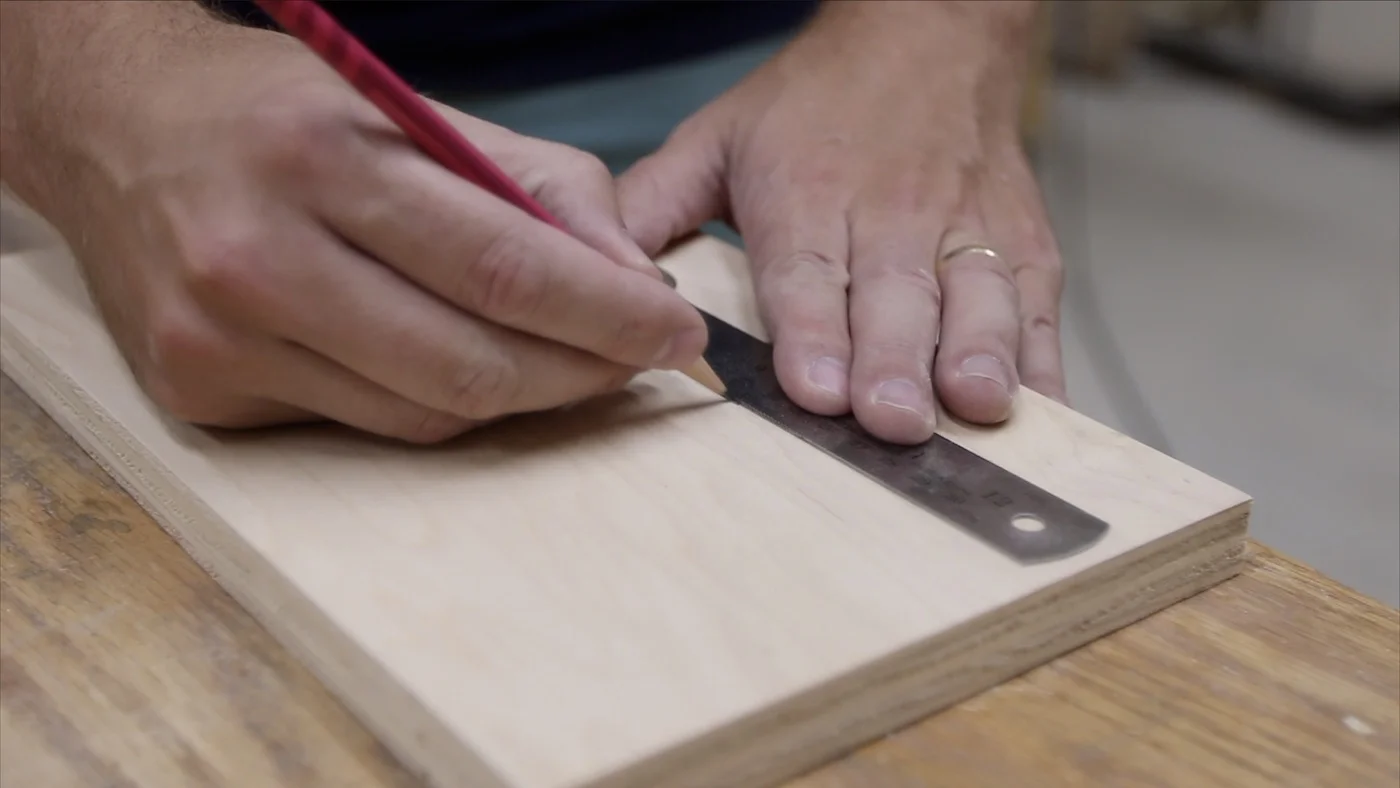
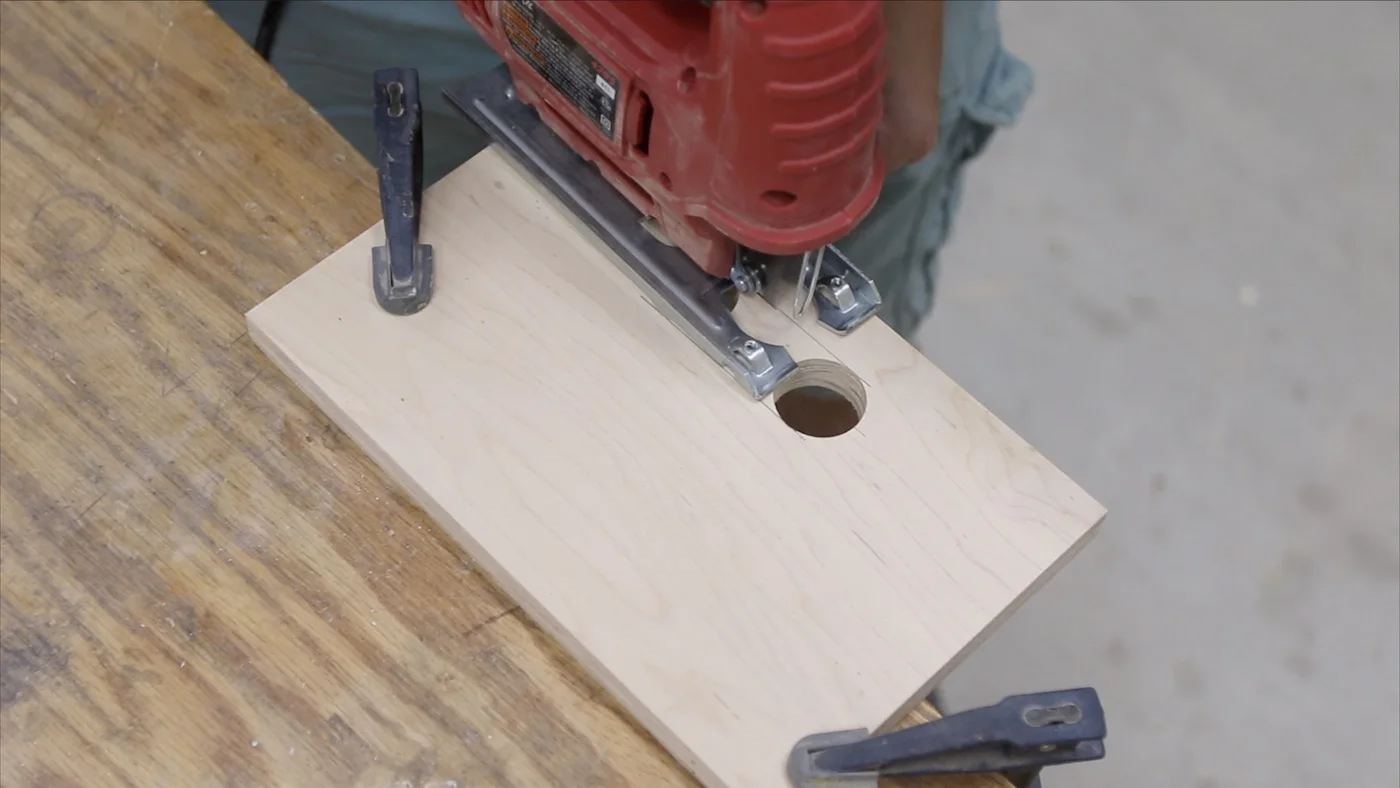
LAYING OUT THE HANDLES
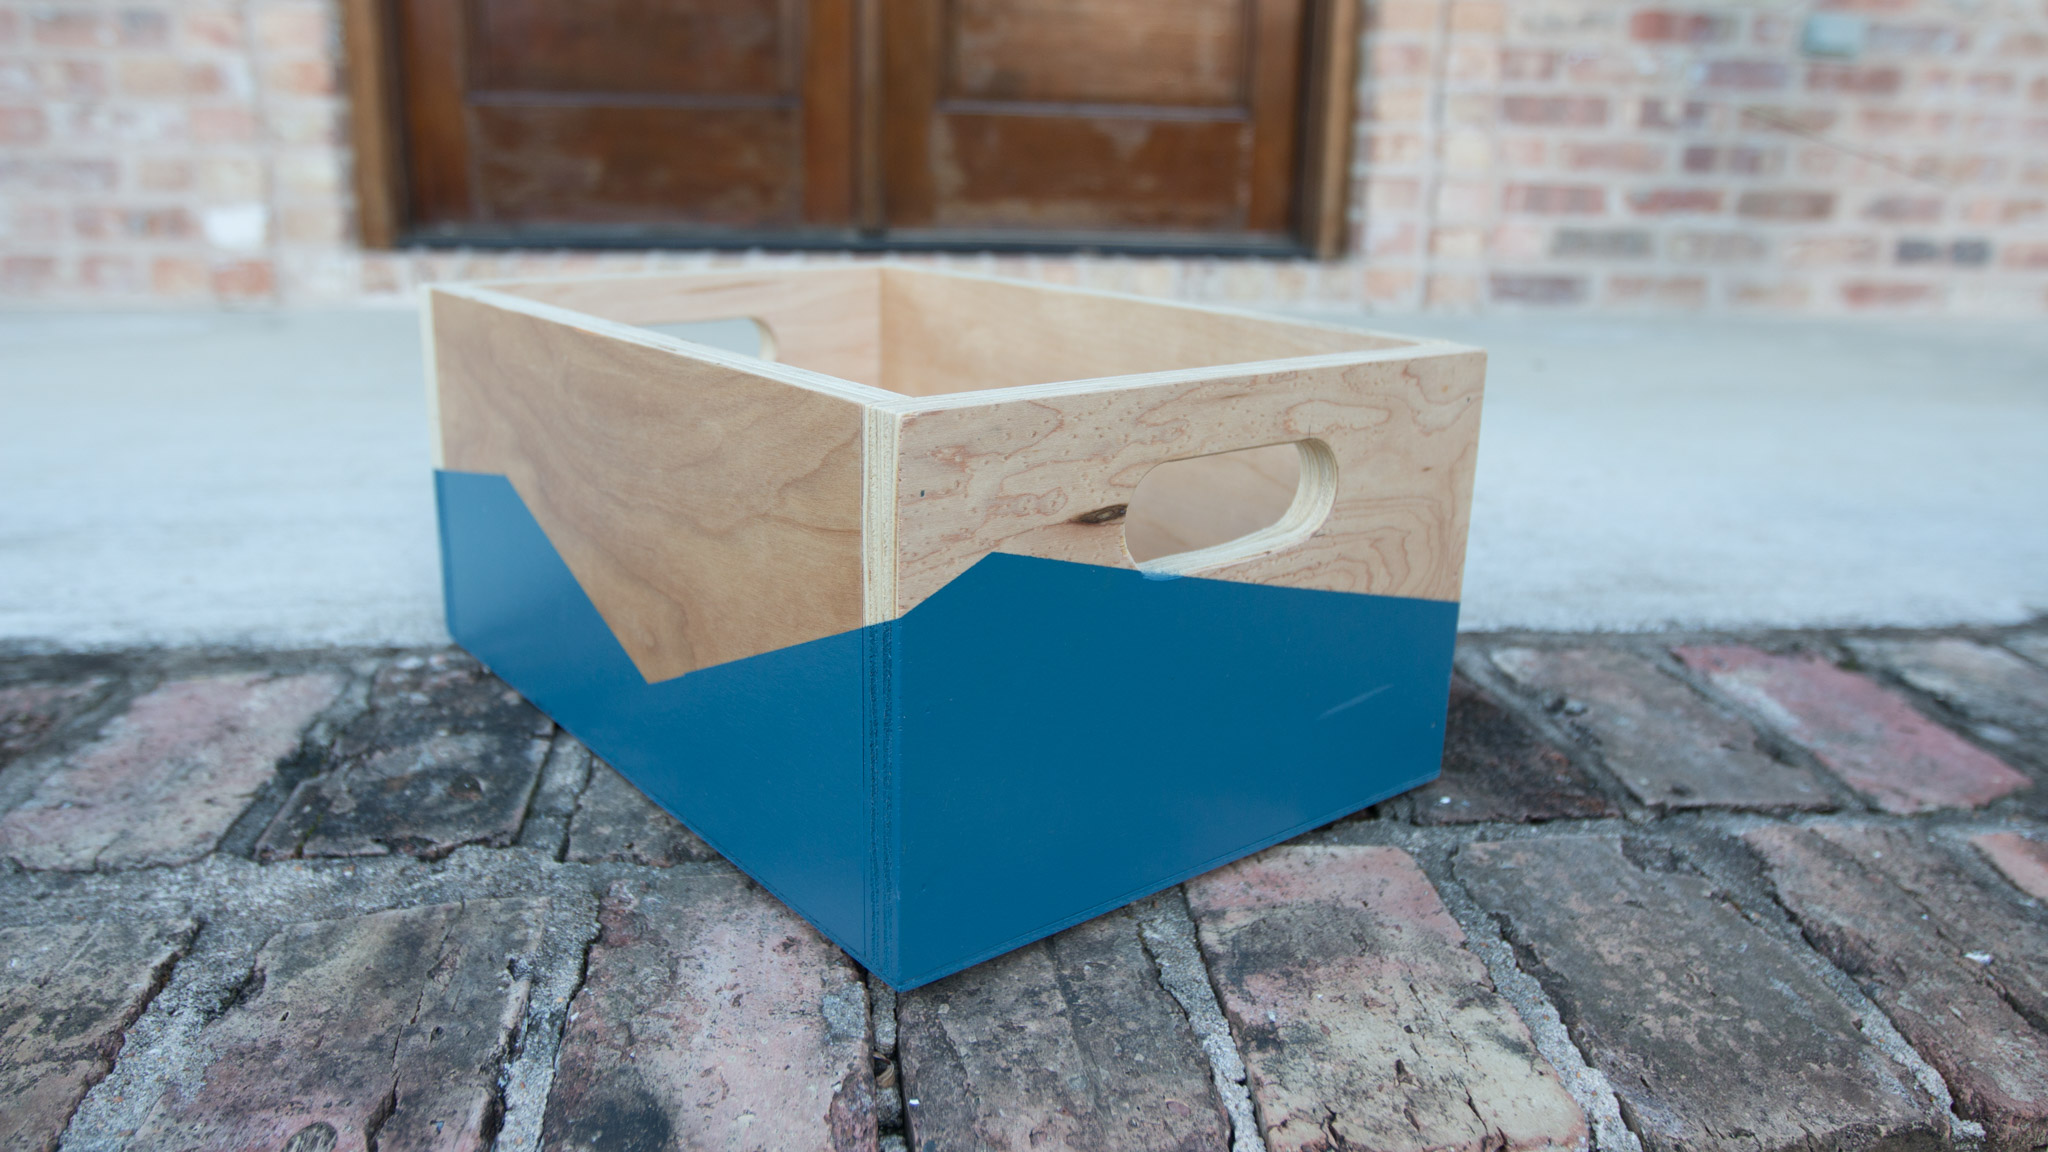
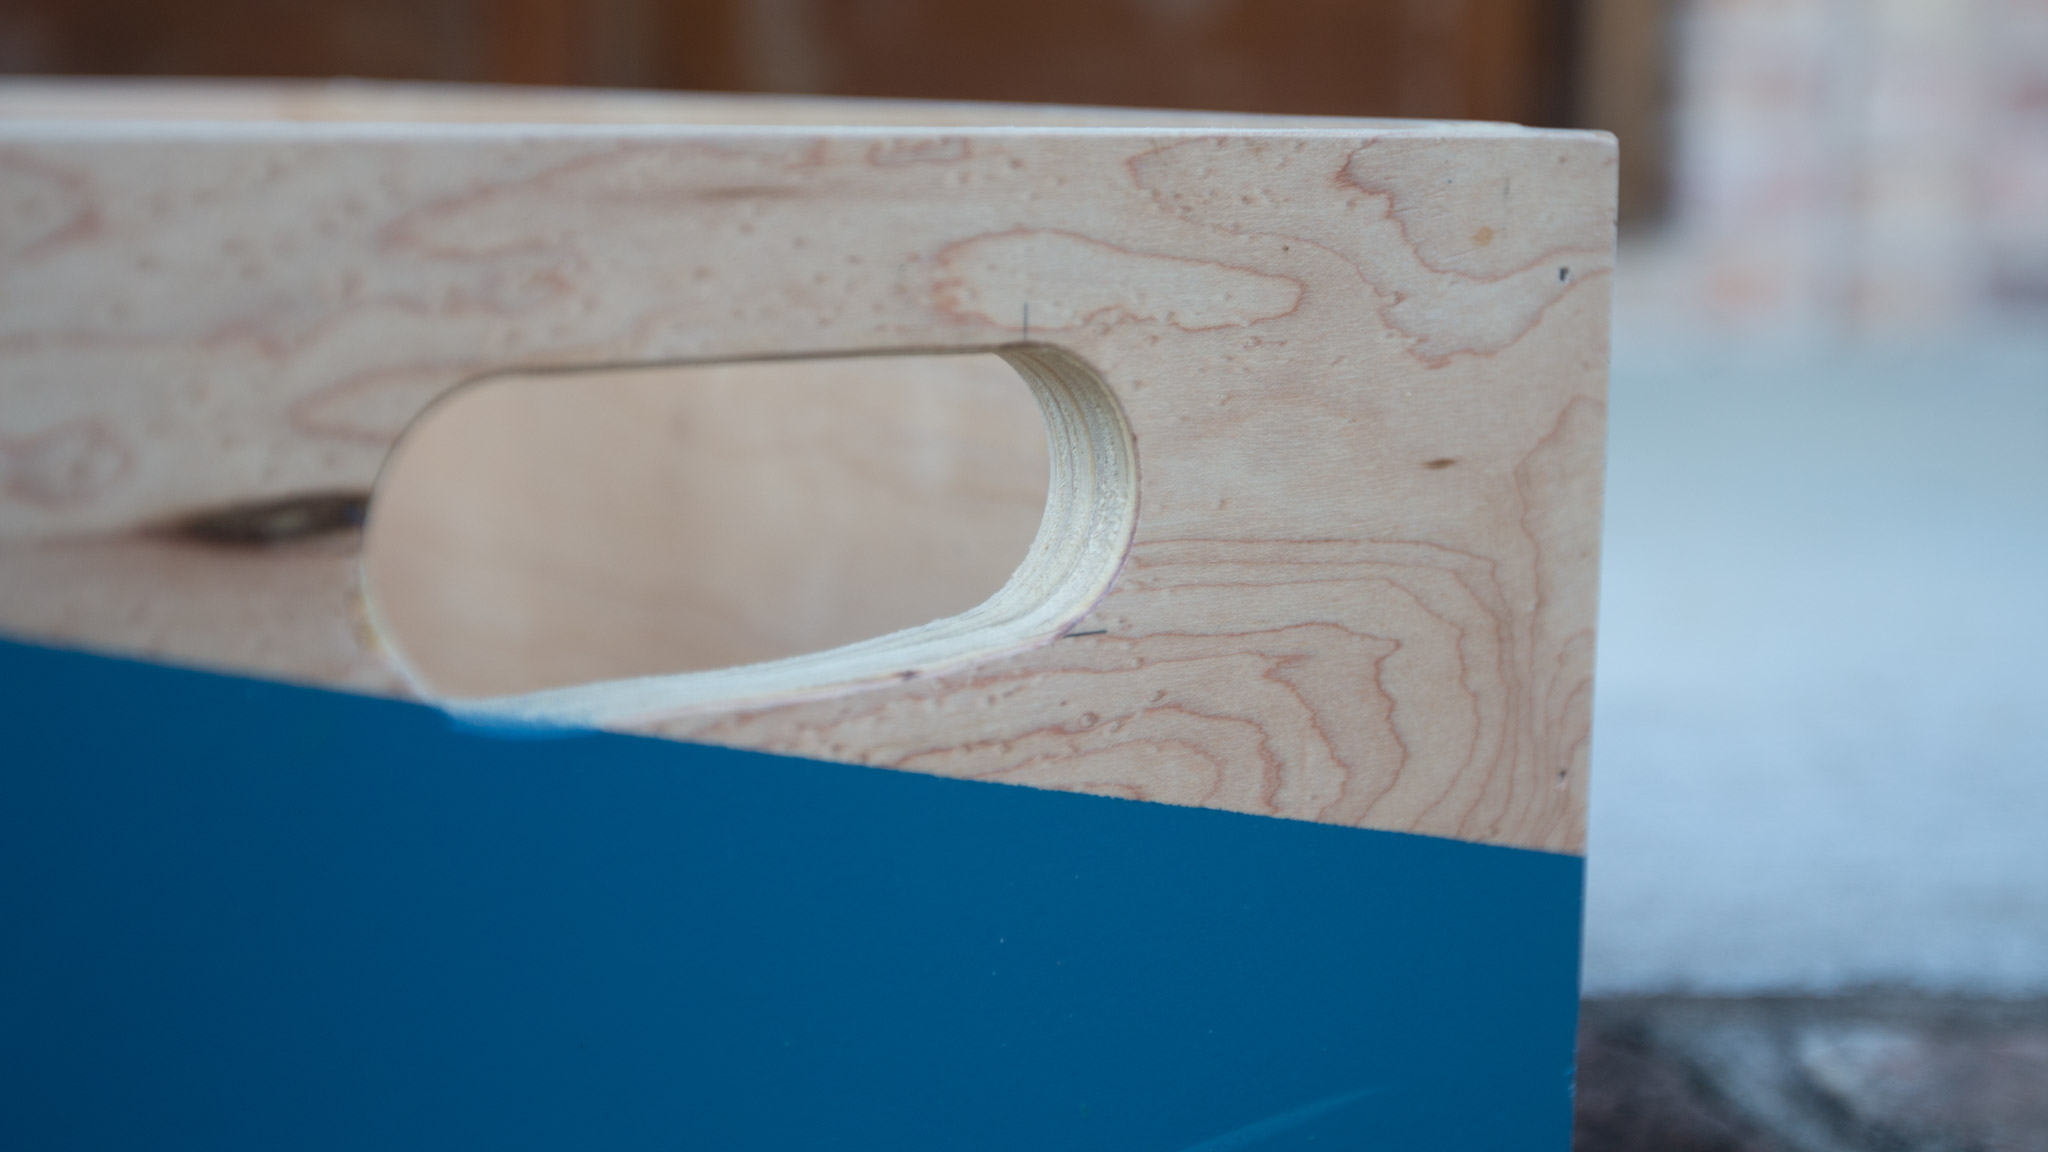
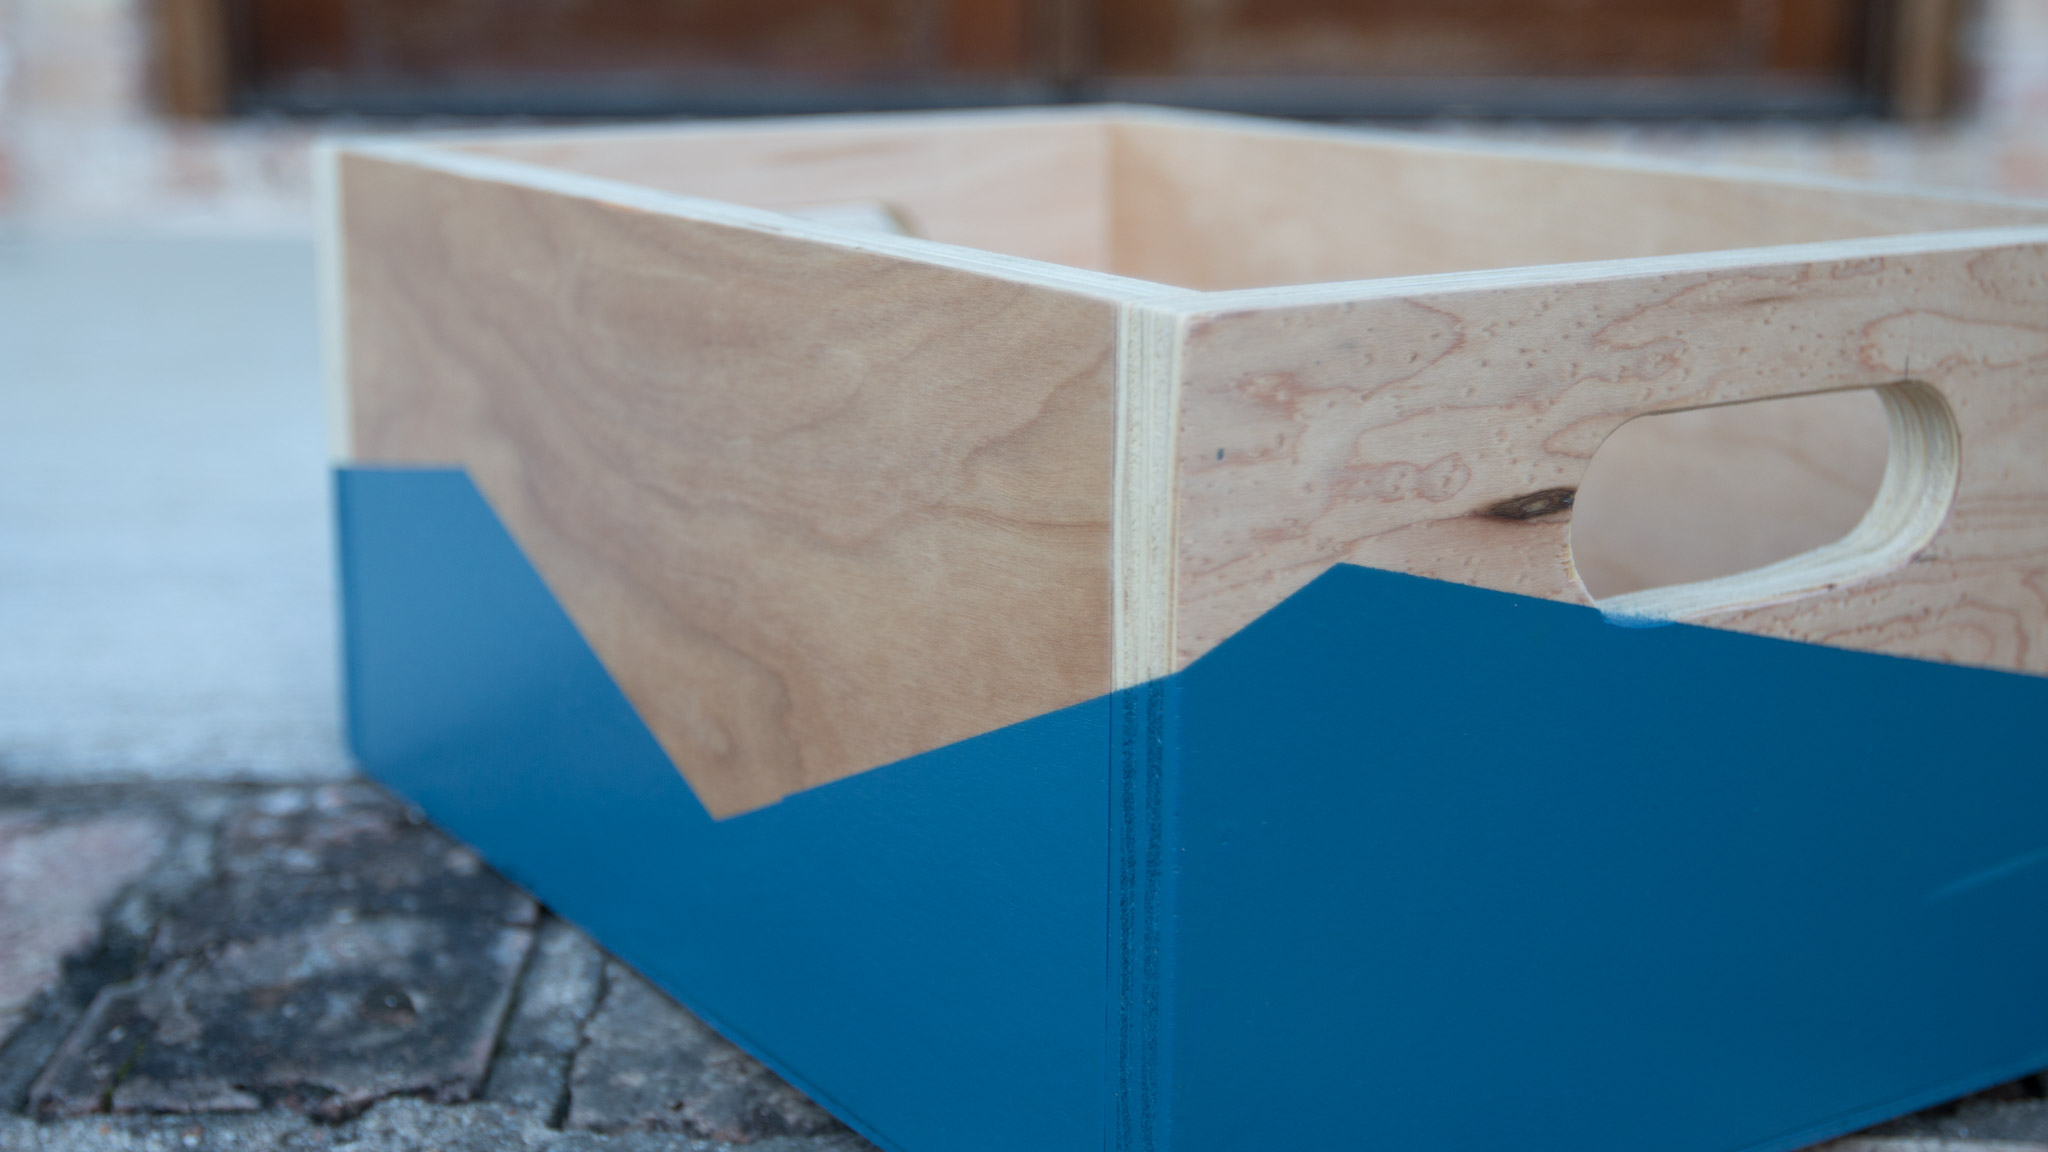
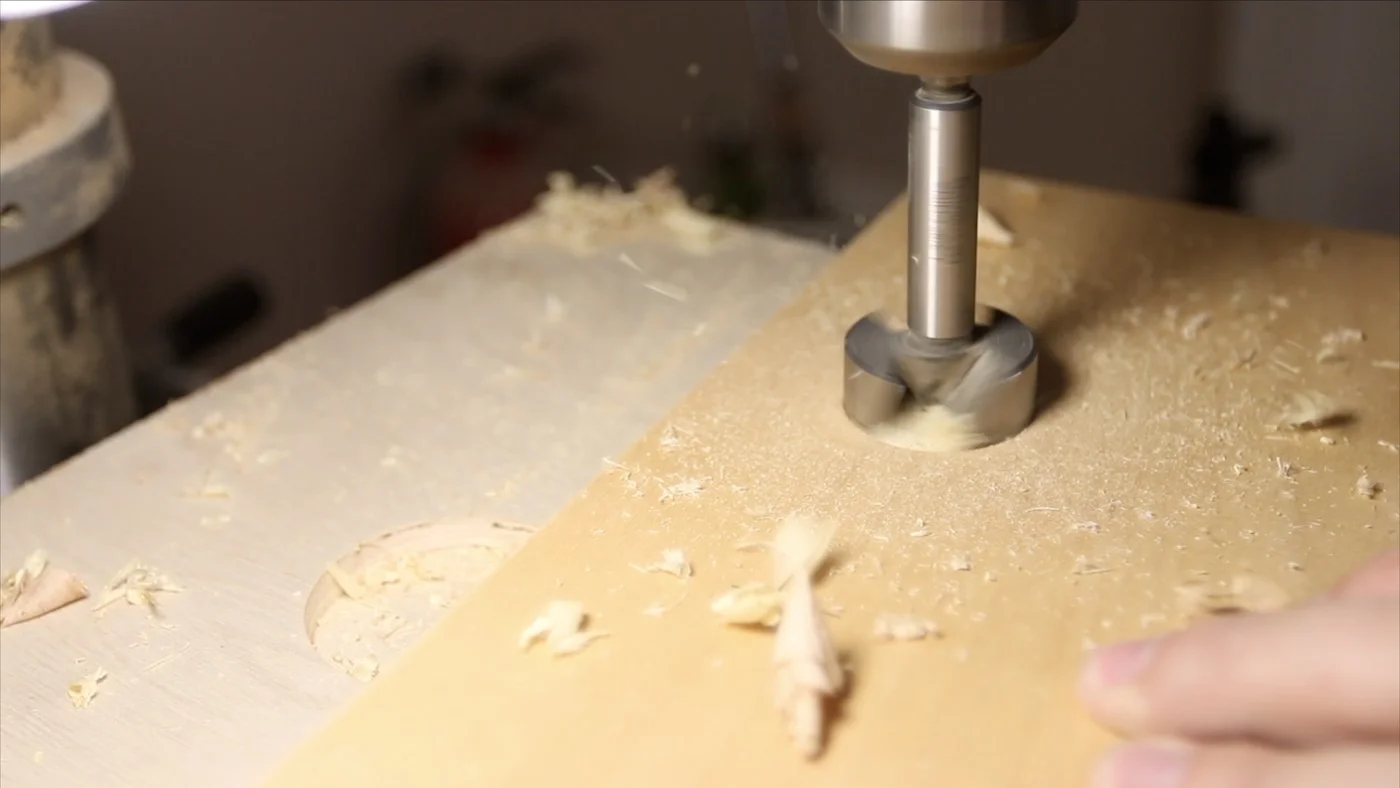
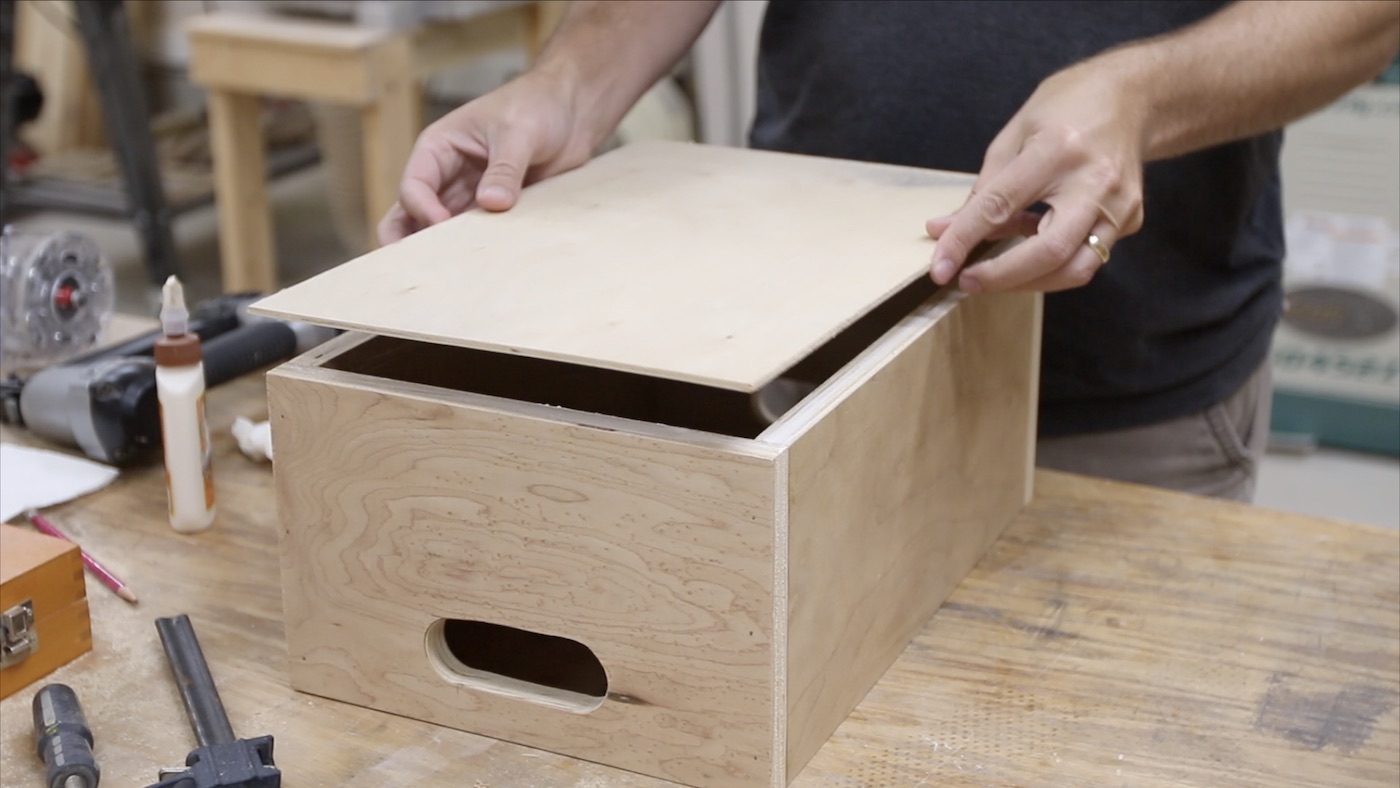
Next, I marked out some spots where I wanted the handles of the storage bins. I am just going to have some integrated handles cut into each of the ends, so I accomplished this by using a a forstner bit on the drill press to establish the two sides of the handle hole, followed by the jigsaw to connect those holes.

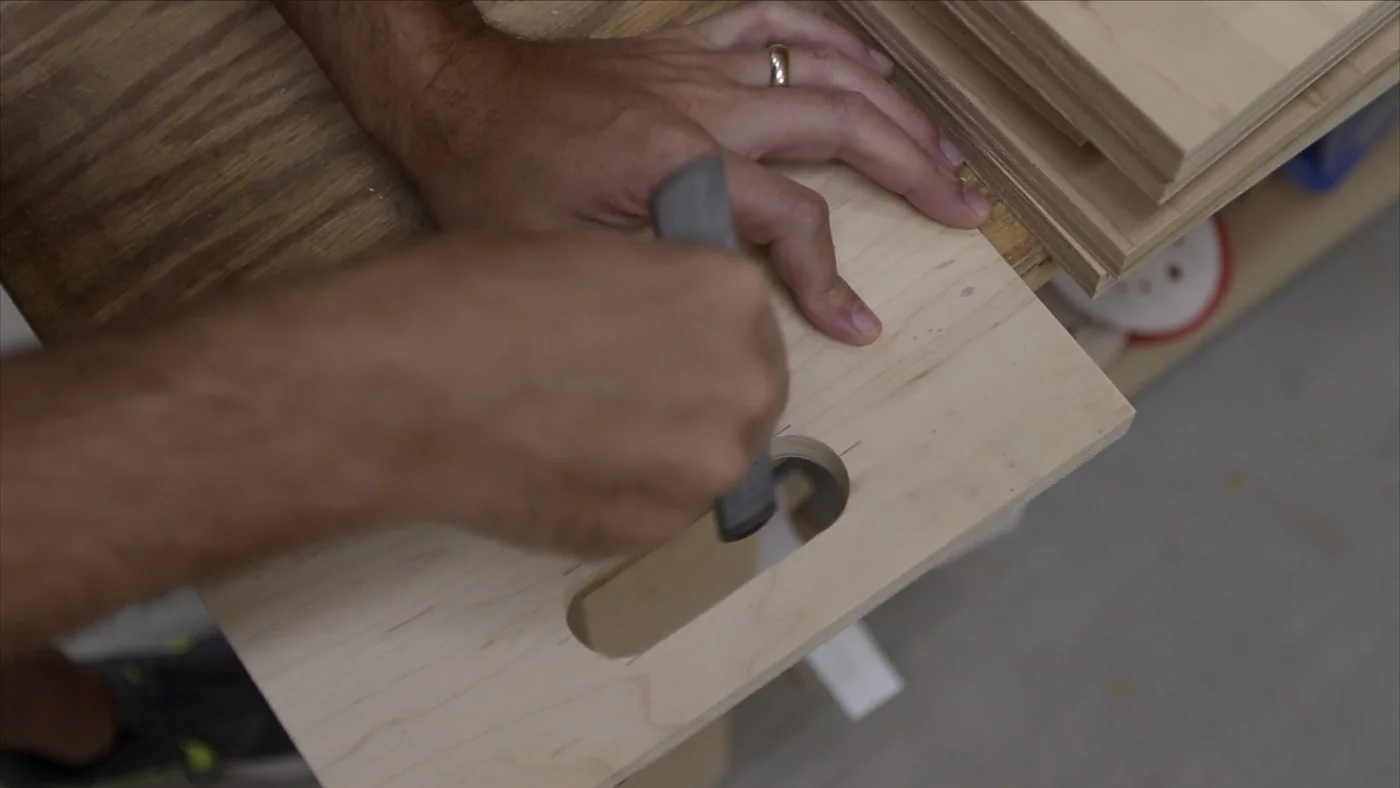
CLEANING UP THE CUTS
The jigsaw left a pretty jagged edge to these cuts, so I took some time with a rasp on hand, and smoothed them back out. They didn’t have to be perfectly smooth, but I was able to kind of shape them a little with the rough end of the rasp. If you don’t have a rasp, get one or some. I have a few, but this combination rough and smooth one gets used all of the time. (I’ve got an affiliate link to the one I have up above in the Tools & Materials section.)
EASY TO THE TOUCH
Next, I added a 1/8” roundover to all of the handles, so they would be easy to touch without the sharp edge to mess with. I tend to like the look of a small roundover like this, because it still has a crisp look (not very rounded), but it is quite smooth to handle.

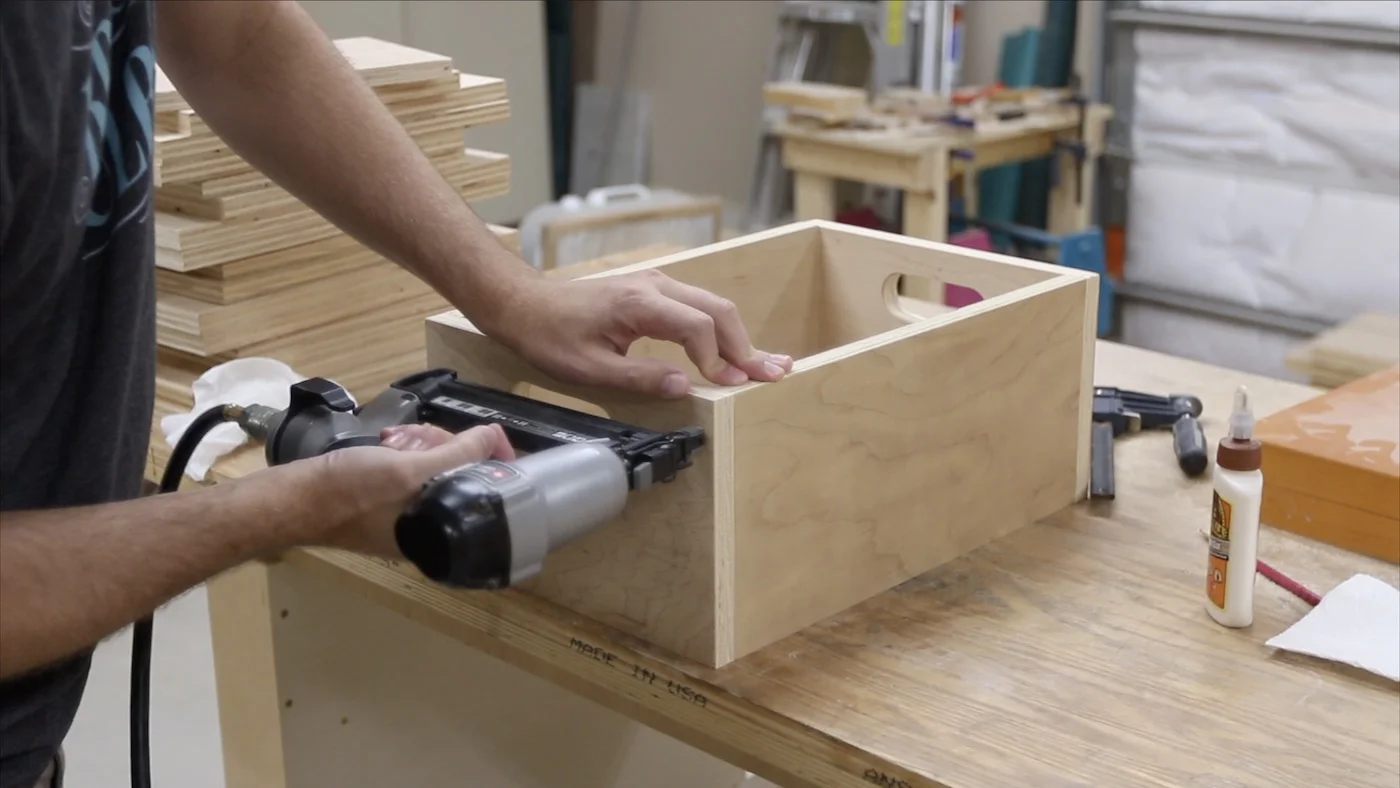
TIME TO ASSEMBLE THE PIECES
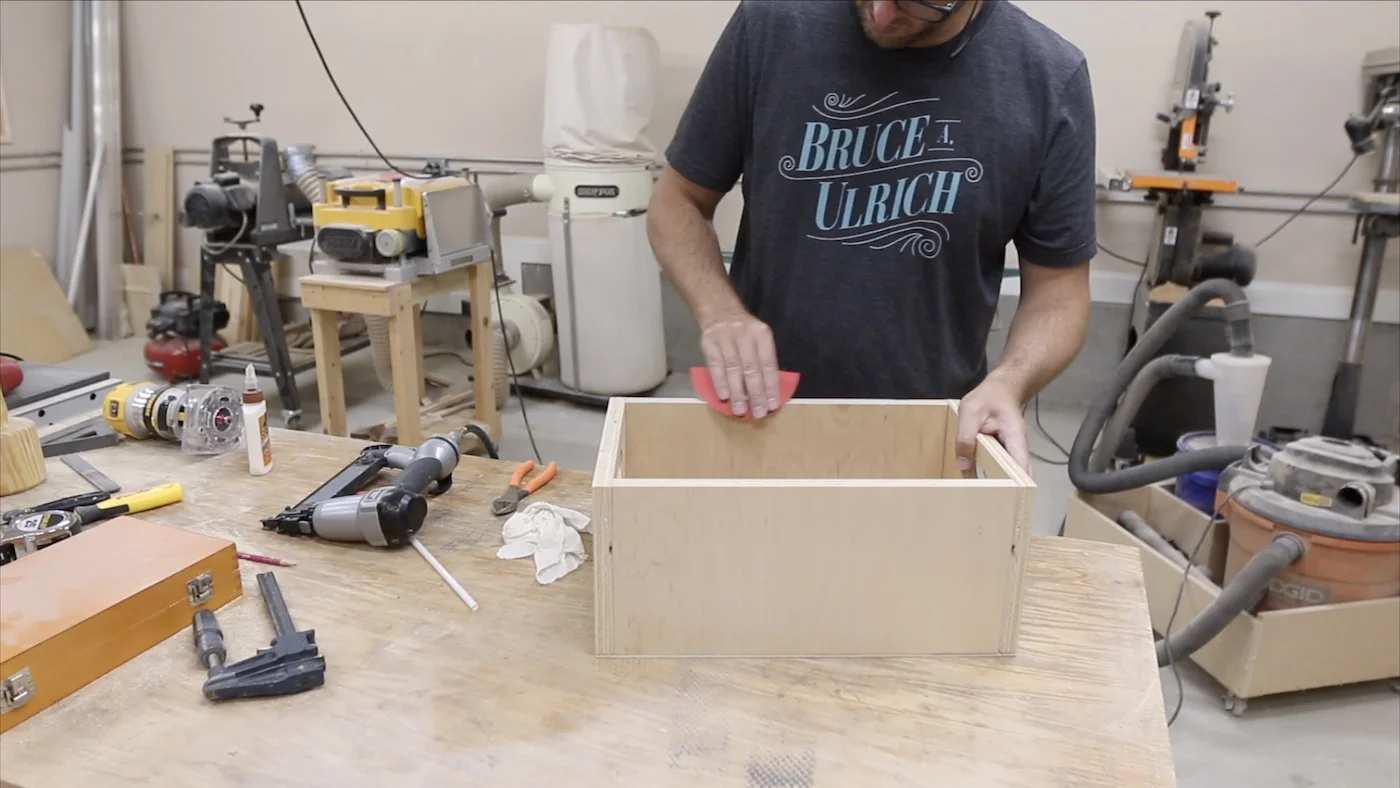
At this point, there are just piles of components of the storage bins. Now, it is time to start assembling all of them and making them look like boxes. Again, I’m just using glue and brad nails to assemble these. It will be plenty strong for what we’re doing with these bins.
HAND SANDING
To keep all of the other edges looking sharp and crisp, but not feeling sharp, I just broke the edges by hand with some 120 grit sandpaper. All “breaking the edge” means is running the sandpaper across each edge a couple of times to where it feels noticeably less sharp to your bare hand. It doesn’t really change the look of the piece.
TIME FOR DESIGN
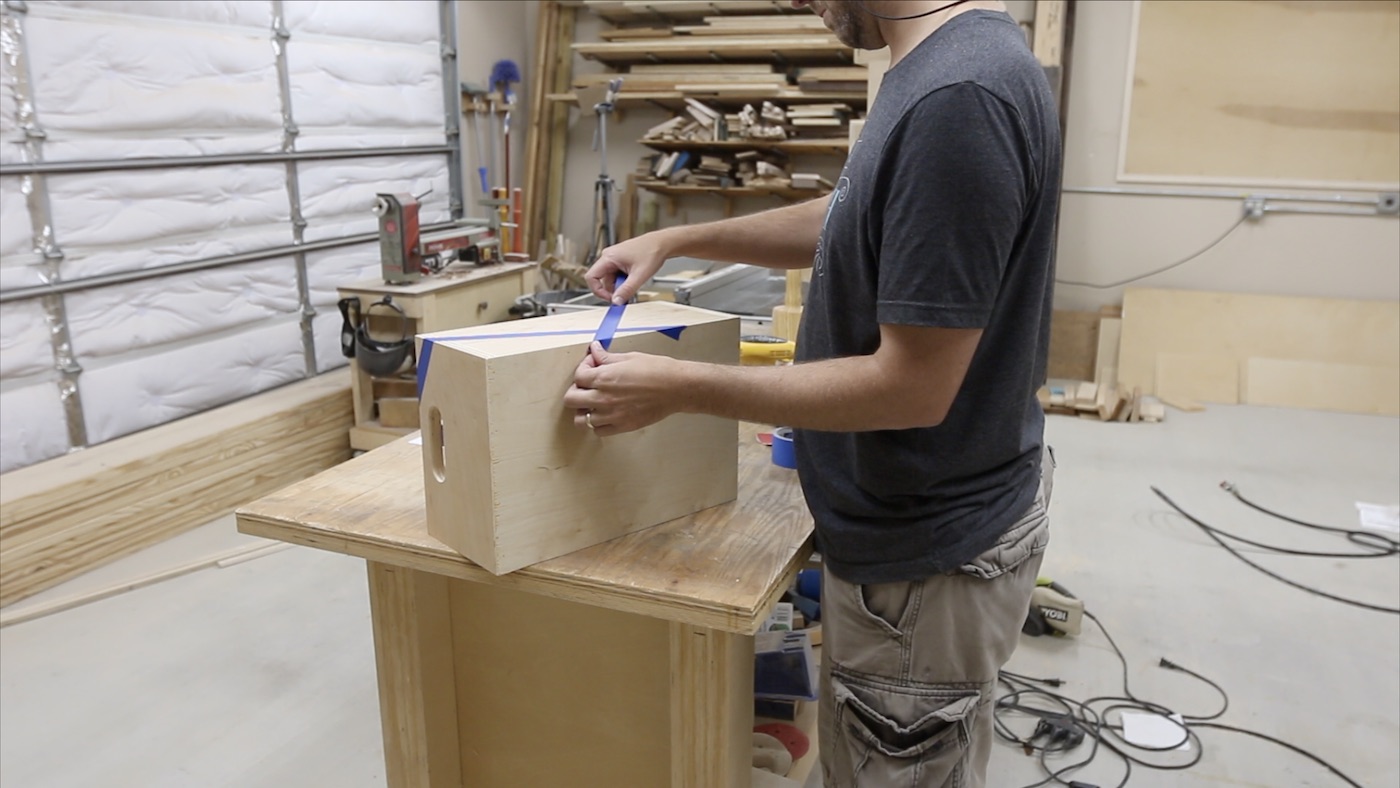
It’s now time to add a little design to these scrap wood storage bins, so they stand out just a bit. I chose to paint some designs onto mine, but there are other ways you could add a little character such as wood burning, stenciling and more.
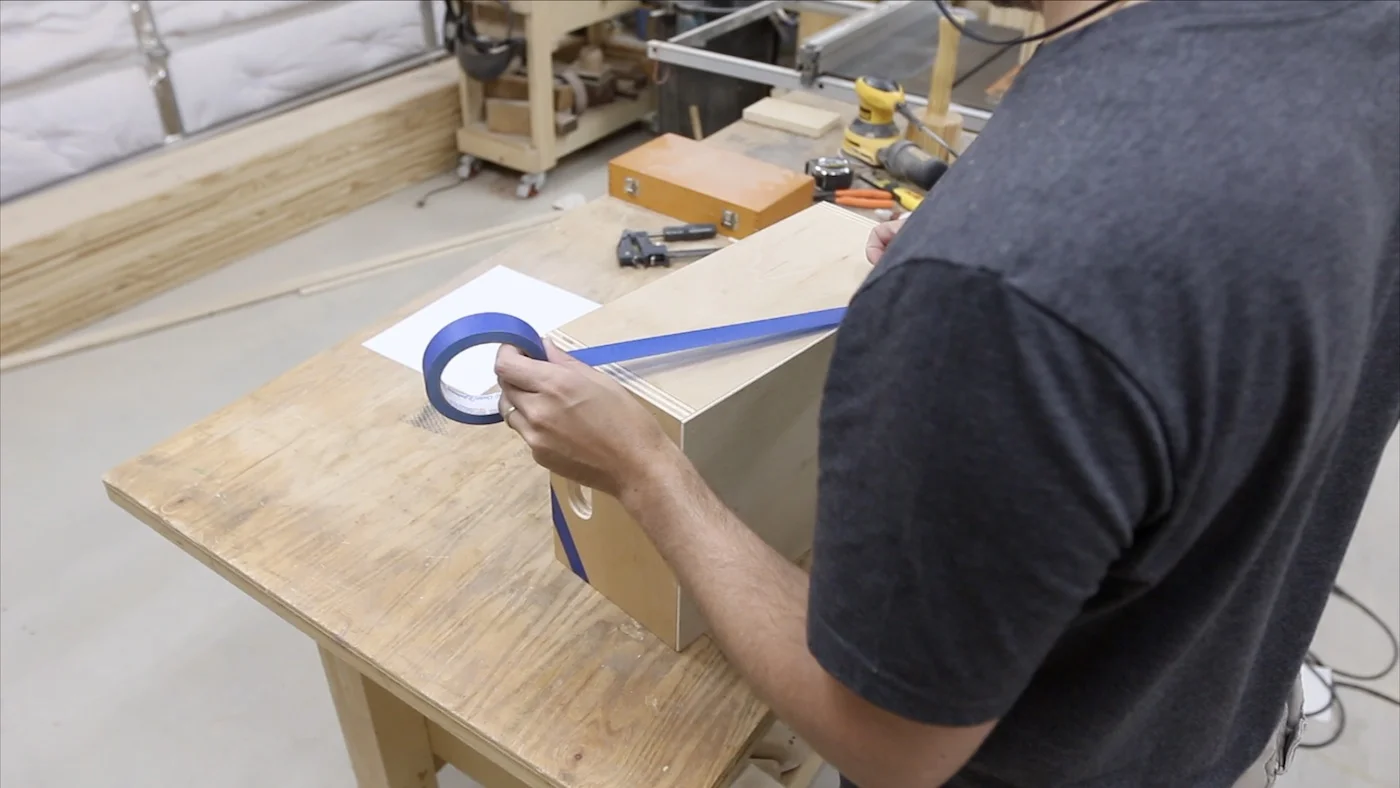
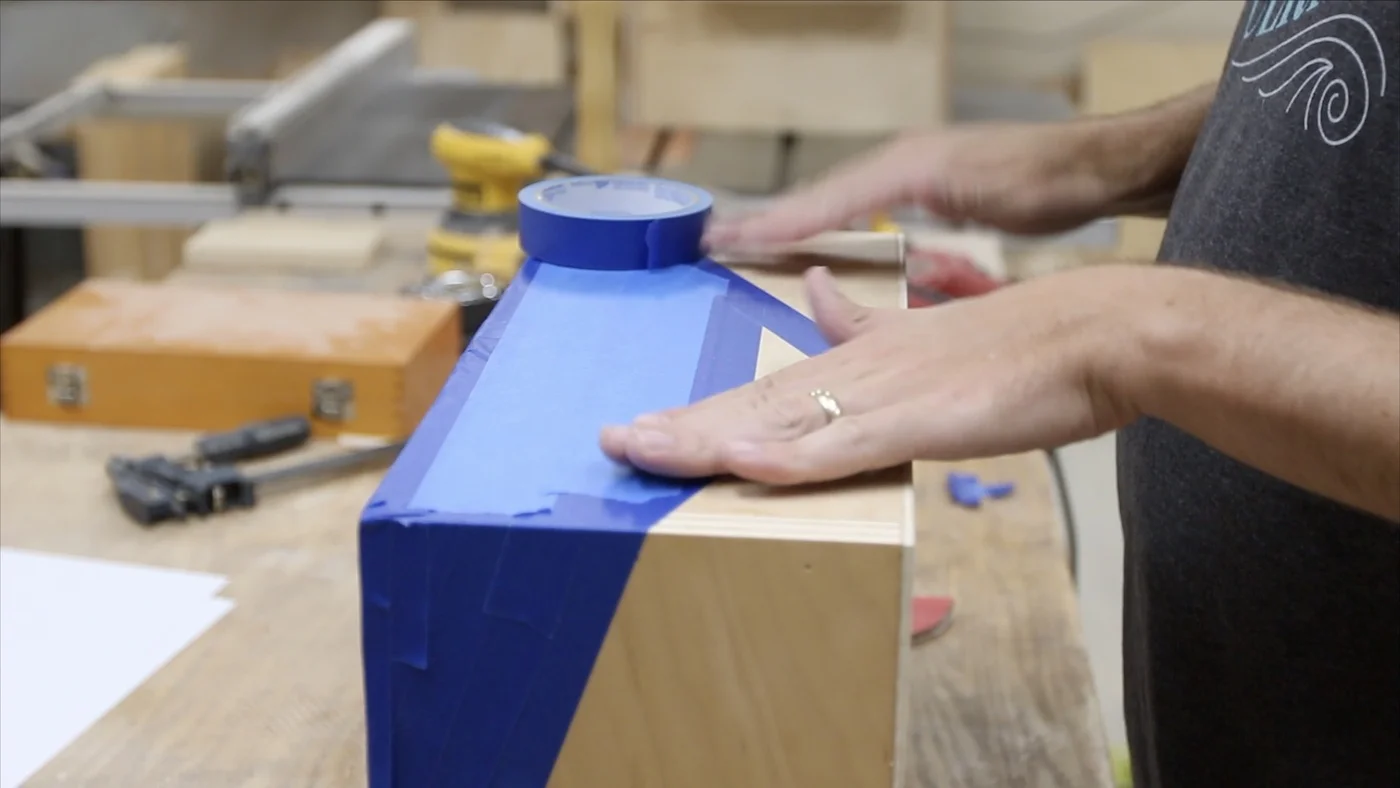
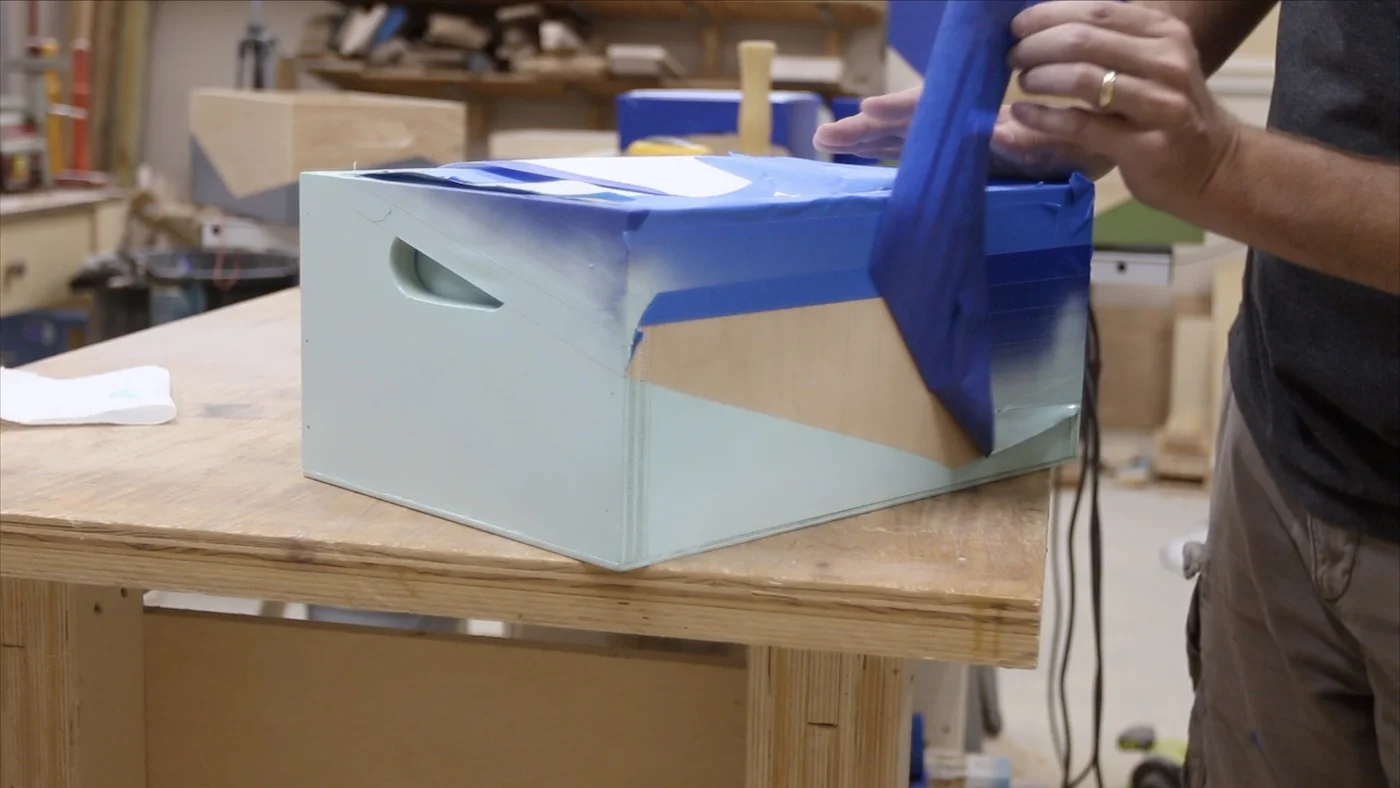
I used some painter’s tape to tape off angular, geometric shapes on all of the boxes. All of them are a bit different, and I think that’s pretty cool. Just be sure to cover all of the spaces thoroughly that you don’t want to be painted. Since we are spraying them, you’ll be surprised where all that airborne spray paint can land…where you don’t want it.
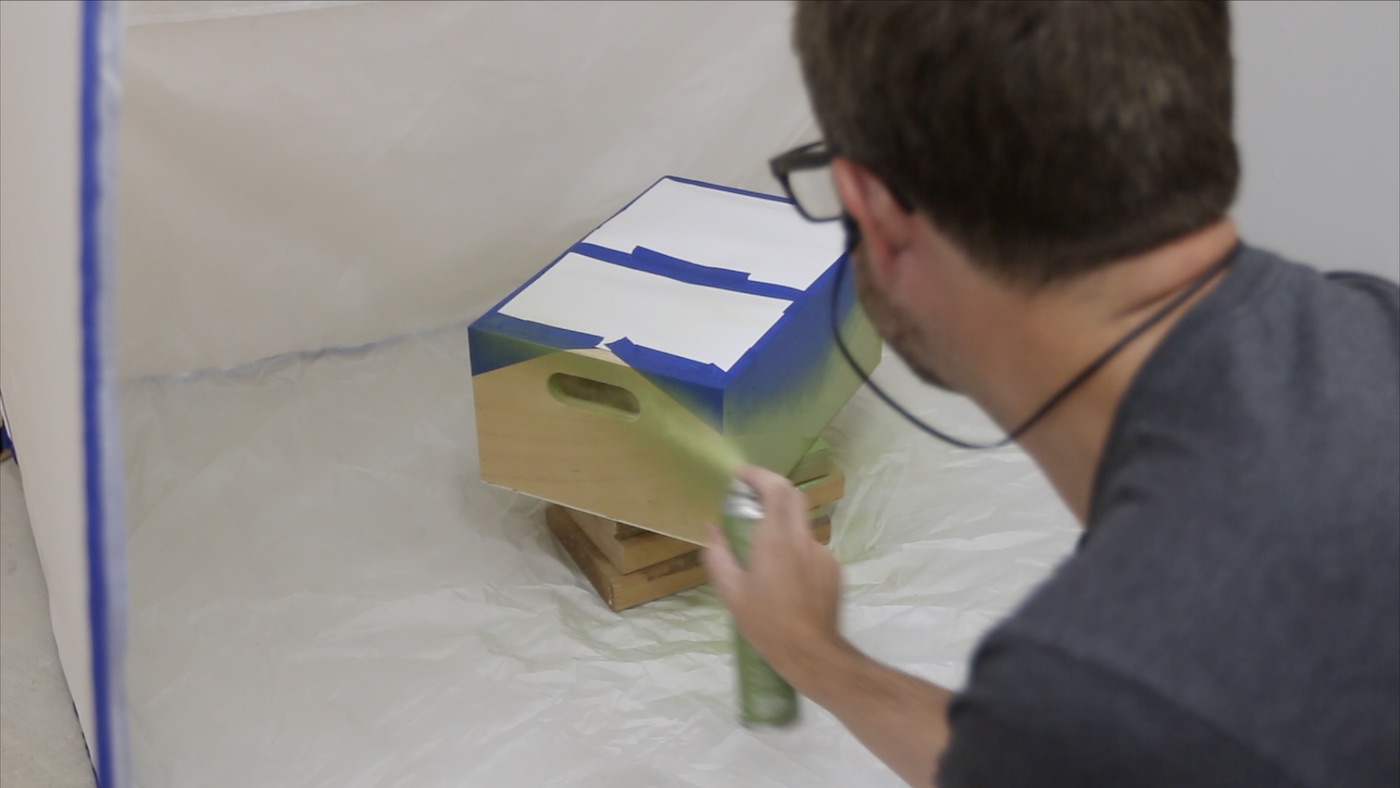
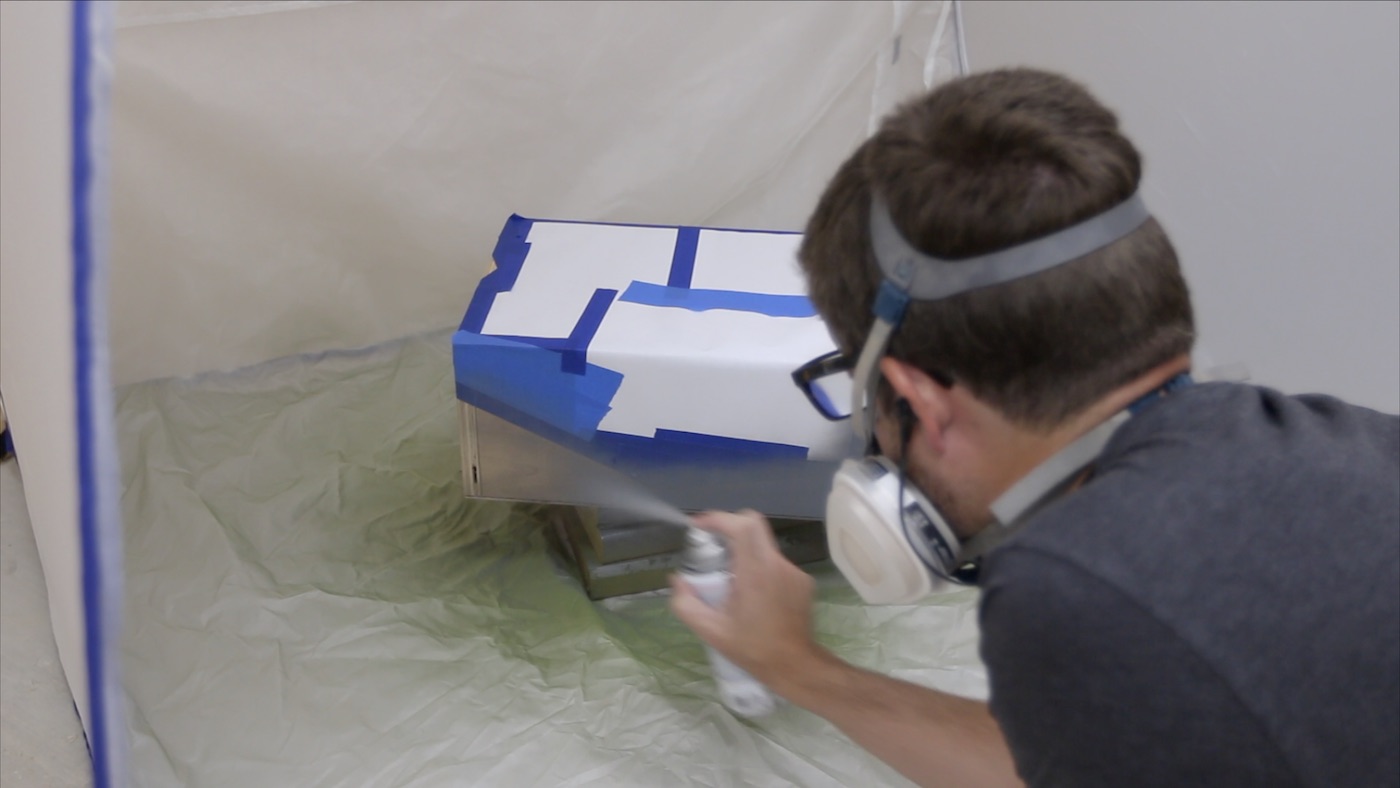
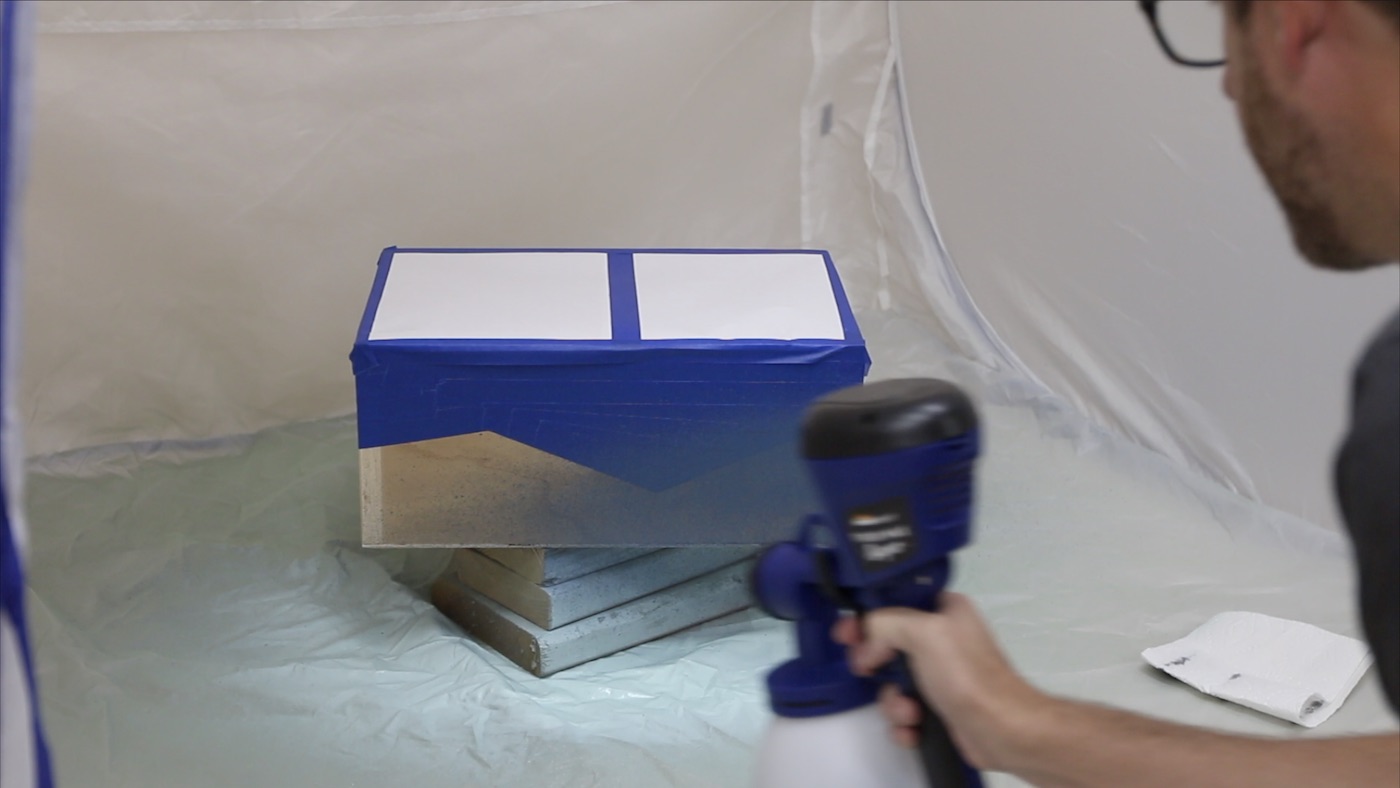
DIFFERENT PAINTING METHODS
I used 3 different things when painting these storage bins:
Mycolorshot premium spray paint. I would equate this spray paint to something like Montana Gold or one of those higher end spray paints. The dry time was unbelievably quick, and with two basic coats, I had really good coverage.
Regular spray paint. The one I used is Rustoleum, but it is not the most basic spray paint you can buy. This can was about $4, which you see pretty regularly. It ended up looking really good, but the dry time took a really long time (like it was still tacky after more than 12 hours), even in my temperature/humidity controlled shop.
Acrylic paints (2 different brands/types) sprayed in my Homeright Super Finish Max paint sprayer. This was my first time using this sprayer and it was super easy. And with this particular one, I didn’t even have to thin the acrylic paint. For one of the paints, I used a sample color from Lowe’s…I believe it was Valspar. The other paint was from DecoArts, and it was a really cool, copper metalic paint. Anyway, I would highly recommend this sprayer!

REMOVING THE TAPE
Removing the tape to reveal the crisp, geometric lines/design was one of the most satisfying things. After this, I just sprayed a couple of coats of clear water based polyurethane on each of the bins, and they were ready to use. I used the Homeright Super Finish Max to spray that as well. Just be sure to turn down the volume at which you’re spraying vs. what you did with the thick acrylic paint. I ended up spraying a little too much of the thin poly at first.

CONCLUSION
Well, that was a fun little project, and I love it when a project can be functional too! If you haven’t already, to watch the video and be sure to leave a thumbs up and drop me a comment. Doing it there really helps YouTube to know that people like the video, and they’re more likely to show my video to more people…helping my channel grow!
Thanks so much for checking out the project and I’ll see you really soon on the next one!