Massive Walnut Cutting Board
You might have seen how to make a cutting board at this point, but have you seen ways to be efficient at making multiple cutting boards at once?
I'll show you some of the ways I'm able to save time while making 8 cutting boards at the same time.
VIDEO
This project is all about performing batch actions to create multiple cutting boards for a customer order. Follow along with the video, or keep reading below for more details:
BACKGROUND
I sell a decent amount of physical items locally, and some of the most popular items are cutting boards. There are a couple of sizes that I typically sell: 8"x12" and 12"x18". I have used any number of hardwoods in the past, but my favorites to use are some of the domestic hardwoods like walnut, maple and cherry. Some will say that oak is not a good choice for cutting boards, but I have used it some, and in this project, I used some white oak that turned out great.
TOOLS & MATERIALS
Miter saw - https://amzn.to/2uC092T
Table saw - https://amzn.to/2mzmXvG
Planer - https://amzn.to/2NCAqyh
Jointer - https://amzn.to/2myoGBj (Mine is a Grizzly, but couldn't find a link for it)
Clamps - https://amzn.to/2LETmvM
Wood glue - https://amzn.to/2LiVSfe
Black Walnut
White Oak
Maple
USING SCRAPS
Even scraps can be used for many of these applications. So, the board you have is not thick enough to create the cutting board you want? That's fine. Just set your table saw to make cuts the size of the ultimate thickness you want your finished cutting board to be.
Then, after you've made the cuts, you can stand the pieces up 90 degrees, and you have the thickness you desire.


WALNUT, WHITE OAK & MAPLE
For the smaller boards, I'm using white oak. This particular white oak has a lot of interesting grain, and made for a great look when all of the pieces were glued together.
The larger boards were primarily made from solid black walnut, but I also added in some maple accents just for a little contrast. I started out with some four quarter (1" thick) boards and some nine quarter (a little over 2" thick) boards. These were rough from the mill, so I had to do some flattening and squaring. I usually start breaking down the rough stock at the miter saw.
Check out this other project to see more about that milling process.


CUTTING THICK HARDWOOD AT THE TABLE SAW
I have found, with my saw at least, I can get a much cleaner cut if I cut through thick hardwoods in multiple passes, rather than trying to cut all the way through it at once. I will have the blade about halfway up, make a cut, raise the blade the rest of the way, and then cut all of the way through the board. This prevents too much binding by the blade, and I just feel like it is safer for the saw that I have. Some of the larger table saws would not have a problem cutting through a board this thick in one pass.

BATCHING ACTIONS
Looking for ways to get more done in the shop?
Batching actions can be just the thing you need. Do things like flatten all of the boards you will need at once...for multiple finished cutting boards. Since the white oak cutting boards were going to be a smaller size, I batched all of those at the same time.
Having all of the pieces and arranging them into the 4 finished cutting boards at once saves a lot of time too. You already have your work surface occupied, so go ahead and utilize that space fully.
Much of the time that you spend making things is spent setting up your tools. Once a particular tool is setup, like the table saw, cutting the proper width pieces, go ahead and cut all of the boards needed at once. Not only will the pieces be more accurate with each other, you will save a lot of time going back and forth between tools and setting up everything.


BOARDS MEETING PERFECTLY
Are you getting your boards perfectly flat?
One of the paramount things about making cutting boards well is getting really good glue lines. Some of this has to do with the amount of glue used and how you clamp the boards, but it all starts with how flat your mating surfaces are.
I have tried many different ways to arrive at the same end result: flat mating surfaces so there are no gaps in the cutting boards. Many people will fully mill all of their boards before they cut the strips at the table saw. Then, they'll take them straight from the table saw and glue them together. I've never been quite happy with doing this, and I always find that they need a bit more touch-up before gluing up.
Because of that, I typically get the boards flat enough for them to register properly at the table saw, but I leave the final flattening for the jointer, a tool that is built very specifically for this job.
In the above photo, you see me laying out each cutting board, making sure I like how the grain looks. After I get this finalized, I will take each board over to the jointer and take a couple of extremely light passes, ensuring a dead flat surface. I'm probably cutting less than 1/32" with each pass. Yes, it does use up a little more of the material, but I have had great results with this method, and keep coming back to it.
Be sure to use some push blocks at the jointer. Don't try to hold those with just your hands...these pieces are far too small at this point for that.
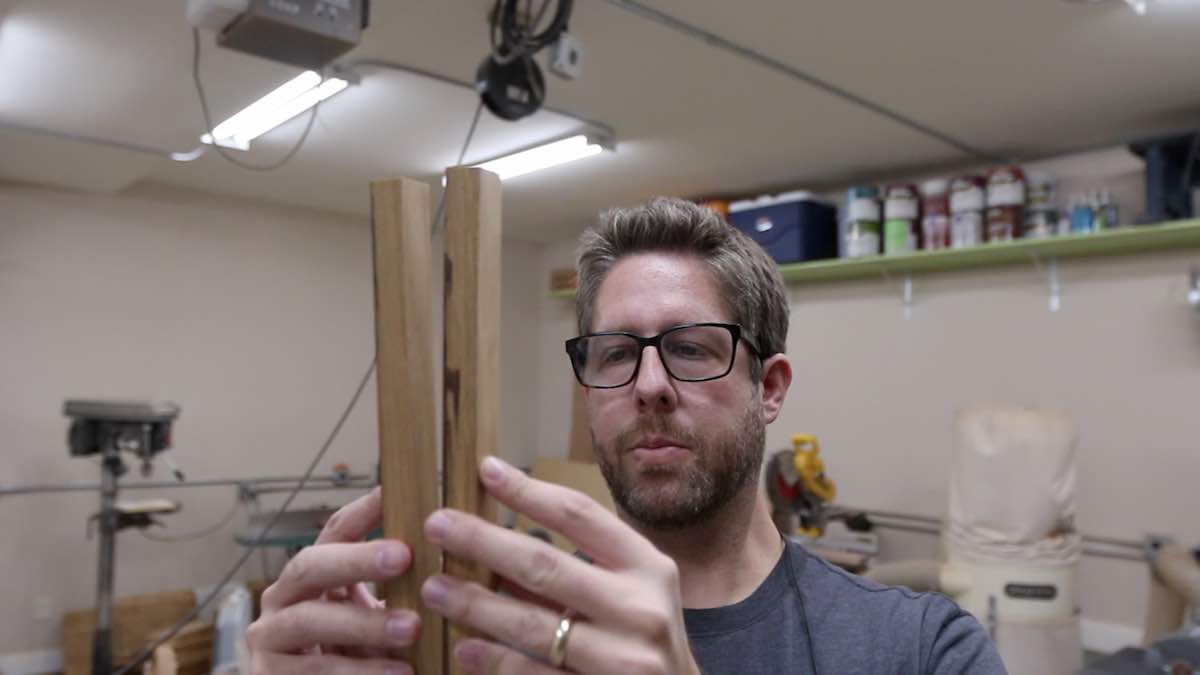
So, how do you check to see if the surfaces are perfectly flat?
One great way to check for perfectly flat mating surfaces is to take your two boards, put them together with light pressure as if they were in clamps, and hold them up to the light. Move them around a bit, and if you can't see any light through the seam, you've got a great joint!

TIME FOR GLUE
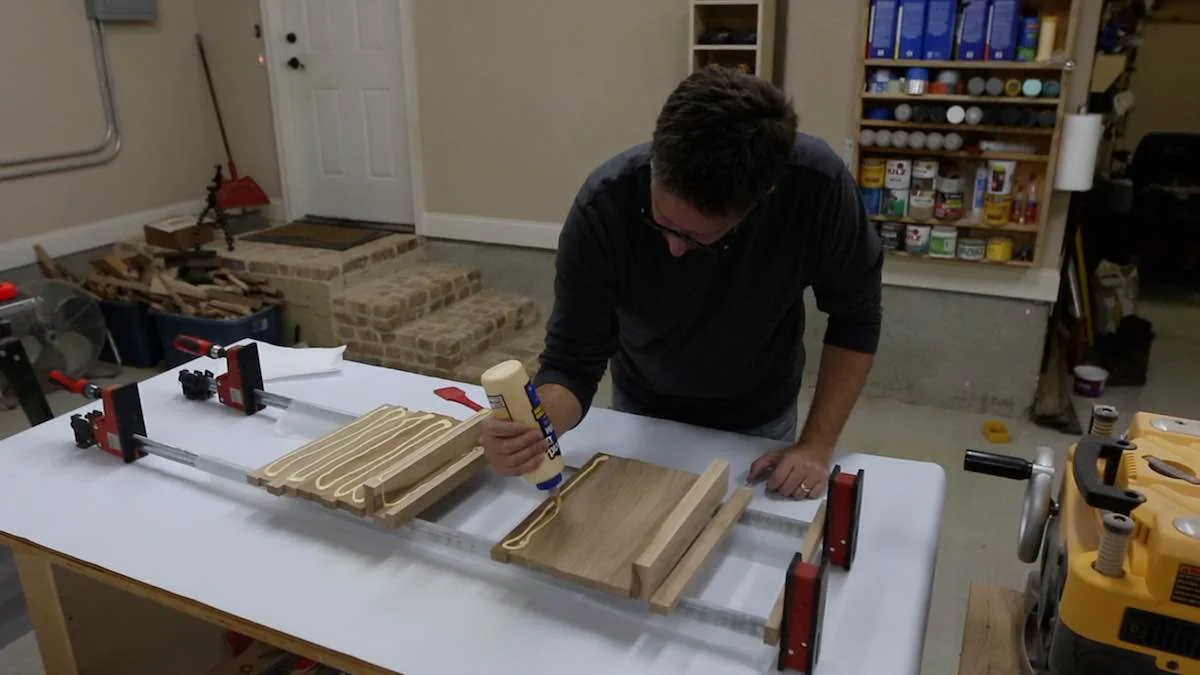
Now that you've got all of the boards perfectly flat, it is time to glue up your cutting boards. I like to use parallel clamps for this. I find that they provide the most even clamping pressure of any clamp I've used. That way, I have less of a chance of the cutting board bowing up or misaligning somehow.
Here is another instance where doing multiple things at once can really save time. I will usually glue up at least 2 boards at once. It uses the same number of clamps, but I can at least double what I get accomplished with not much more time involved.
Is glue getting all over your work surface?
A way to prevent glue from getting all over your work surface is to find a large, vinyl sign like I have, and lay that under your clamps as you're gluing everything together. I'm sure you can find these around...many companies have them, and when they're done with them, they discard them. Also, if you've seen those signs around for baseball leagues, etc...when they're done with them, you can probably grab the sign. These work great, and roll up out of the way when you're done with them. Plus, you're not having to use a ton of waxed paper each time...they're reusable. If too much glue is on them, just scrape some of it off gently, and you're left with a fresh surface again.

Speaking of waxed paper, I do use some strips of it to protect my clamps.
Why do you need to protect your clamps?
Especially with these parallel clamps that I've linked, The way they work is that the ridges on the main bar provide grip for the clamp to apply pressure. If glue gets all over the bar and these grooves, your clamp will not perform nearly as well. Ask me how I know.
So, it is very easy to just roll out a bit of waxed paper to cover where the cutting boards will be. But don't stop there. Take some scissors and rip the waxed paper in half. You can fold this over your clamp bars, and it is plenty of coverage against the glue. You will save a ton of waxed paper, and this will be a really cheap solution to keep your expensive clamps going for years to come.


Once you have your boards perfectly flat, it is time to glue everything together. Take each strip, and rotate it 90 degrees. That is the surface you want to add glue to. Add a generous amount of glue to each strip. You can use a number of things to spread the glue out: your finger, a cheap spatula (like you see me using), an actual glue brush that some companies sell or even just a cheap silicone basting brush will work. Be sure the glue is evenly spread on each of the surfaces, rotate the pieces back 90 degrees, and put them together.
As you bring the clamps in, be sure the boards are not sliding around or popping up, misaligning your cutting boards. Go nice and slow so that the pressure is even, and you'll typically have no problems.

SUCCESSFUL GLUE INDICATORS
How do you know if you used enough glue, or if the coverage is plenty?
Look at your boards after you've glued them up. So you see glue squeezing out between each of the individual boards? If so, you've done it right. Many times, you will not see a continuous line of glue between each of them, but rather some kind of dots where the glue is coming out all along each seam. Great job! You've done it!

REFINING THE SHAPE
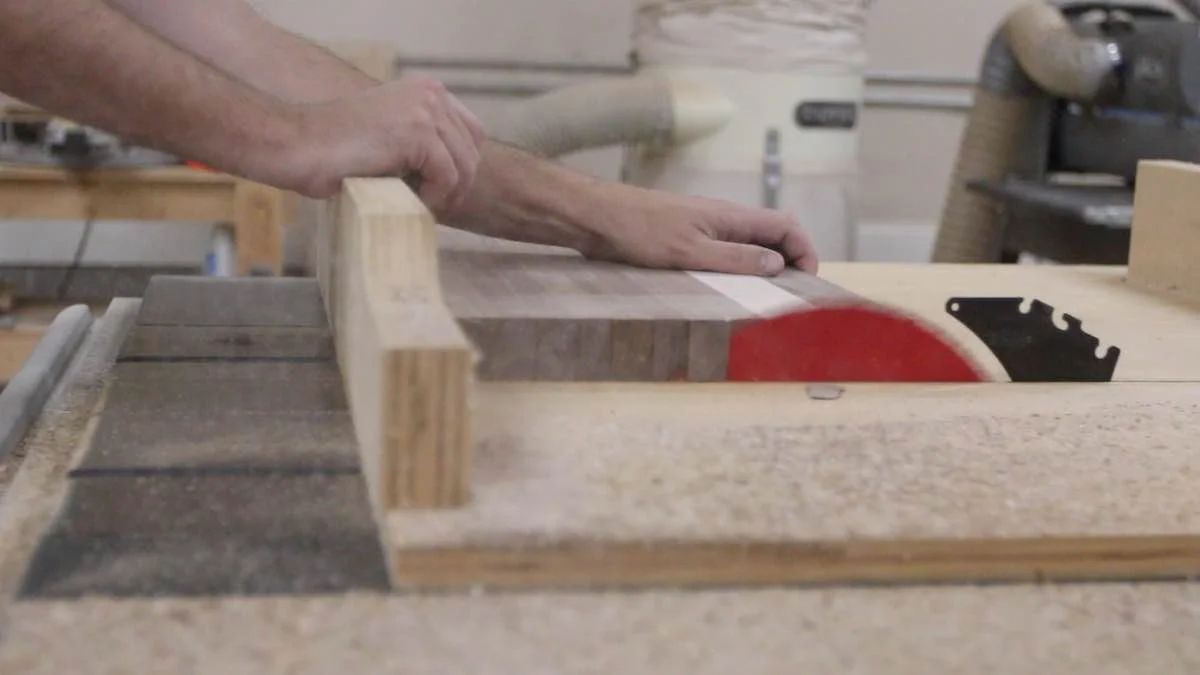
Once the glue has dried (I usually try to let these sit overnight. It is very humid where I live, and glue tends to take longer to dry here.), I take the cutting boards out of the clamps, scrap off as much excess glue as possible, and then run them through the planer a few times. Usually, I've done a good enough job while gluing them all up that they will remain very straight and flat after using the planer.
Then, I take them over to my table saw where I use the cross cut sled to refine the shape. For these particular boards, I just want them to have square corners and straight sides. This sled I made is very accurate, and I can bring them back into square with just a few small cuts.
For the smaller cutting boards, I added a thumb hole for decoration and function. I use a forstner bit to drill out the hole at my drill press.

EDGE TREATMENT
For most of my cutting boards, I like a simple 1/8" roundover. This is nice to the touch, and I accomplish it by using a handheld router. I go over all of the edges, including the thumb holes I drilled out, with the router.

RAISING THE GRAIN
You may have heard people say they are "raising the grain" of a cutting board.
But why do we need to raise the grain?
Many cutting boards will come into contact with water and moisture at some point in their lives. As soon as water is put onto a board that previously felt very smooth, it is suddenly not smooth to the touch any longer. This is because the fibers of the wood actually react with the moisture and kind of stand up.
I used a quirt bottle with some water in it to mist the boards, wiping off any excess with a paper towel. I let them dry and then do a final sanding with 220 grit sandpaper. Now, when the client gets the board wet at all, it will still feel as smooth as the day I gave it to them.

PROTECT THE BOARD
I typically use mineral oil for the treatment on my cutting boards. This is a food safe finish, and is readily available. I have some tricks I've learned over the years of making many boards, and I've tried out a lot of oils and finishes, but I keep coming back to mineral oil.
I'm not going to go into that here in this blog post, but I will probably do an entire post in the future about my cutting board finishing process.
ADDING FEET
I like to add non-stick feet to the larger cutting boards that I make. This does limit how you use the board, since that pretty much eliminates one side, but I just think it looks nicer. Plus, many people that purchase these large ones keep them out on the counter as part of their kitchen decor. They don't want this particular one to have to put away each time they use it. I don't typically add feet to the smaller ones, since they're the type of board that gets pulled out, used quickly, and put away. This also allows both sides of this small board to be utilized.
The feet I use are in my materials list above. They are Everbilt from Home Depot, and they're my favorite. They are white, and rubber, and very high quality.
To add the feet, I use a combination square and measure out a set distance from two of the the sides. I mark that spot, and drill out a tiny bit of the material, making room for the screw so the wood won't split.
Then, I just add the screw to hold the rubber foot on, and the cutting boards are done!


CONCLUSION
This was a big project, making 8 cutting boards in total; 4 of the smaller ones and 4 of the massive walnut ones. It was fun to kind of figure out ways that batch actions to save time.
Be sure to watch my video of how I made these. You might catch some things in there that I didn't include here.
Let me know what you think of this project. Please leave me a comment below! Thanks for following along and I'll see you back here really soon!