Live Edge Sliding Barn Door
In this project, I’m building a live edge sliding barn door out of some air-dried walnut. It was a massive sliding barn door I made custom for a client’s home. Watch the video and follow along with the project below:
BACKGROUND:
A client approached me with this project. She had some air-dried walnut from Illinois that was on her grandmother’s land. She had it milled up years ago and it has just been drying, waiting for a project.
She wanted two different things: a massive sliding barn door and 3 large cutting boards for some of her family members, with custom engraving.
TOOLS & MATERIALS: (affiliate links)
Starbond adhesives (Save 10% using CODE: bruceaulrich) https://www.starbond.com/?rfsn=272403...
Sliding Barn Door Hardware: https://amzn.to/2QU1750
Barn Door Handle: https://amzn.to/2un3c1F
Barn Door Floor Guide: https://amzn.to/36r5Dyj
Miter saw - http://amzn.to/2GxJbX4
Narex Marking Knife: https://amzn.to/2ZTW3S7
3M Painter’s Tape: https://amzn.to/2QpE2aZ
Bessey parallel clamps - https://amzn.to/2S4m4tv
Glowforge laser engraver: https://glowforge.us/r/GwnI7W
Drill & Driver: http://amzn.to/2C0JDfa
Palm router: https://amzn.to/2qBTztP
Random orbit sander - https://amzn.to/2C0gR0k
Domino Joiner: https://amzn.to/2SWbIiu
50mm Domino Floating Tenons: https://amzn.to/2SU8ufd
Circular Saw: https://amzn.to/35nNfVO
Rubio Monocoat: https://amzn.to/2rWvT4F
Titebond II wood glue: https://amzn.to/2XVcefw
Stanley Bailey Chisel Set: https://amzn.to/2MWQeOw
Adjustable Drywall Square: https://amzn.to/39ENTBv
Center Punch: https://amzn.to/2N0HjvA
Dental syringes: https://amzn.to/2MUqkdp
STEPS:
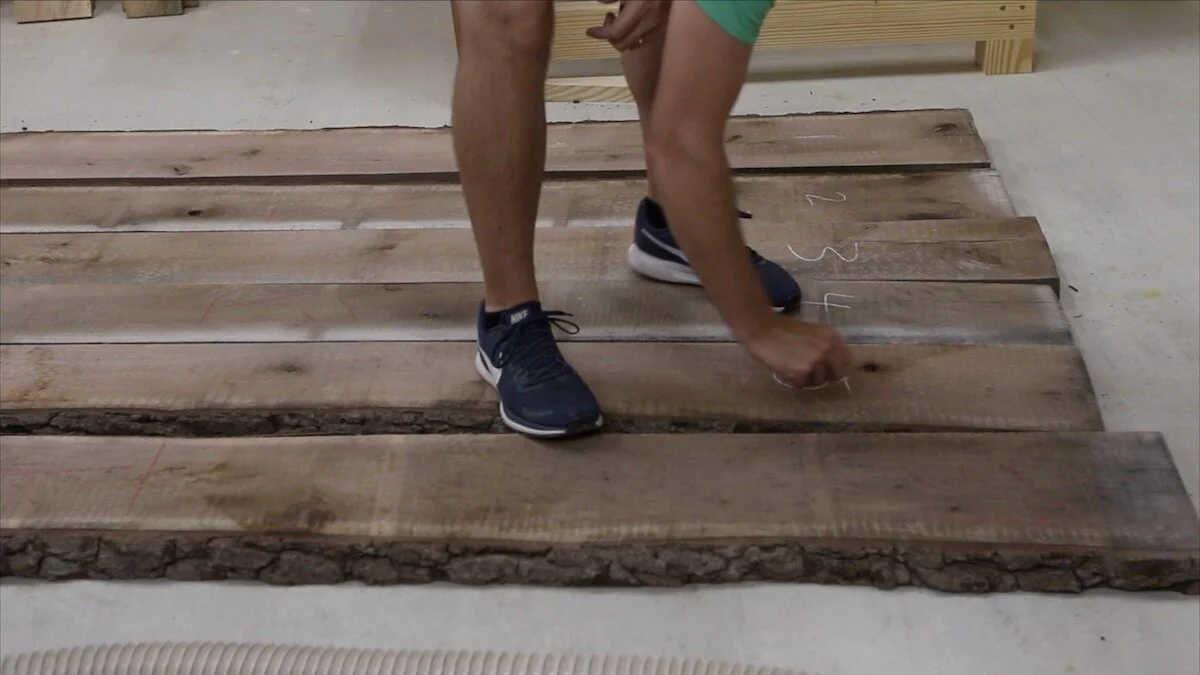
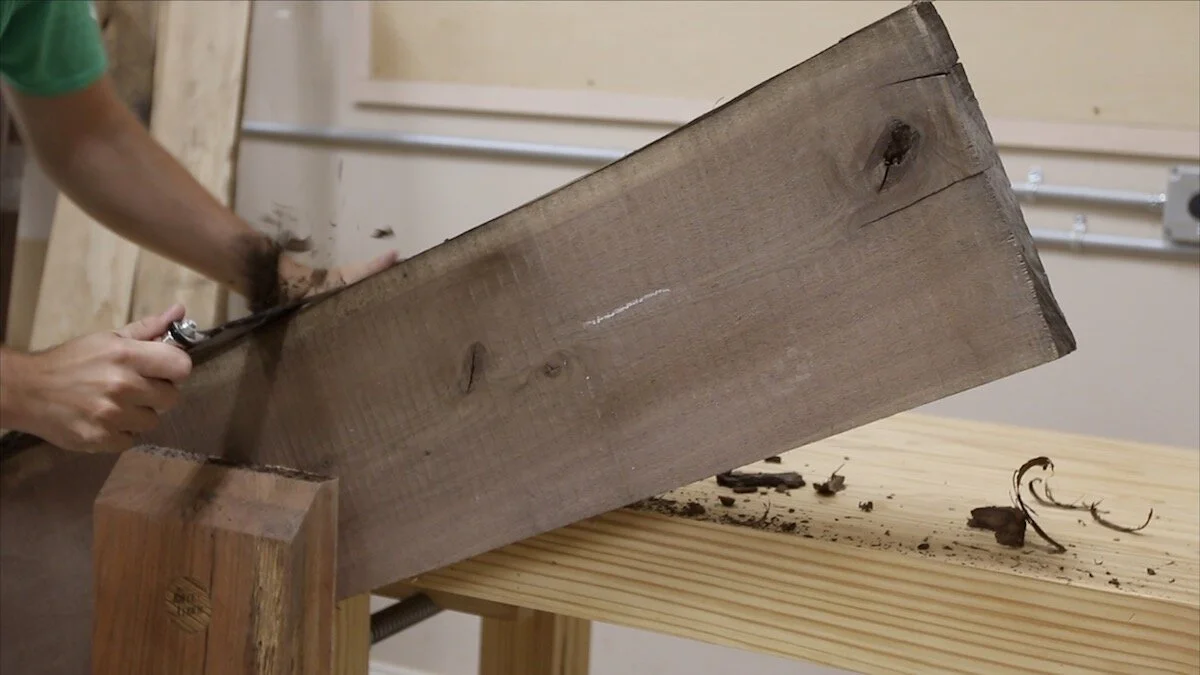
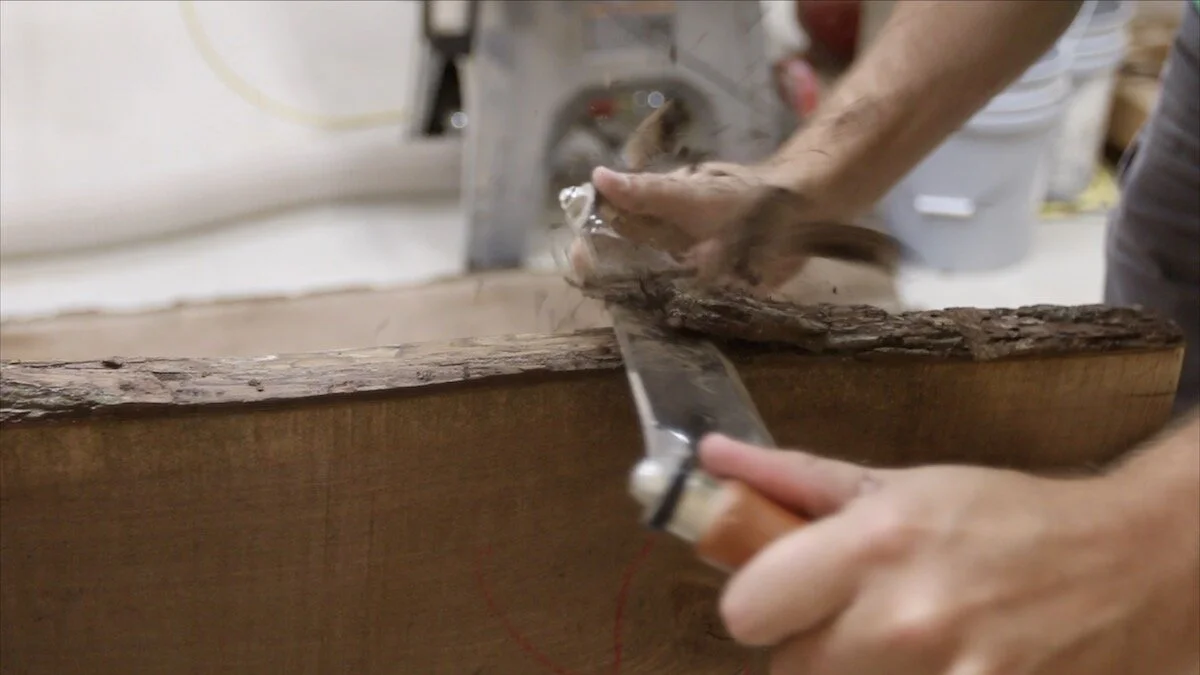
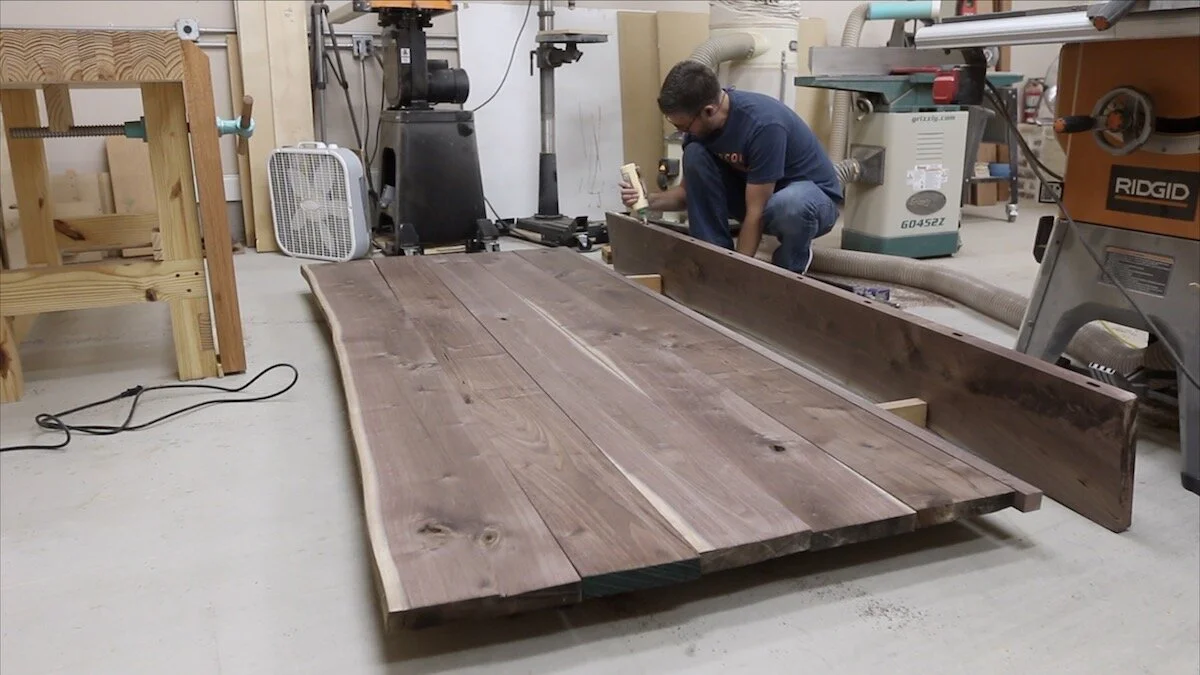
I started off with some rugh cut walnut that was given to me by the client. After I got the boards in the order I wanted, I grabbed my draw knife and removed the bark from the two outside slabs that would keep the live edge. I wanted to keep as much of the live edge look as possible, but not make it look overly rustic.
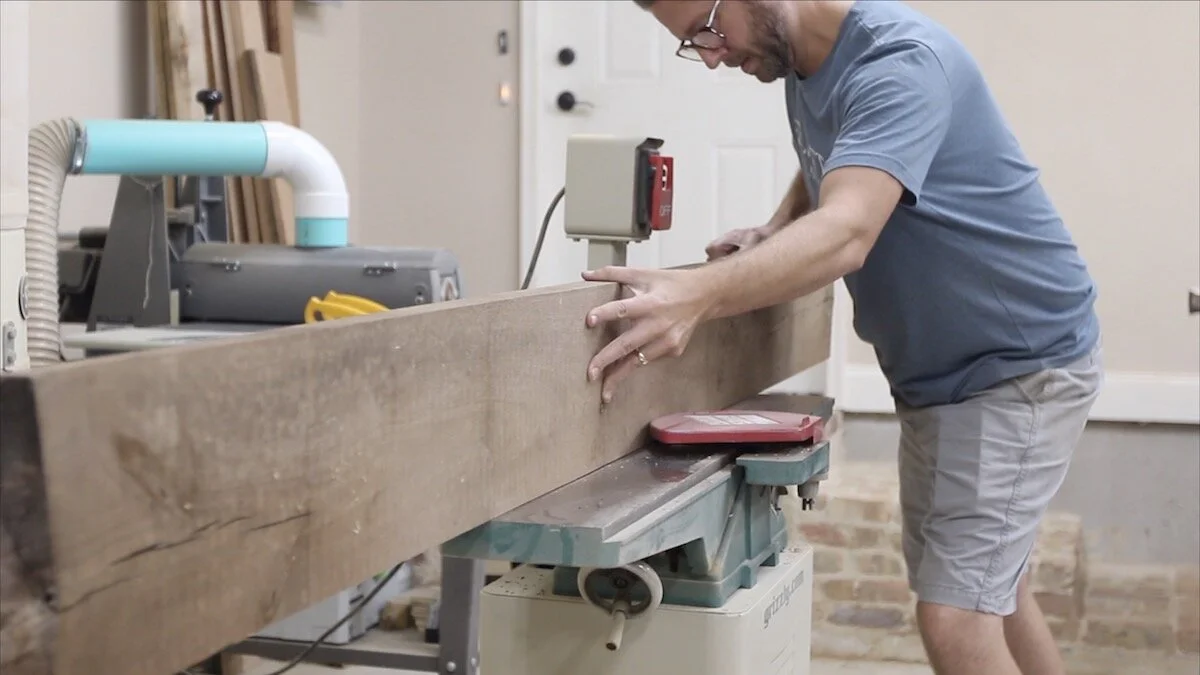
FLATTENING THE SLABS:
I tried to do some flattening using a melamine jig I have used in the past to run through my planer, but these boards were just too long, so it was not working well. My friend Brandon lives near me and I knew he had a router flattening sled, so I took the boards to his shop and he helped me flatten them there.
I'll link to Brandon's channel, Maddux Woodworks, below. Go check it out. It made a huge mess in his shop, so I'm thankful he let me do that.
Even his flattening sled wasn't quite long enough to flatten the whole 101" length I needed, so when I got back to my shop, I had to bring the last little bit down with a hand plane.
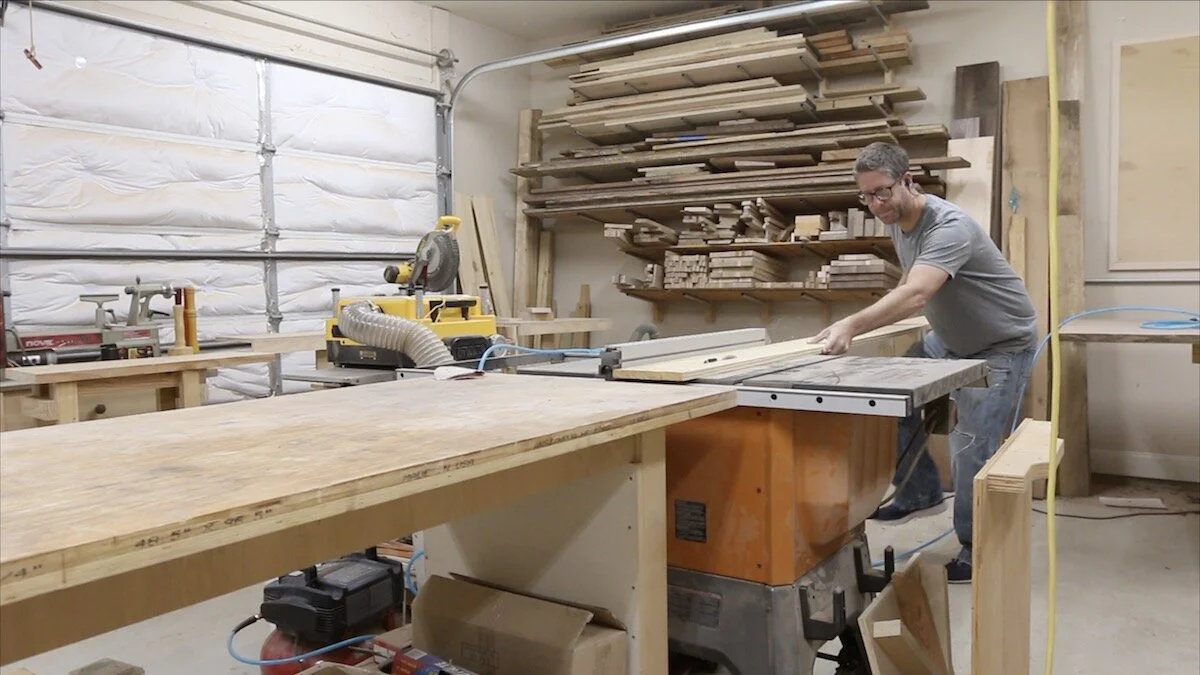
I started getting one flat edge and then I could rip the other side at the table saw. This would be for the internal pieces, not the ones that were keeping the live edge.
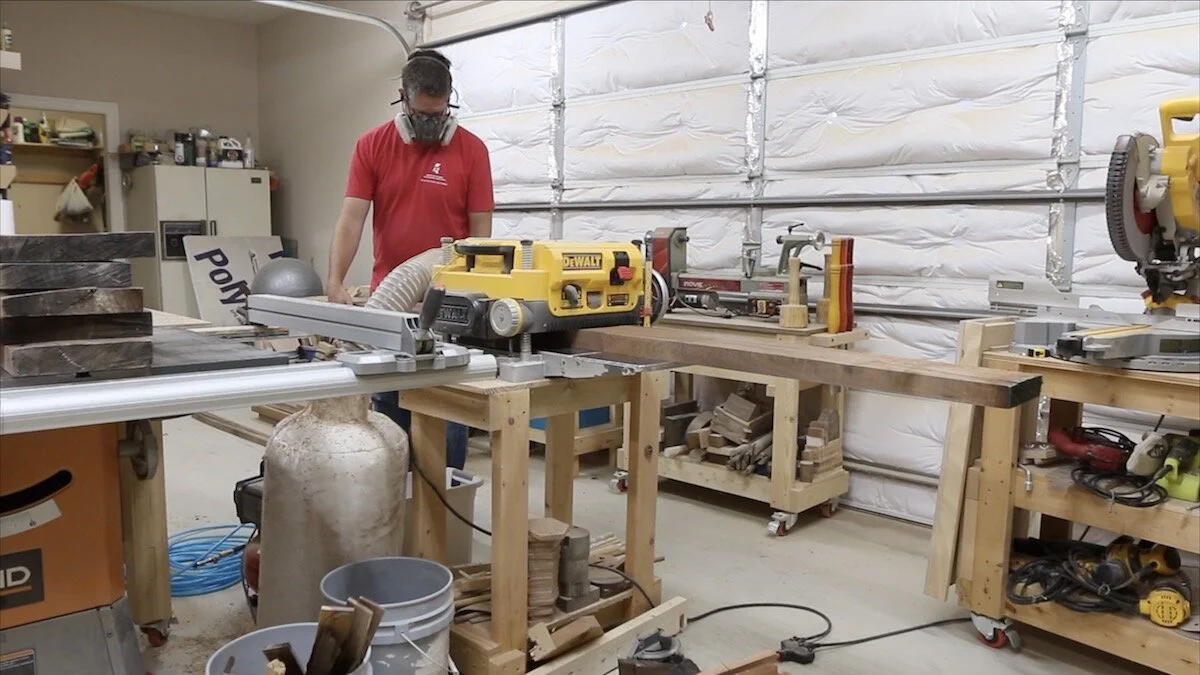
Then, I just brought them all to a consistent thickness at the planer.
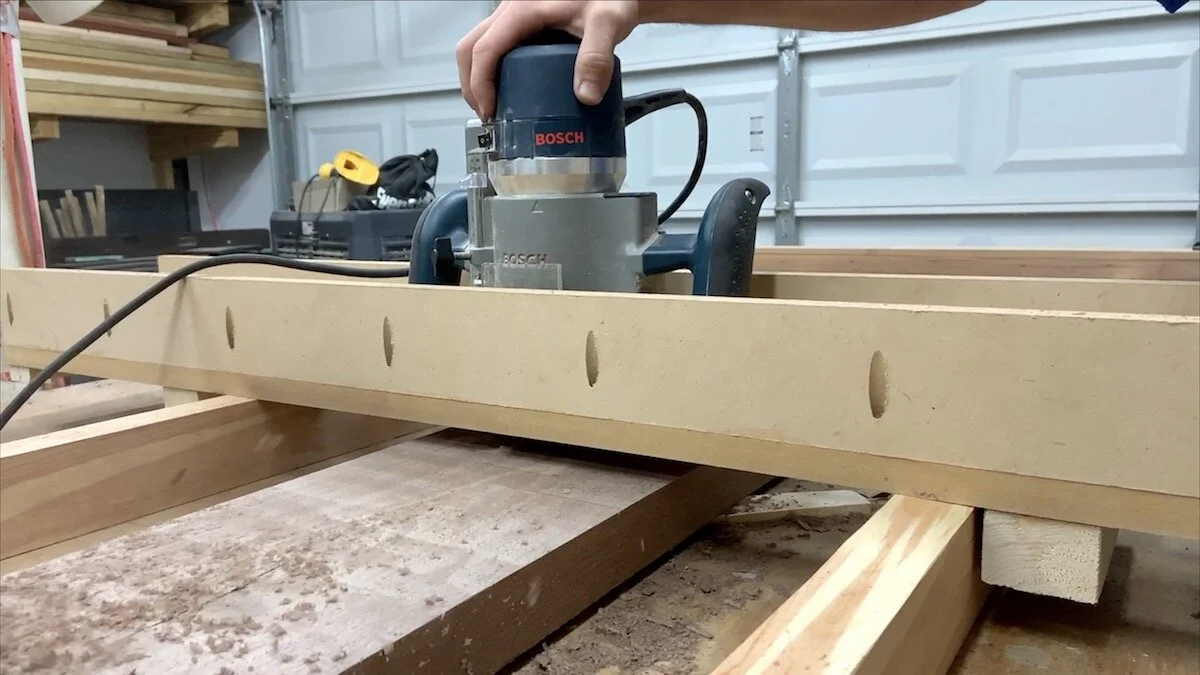

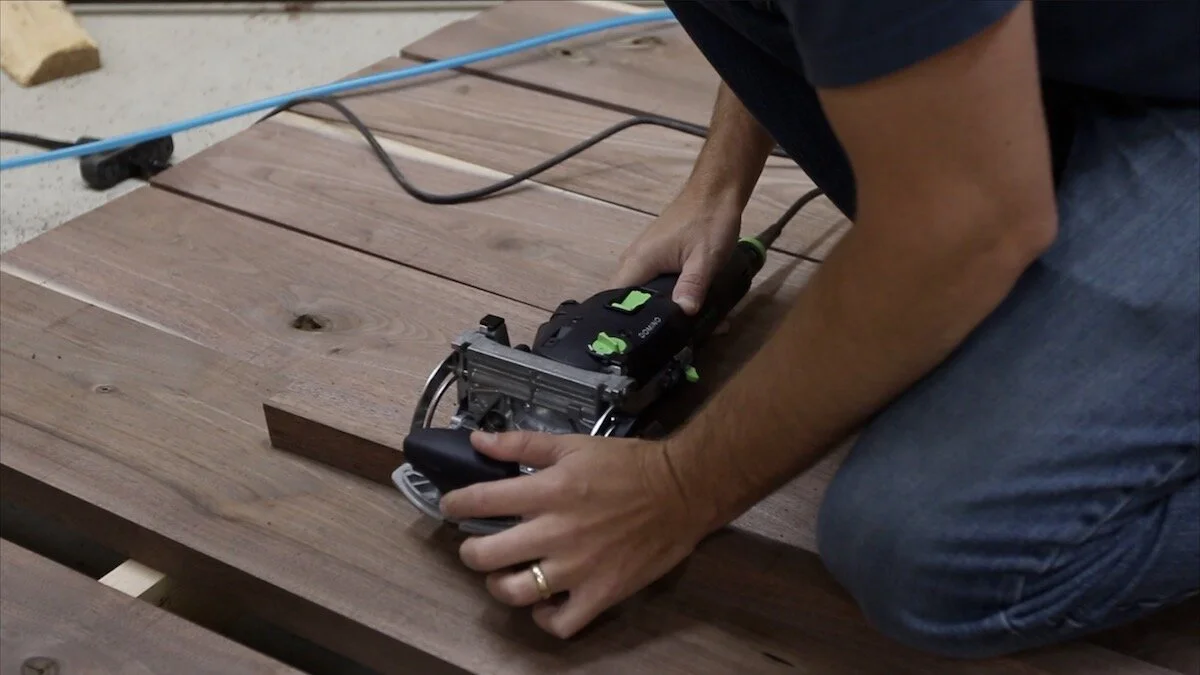
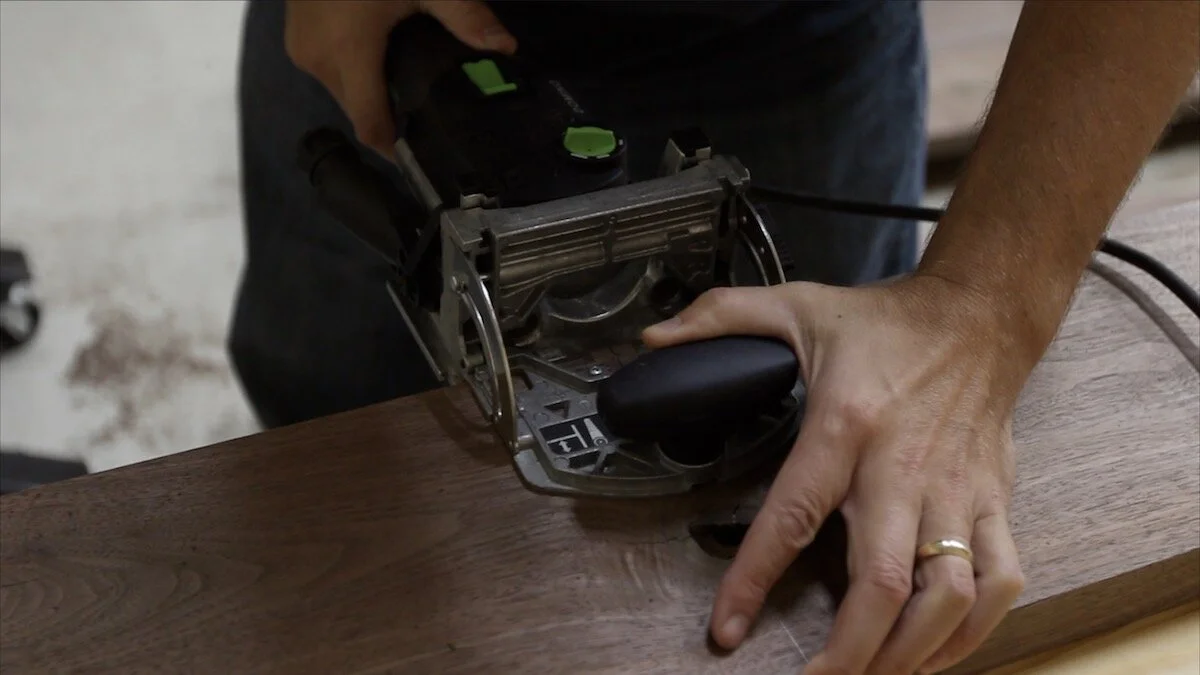
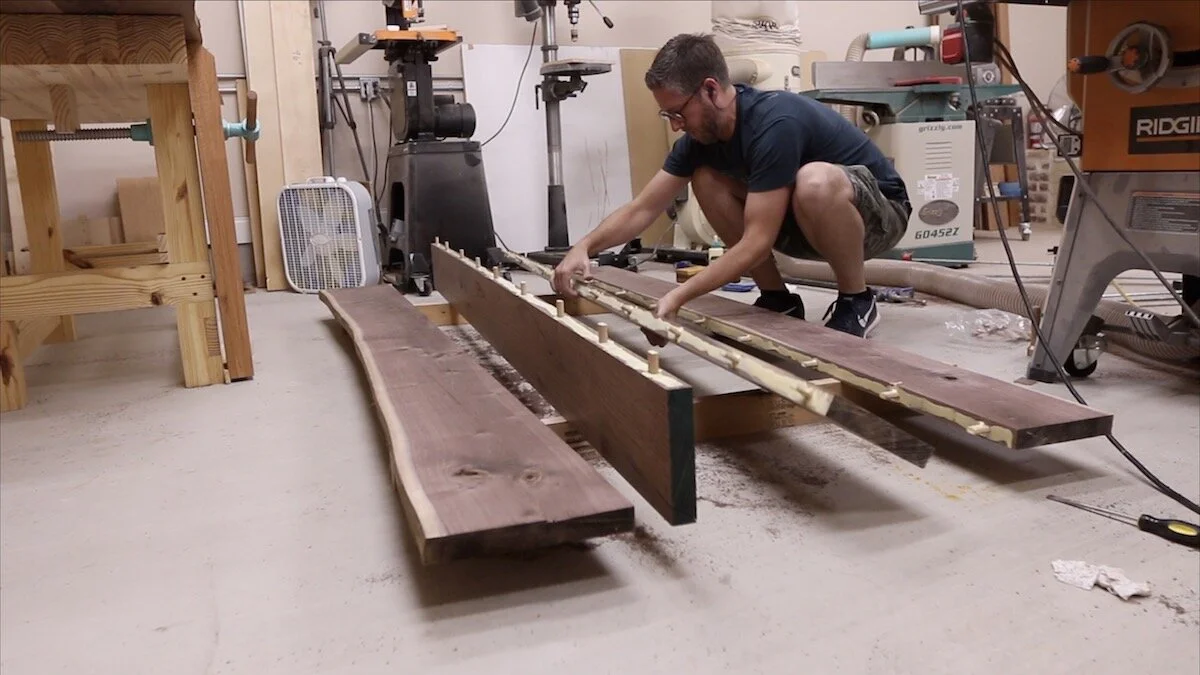
ADDING FLOATING TENONS:
Then, it was back to laying them all out, getting ready to glue up.
I marked out where I wanted to add dominos and then proceeded to drill about 100 holes with my Domino mortiser.
GLUING THE SLABS:
I decided to take this glue up in stages...only trying the first few boards at once. As you can see, I was just a little too narrow, so I had to add one small strip to the mix.
I tried clamping the first section together before realizing my mistake...
The next day, I started gluing up the rest of the pieces. I decided to try a few more at a time this time. I am using Titebond II so there is not too much working time with the glue. It was a little bit stressful.
Now, it was time for the final glue up. I had a couple of long pipe clamps that would work, but when I tried to use two of my parallel clamps together, it didn't go so well. I ended up using some ratchet straps I had and those worked out just fine.

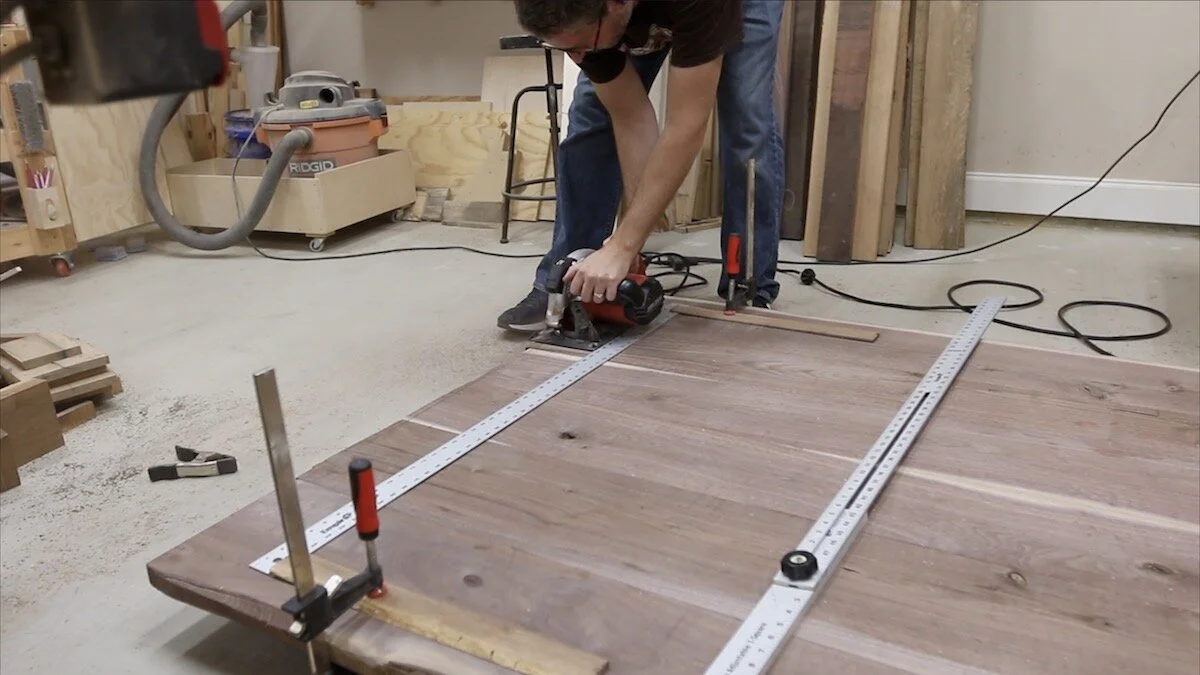
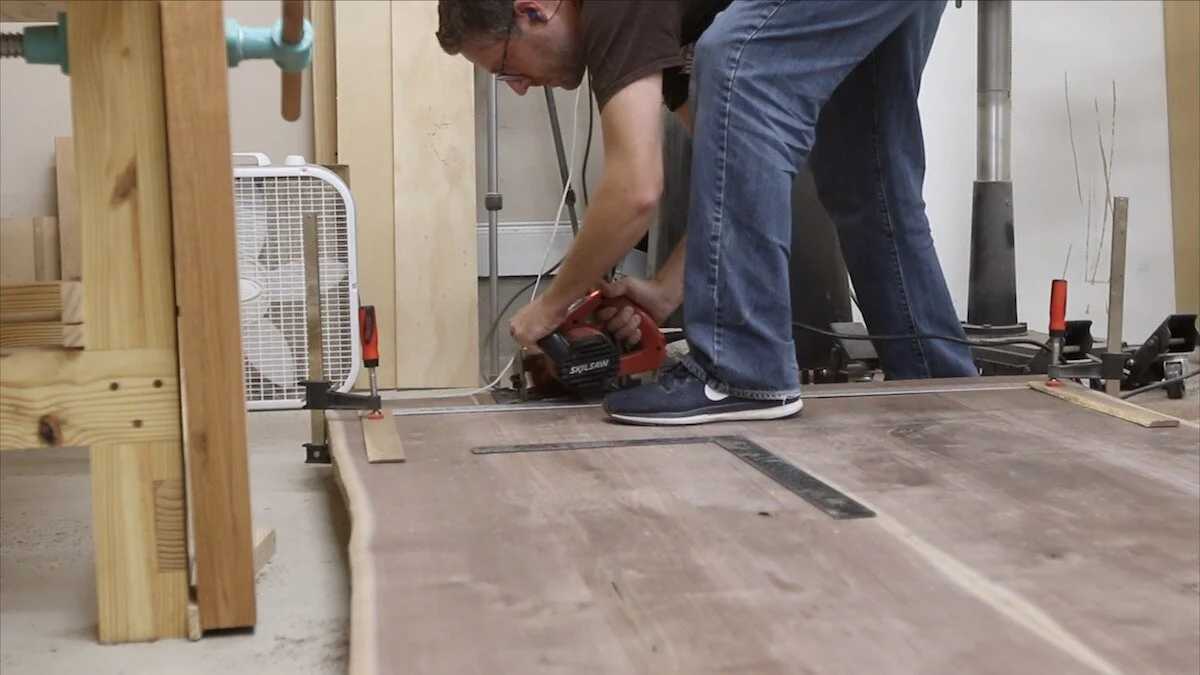
SQUARING UP THE DOOR:
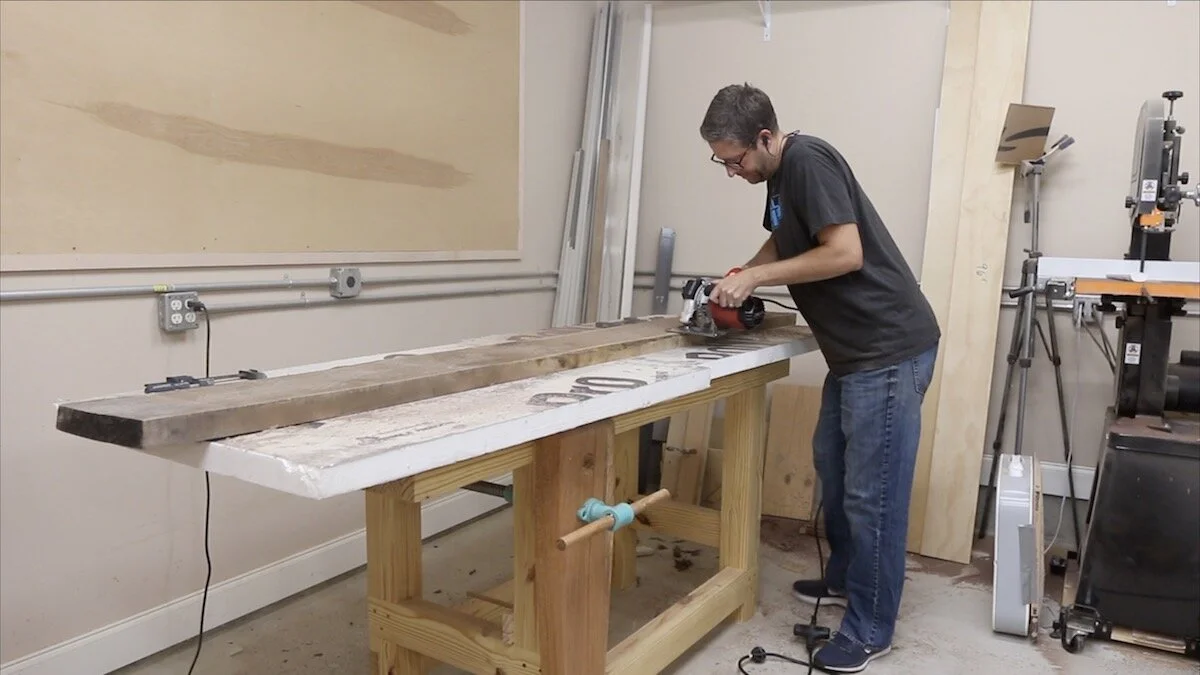
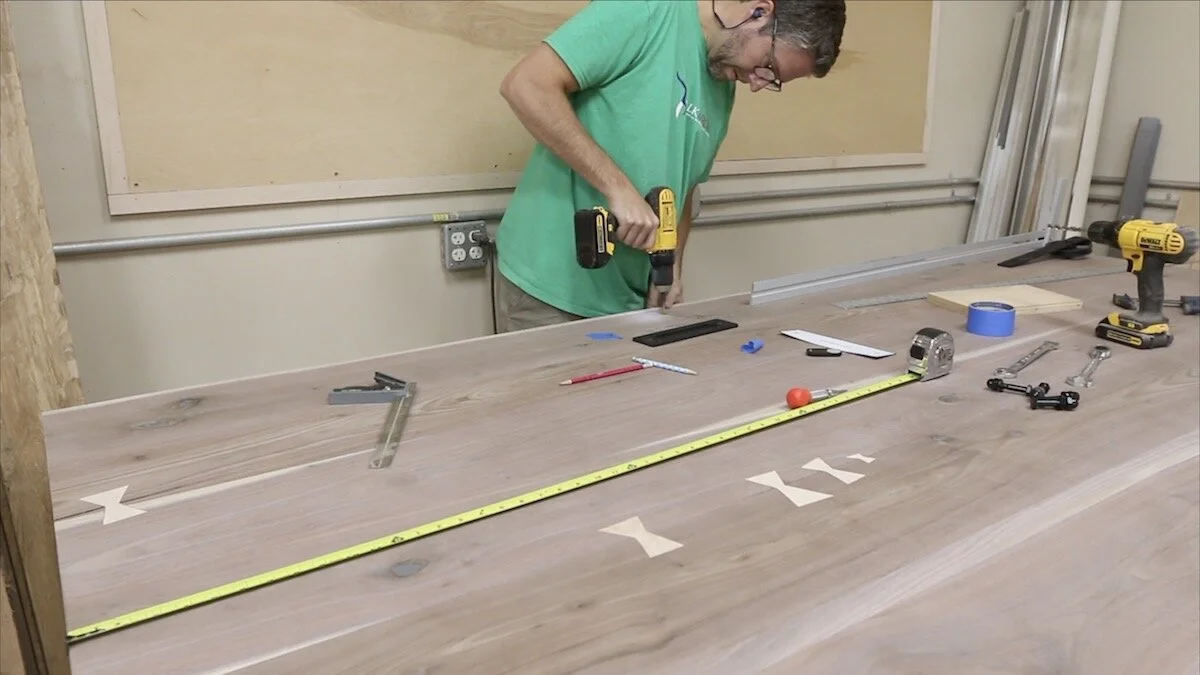
I marked a line on the bottom of the door and used my circular saw and a straight edge to establish one straight end of the door. Then, I used a T Square to bring a perpendicular line toward the other end of the door. I used this new line to draw the final top size so that the top and bottom of the door would be parallel with each other.
Then, I just trimmed the top of the door straight using the same method as the bottom of the door.
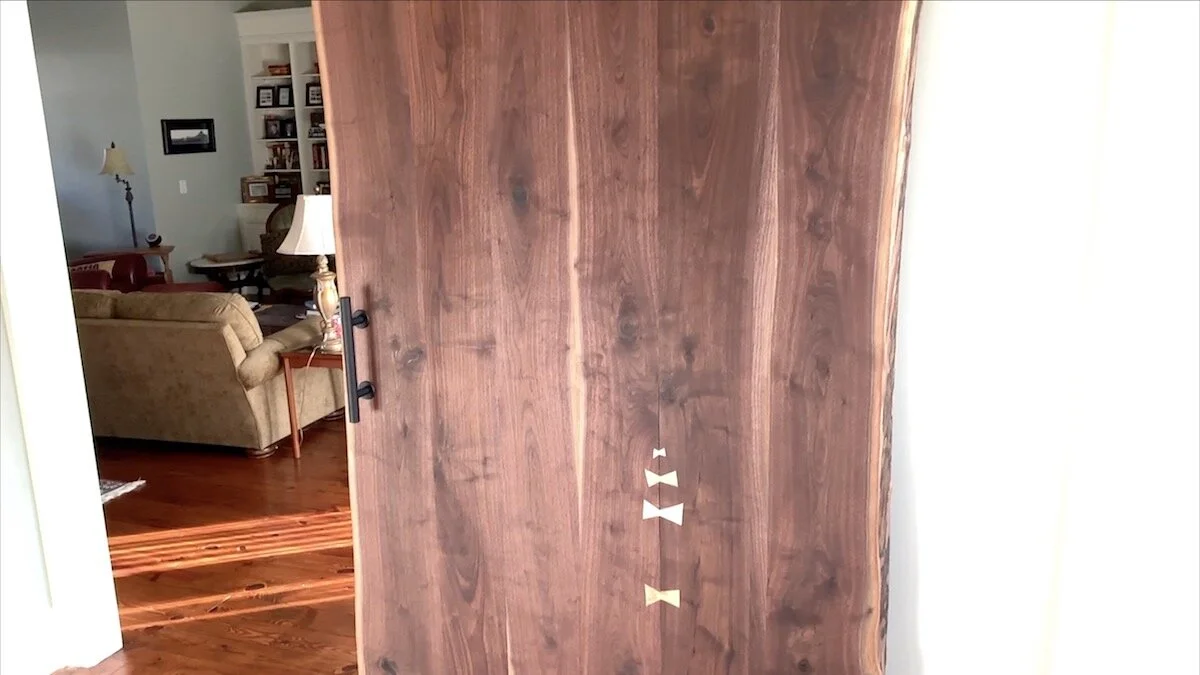
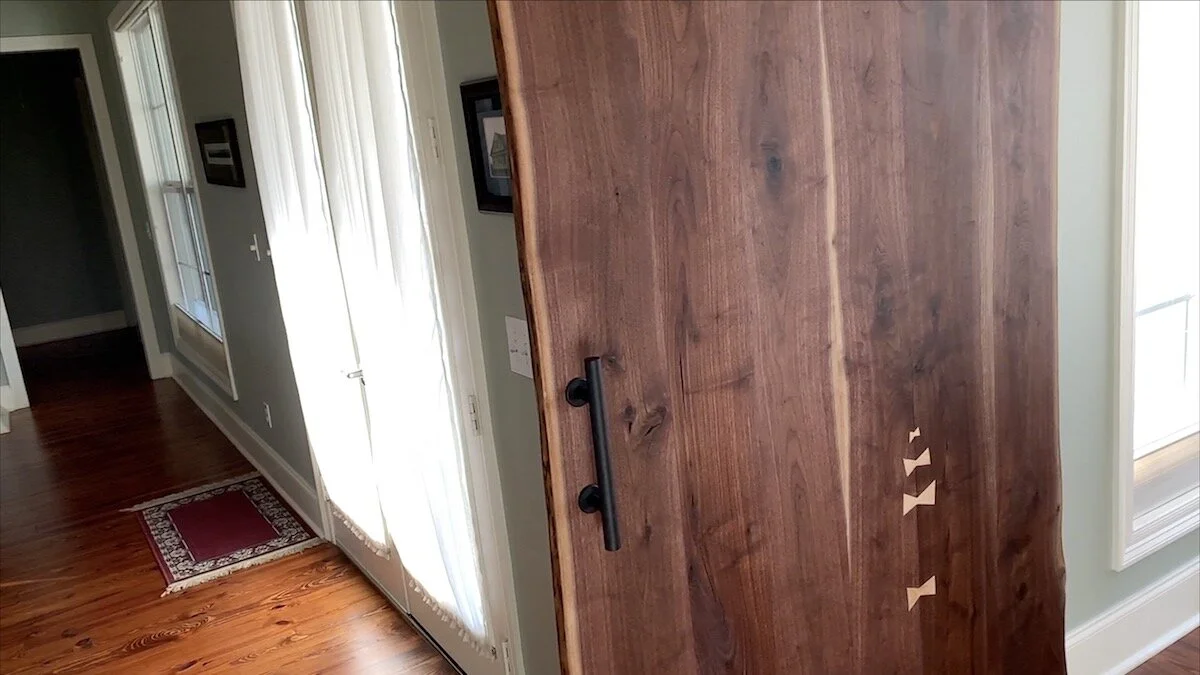
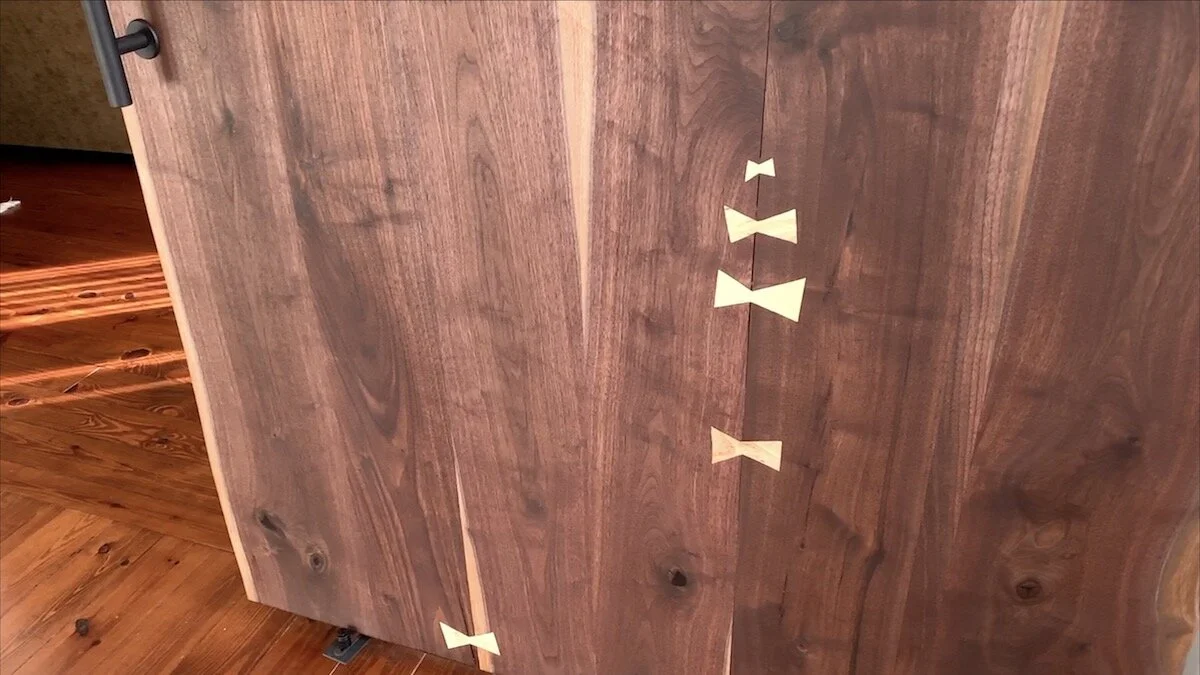
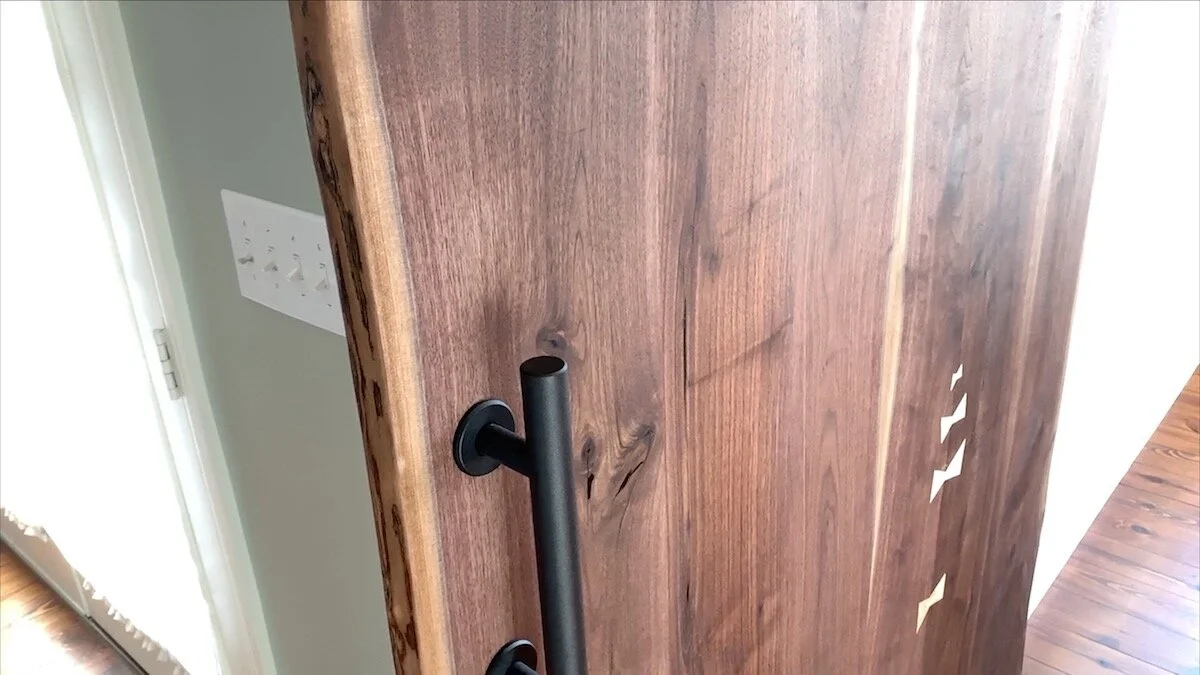
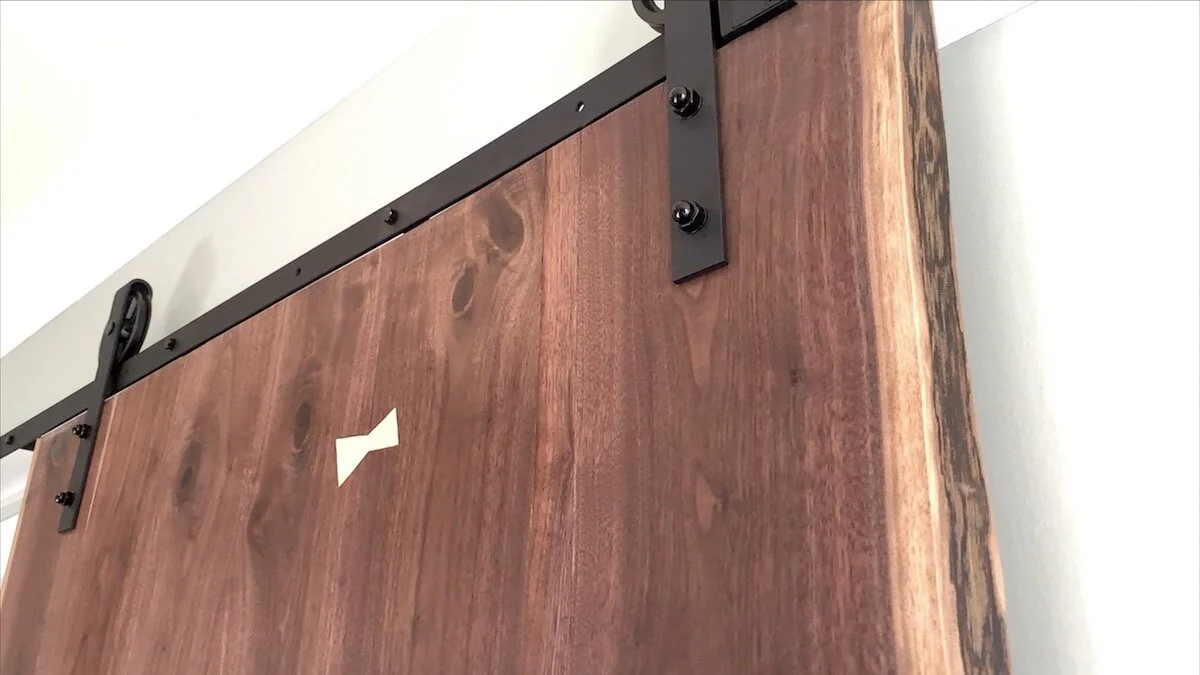
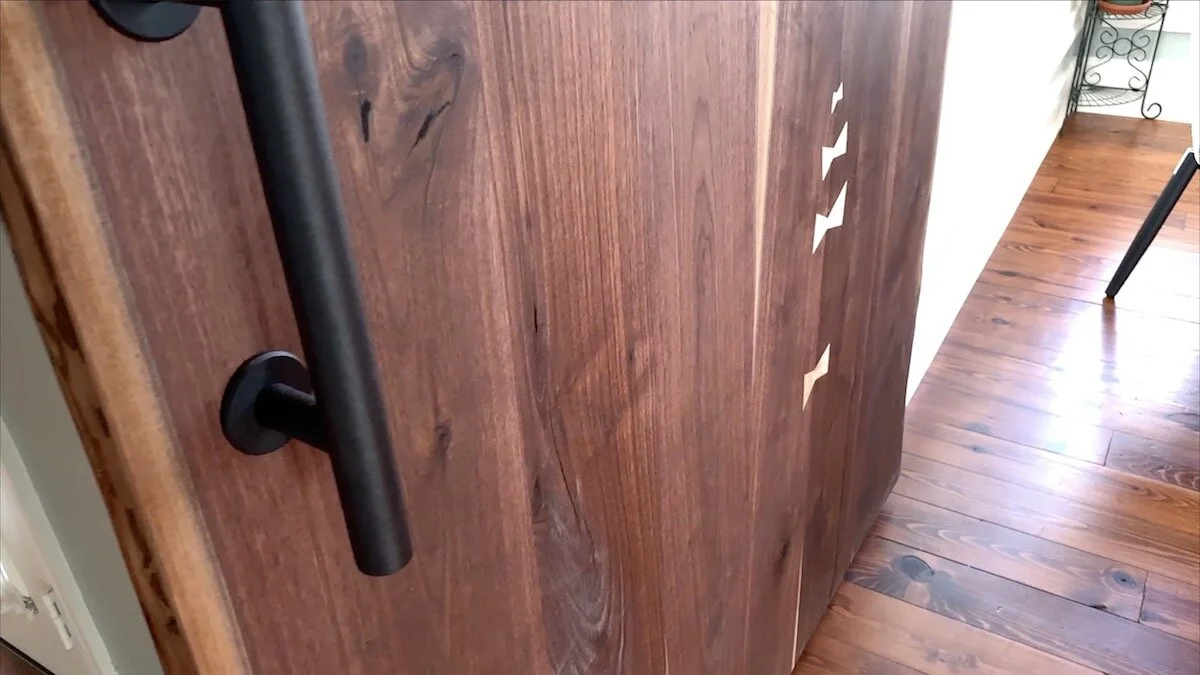
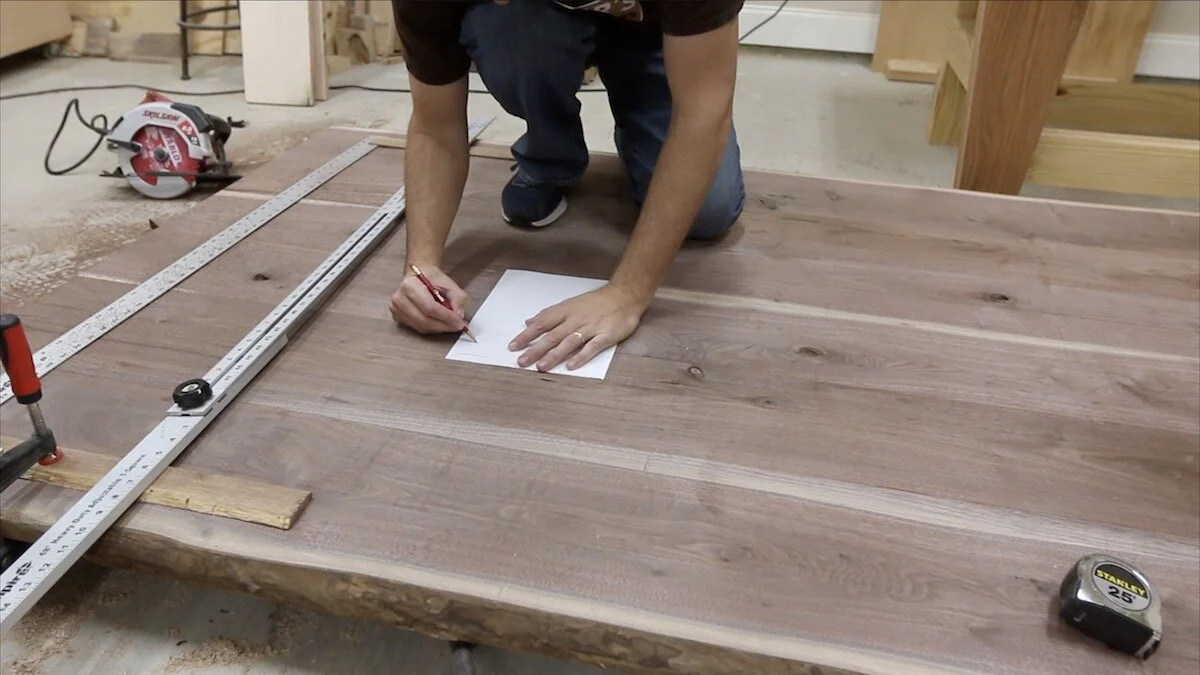
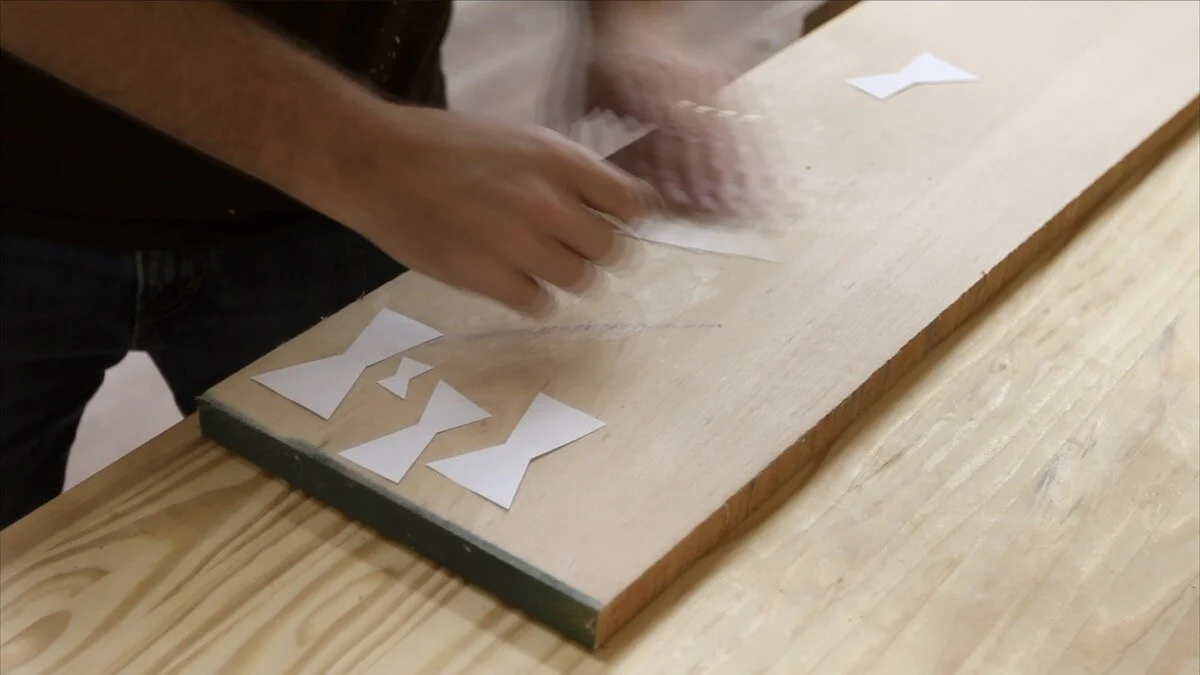
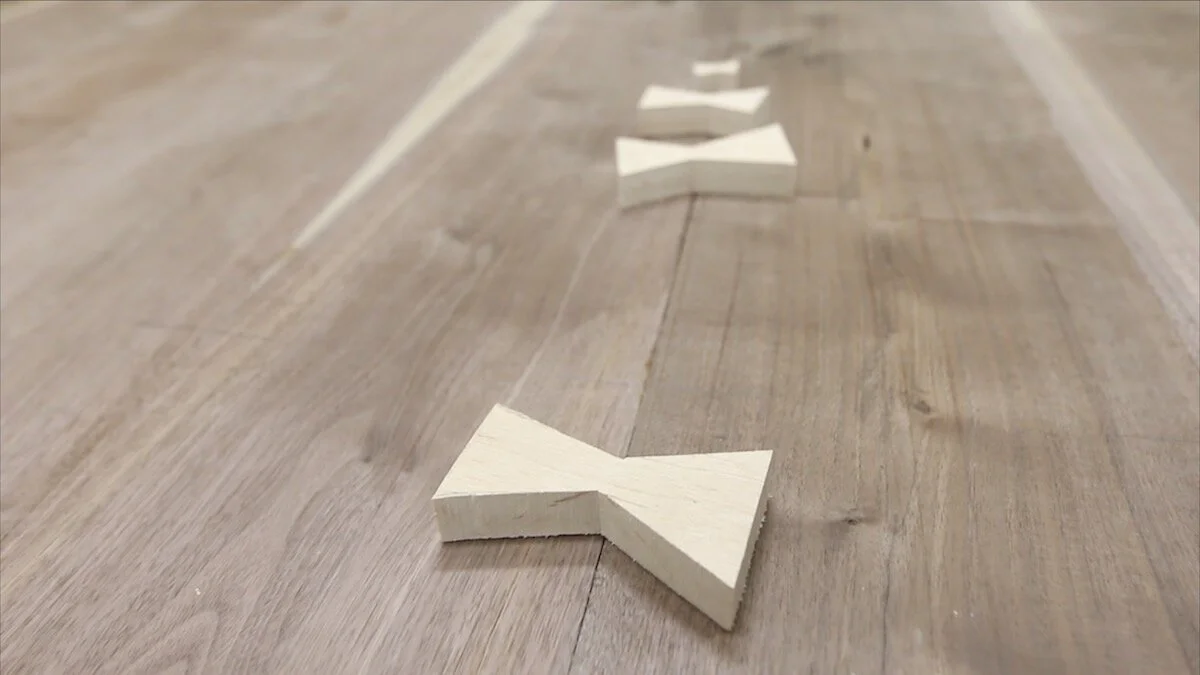
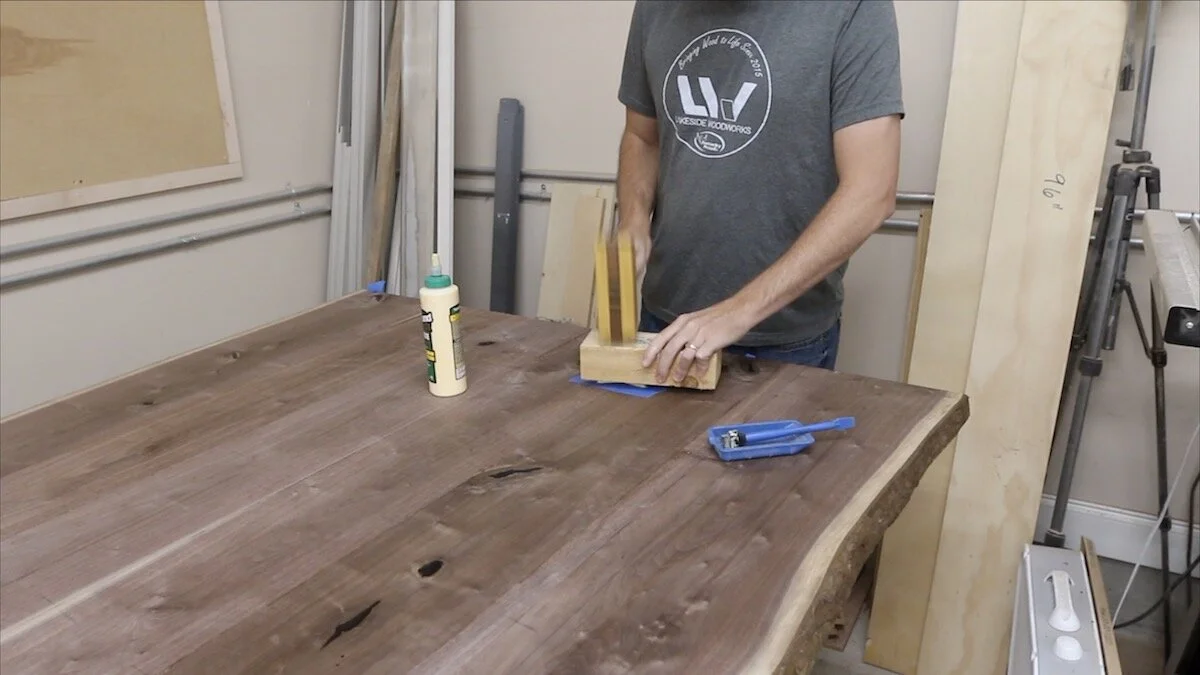
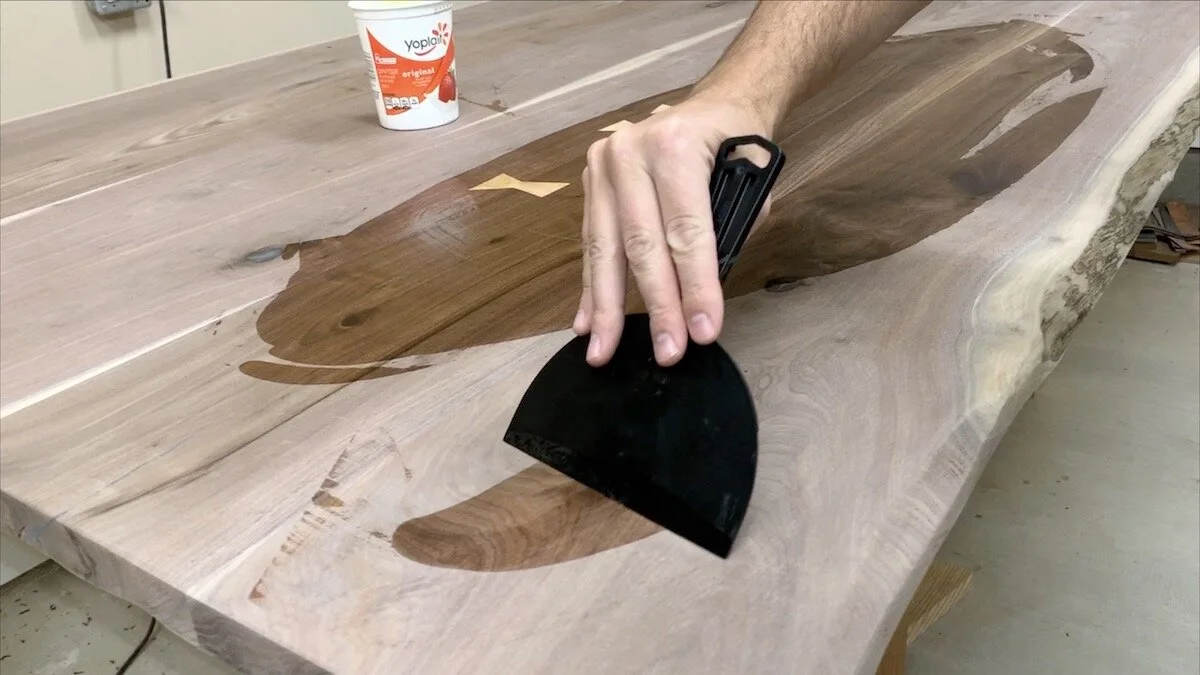
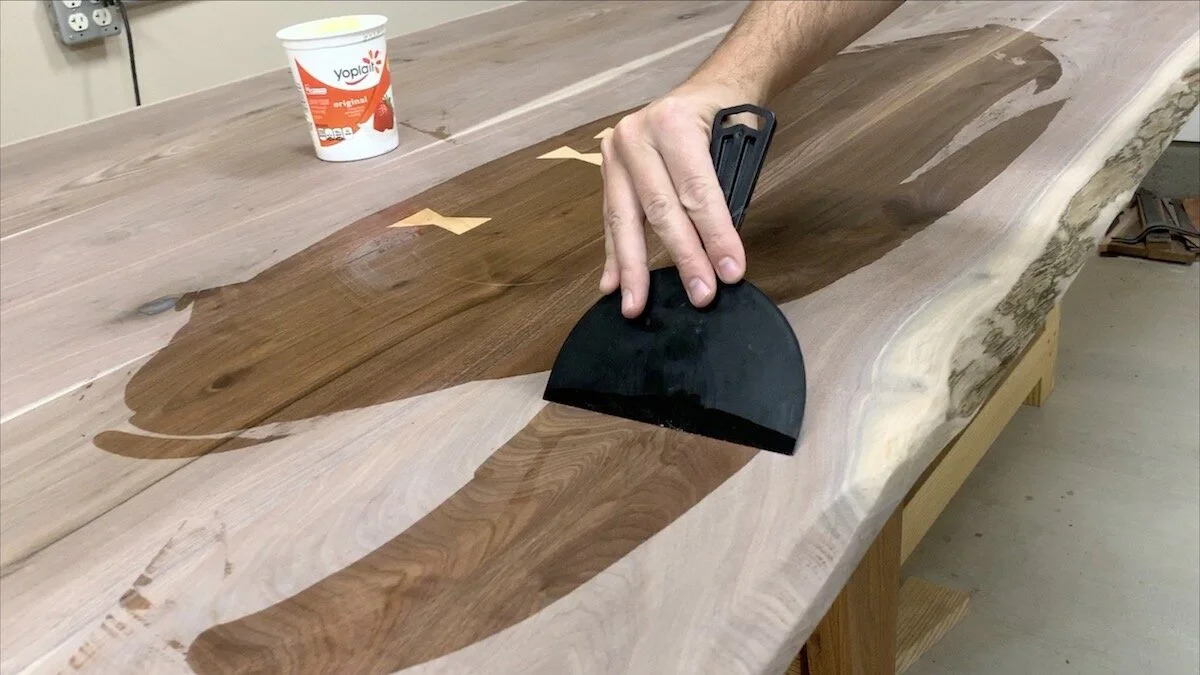
INLAYING SOME BOW TIES:
I traced out some bow ties by hand using some regular paper. I put the paper over the actual place on the door where I wanted them to be cut. This served two purposes: One was so that I could cut them out and leave them there to send a photo to the client. I wanted to make sure they were good with the positioning. Second was so that I could make sure the proportions of the bow ties looked good in those places.
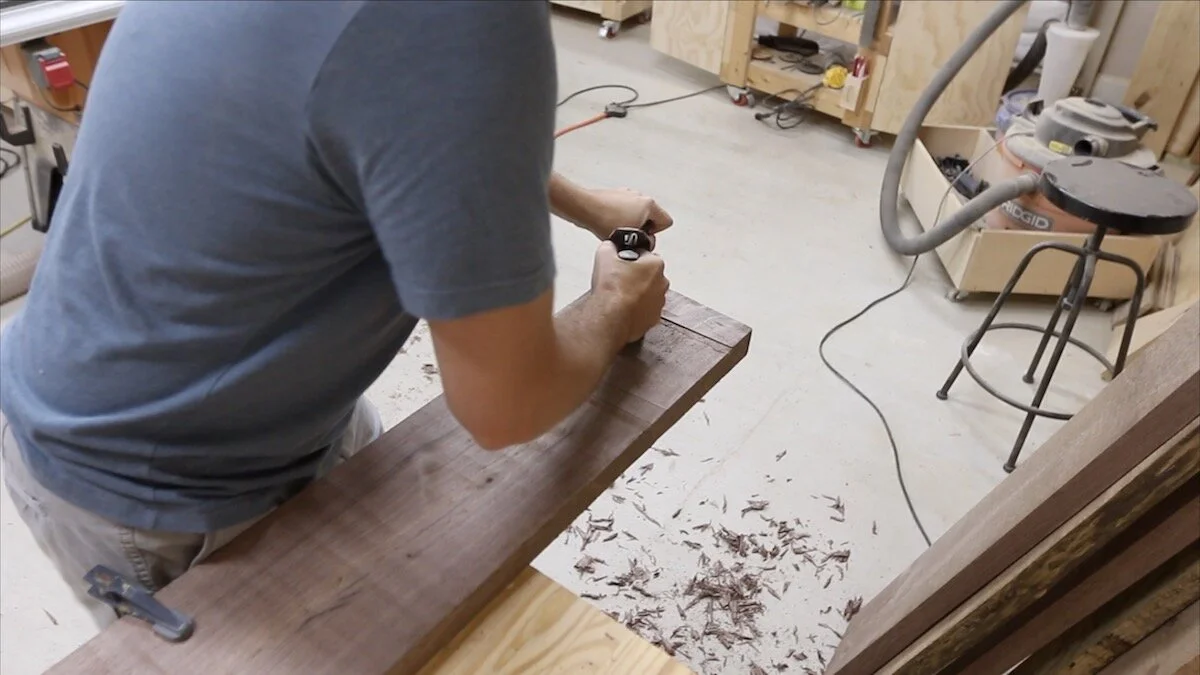
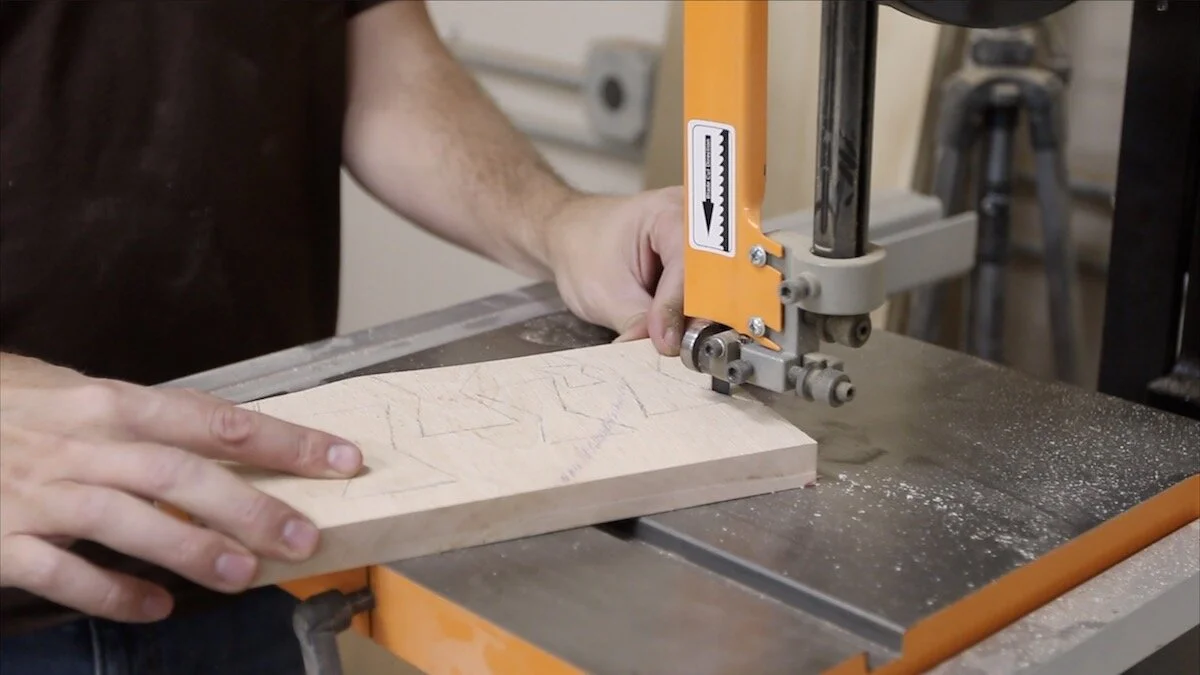
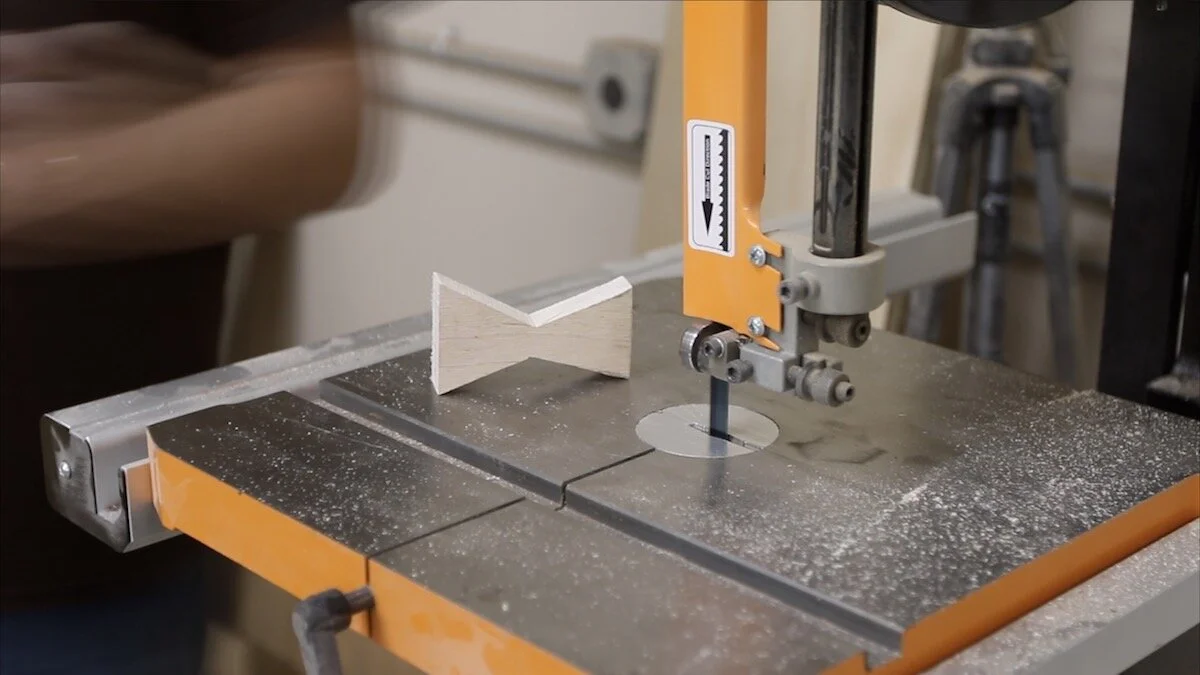
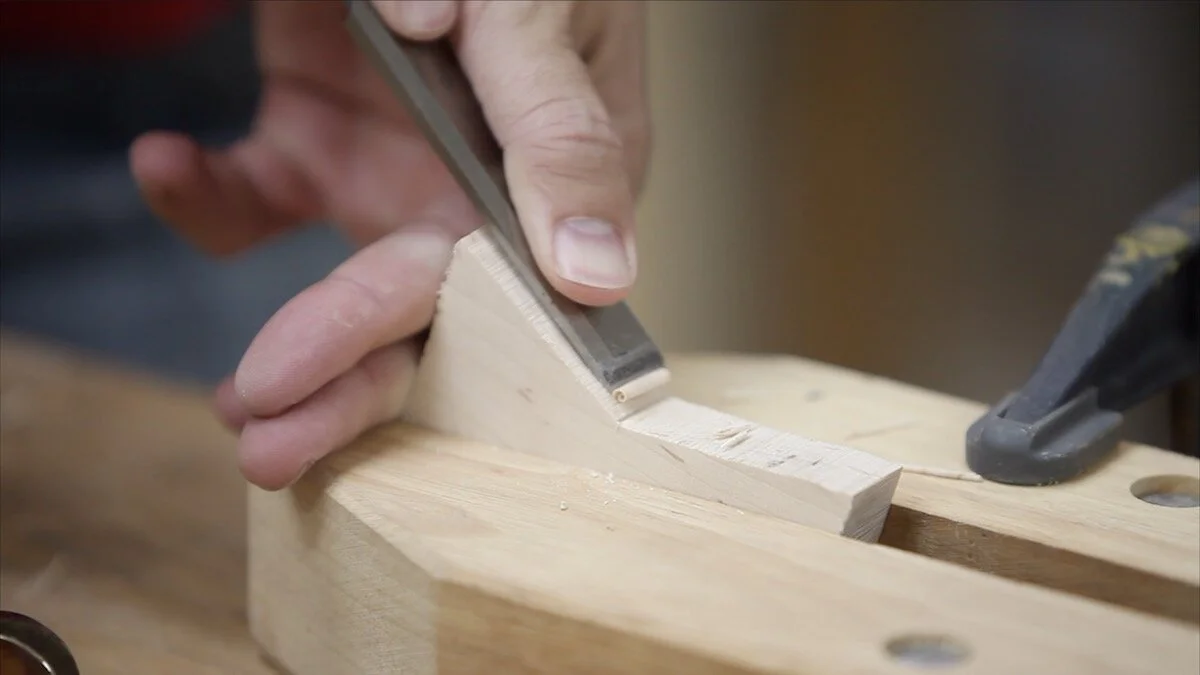
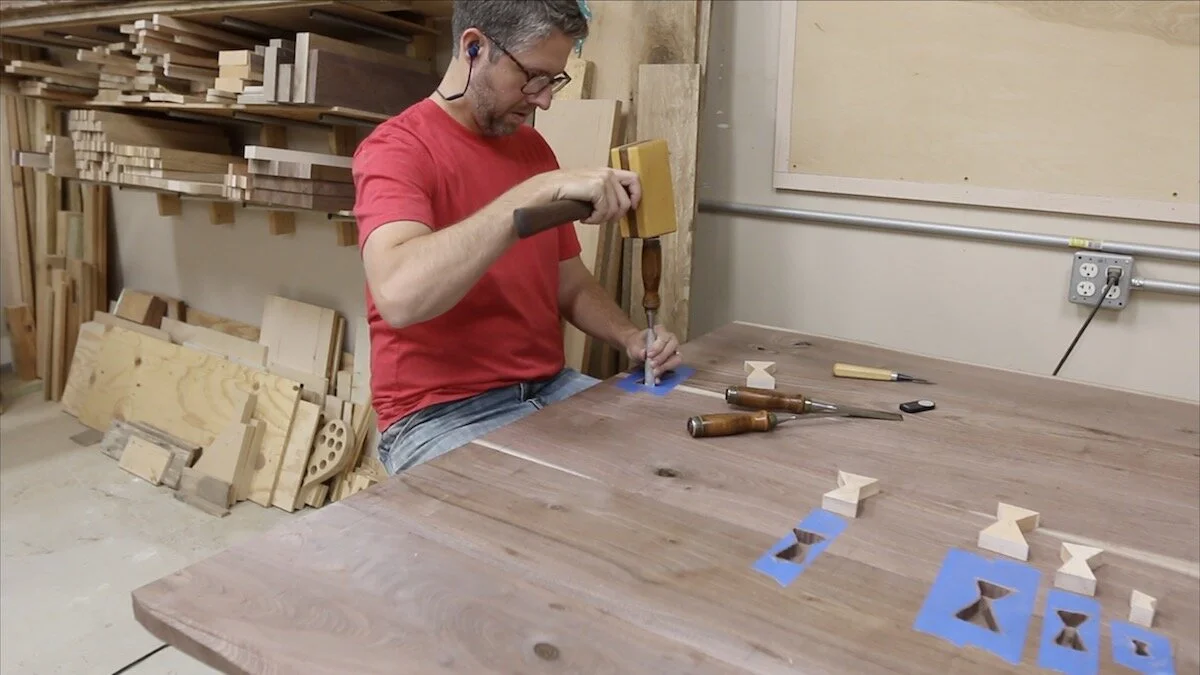
Then, I cut out the bowties at the bandsaw and refined the edges with my chisels.
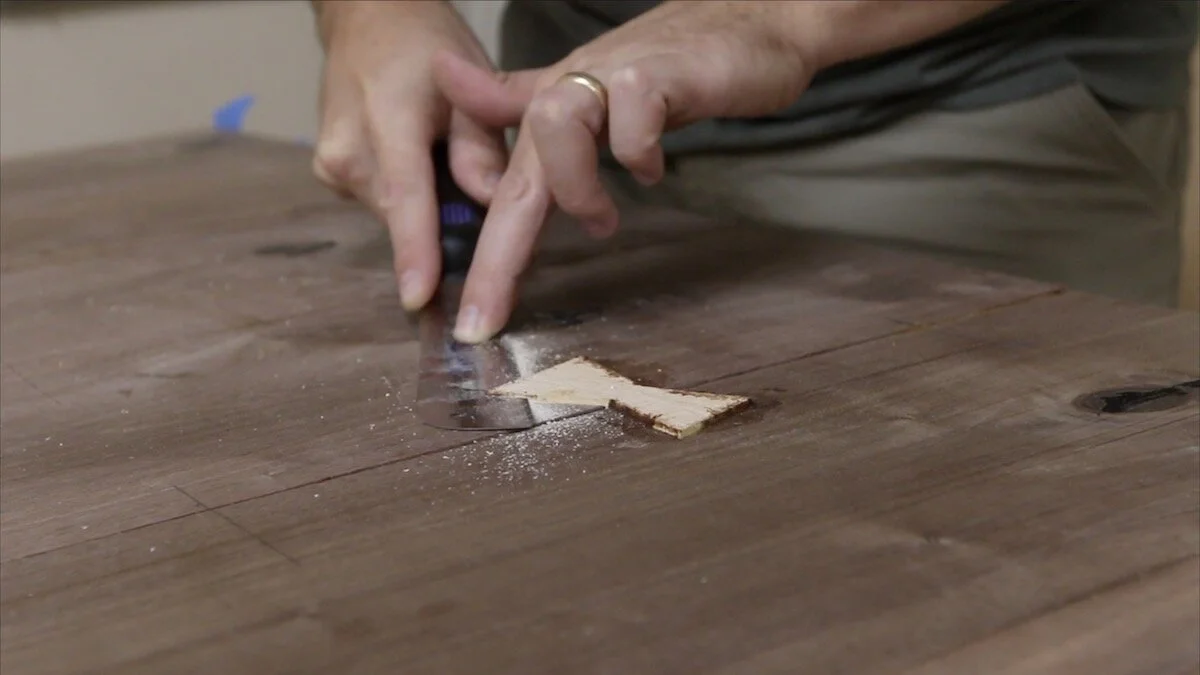
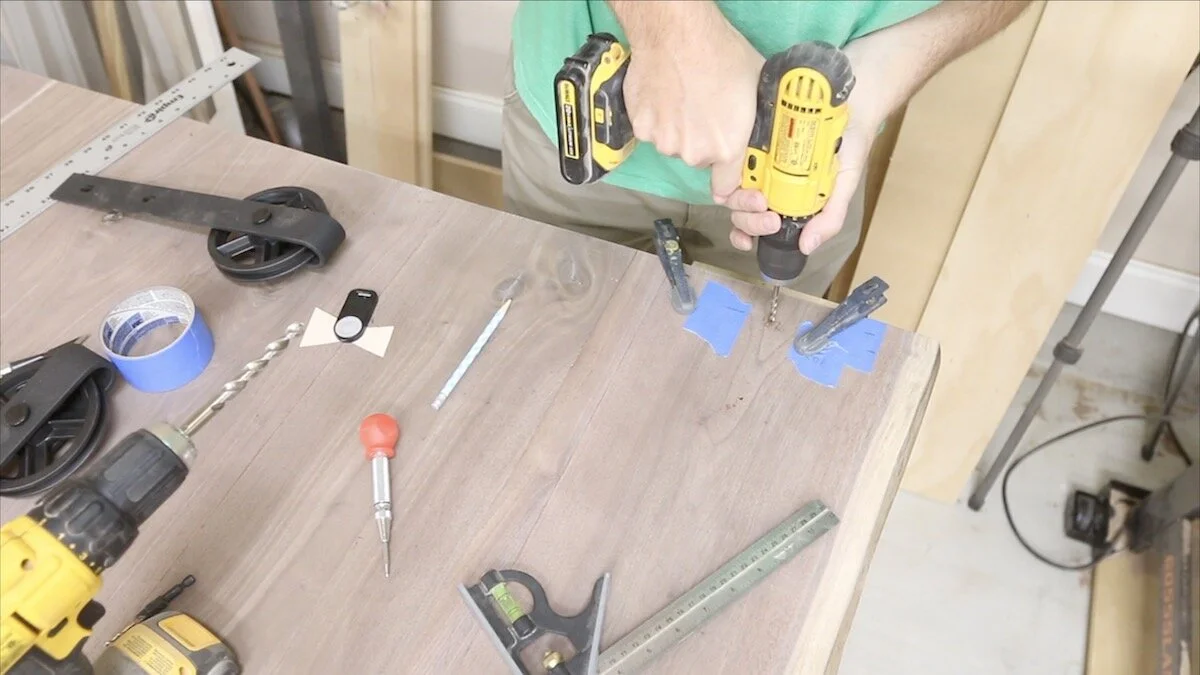
It was time to secure the bowties and cut the mortises for them. I'm not going to tell all about this process in this video, but if you're interested in this process using CA glue and blue tape, I'll link to another video of mine where I explain it in more detail.
I used the router to get rid of most of the waste material. Then, I came back with chisels and got the mortises just how they needed to be.
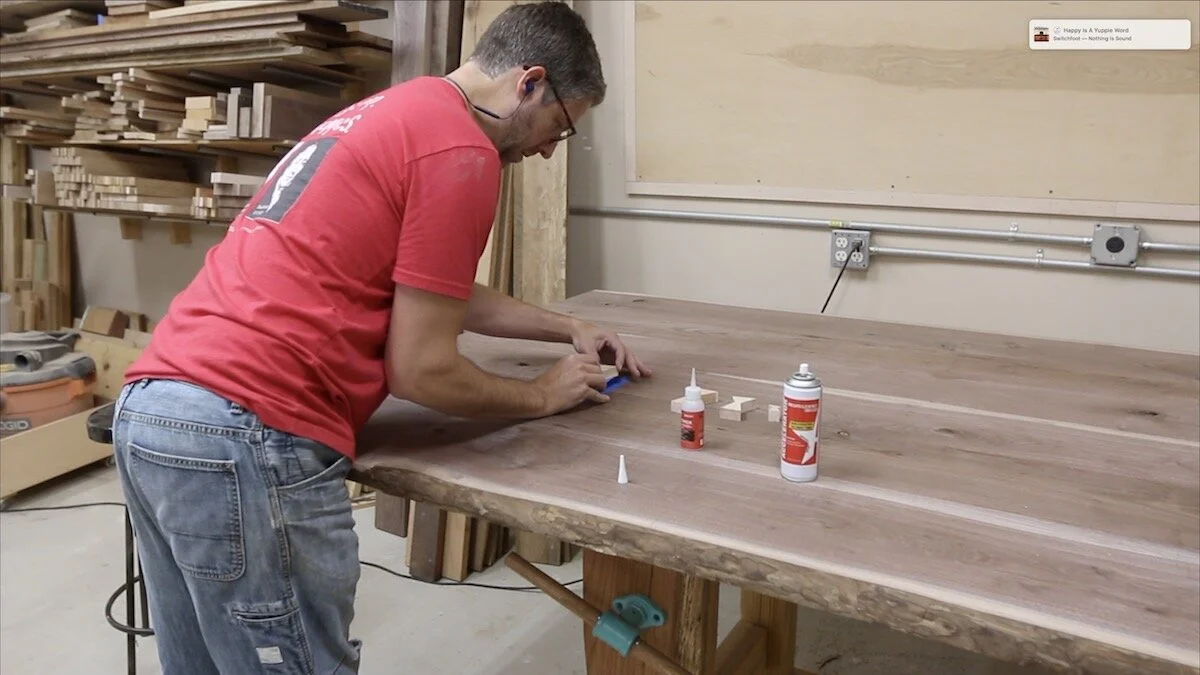


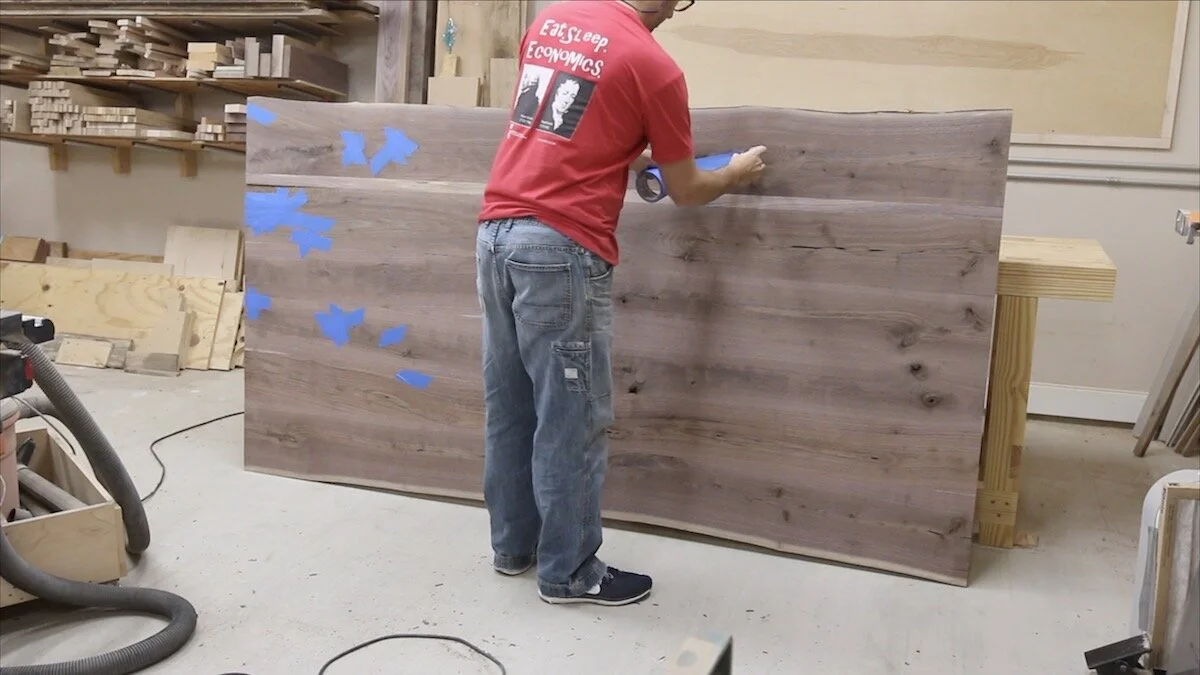
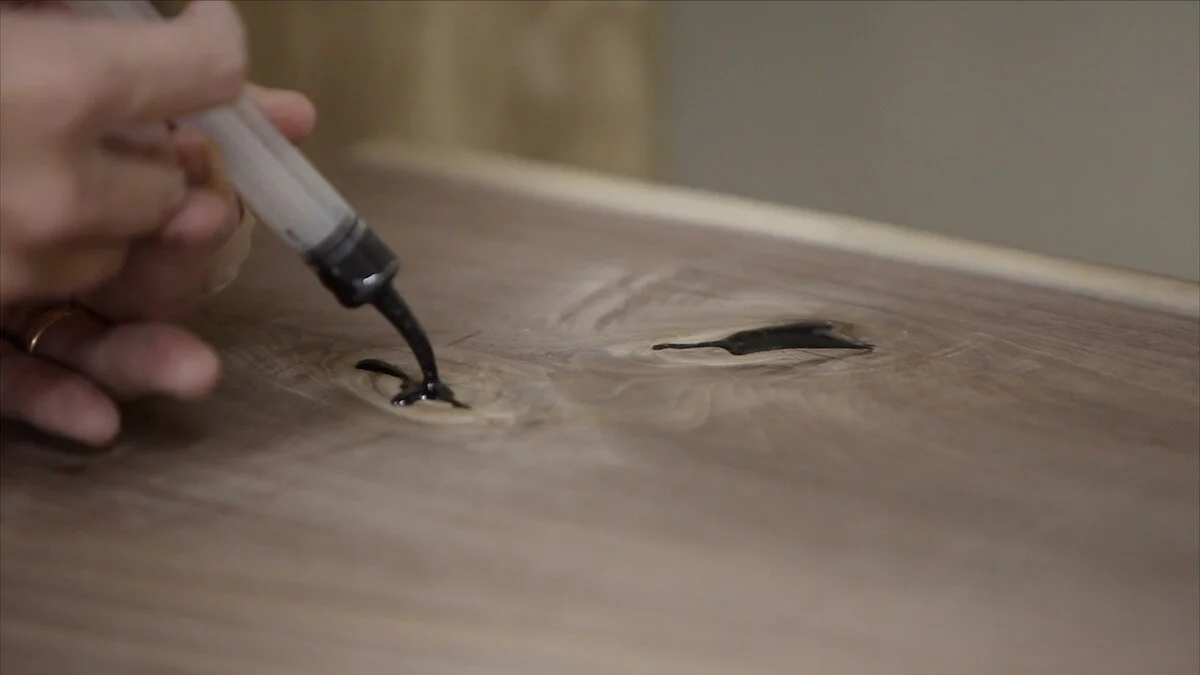
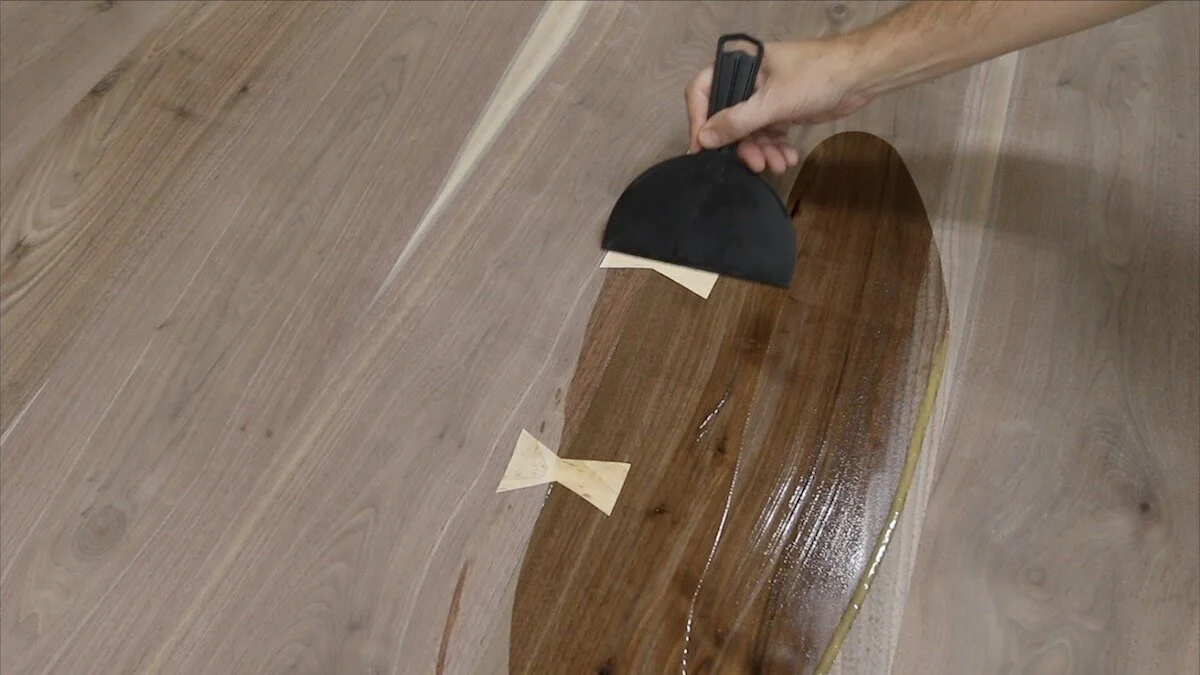
FILLING VOIDS WITH EPOXY:
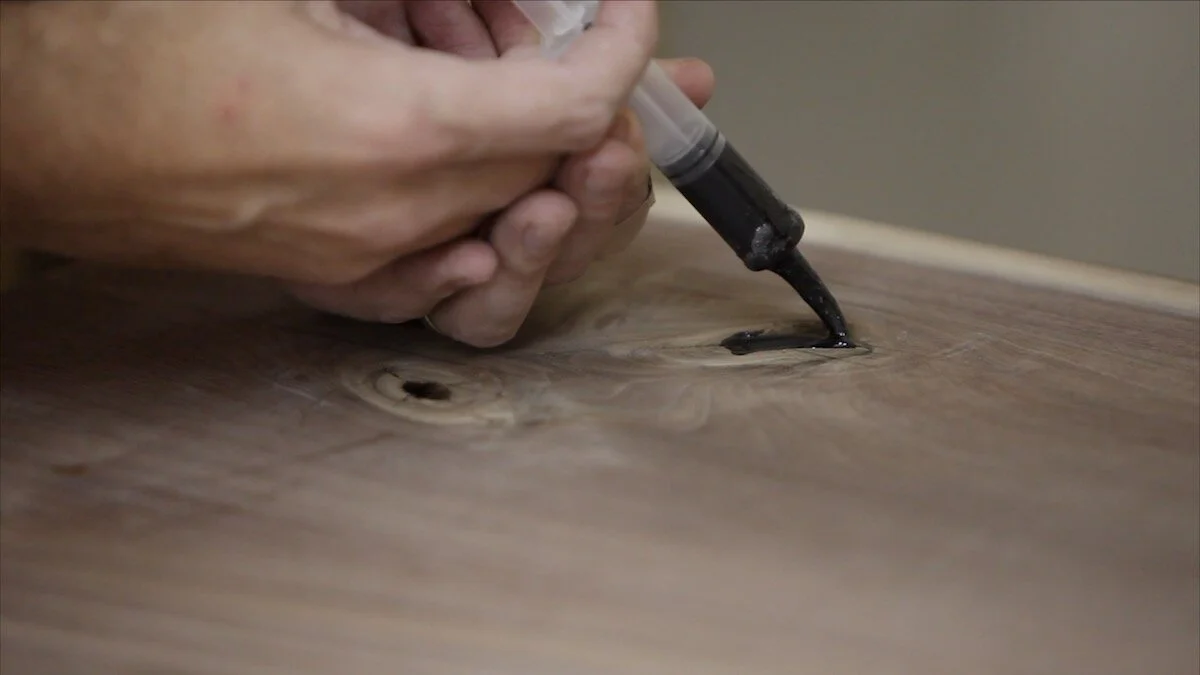
I flipped the door over and taped the bottom side wherever I saw a knot. I needed to do some epoxy filling, so this was needed.
I used a dental syringe to fill the voids with epoxy. This worked really well. I found a really cheap listing of these, so be sure to click on the link above in the “Tools & Materials” section. They’re handy for all kinds of things.
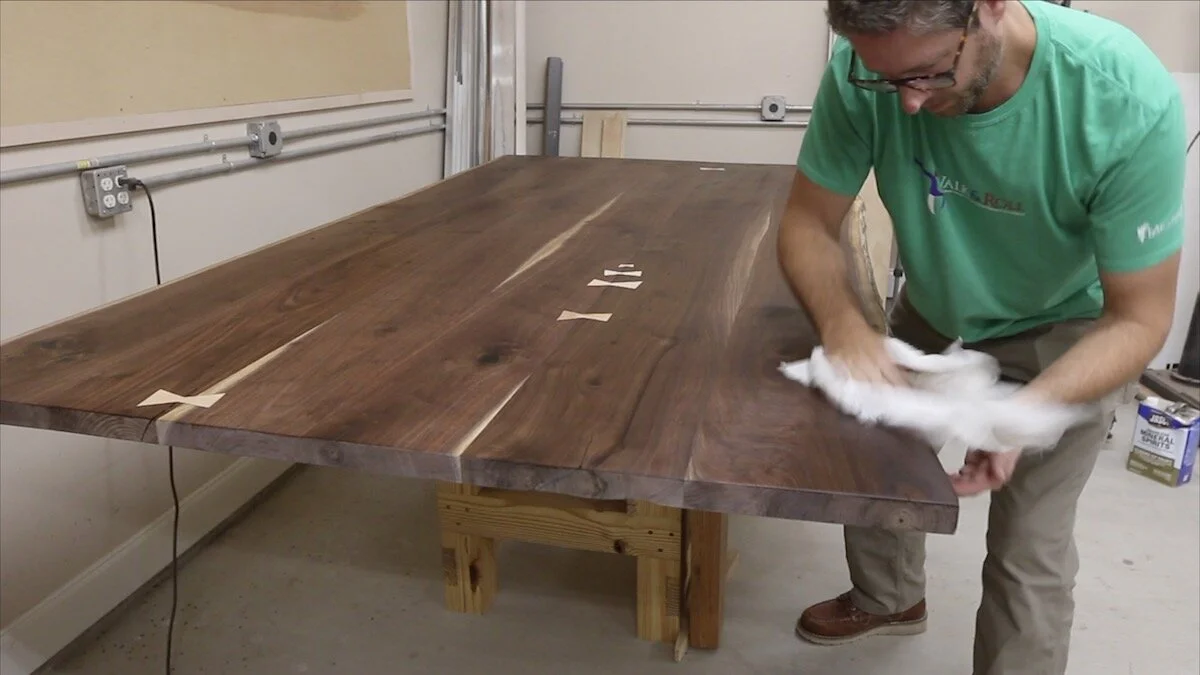
I glued in all of the bow ties using Titebond II wood glue and trimmed them flush.
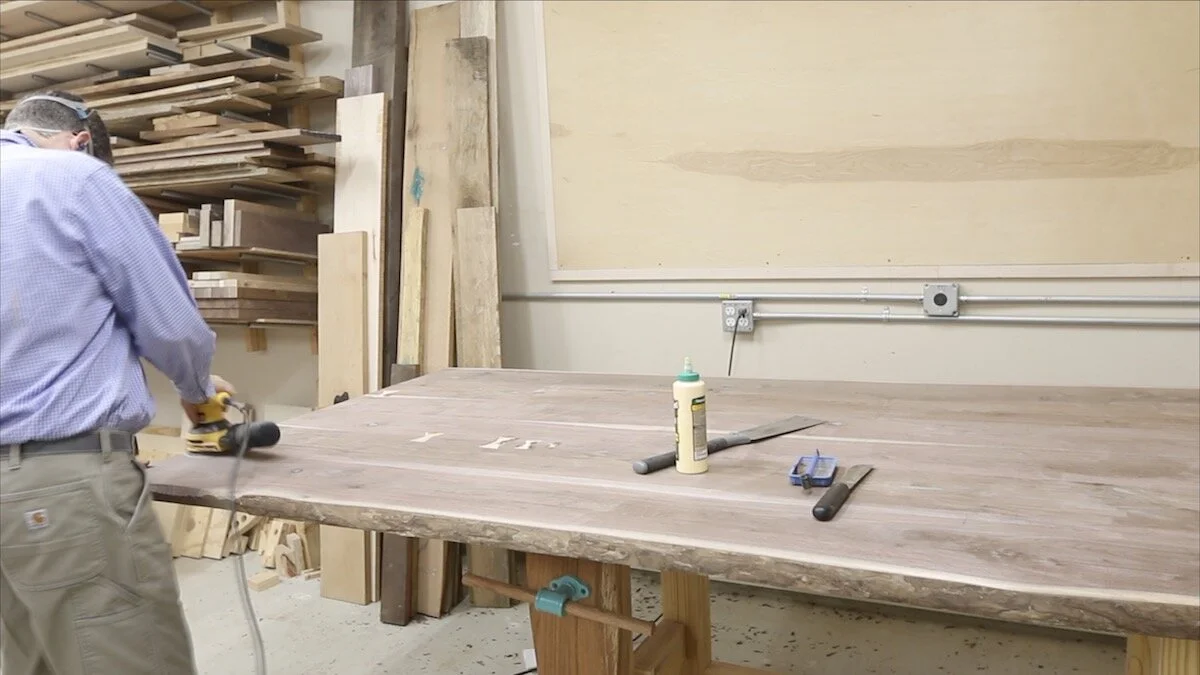
SANDING TO A PERFECT FINISH:
Then, there was what felt like forever in sanding. I worked up through the grits to make sure everything was very smooth.
MOUNTING BOARD:
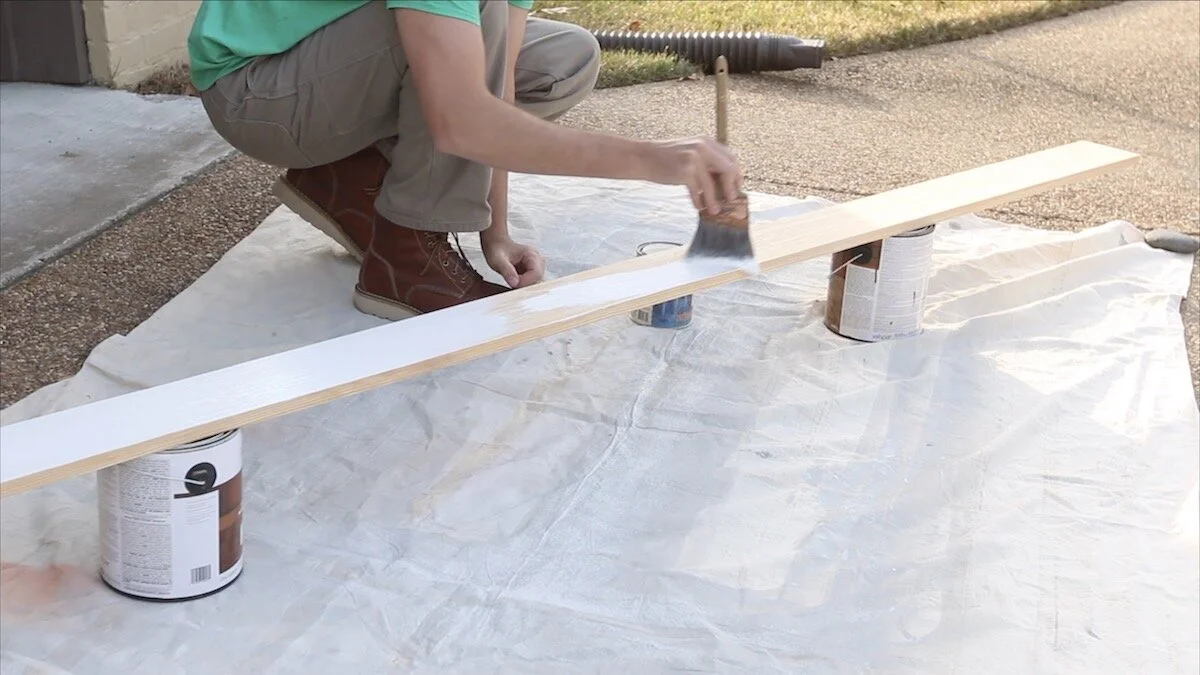
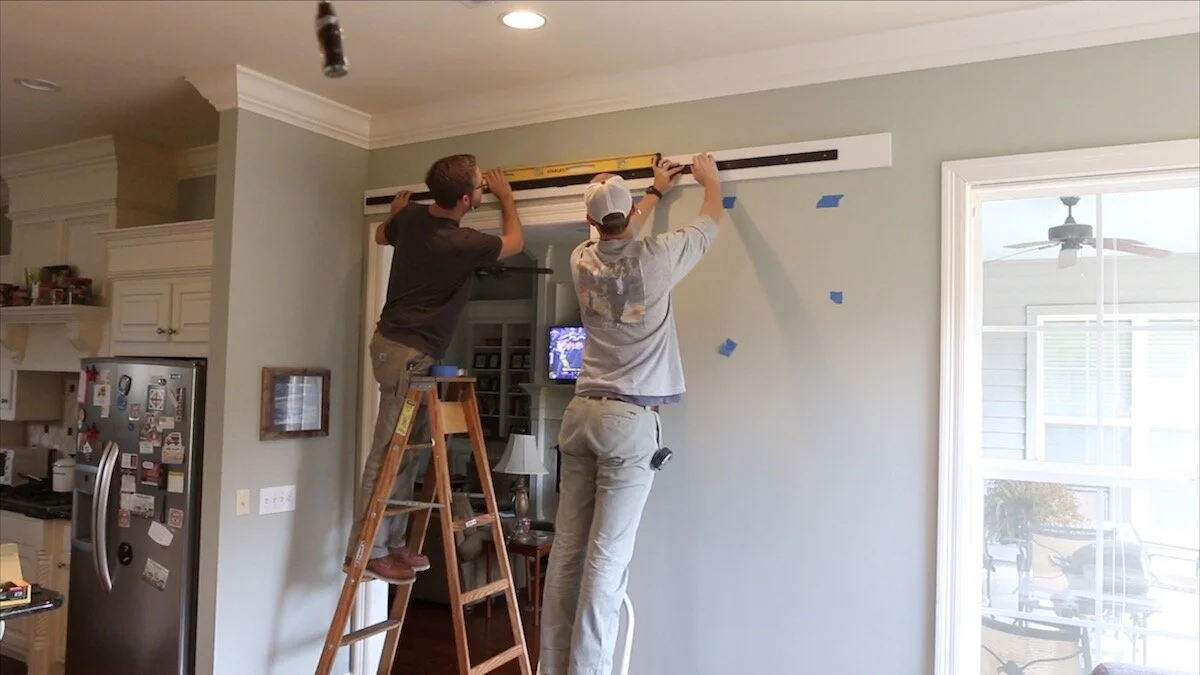
I turned my attention to the mounting board. The client wanted this to be the color of their trim, so I trimmed a board to size and painted it to match. I got the paint from my client so I was sure it would match.
This board is typically used to bring the door out from the wall just a little bit so it can clear the trim of the opening without hitting it. You don’t want to use something too thick, because then you’ll have a really big gap behind the door.
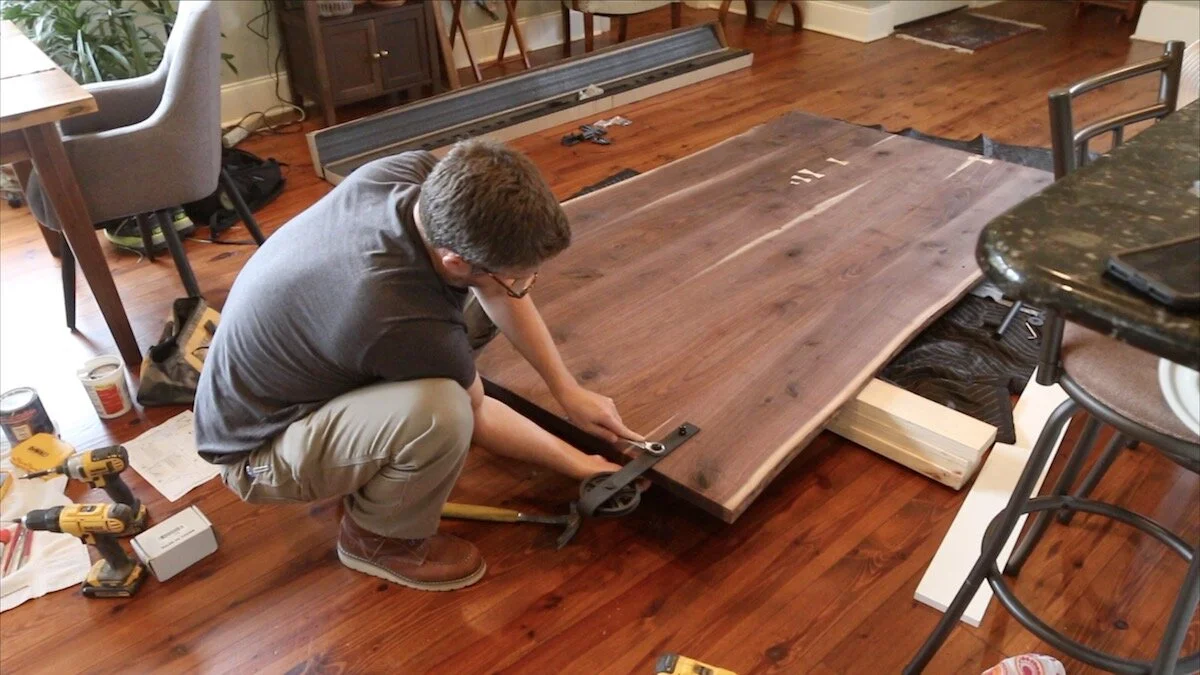
HARDWARE:
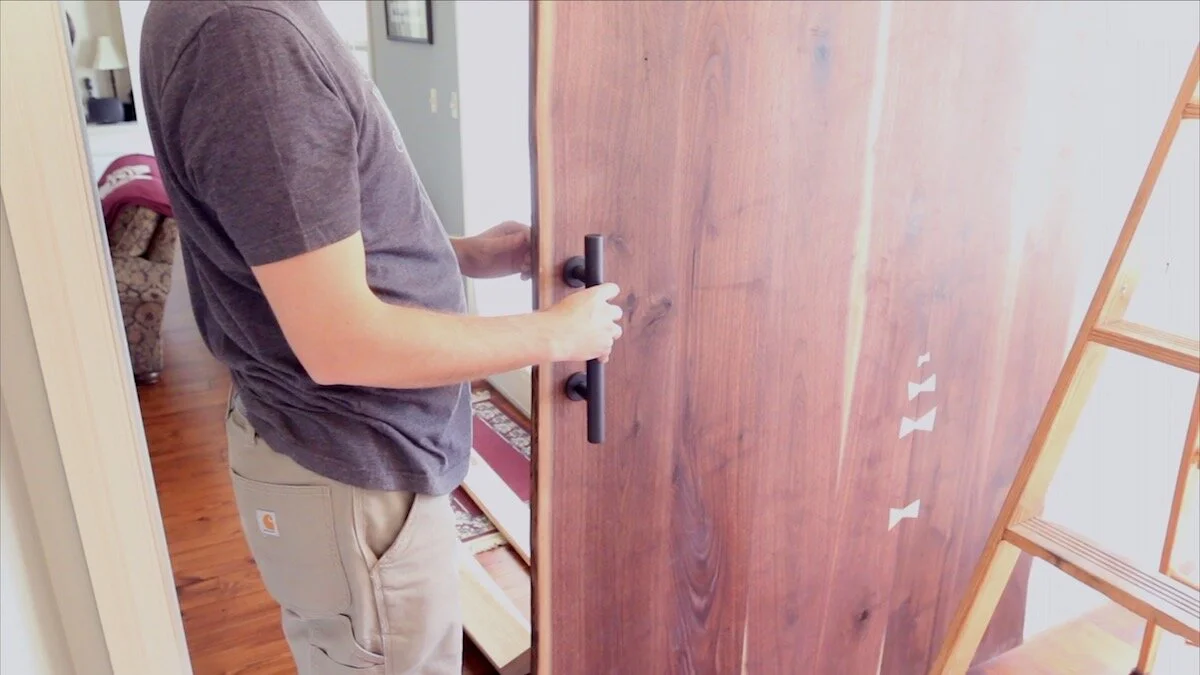
I inspected all of the hardware in this kit and I was really pleased. If you want some good hardware for a sliding barn door, I have a link to the kit and the handle hardware in the links section above. I would definitely order this hardware again.
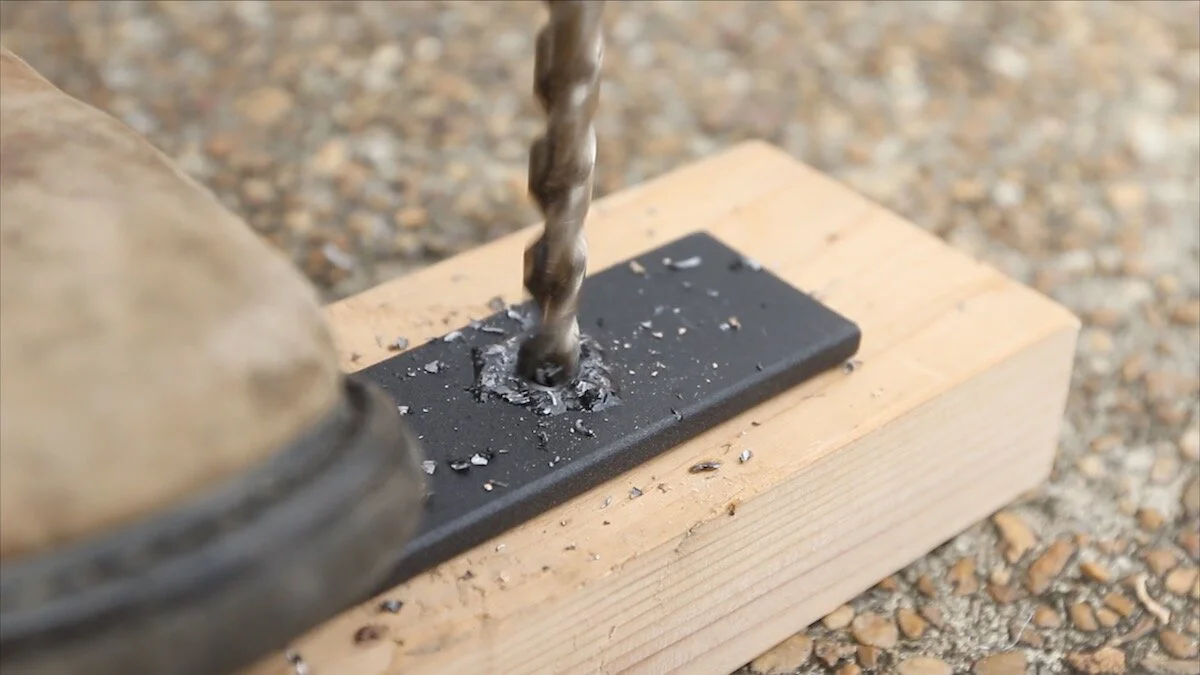
I needed to drill the holes for the handle and the metal parts that held the wheels, so I marked those out, started with smaller drill bits and worked my way up to the larger ones. This ensured that I didn't get much tear out. Oh...and be sure to clamp a board to the underside when you're drilling...that way, you don't get blow out on the underside when drilling.
I actually started out with a drill bit that was smaller than the final size I needed, and then worked my way up to the larger one. This helps ensure that your bit will not wander, but will go right where you want it.
ADDING FINISH:
Then, it was time for finish. For this one, I'm using Rubio Monocoat and it really turned out beautiful. I used this stuff for the first time when I made the live edge walnut desk at Jeremy's shop, and I thought it would be perfect for this application. It goes on really easy, and then you just wipe off any excess you have after a few minutes. Then, you just buff it out and it looks great! The stuff appears to be kind of pricey, but it goes a long way!

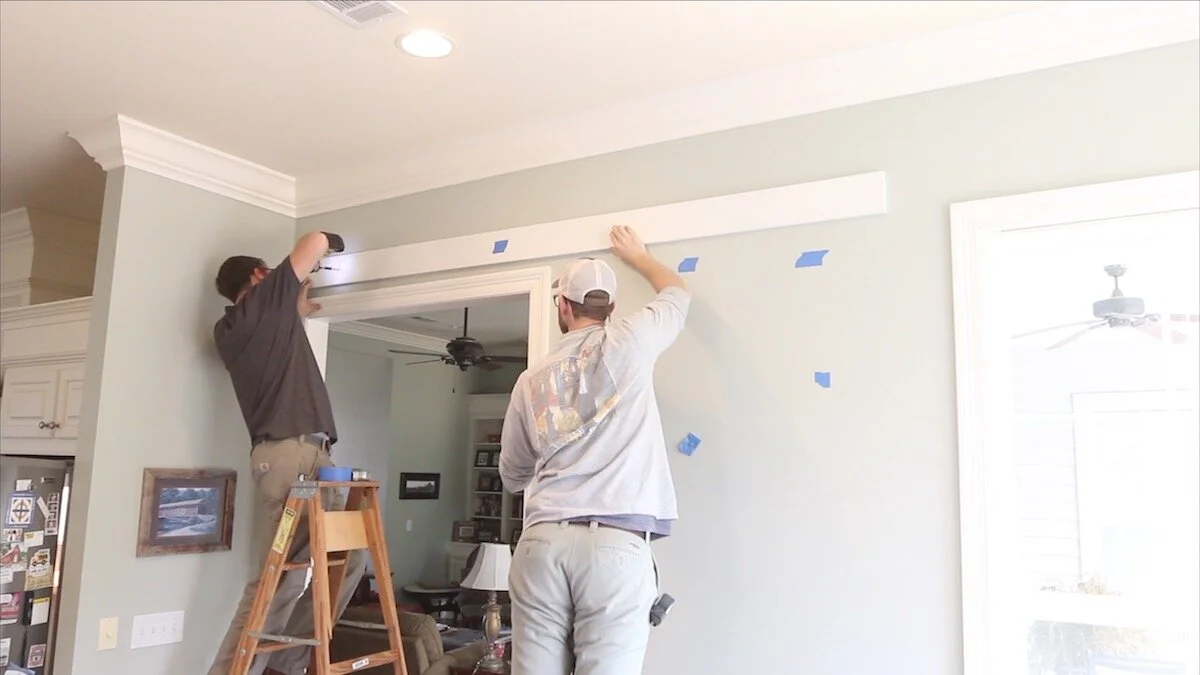
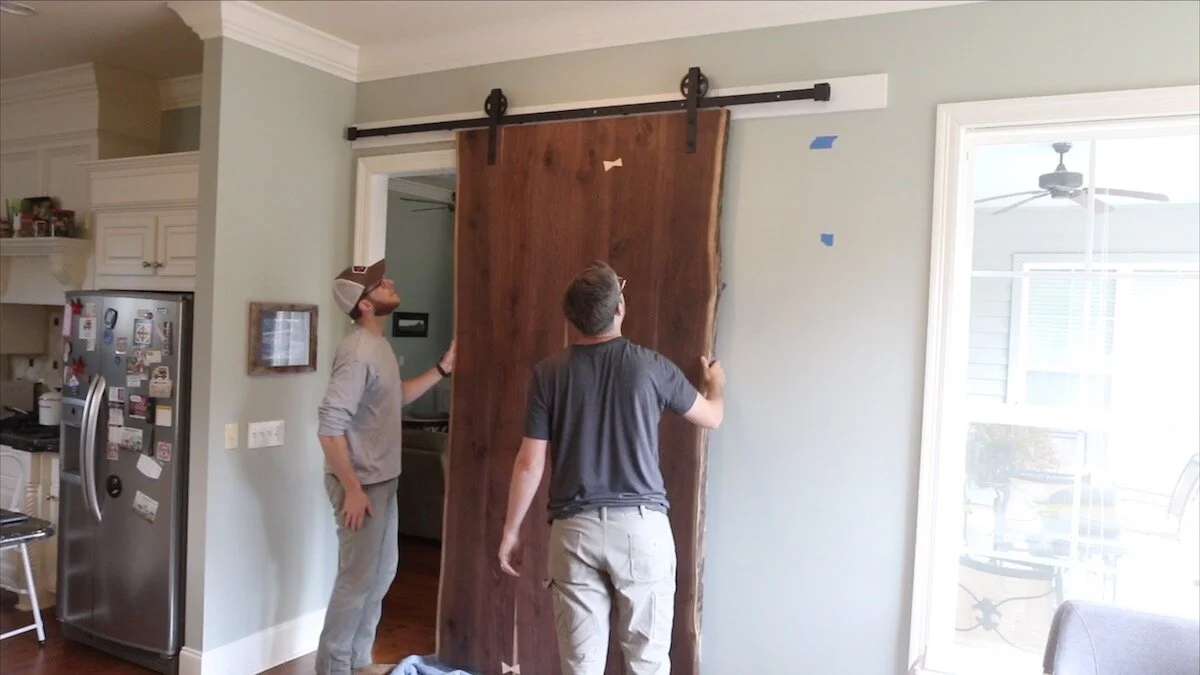
INSTALLATION:
Now, it was time for the install.
The holes for the metal pieces to hole the wheels were too small, so I had to reem them out a bit to accept the bolts.
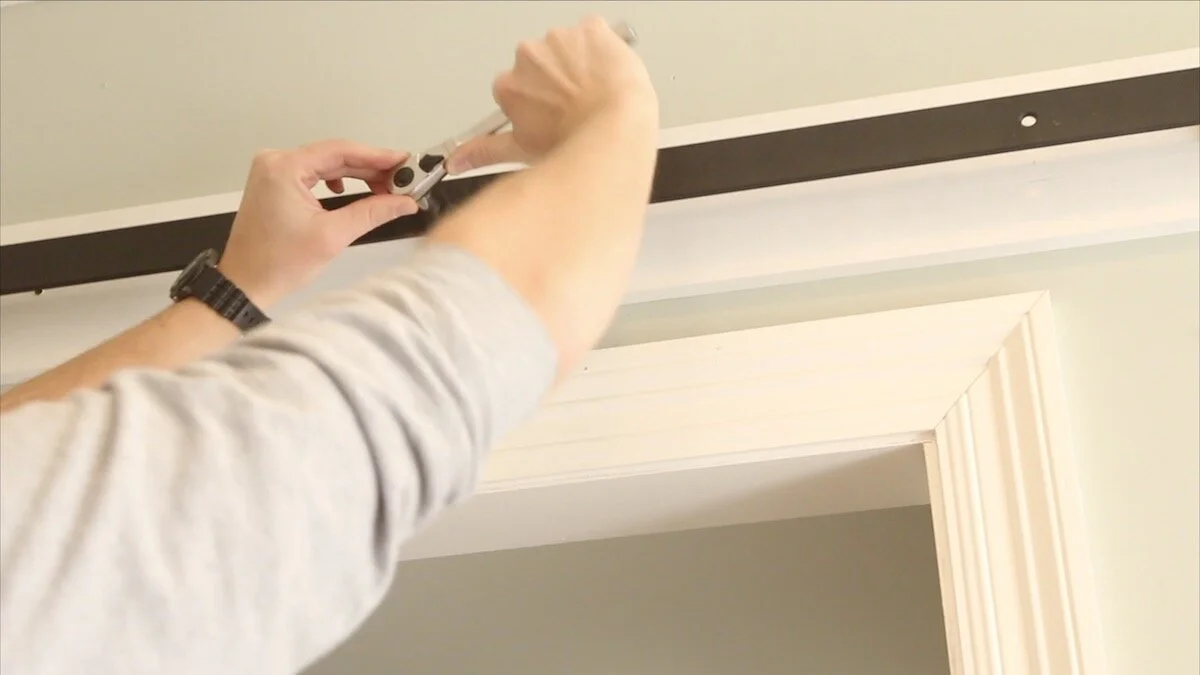
We got the backer board mounted and the studs on this wall were not cooperating. We had to drill a couple of holes in the steel rail to make sure they lined up with the studs in the wall.
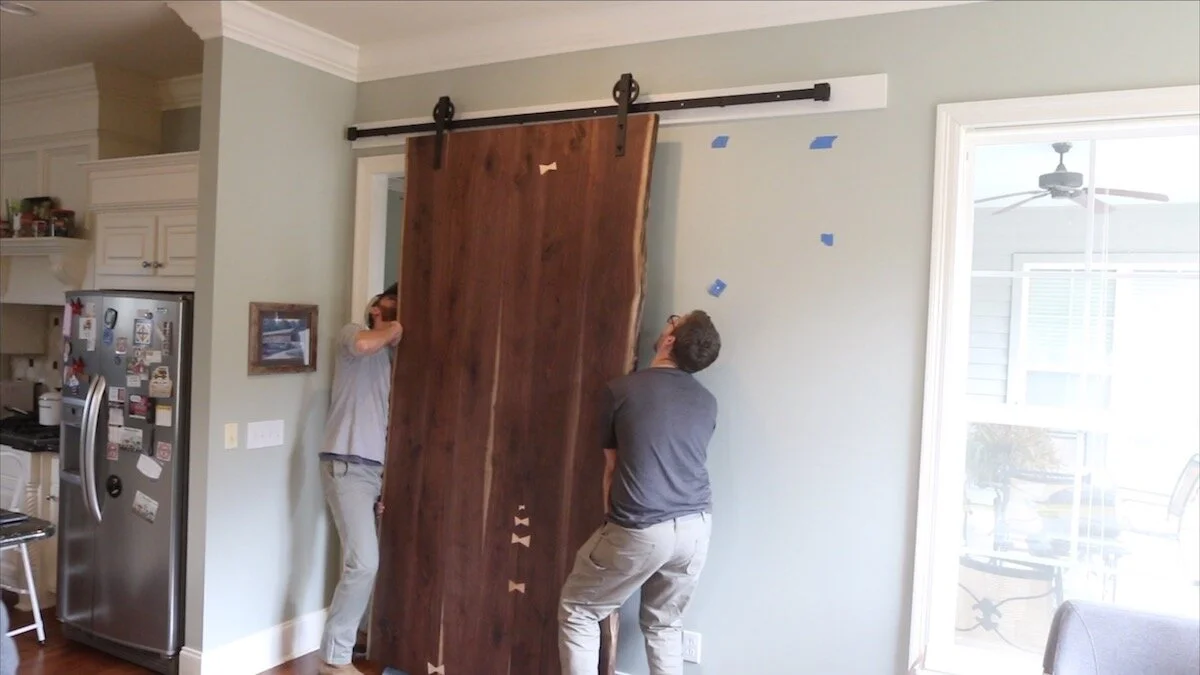
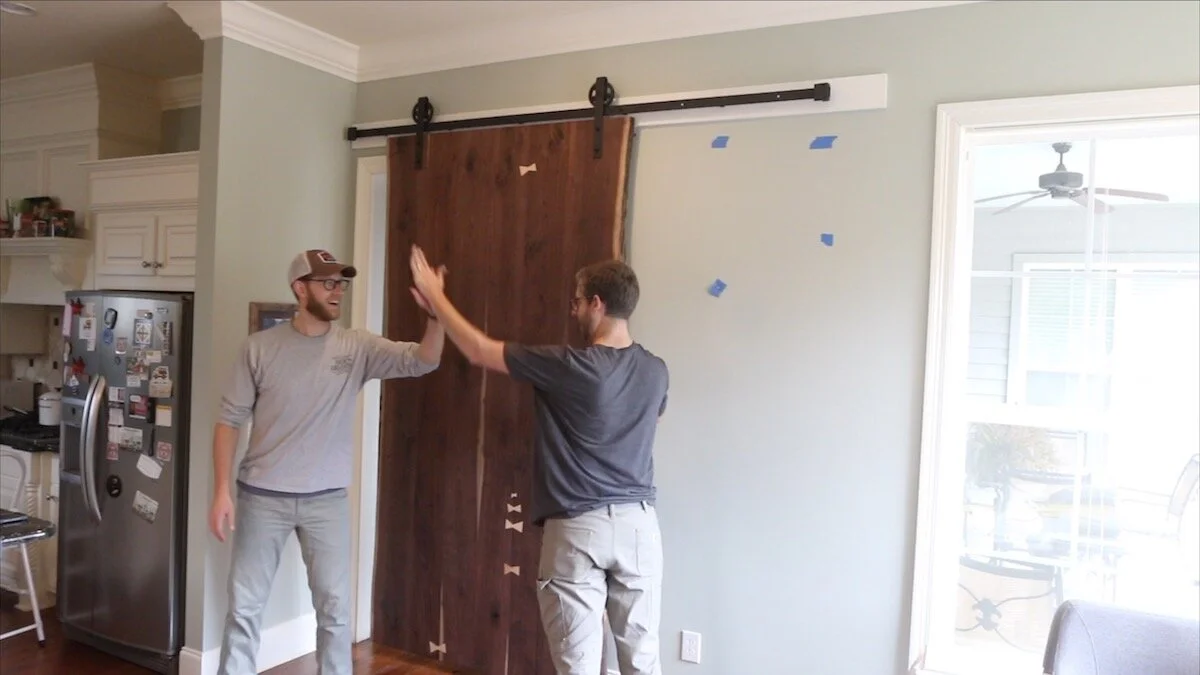
Then, it was time to lift the door up on to the rail. This this weighed over 200 lbs and it was a beast! Of course, once we finally got it up there and tracking properly, a high-five was in order to celebrate.
After that, I just had to add the handle, the two rubber stoppers that limit how much the door can slide from side to side and the floor catch and this door was done!
CONCLUSION:
This was a fun project and it really pushed some of the small tools I have in my shop, particularly in the milling of the rough lumber. It really made me want some larger machines, but really made me proud of what I could accomplish with what I do have.
Thanks so much for following along with this project! I’d love to know what you think. Leave a comment below and don’t forget to watch the video on my channel!
See you in the next project!