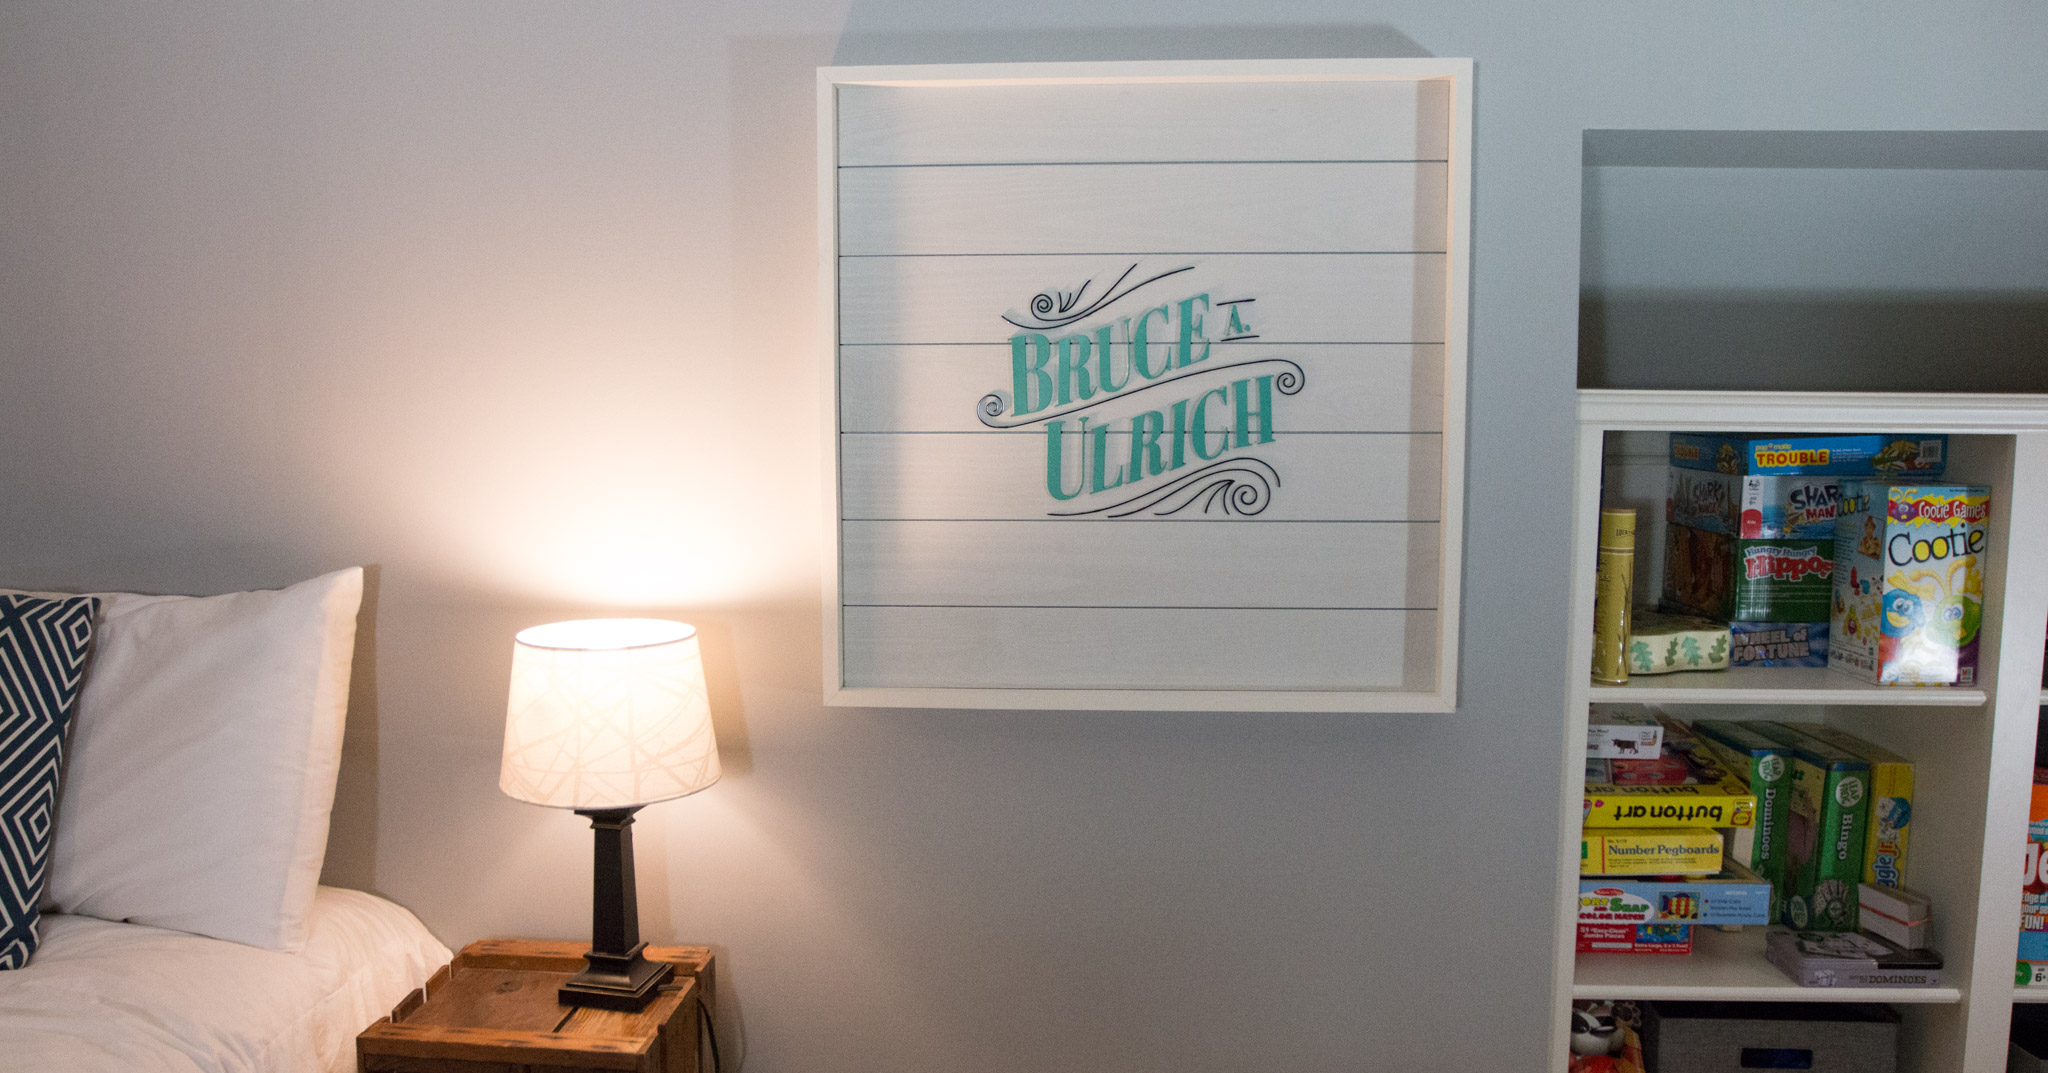
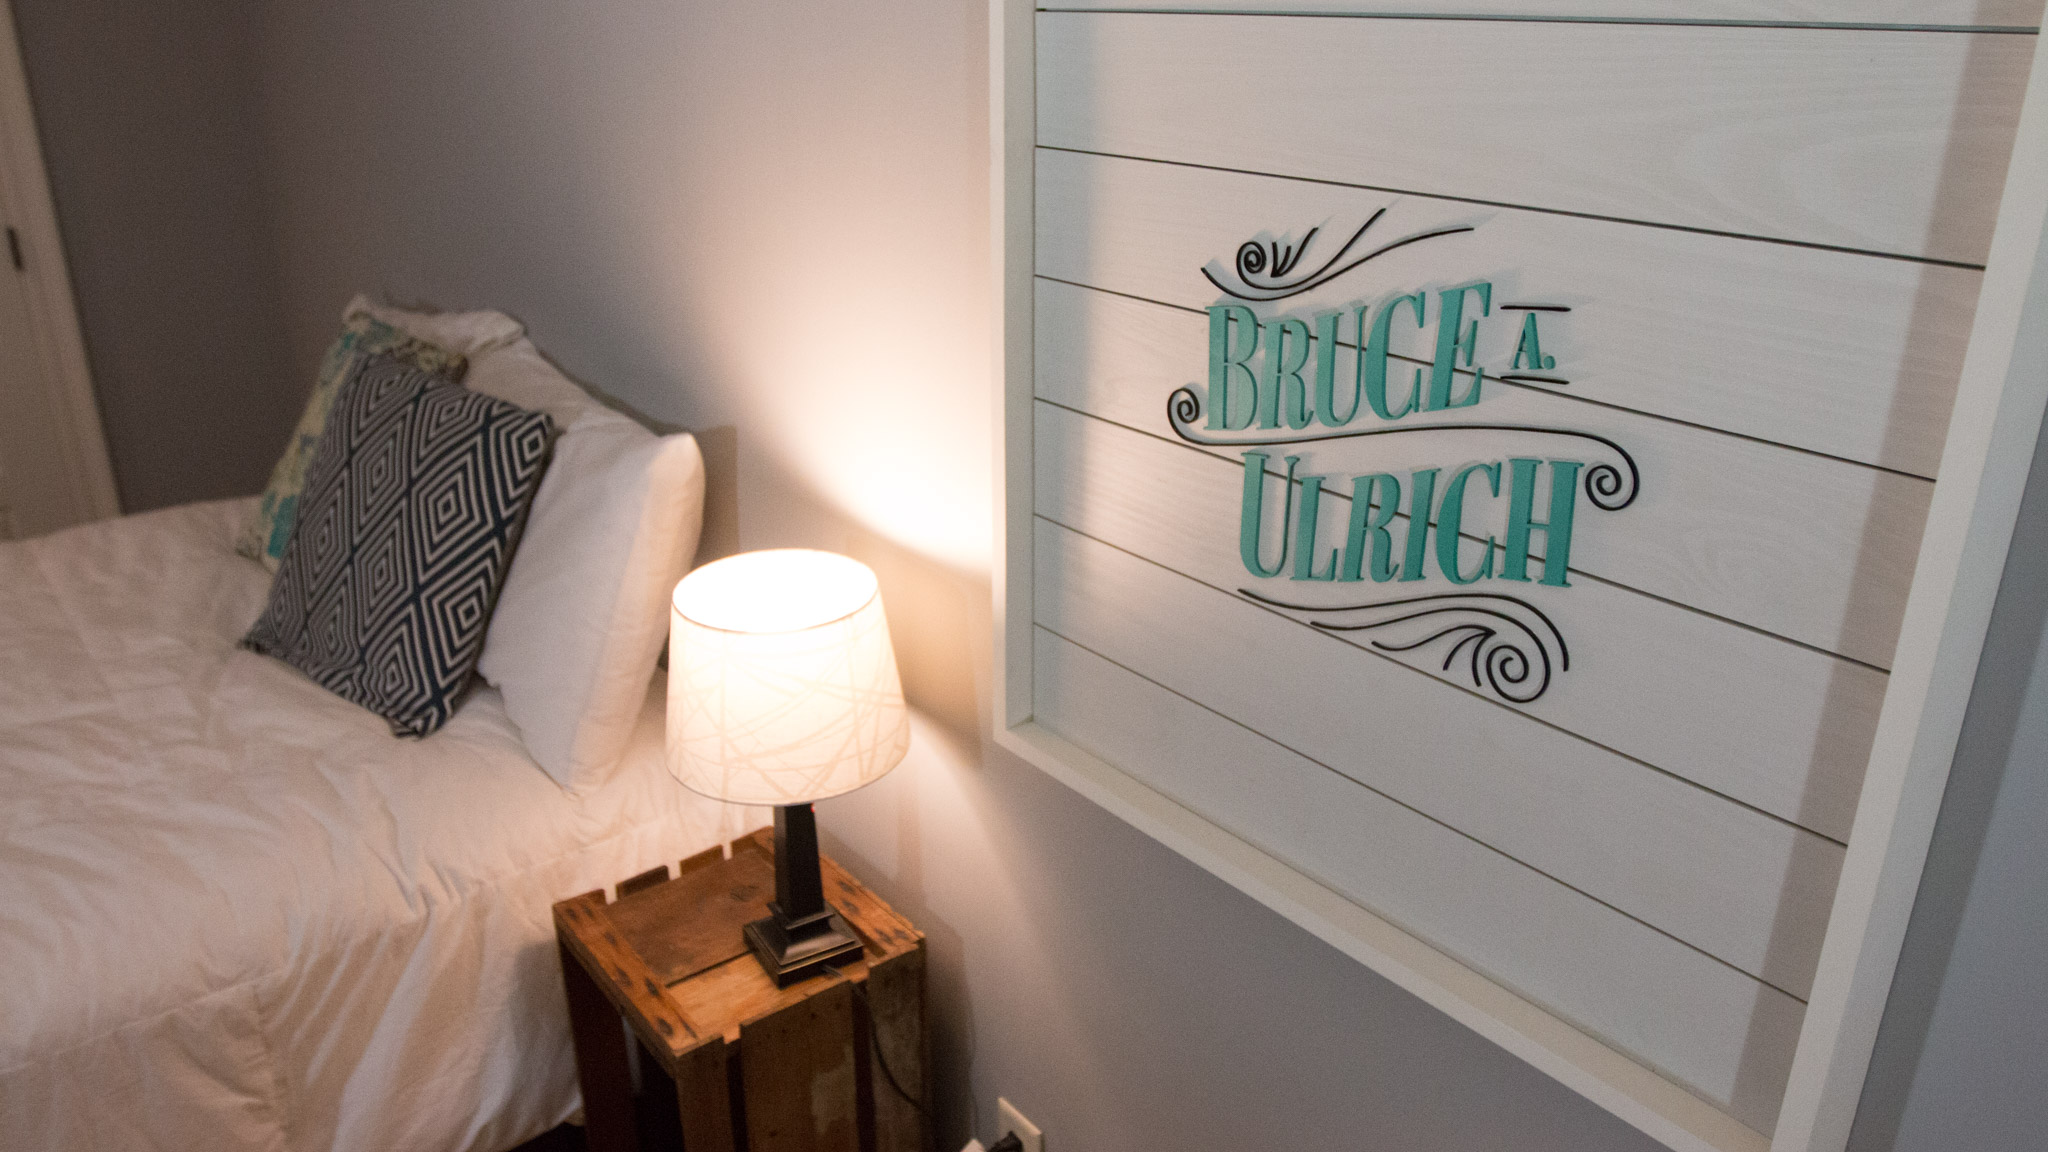
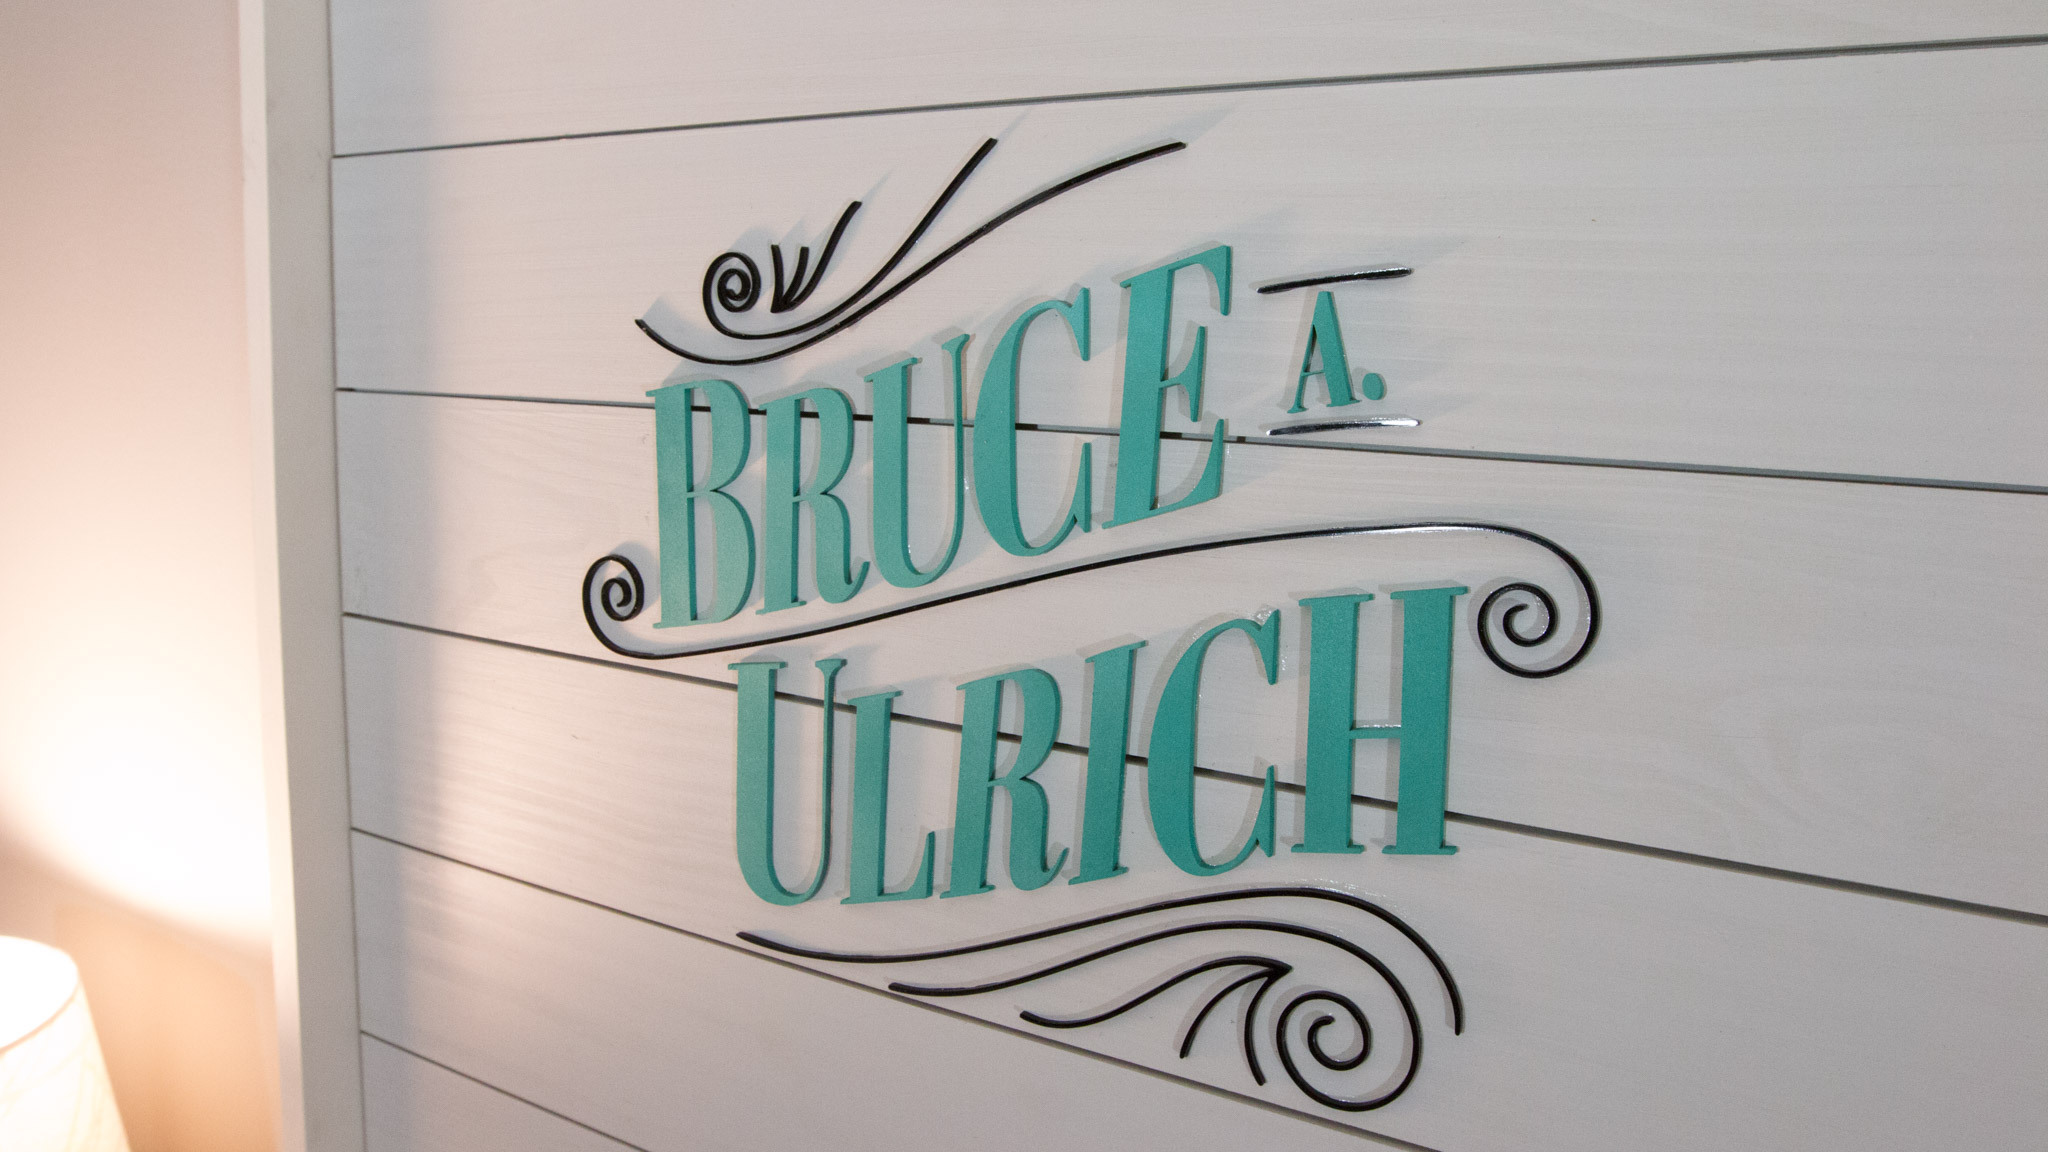
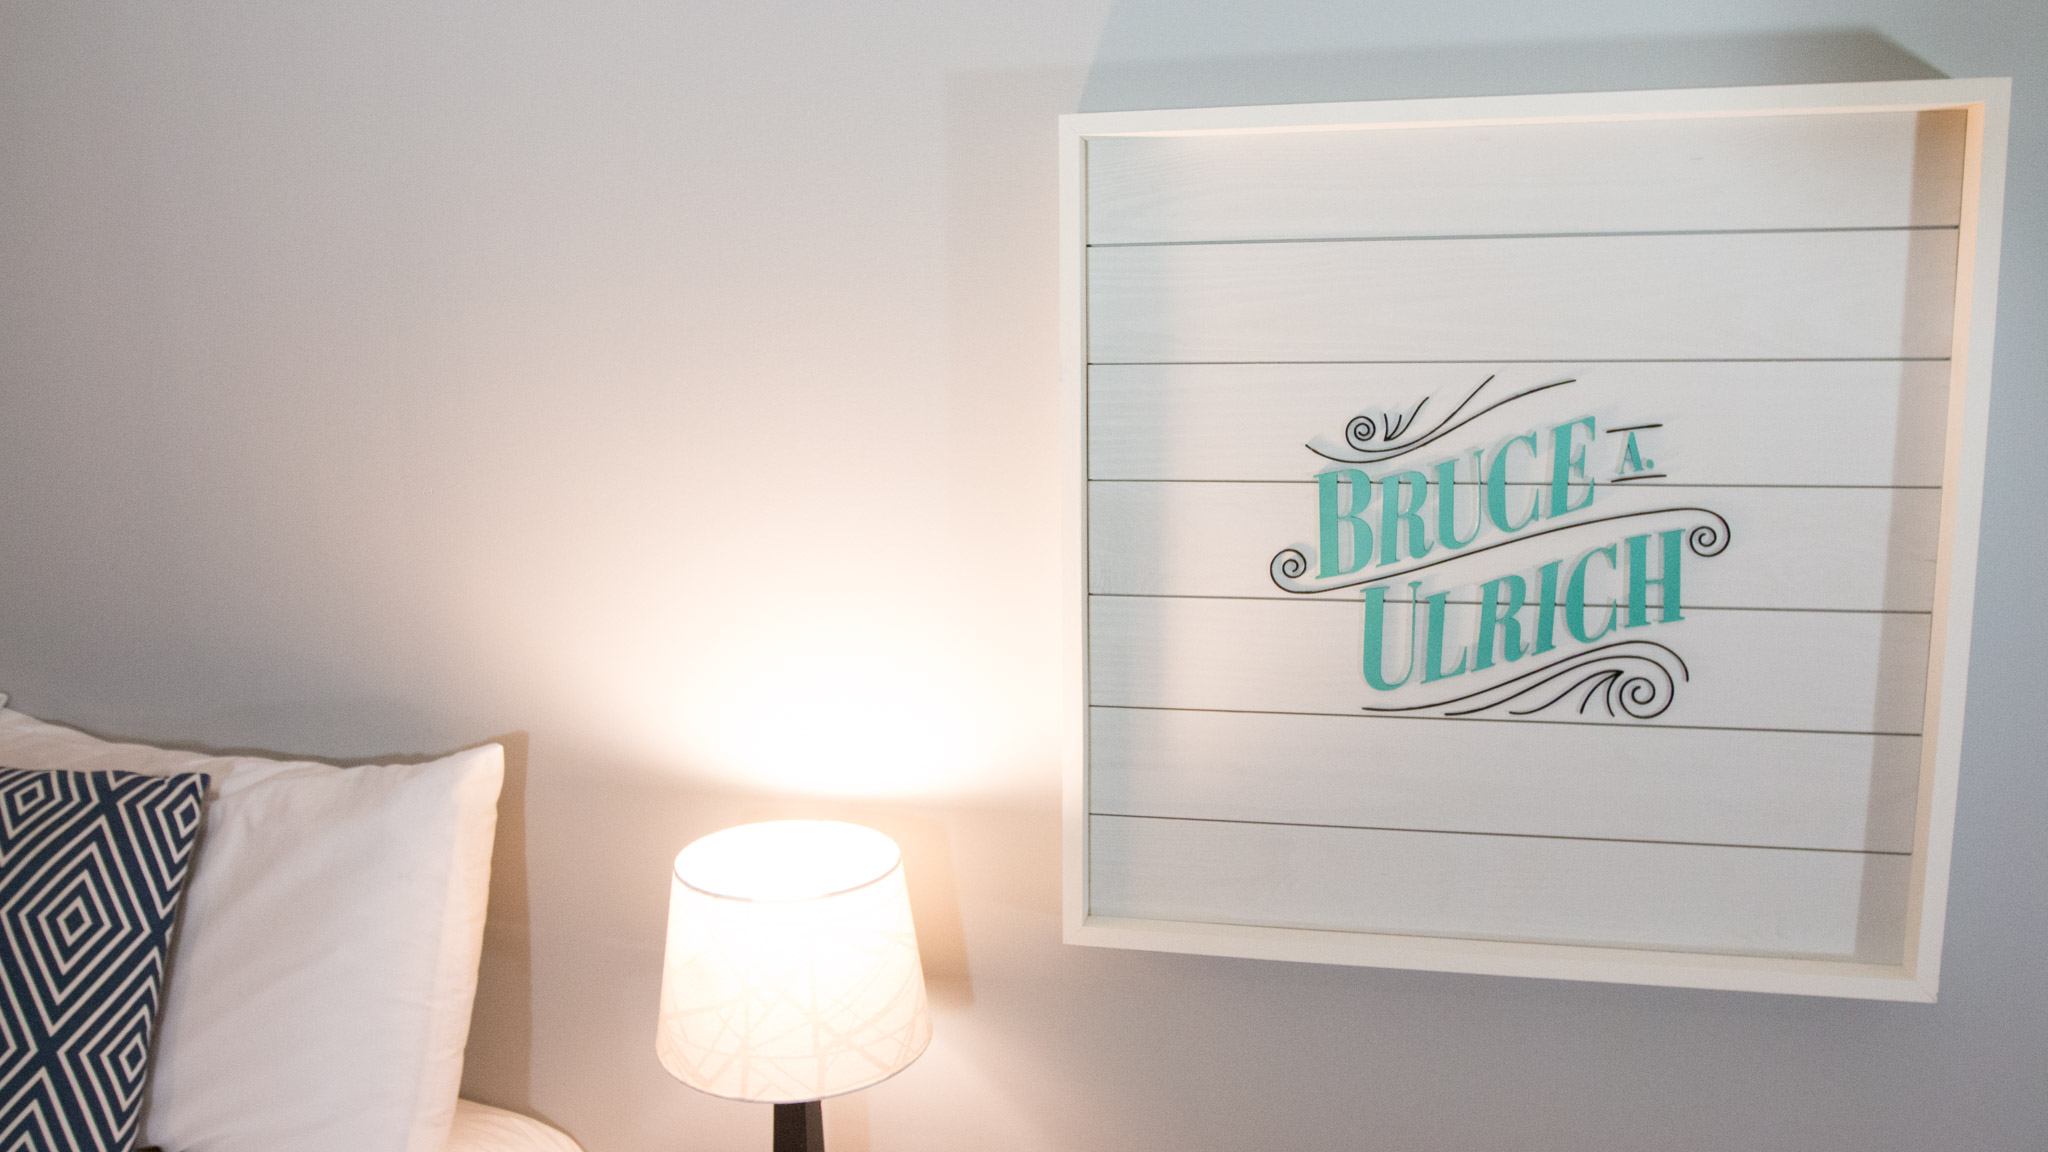
Shiplap Wood Sign
VIDEO
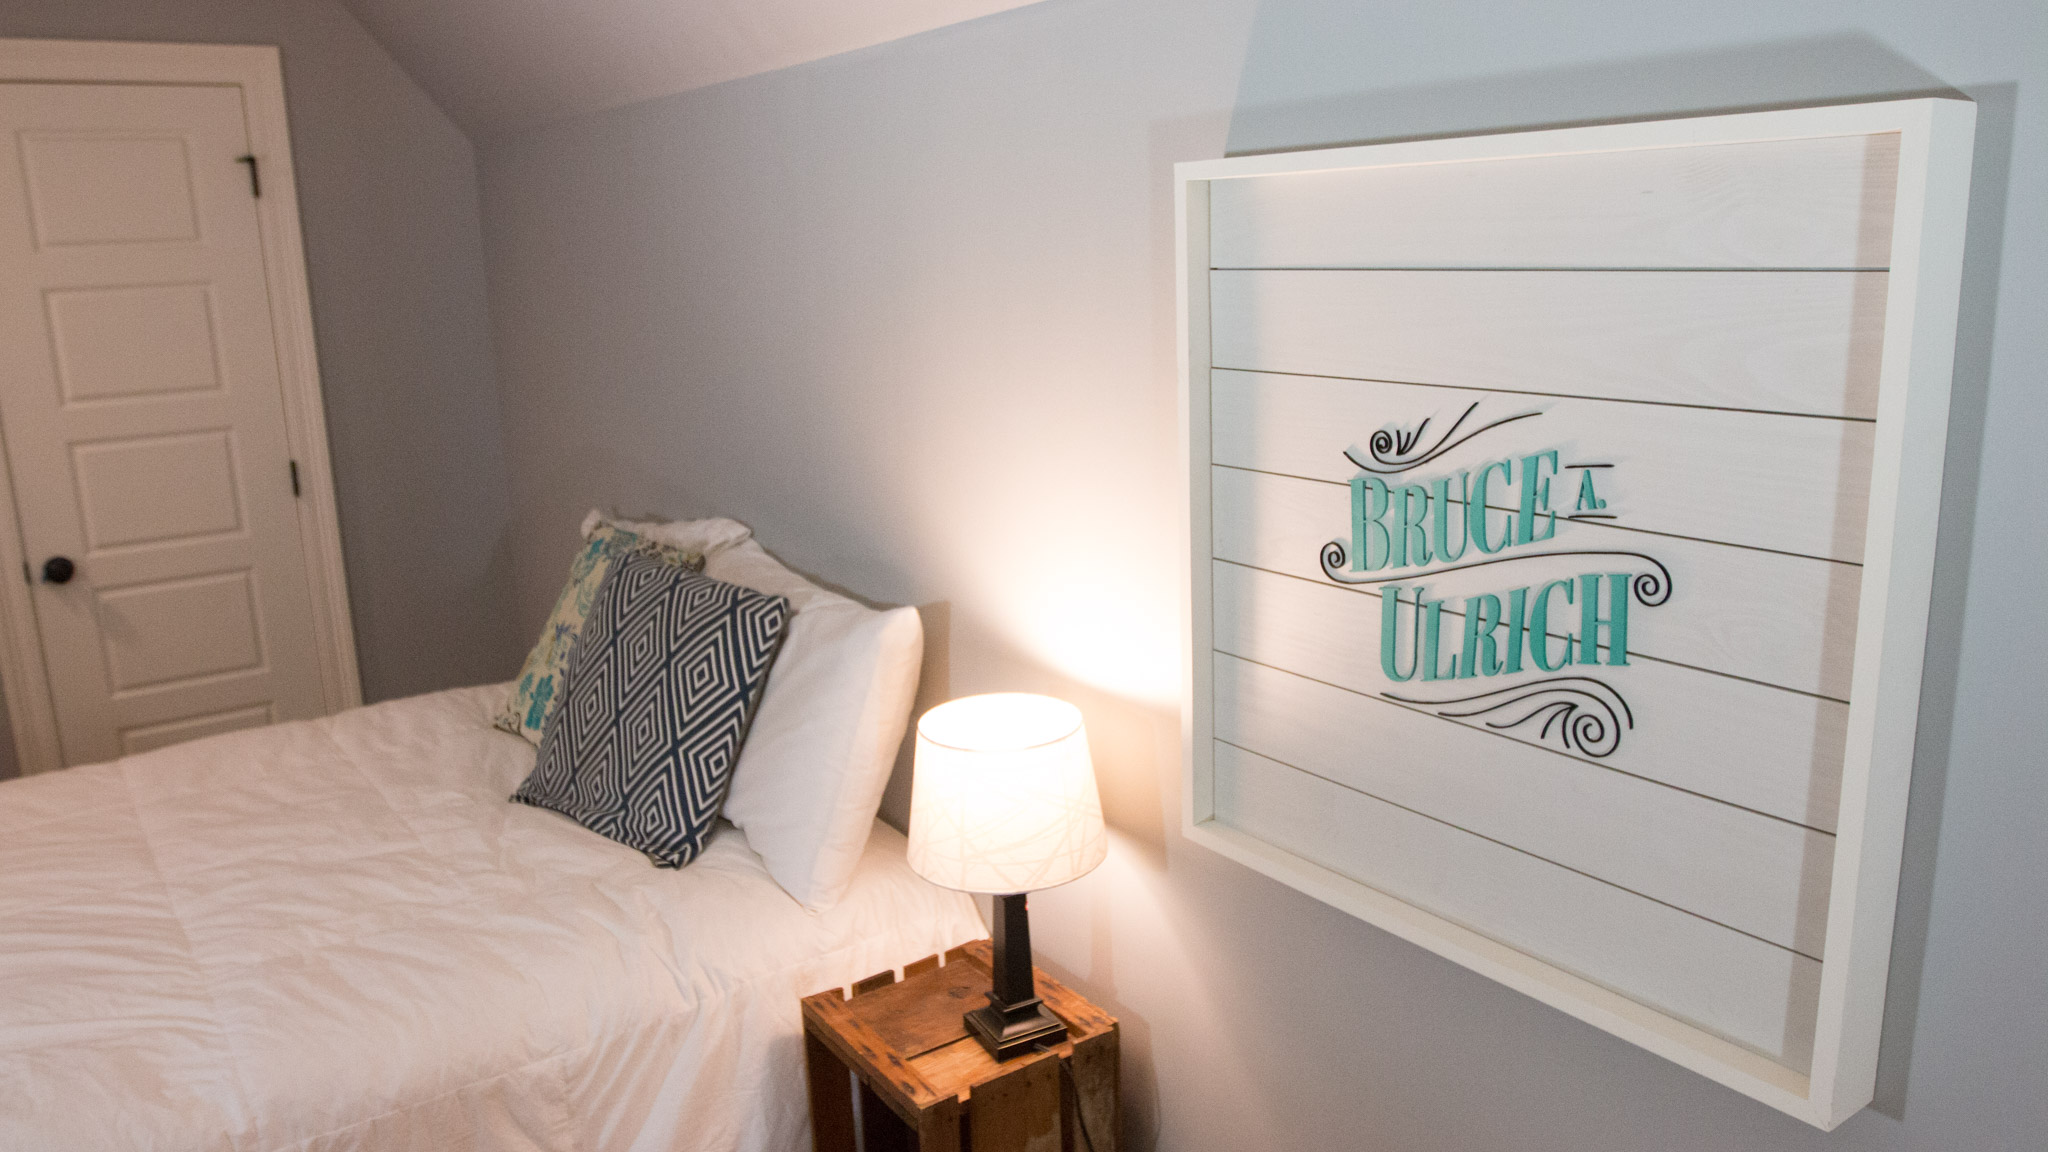
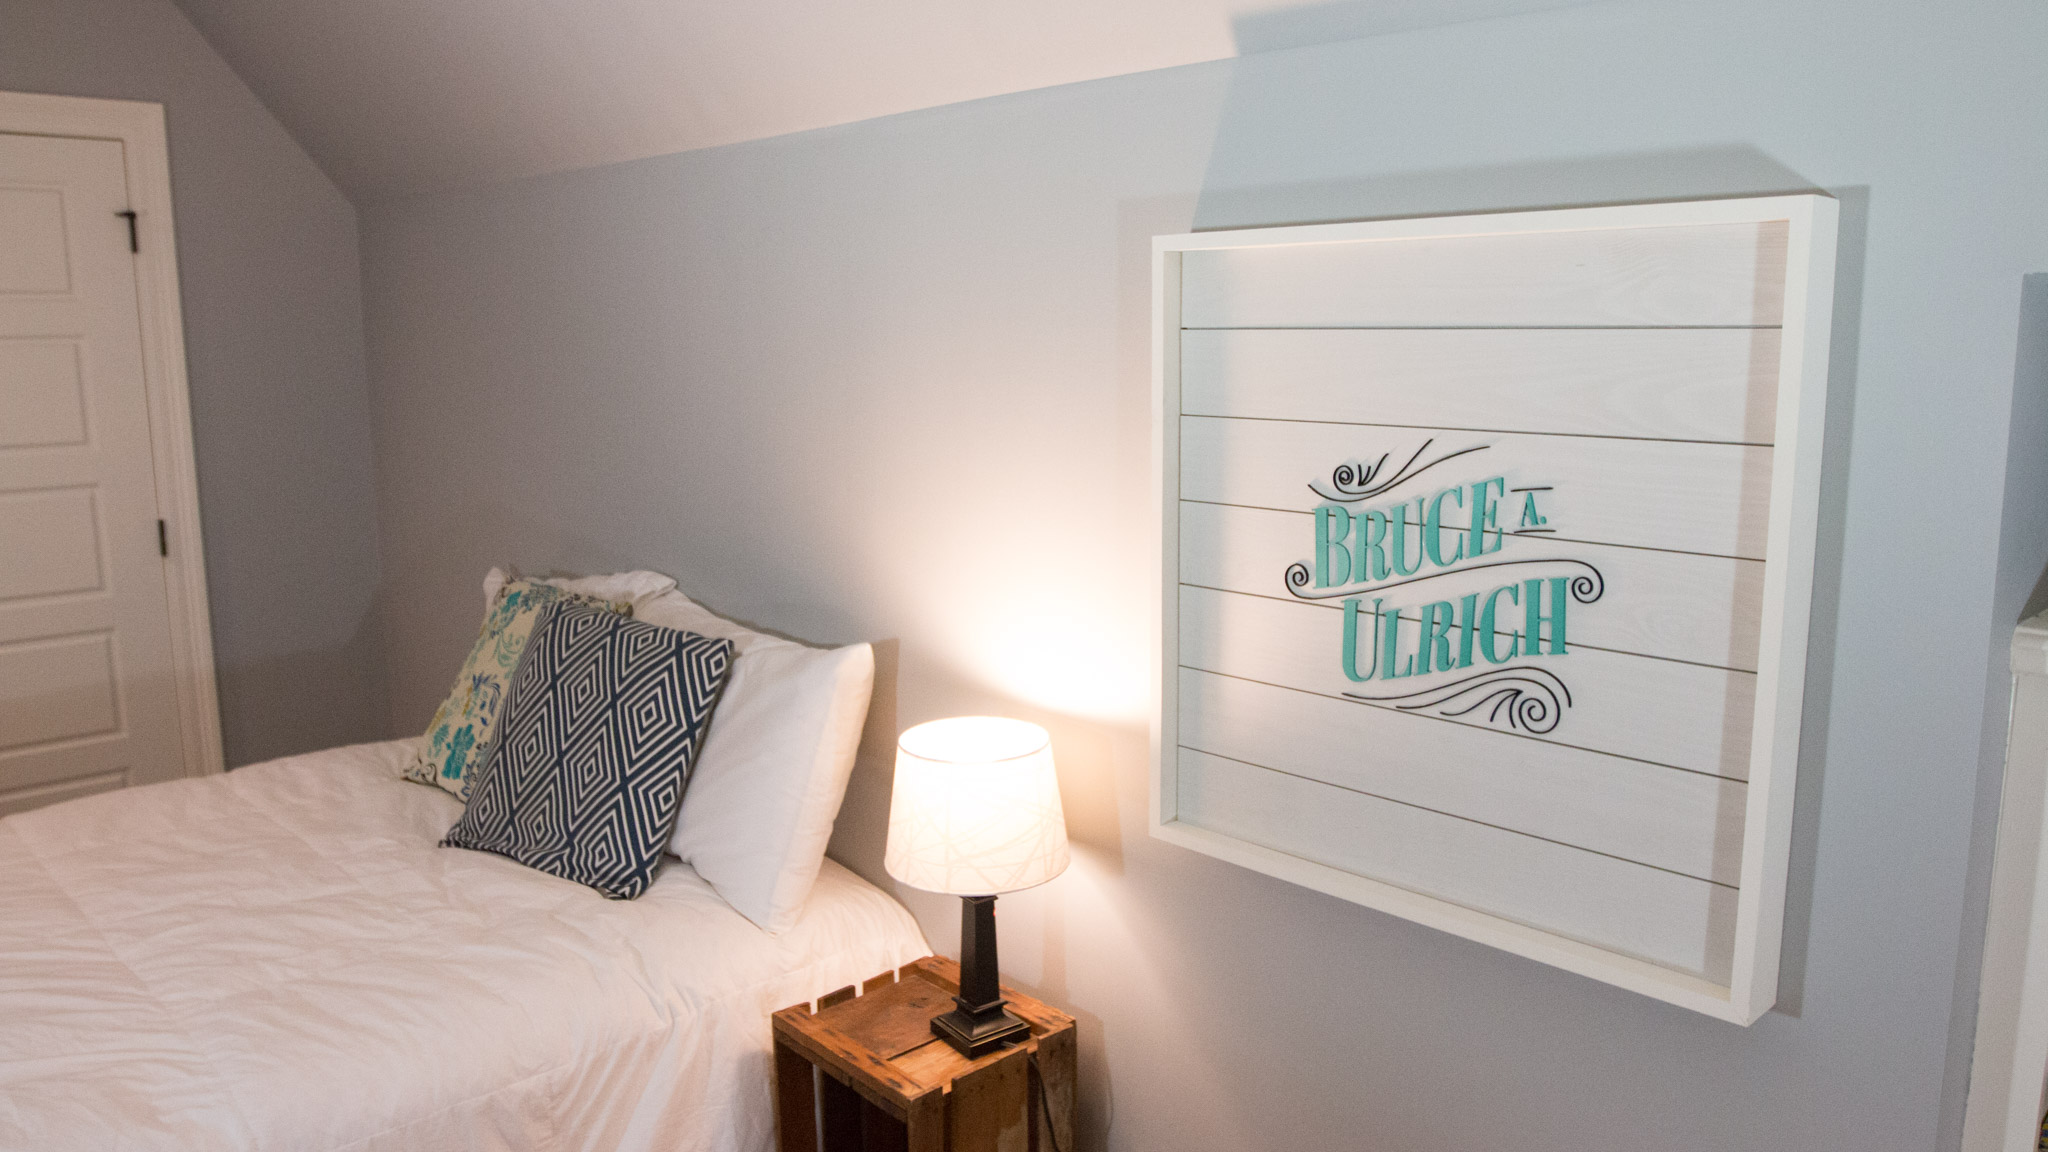
In this video, I’ll show you how I made this shiplap sign for a logo. Watch the video to see more of the details about it or follow along below:
BACKGROUND
I wanted to make a sign for my logo, as some art work for my office. I still had some material left over from some of the tray ceilings in our house, so I decided to go for it. This material is tongue and groove pine, and it is really similar to 1x6 boards, but with the tongue and groove profile on it.
TOOLS & MATERIALS
(These are affiliate links. Clicking on them and buying anything on amazon helps support me, at no extra cost to you.)
Table saw – https://amzn.to/2Mdu7AE
Miter saw – https://amzn.to/2yvO57F
Brad nail gun – https://amzn.to/2Ma0hNo
Compressor – https://amzn.to/2Ma0hNo
Dado stack – https://amzn.to/2JVKJQw
Wood filler – https://amzn.to/2K5IHJF
Acrylic
Montana Gold spray paint - https://amzn.to/2yyL32A
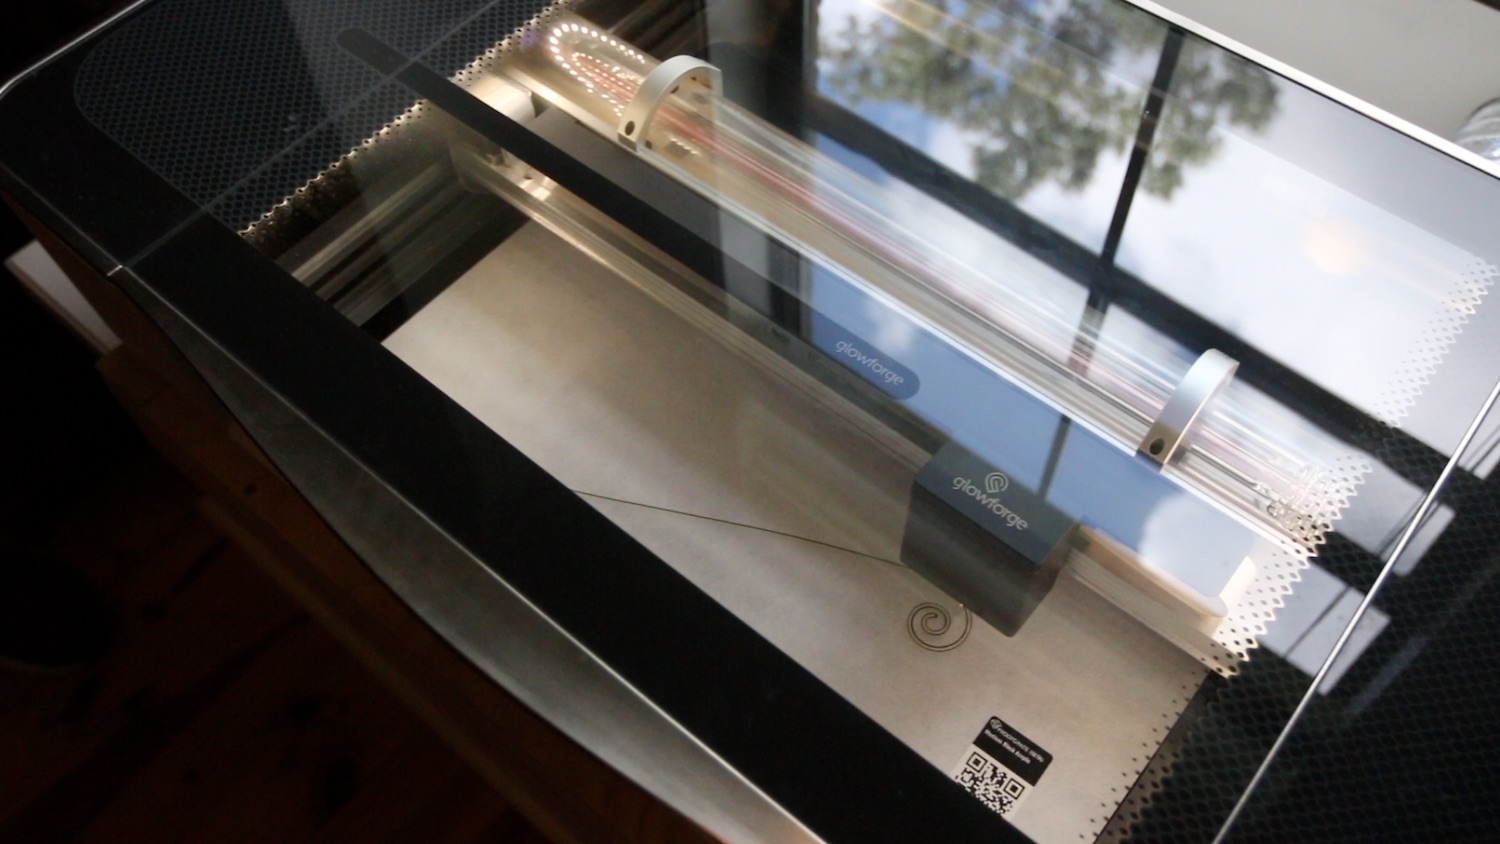
Glowforge laser cutter (there are now 3 models to choose from...I have the Basic) – https://glowforge.us/GwnI7W
STEPS
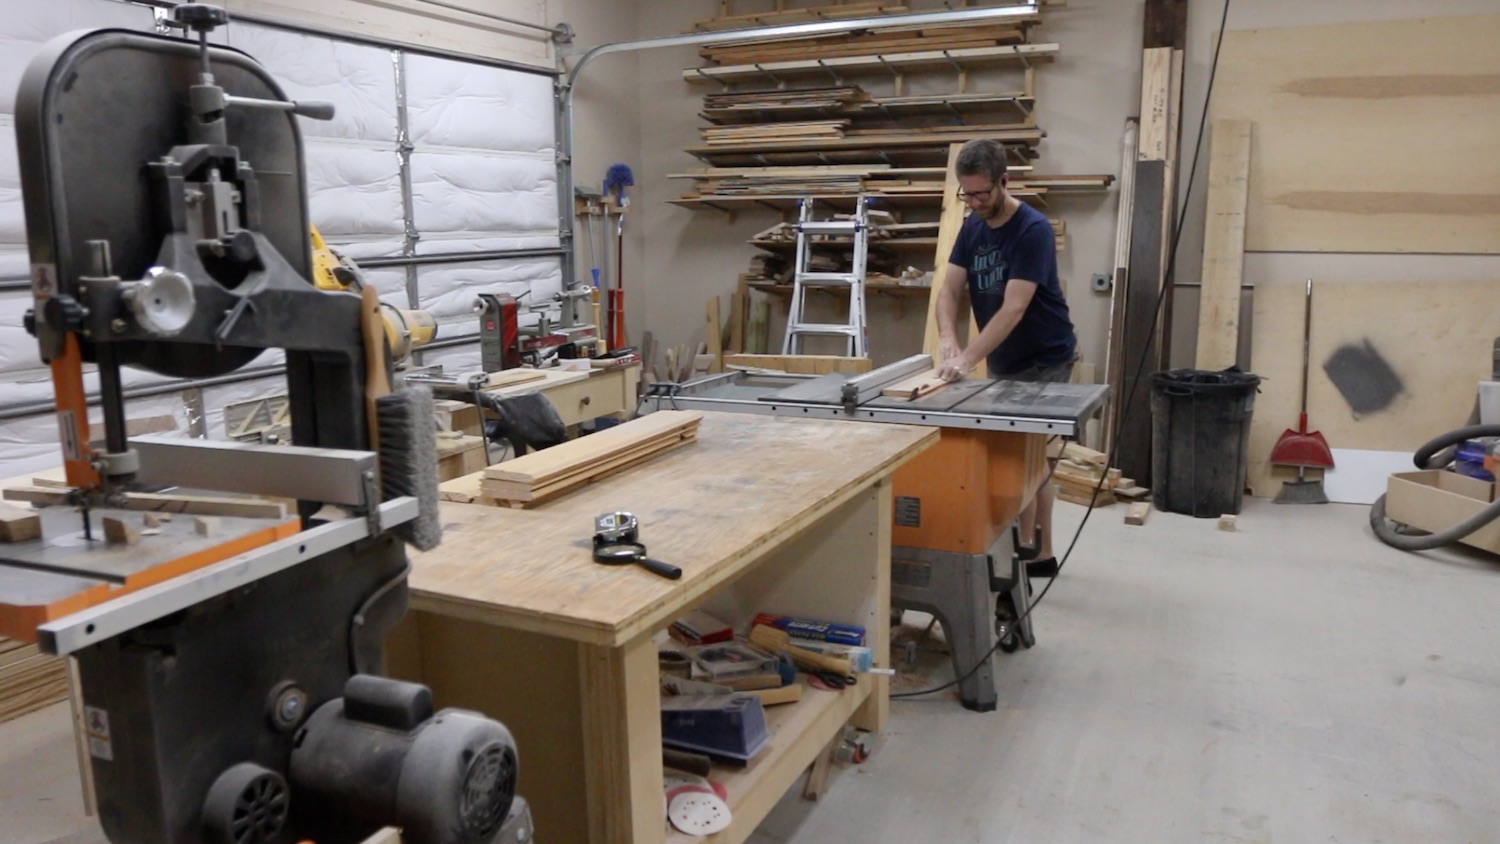
I sifted through all of my scraps and leftover wood from other projects and found some to make this one. If you don’t have tongue and groove like I had, that’s actually better. If you pick up some 1x6” material, you’ll have fewer steps to do than I did. I had to rip off the tongue and groove from the sides before I could cut in the half laps that make up the ship lap. Some stores are actually even selling shiplap boards…already pre-cut. I don’t know if it is much more expensive to buy them pre-cut, but it would be worth looking into.
I tried to avoid any knots when I was choosing the boards. I landed on making the sign a square that was 28”. Because of that, I setup a stop block on my miter saw at 28” and make all of my cuts the same length.
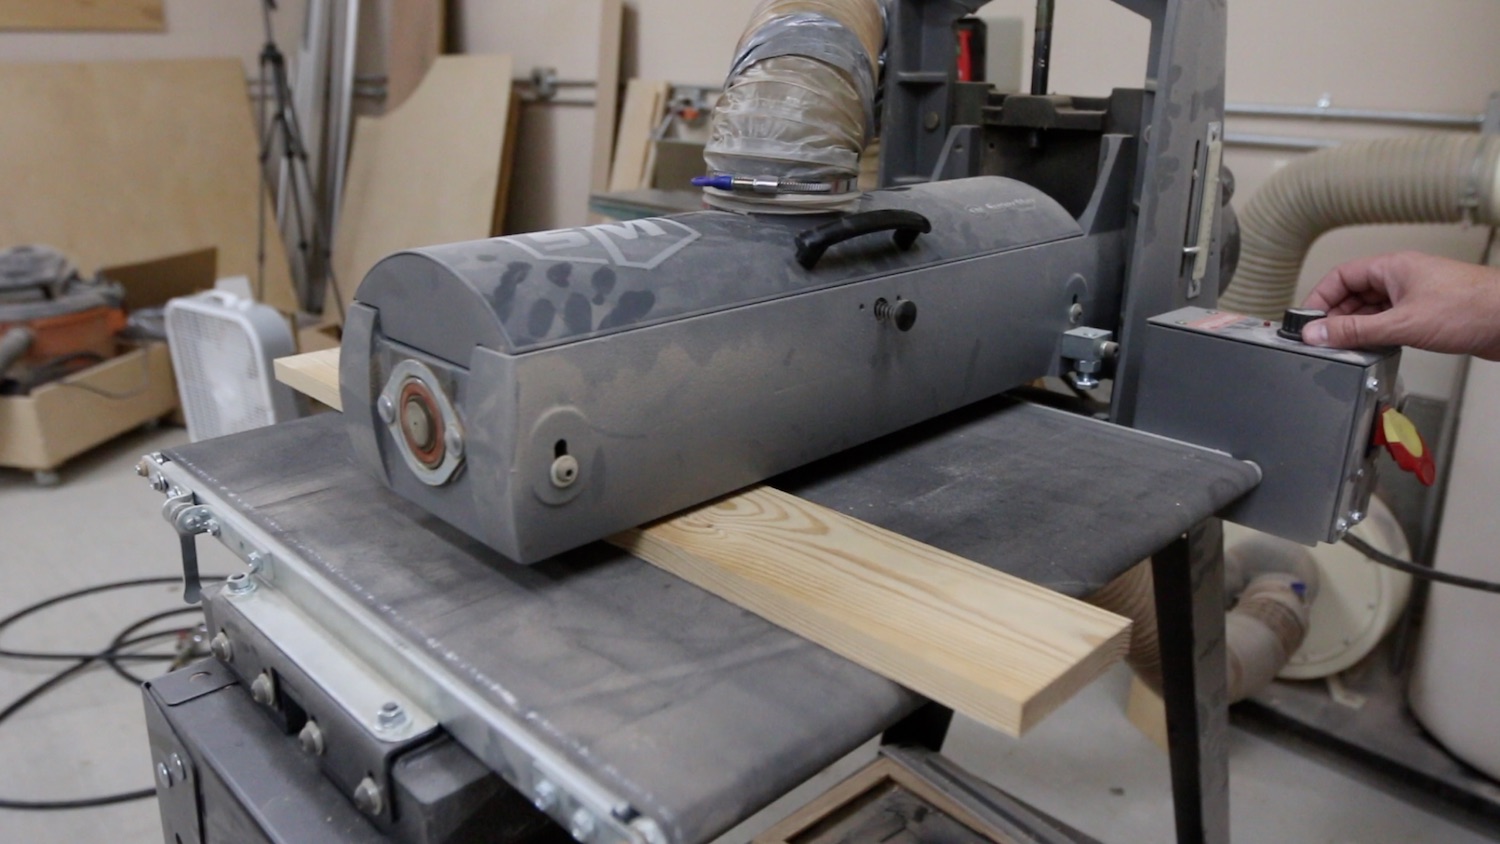
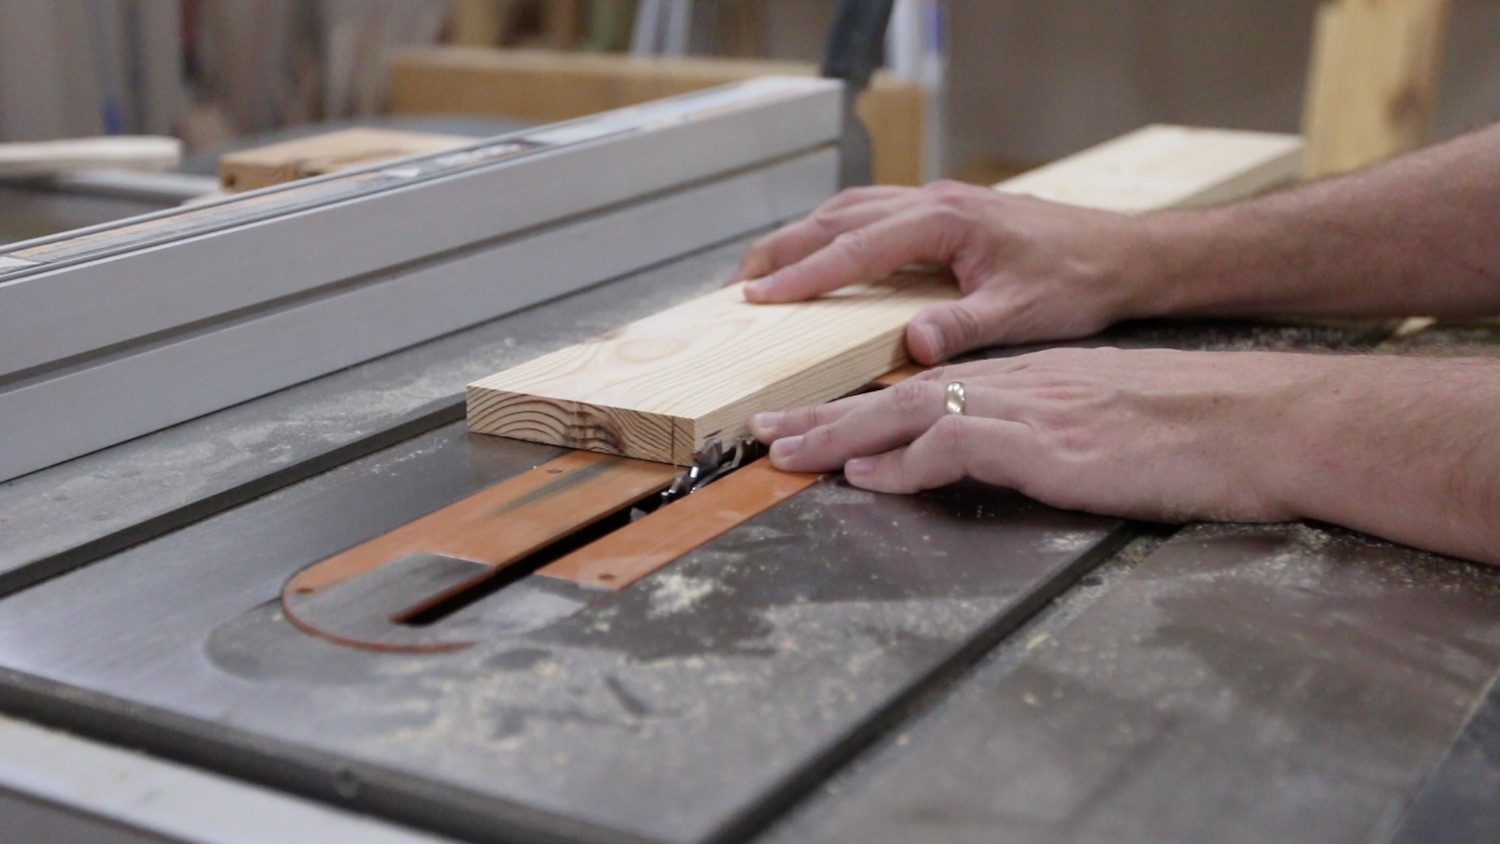
Then, I moved on to the table saw, ripping off the tongue and groove that I mentioned above. After the boards were cleaned up, I could get out the dado stack and set it up to cut my half lap. For this, you just want to measure the thickness of your board (actual thickness) and mark half of the thickness. It is probably a good idea to get a combination square and set it to this measurement, because you’ll need it again in the future. Oh, and I’ll point out that I ran all of these through the drum sander a few times so that they would be the exact same thickness. That is important to have them all consistent before trying to cut the half laps in them.
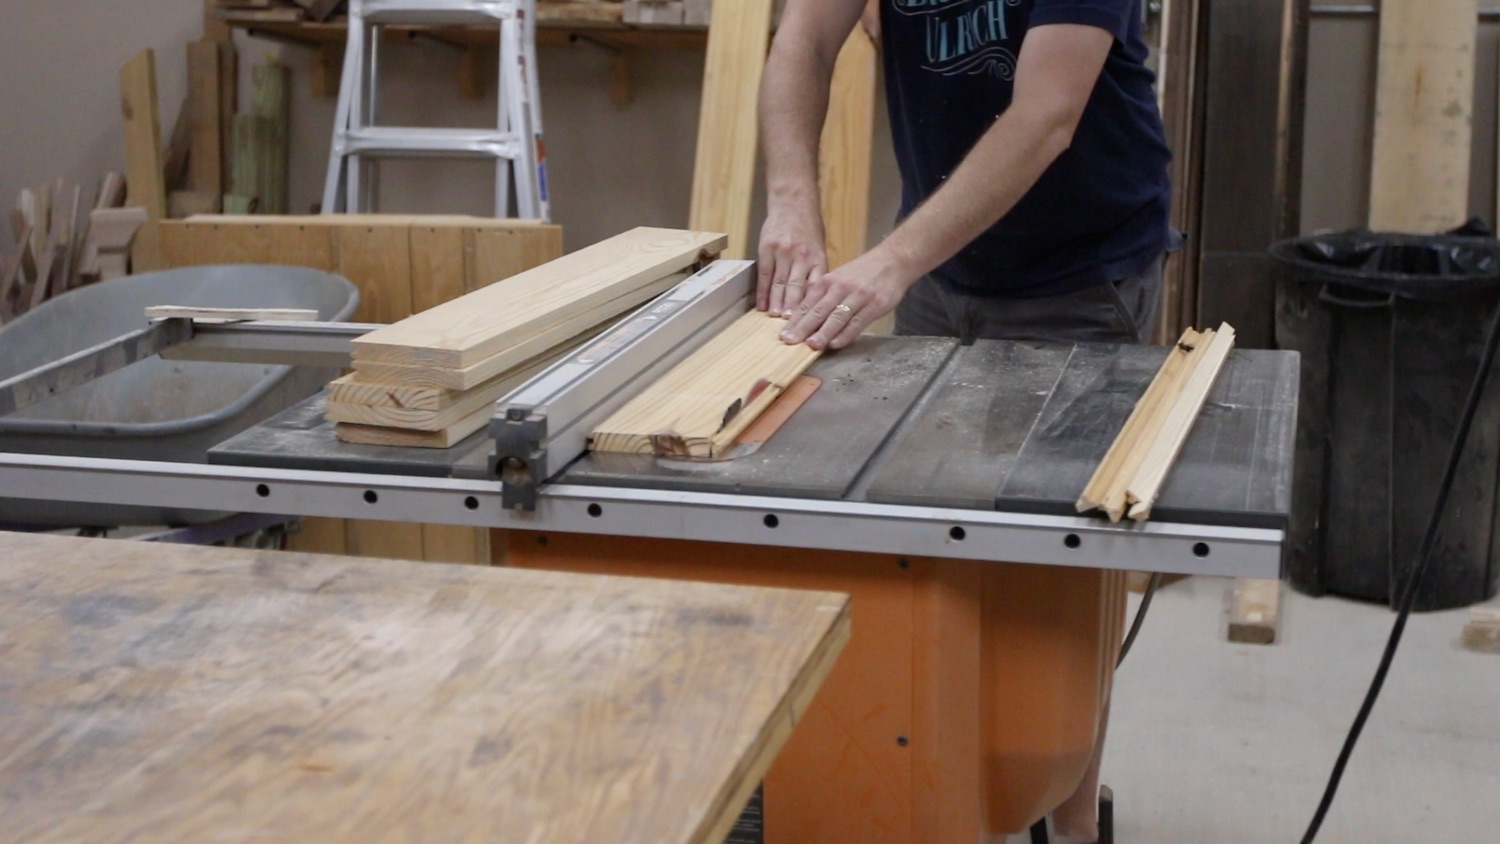
Once you have that measurement of the halfway of the thickness, use the same measurement to mark in from one long edge. I make this mark on the end grain of the board so it is easier to use that mark to setup the cut.


Use the dado stack and some scrap pieces of the same material to dial it in and get it precise. Then, run all of your pieces over the dado stack. To get the shiplap look, the grooves are cut in on opposite faces. That way, they kind of interlock.


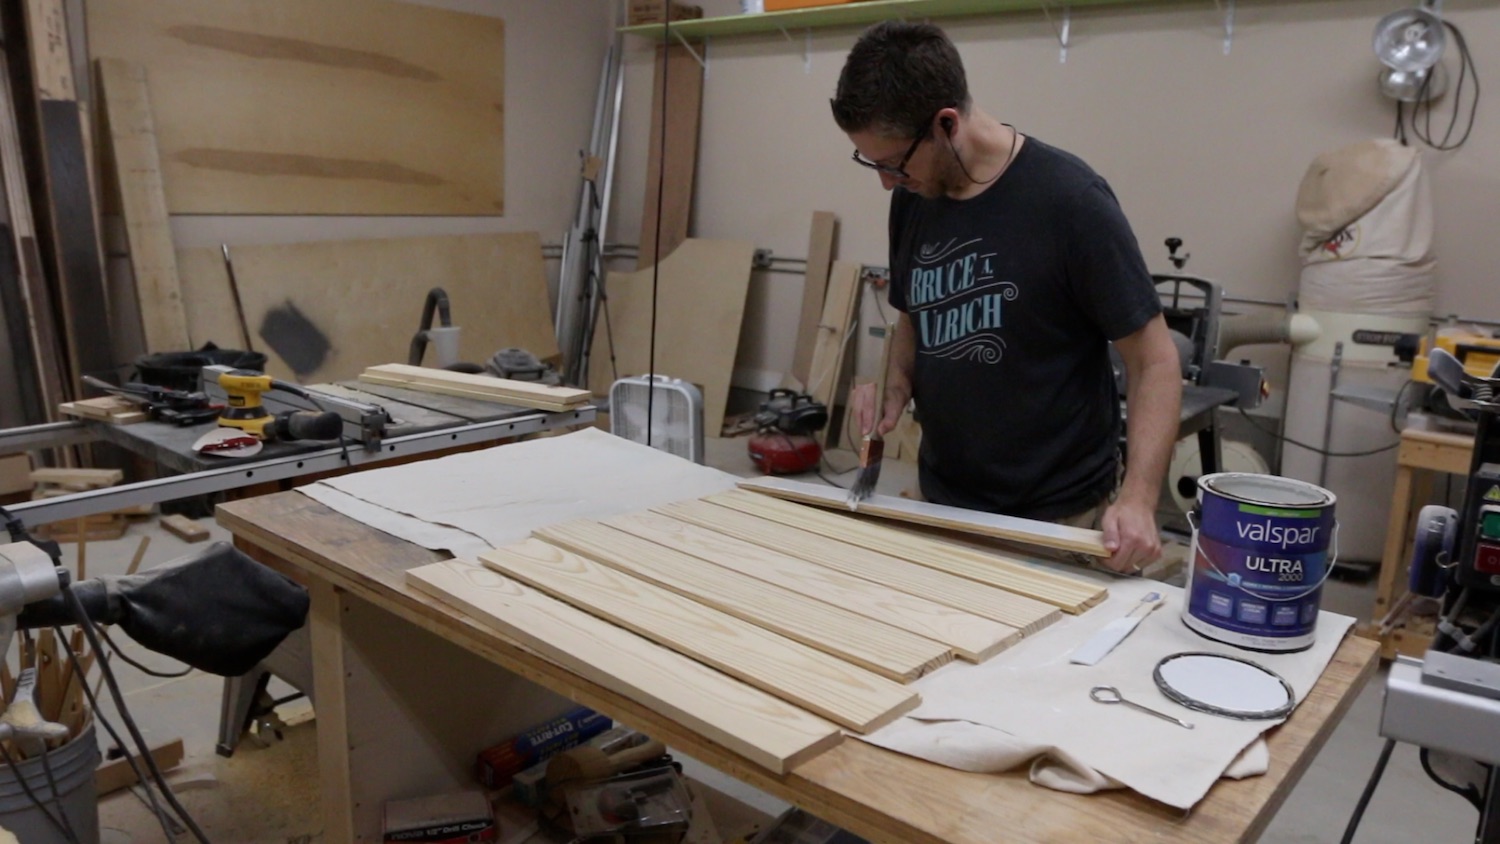
I painted the shiplap pieces before going any further. I just thought it would be easier to do now. And I just did one coat of paint. After that first coat, I liked how you could see the pattern of the grain just faintly, so I left it.

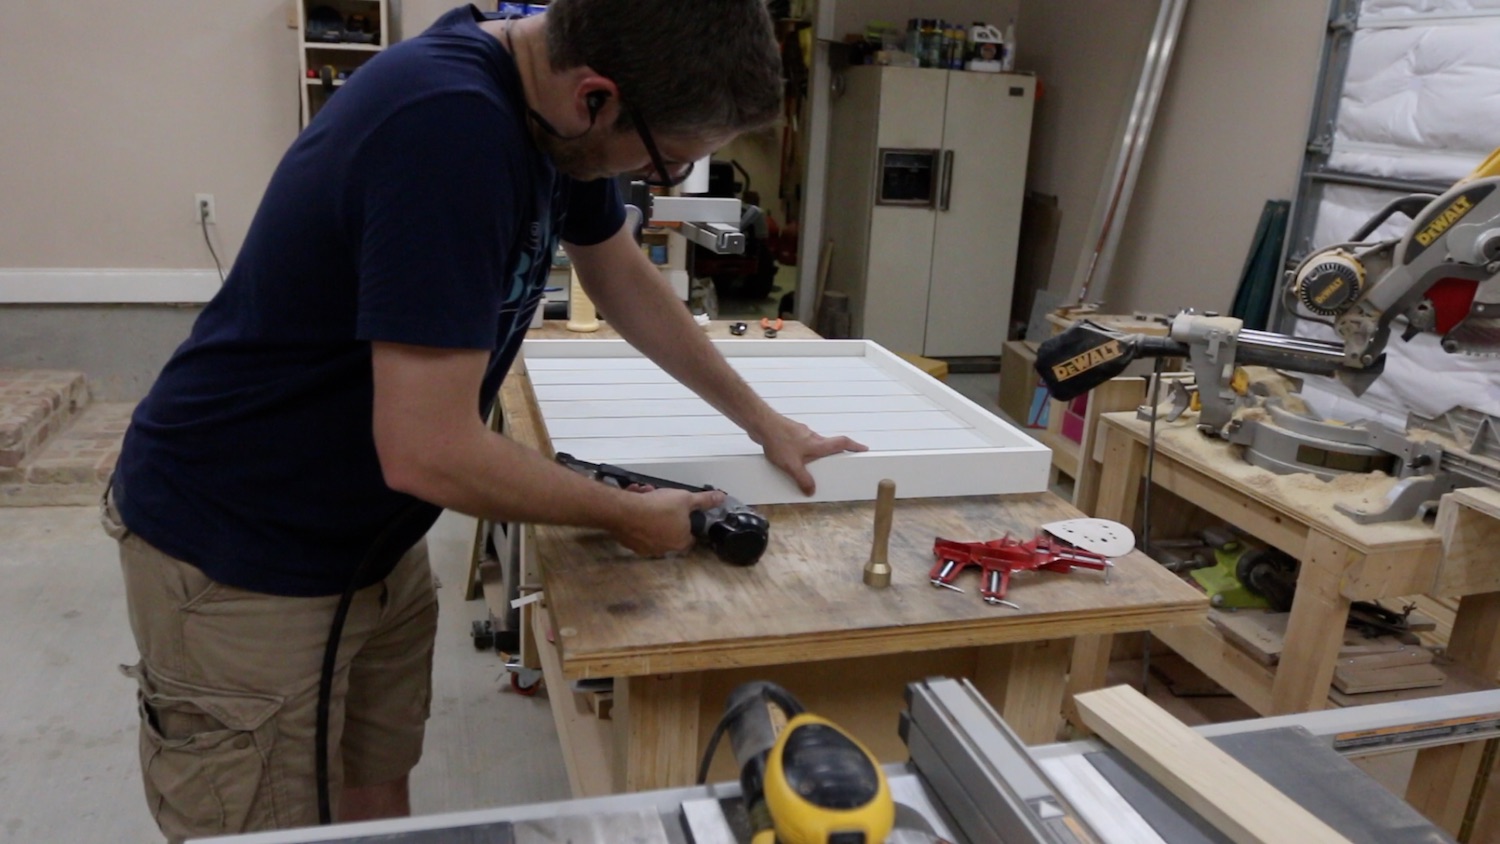
Next, I cut a few strips that will go along the back side of the pieces and allow them to all hold together. These will help the overall structure of the piece. I used two long ones, almost the height of the piece, and two smaller ones. I did two of them smaller because I didn’t want them to interfere with the French cleat.
I cut a French cleat and attached it at the top of the back side. I’ll use this later on to hang it on the wall since this piece will have a good bit of weight to it. It is a good thing to remember to use a square when attaching the French cleat. You want to have the cleat attached in line with the actual piece’s edge. That way, it is easier to get the whole thing level when you hang it on the wall.


Next, I cut some pieces for a frame. I had some finger joint scrap leftover from something else, so I used that. It was a similar thickness and I could get the width out of the pieces to make a frame that I wanted. I cut 45 degree miters into one side of a piece, held it in place, and marked where the next cut would need to be, and then cut it. This seems to be a good way to kind of measure and cut as you go. Just be sure to label which sides and frame pieces go together, because they might be slightly different. Just like with the shiplap pieces, I pre-painted the frame pieces before moving on.
I attached the frame pieces to the shiplap with some small brad nails. I also used some wood glue, but if I did it over, I probably wouldn’t do this again. The glue kind of got everywhere, and it smudged up the paint a good bit.


I ended up having to remove a couple of the frame pieces after I had nailed them a few times, so I had more nail holes than I wanted. If there would not have been that many, I might have considered leaving them. However, there were a ton of holes, so I used some wood filler and a putty knife to patch the holes.
After that dried, I sanded them down a bit.


Then, I had to paint the frame again. Most of it was to cover the spots I had to patch, but some of it was just for the smudges like I mentioned about the glue.

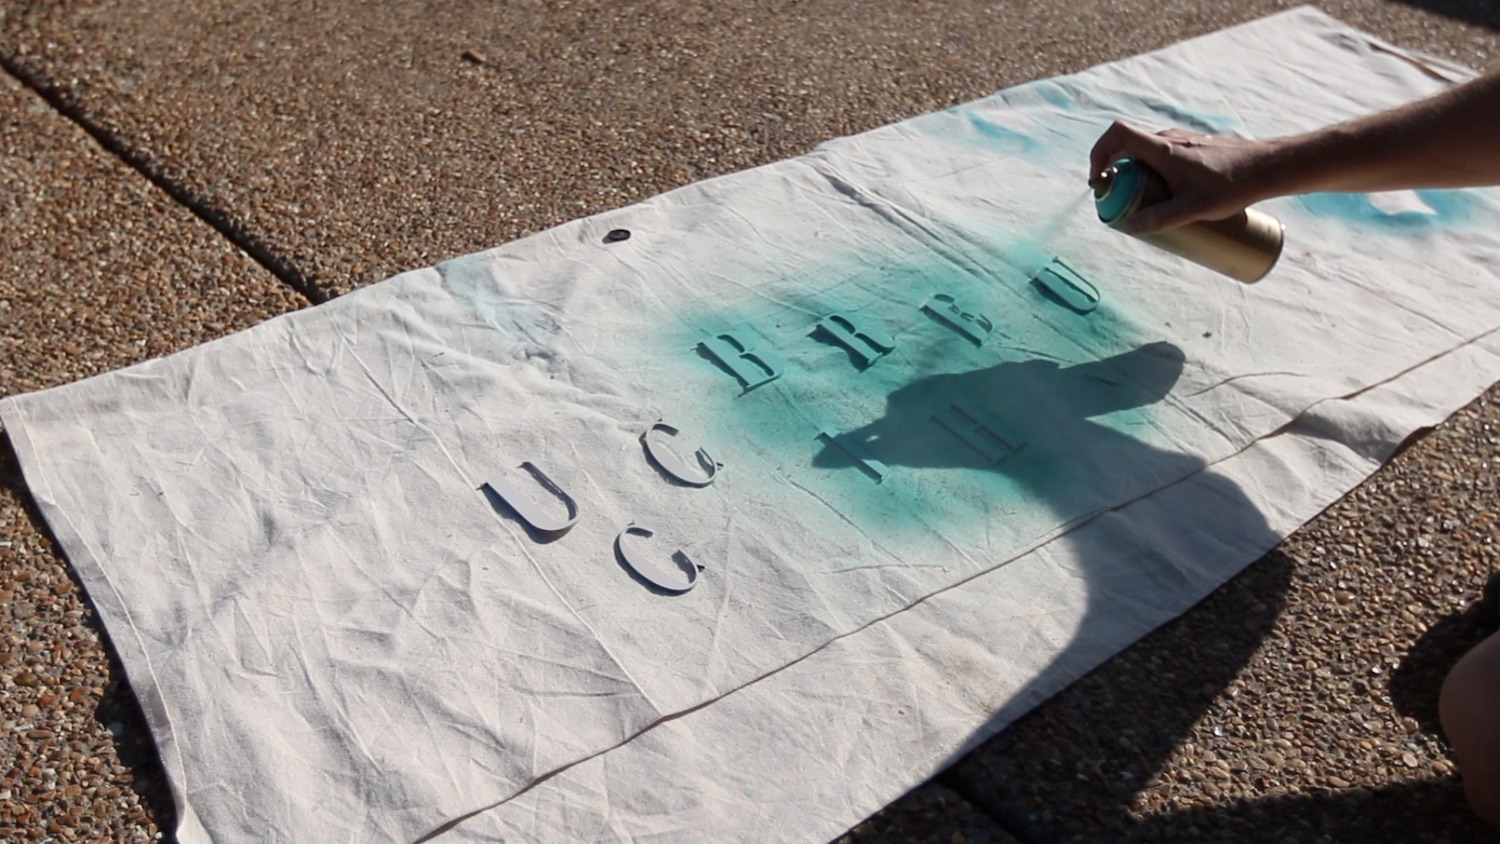
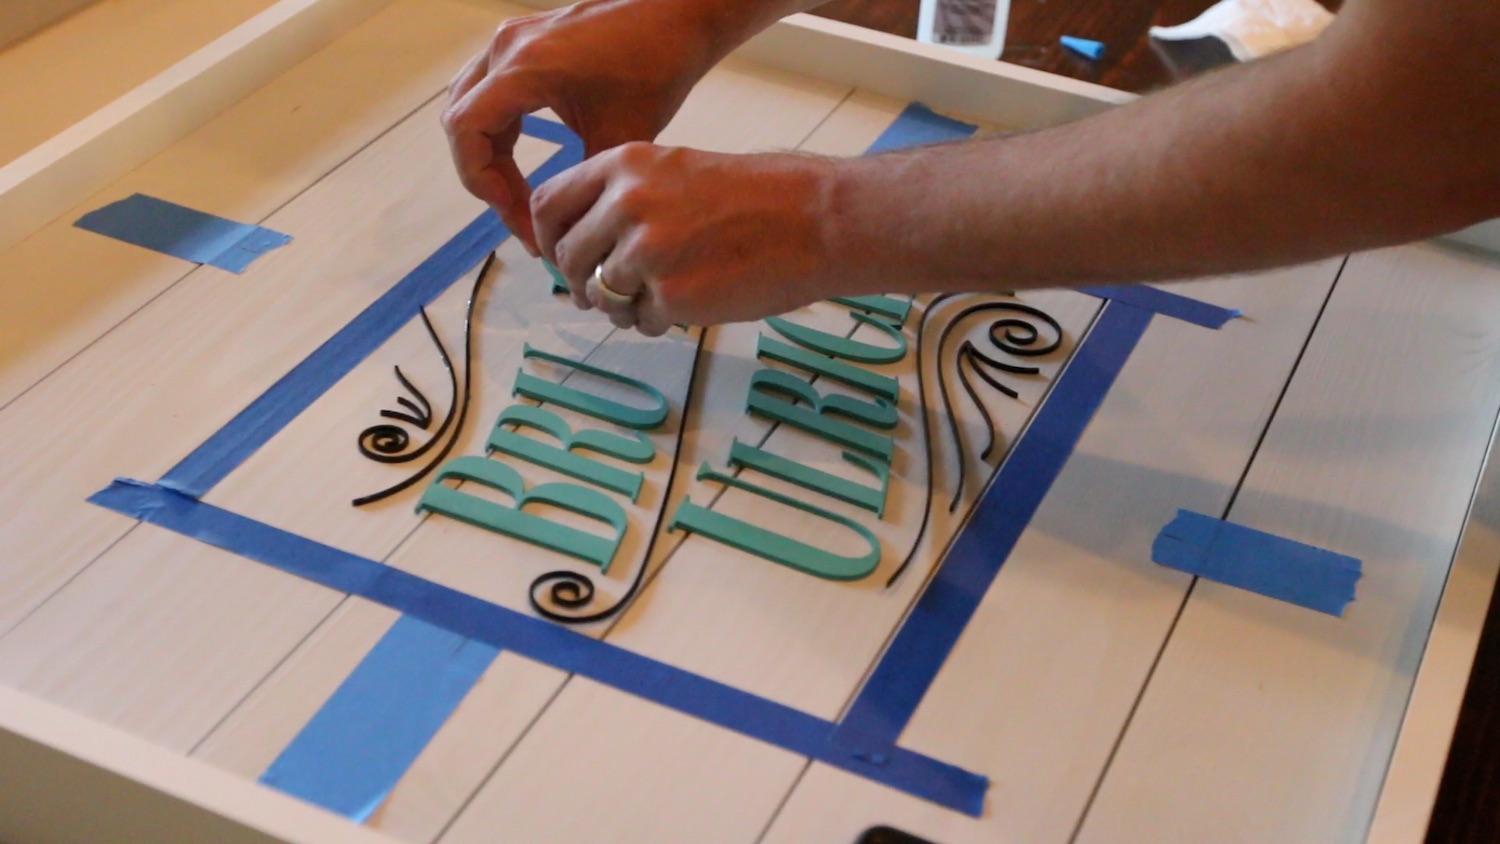
I cut out my logo from a couple of different types of material on my Gowforge laser cutter. I wanted to use some black acrylic for all of the hand drawn elements in my logo, and for the letters, I used some maple plywood. On the plywood, I used some Montana Gold spray paint in the color of my logo (they have TONS of colors!), and sprayed on a couple of coats. There is really great coverage in just two light coats.


After a couple of coats of spray paint, I attached the letters and hand drawn bits of my logo to the shiplap sign. I used Montana Gold spray paint for this, and it covered very nicely in just two light coats. I started using some E6000 adhesive for this and it was a goopy mess. I ended up switching to some CA glue, and that went fine.


I secured the French cleat to the wall, so the sign could be mounted. One thing to note here; be sure to mount the French cleat to the back of the sign in a square fashion. Mine was a little off, but I corrected that by just adjusting the piece on the wall to be out of square. It ended up being perfect.


CONCLUSION:
I really like how this shiplap wood sign turned out. I think using the laser or another digital fabrication tool is a great way to get some precision, but I like mixing some of that and more traditional construction for the rest of the frame. You could definitely cut out all of these letters and lines with a coping saw or a scroll saw, if that’s what you had.
If you haven't already, check out the video and project of the shiplap treatment we did on the walls some months ago. For this project, we used some material to give the look of shiplap, but it was not actual shiplap like I made for this sign.
Thanks for following along with this project! Let me know what you think about it below. Would you have done anything differently? Would you have used different colors?