DIY Headboard with Modern Art
VIDEO:
I’ve been needing to make a headboard for our guest room for a while now, so in my most recent project, that is exactly what I did. This DIY geometric headboard is made from maple hardwood and utilizes paint for the design. Follow along with the steps below and watch the video:
BACKGROUND:
I’ve had this idea rattling around in my head for a while now and it feels good to finally get the project built. I’ve partnered with Wagner for this project to use one of their sprayers, the Flexio 5000. With some planning, a little bit of tape, and this sprayer, I was able to create this cool, geometric design.
CHOOSING THE LUMBER:
When I was picking out the lumber house for this project, I was looking for boards that were decently wide, so I would not have to use many. However, my jointer is only 6 inches wide, so I had to utilize my iBeam sled in the planner and on the table saw to mill the material. (If you want to see more about this iBeam sled, I did a full video about it.)

MILLING THE MATERIAL:
The milling process is really the same for every project. This one was slightly different because I had to use that iBeam sled, but I still needed to get all my material flat on one side and one edge and then all a consistent thickness to be glued into a panel.


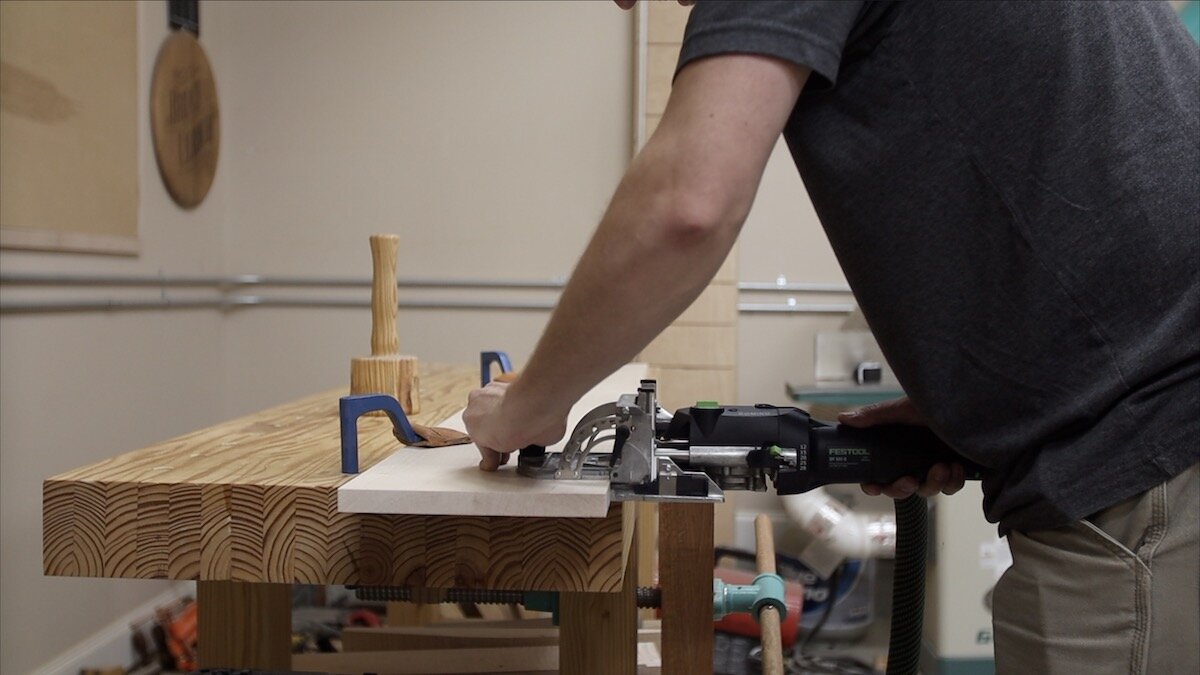
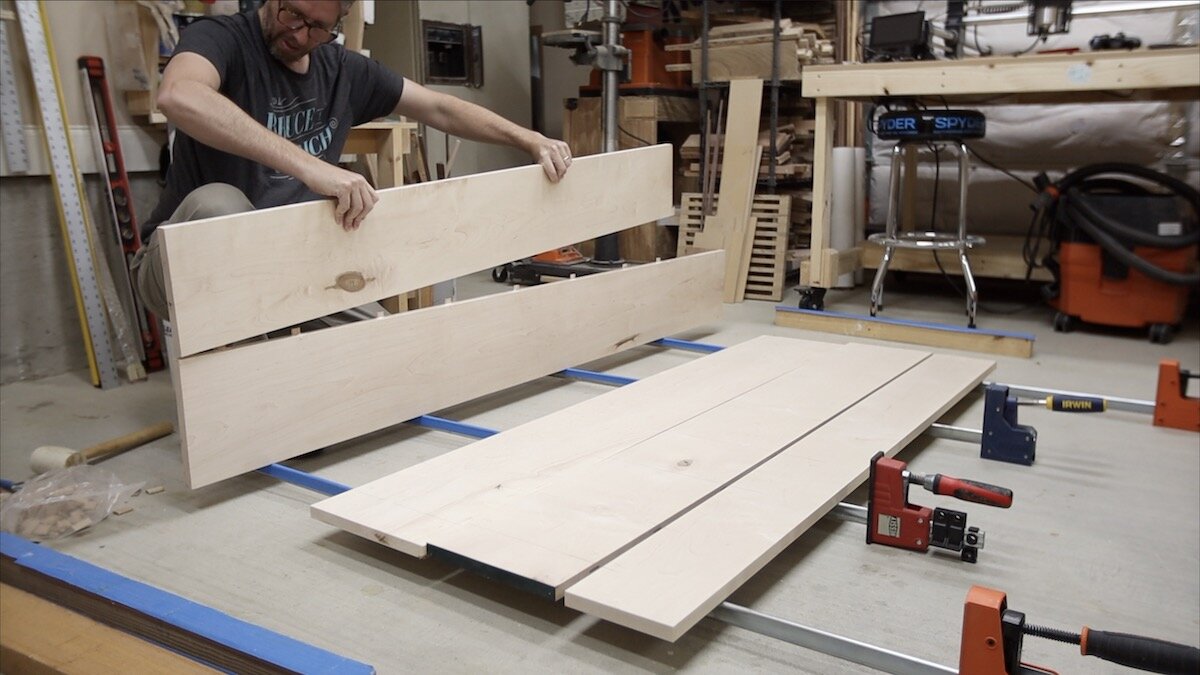
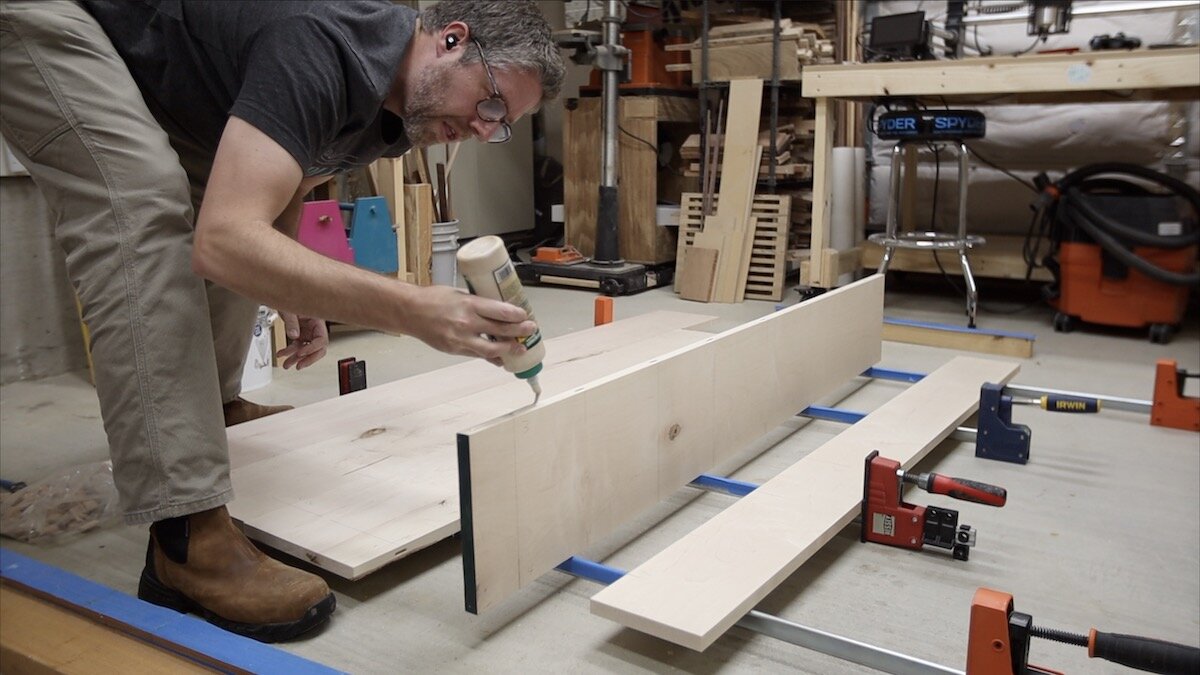
ASSEMBLING THE PANEL:
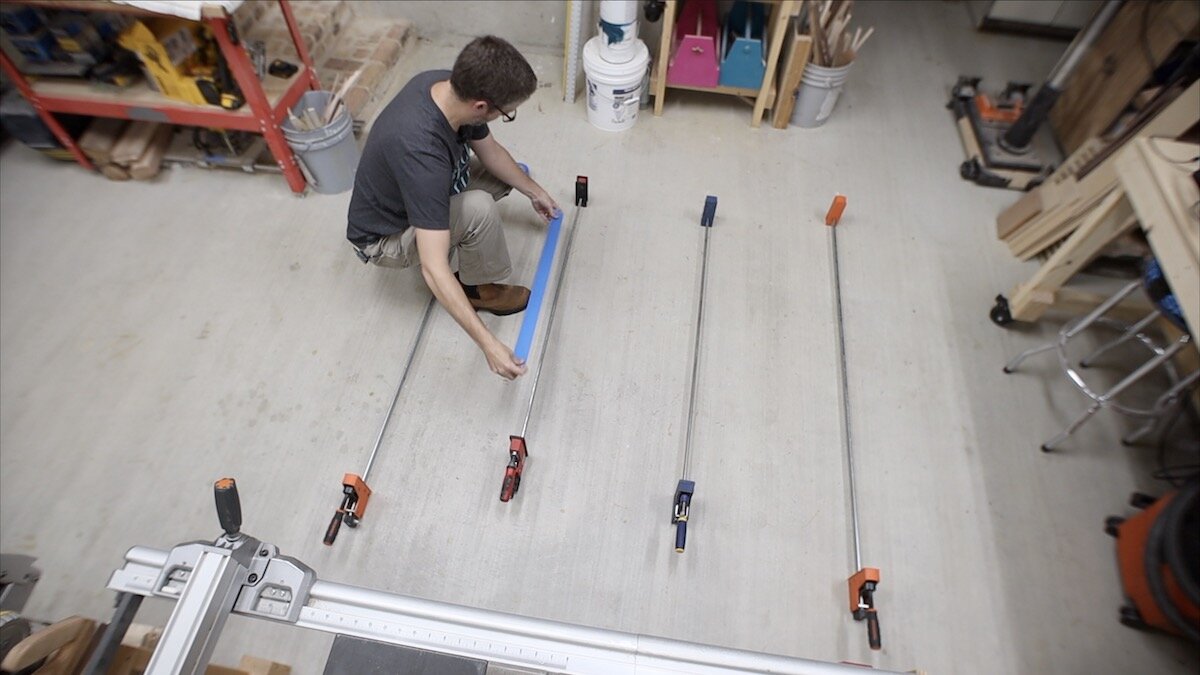
Now that all of my boards are milled, I used my domino to cut some mortises in the edges of the boards and then I will use loose tenons when joining them together. I apply glue to the first board and add the loose tenons being sure to get lots of glue on the tenons. These tenons are made from compressed wood and work best when you get them wet with glue. Once they are placed inside the joint, they swell just a little. Then, I just continued on until I had all of my boards glued into a panel. QUICK TIP: lay down some painter’s tape on your clamps to prevent glue squeeze-out from getting on them. Once glued together and in clamps, wipe off as much excess glue as possible.


SANDING AND SCRAPING:
Now it’s time to clean up the panel once it comes out of the clamps. I started off using a scraper and removing the excess glue before moving to an orbital sander starting at 80 grit and working my way up to about 180 grit. Go slow and keep your sander flat. You don’ want to create dips or ridges as you are trying to get rid of the glue.
THE DESIGN:
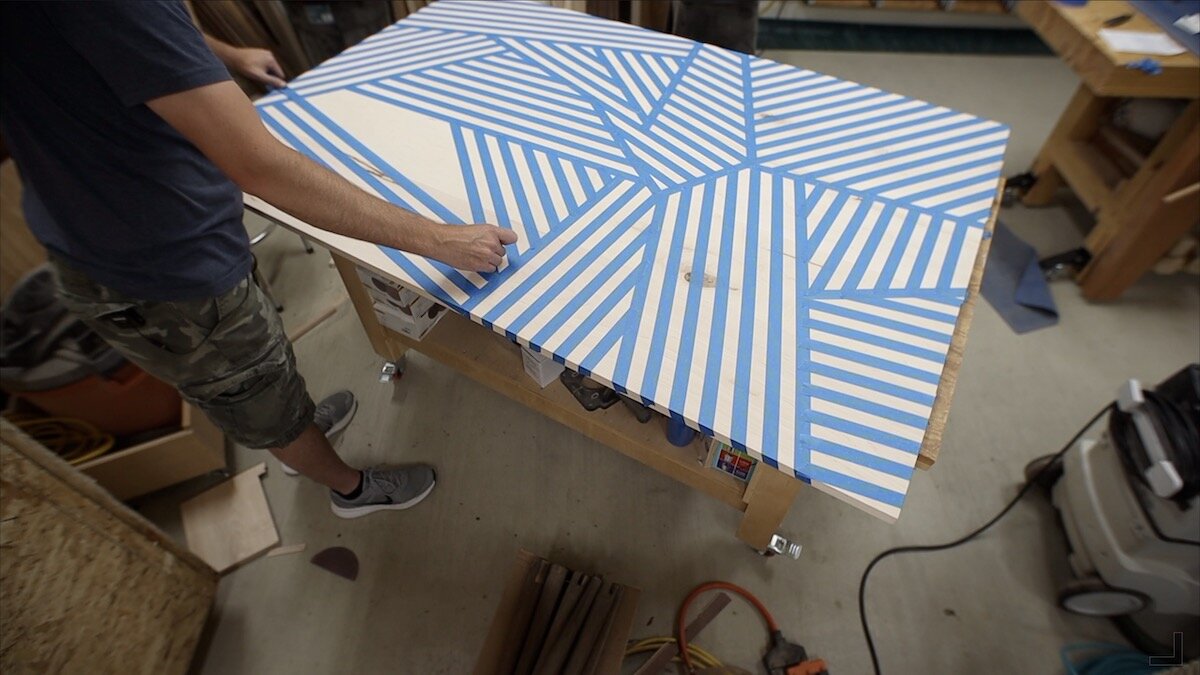
Next, it’s time to add the geometric design. As I mentioned, I have had this idea for a while now. However, I needed to do a little planning to make sure I could execute it the way I envisioned it. It’s a little difficult because the tape that you are laying down on the piece is actually the negative of where the design will end up. I just went slowly and laid out one section at a time. I could have measured and laid out marks and been very exact with all of the taping, but I found I was able to be exact enough doing it all by eye. I used the tape width itself as a guide to help me space everything the same width. As I would make a row and move on to make the next row, I would just roughly make sure that my next row has about a tape’s width in between. The basic concept is to put a bunch of lines of tape down all going in the same direction. Then change the angles and use a borderline of tape and continue on making variation after variation. I wanted some lines to be long, and some lines to be very short sections going in every direction.

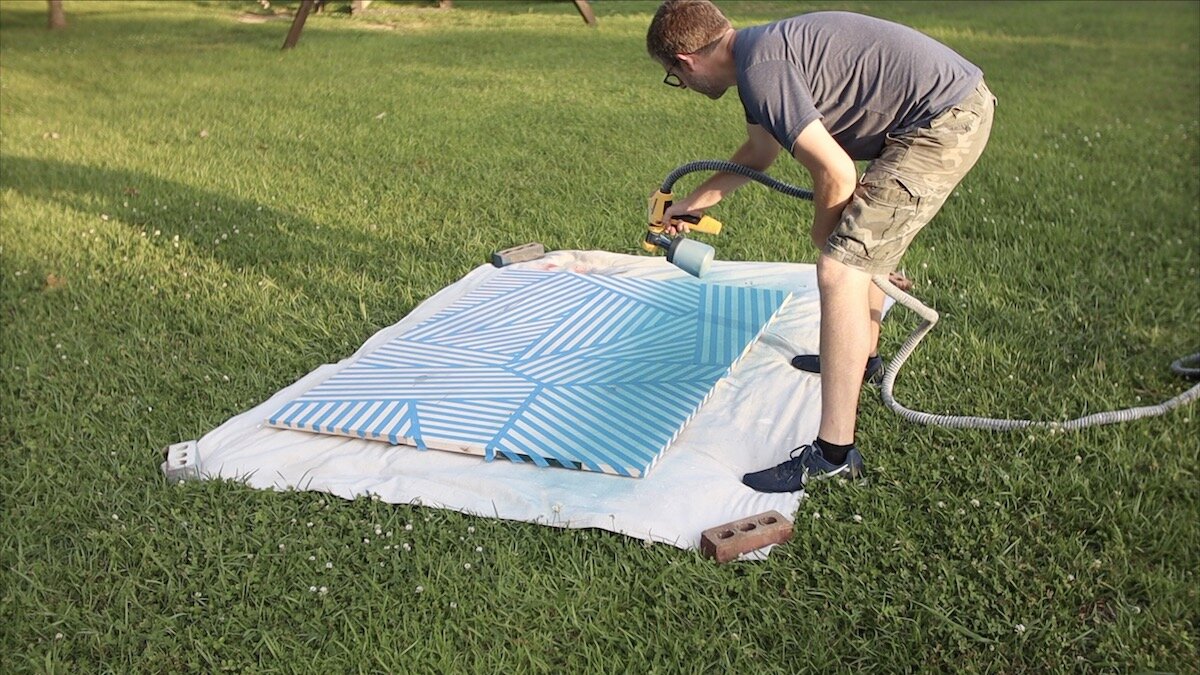
SPRAYING THE PAINT:
It is time to spray the paint on this piece. I decided to spray mine outside because it was a nice day and I had plenty of ventilation. I loaded up the Wagner Flexio 5000 paint sprayer with the paint I chose and for this project, I am using the detail sprayer that comes with it. Take a minute and dial in the sprayer like you want it. For me, this is usually squeezing the trigger a few times to see how much paint is coming out and how much pressure the machine is using to push it out. These two are adjustable. I prefer to do a few really thin coats. The first coat will not even look like the same color, because it is typically very thin, but don’ worry, after a couple more coats, the project will look fantastic. I painted a total of three coats moving slowly back and forth across the piece at a consistent distance.


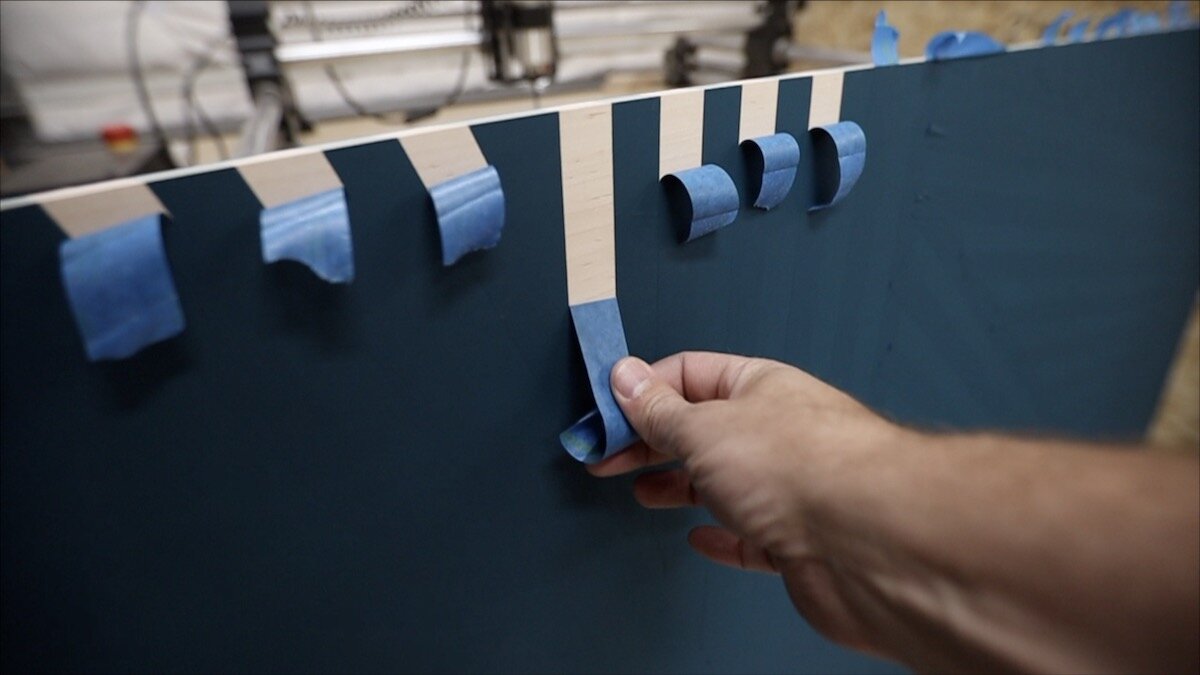
REMOVING THE TAPE:
Removing the tape was probably the most satisfying parts of the project. I got to pull each piece of tape revealing a crisp line left from spraying the paint. There is not much more to say about that. I just continued to pull the rest of the tape off. At this point, the full design was revealed and I was really liking it.


ADDING THE FINISH:
The next day, I sprayed two coats of a water based polyurethane to give the paint some protection. The paint seemed like it wanted to kind of smudge or change color slightly since it was flat paint, so the clear finish really sealed it in and prevented that from happening.
I used a piece of a brown paper bag to burnish the surface and make it smooth. This helps remove any little nibs left behind from the spraying process.


TRIMMING IT TO SIZE:
The panel was left oversized until this point, so I needed to trim it down to final size. I used my track saw all the way around to leave a nice clean edge.

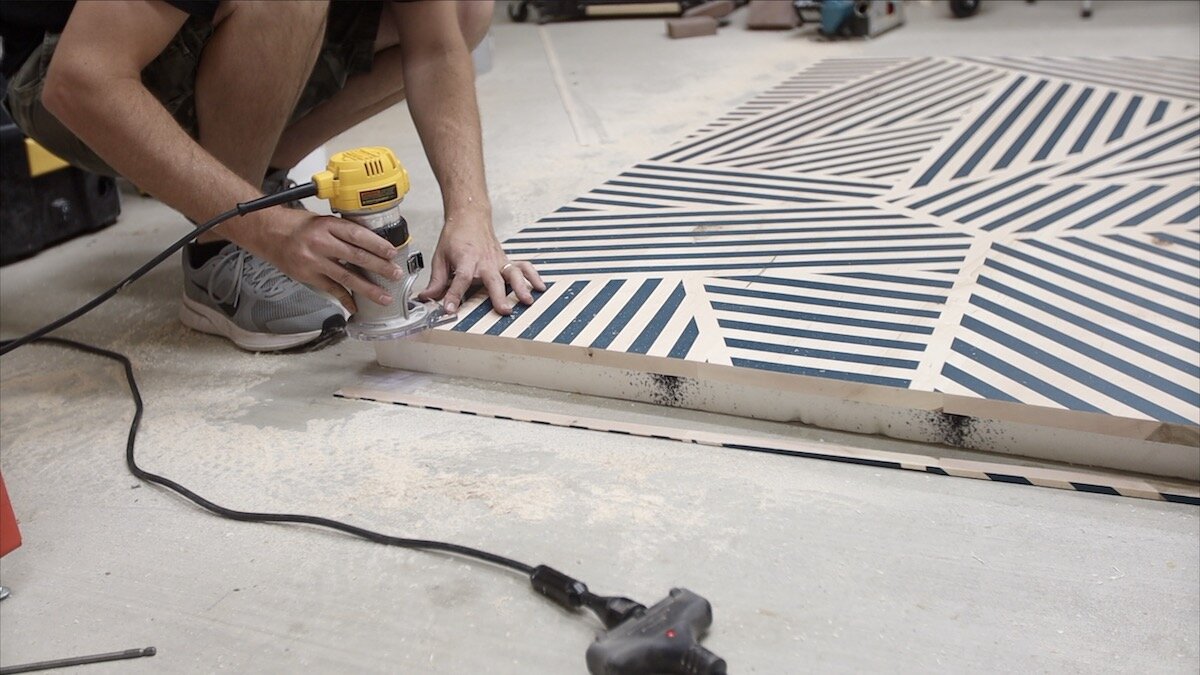
EDGE DETAIL:
We didn’t want this headboard to have any type of frame around it. We wanted it to have a nice, clean modern edge. To aid with that, I used a chamfer bit in my trim router to put a small chamfer on all the front-facing edges. This had the cool effect of making the design end perfectly at the chamfer. Since I trimmed the piece after adding the finish, I wiped some of the same water-based poly onto the freshly revealed edges.
CONCLUSION:
This project was a lot of fun! I am in the middle of making a new bed frame for it as well, so be sure to look for that soon. Take a look at some of the finished pictures below and be sure to watch the video if you haven’t already. See you very soon on the next project!


