Making A Jigsaw Puzzle Board
VIDEO:
In this project, I’m making a jigsaw puzzle board with limited tools that can be stored easily out of the way when not in use. Watch the video below and follow along with the steps as I show how to make this easy project:
BACKGROUND:
Years ago, my wife’s papaw made one of these for us, and we’ve been using it a lot. That is, until my wife got a puzzle recently that would not fit in the previous puzzle board. It was too large. So, I decided to make one that would accommodate pretty much any puzzle (within reason).
I used some nicer materials in this build since I had them on hand, but I’ll show how you can make this very easily out of some scrap that you have using minimal tools.
TOOLS & MATERIALS: (affiliate links)
Track Saw: https://amzn.to/3mo1kMQ
Guide Rail (long): https://amzn.to/3dLm0uC
Guide Rail (short): https://amzn.to/2PXbO9Y
Rail Collector Kit: https://amzn.to/2Px6cUb
Quick & Thick Glue: https://amzn.to/31Rnjm1
Nail Gun: https://amzn.to/3mmZtrQ
1 1/4" 18GA Brad Nails: https://amzn.to/2Q0bTKb
1" 18GA Brad Nails: https://amzn.to/3dJ1BpI
Felt Pads: https://amzn.to/3uq2muI
Brushing Lacquer: https://amzn.to/39NUlIh
Hand Sander: https://amzn.to/2Q4PWcB
Sandpaper: https://amzn.to/2Q4PWcB
CUTTING OUT THE BASE:
For this project, I’m sticking to 3 main tools:
Track saw
Cordless nail gun
Drill/Driver
By doing this, I figure it makes this project approachable for many people, and maybe some of you will make this for your home also.
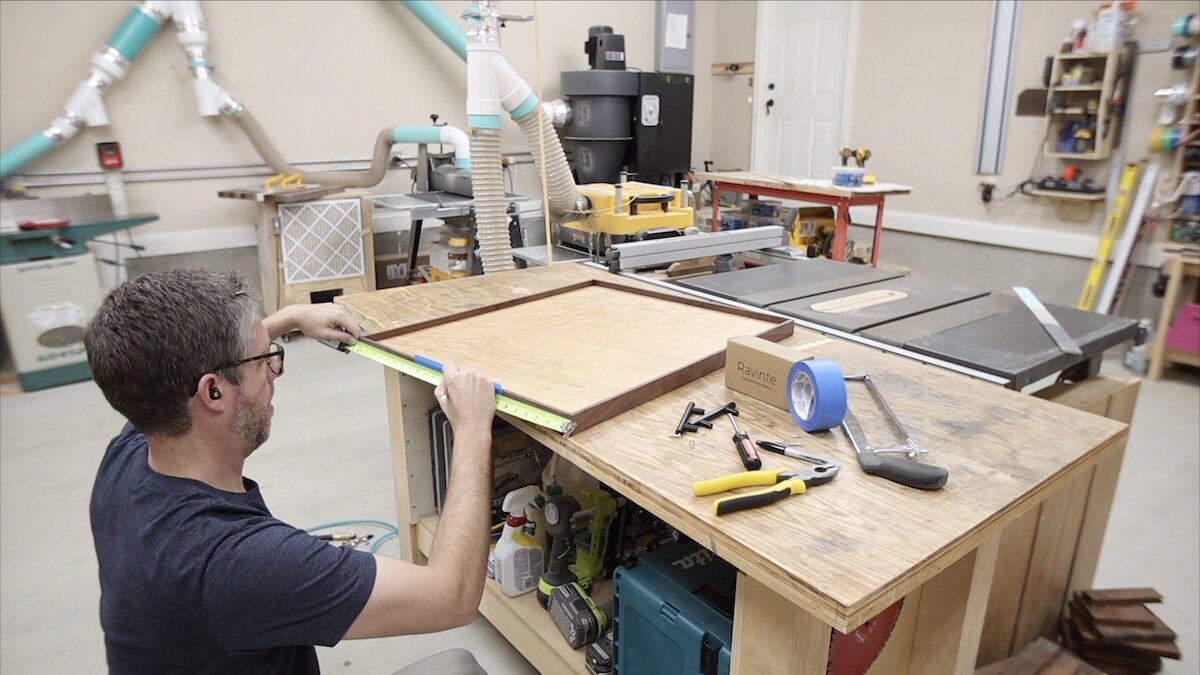
Using my track saw, I cut a piece of plywood I had leftover from another project to roughly 24” x 29”. I’m using 3/4” plywood here, but that’s really overkill for this project. If you used 1/2” plywood, it would make the whole thing lighter, and it would be plenty strong to move around.

CUTTING THE STRIPS FOR THE BORDER:
While the track saw is still out, you can cut a few strips off of a 2x4 or 2x6 by marking the same distance off of a freshly cut face on either end of the board, putting the track saw guide rail on your marks and cutting.
You might need to get another piece of material the same thickness to help steady the guide rail, if there’s not enough surface to support your saw.
I’m going to be using some thin walnut strips for the border of my jigsaw puzzle board that I have leftover from a table build, but I wanted to show how you could get just what you needed from a simple 2x6.
And I’ll show a little later on on the project some ideas for the border that might help you think of other ways you can do this. More about that soon.
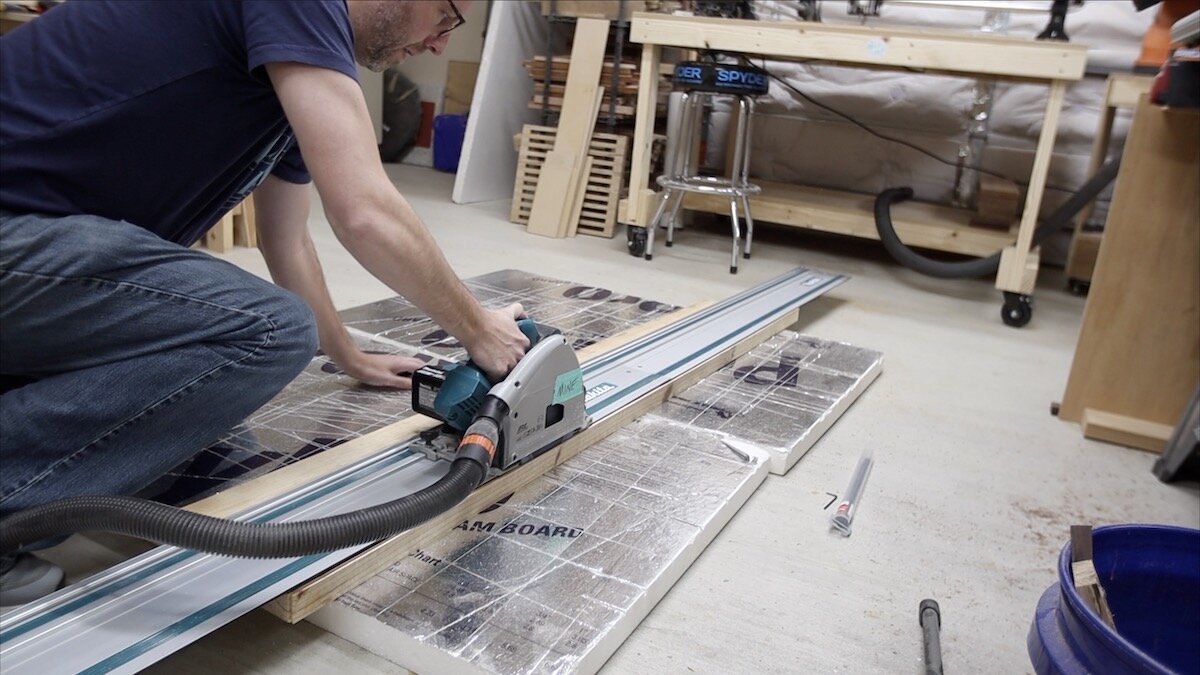
USING A TRACK SAW:
A track saw is a very versatile tool. In the past, I might not have suggested that someone pick one up before they get a table saw, but I’m leaning more that way now. You can just do so much with them…like cut out plywood safely and at any angle, make rip cuts to cut out strips like this, and more.
The guide rails come in multiple sizes so you can pick them up in the lengths you need for what projects you do. Plus, if there are some projects (like tables for me) that are pretty long, you can get a guide rail connector kit and put two of them together to make extra long cuts.

CUT THE BORDER PIECES TO LENGTH:
To cut the border pieces to length, you can strike a line where you need them to be cut with your square, and then put your guide rail on the line and make a quick plunge cut. Be sure to use a square or something to make the line so it will be perpendicular to the piece.
Since I already have a miter saw setup, I’ll be using that, but I wanted to show that this could all be done with the track saw.


SANDING EVERYTHING:
I sanded all of the edge pieces quickly before assembly because it would be MUCH more difficult once the piece was all assembled.
Then, I very gently sanded the plywood. Be sure not to sand too much on the plywood or you’ll blow right through the veneer on the surface.

USING REFERENTIAL MEASUREMENTS:
What are referential measurements? Well, it’s simply when you reference your actual pieces when deciding how long to make your outside pieces. In this case, for the short sides, I just lined one side up with the end of the plywood. Then, I marked where the other end of the plywood came on the border piece.
Then, I cut it at the miter saw.
For the long sides, you have to get a little more creative using this method. Since the long sides will be covering the short border pieces (butt joints), I need to measure the full length of the plywood AND the thickness of BOTH short side border pieces. By doing this, it will give the perfect length to cut the long border pieces.


ATTACH THE BORDER:
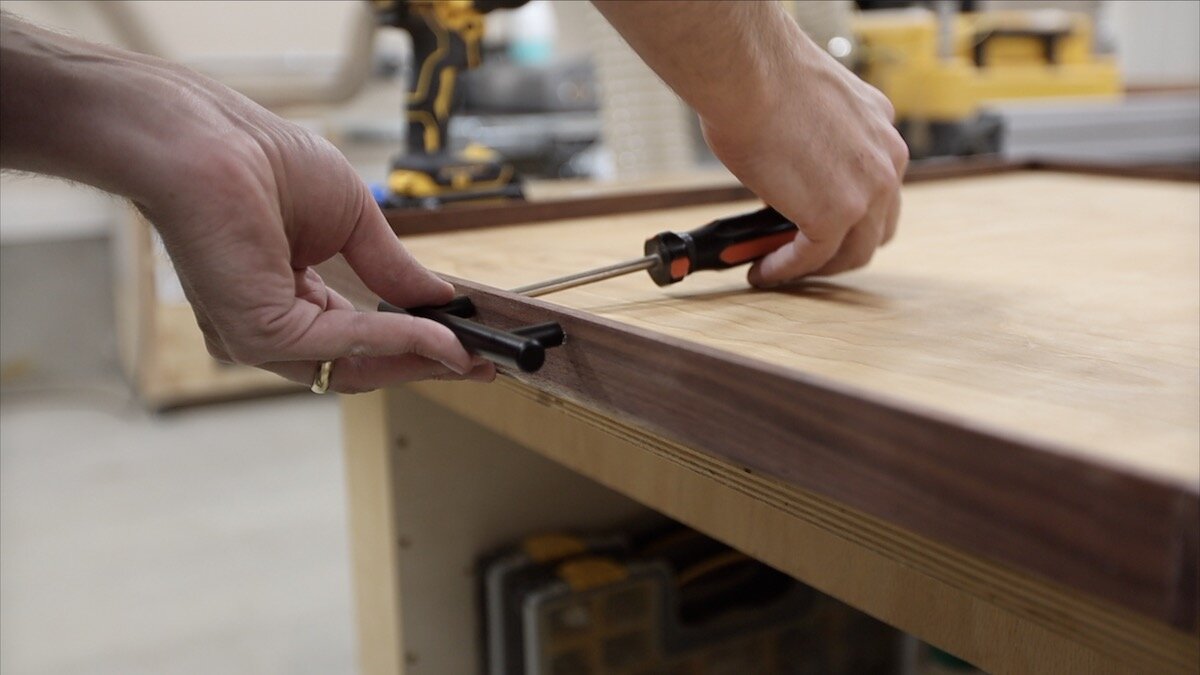
To attach the border pieces, I’m using the cordless air gun I references earlier. This particular one is not very expensive and can be purchased for about $150, including the battery. This is an 18 ga brad nail gun (that’s the size of the nails that it can use…the thickness of the actual nail).
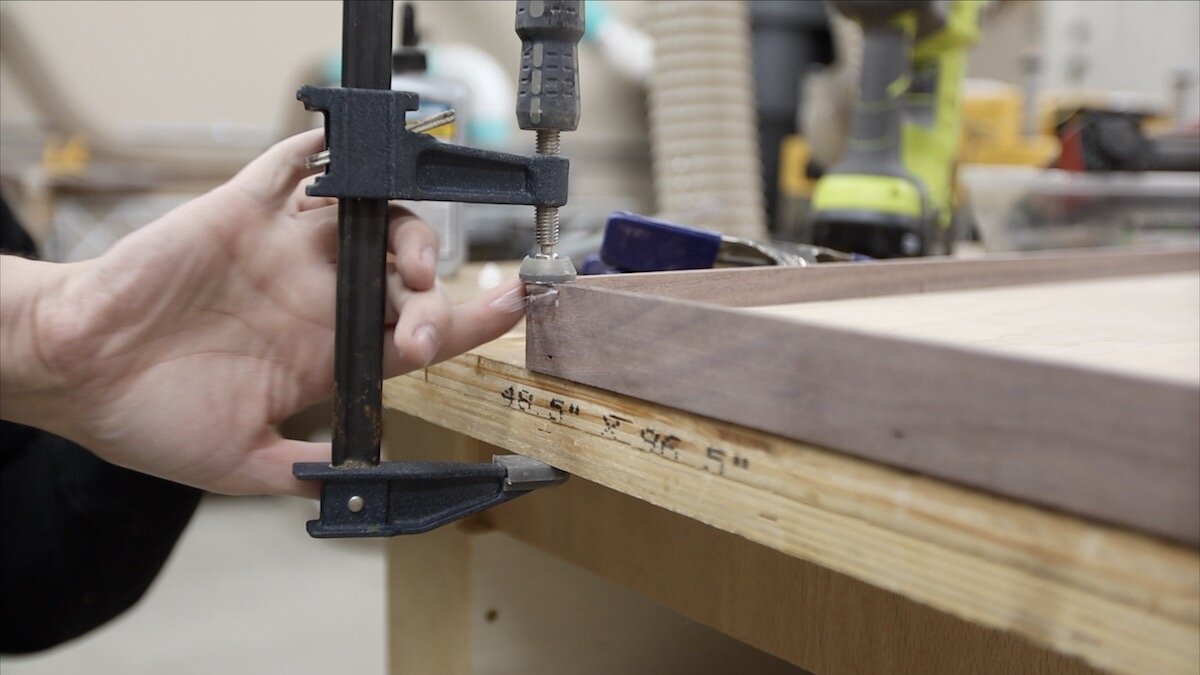
For nailing the pieces into the plywood, I used some quick setting glue and some 1 1/4” long brad nails. I switched to some shorter 1” nails to nail the walnut pieces together.
And that’s where I ran into a problem. I would ideally use a 23 ga pin nailer which is much smaller and doesn’t have the force and action that this one does. However, I was trying to keep the tools used to a minimum. So, when I nailed one of the walnut pieces into the upright of another walnut piece, it split apart. That’s common when you’re nailing with too much force on a thin piece, especially near the edge like this.
No problem, it was still attached at the top of where it split, so I grabbed some more of that quick setting glue, squirted it into the split and then clamped it back together. It turned out just fine, and you can’t really even see it. In fact, when I presented the finished piece to my wife, she never knew it was there until I told her. So, the moral to this story is don’t show people your mistakes! They might never notice! ha


I used a hand sander to give the whole piece a quick sanding before it was time for finish. You always want to make sure to break the sharp edges so when people interact with it, they won’t find any sharp parts.

MARK YOUR WORK:
Keeping with the theme of this build, I wanted to keep my maker’s mark on the piece simple. I have this stencil with my logo cut into it and I just grabbed a can of spray paint to quickly tag the back of my work.
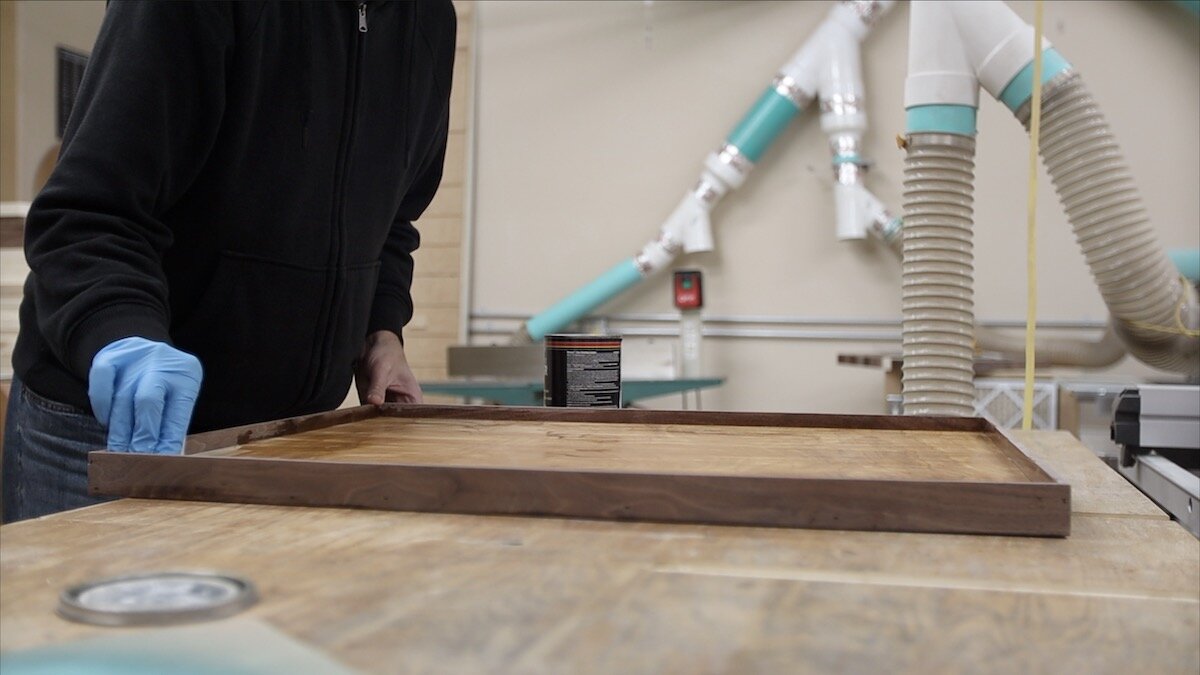
APPLYING FINISH:
It’s always so satisfying to get to this part…adding finish. For this, I’m using some leftover brushing lacquer that I had on the shelf, but I’m wiping it on with a t-shirt, rather than brushing it on. I thought I might need to do more than a single coat, but it ended up looking really good with just a single coat!

ALTERNATIVE MATERIALS:
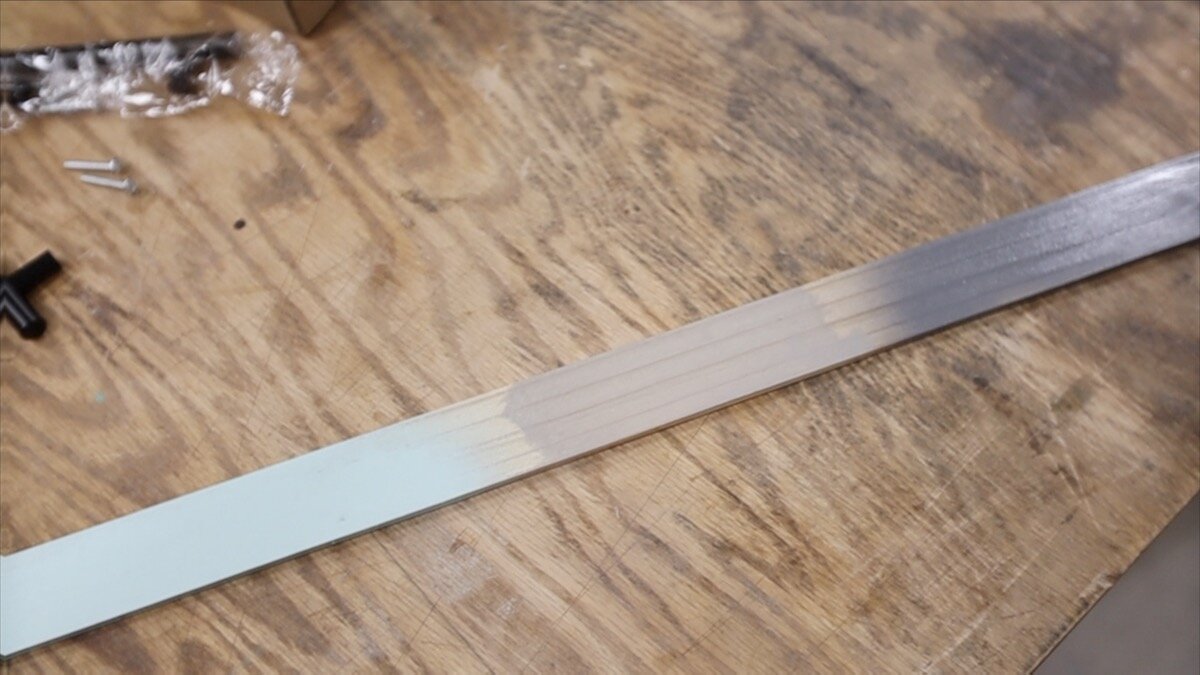
Remember when I cut a strip off of a 2x6 with the track saw? That was to show that you could use whatever materials you have around. You don’t have to use walnut like I did. I just happened to have these strips already. I painted that strip of the 2x6 with a couple of different colors and even a stain in the middle to show what all you could do with it. It could look really good with the edges having a pop of color.
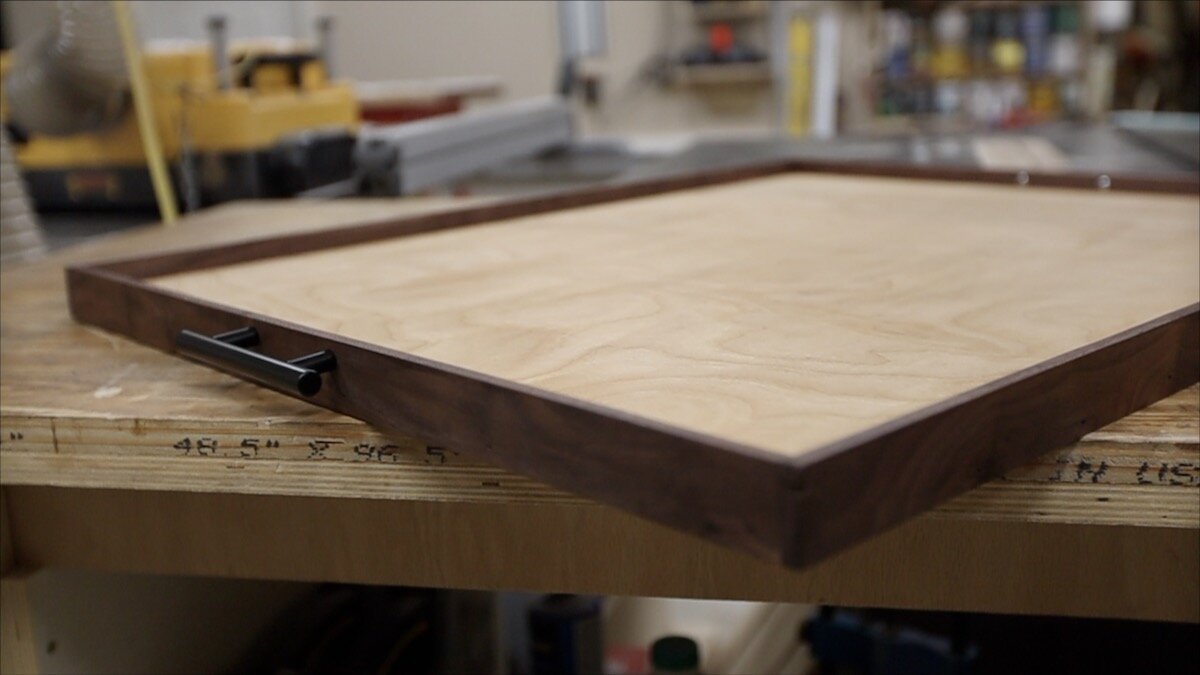
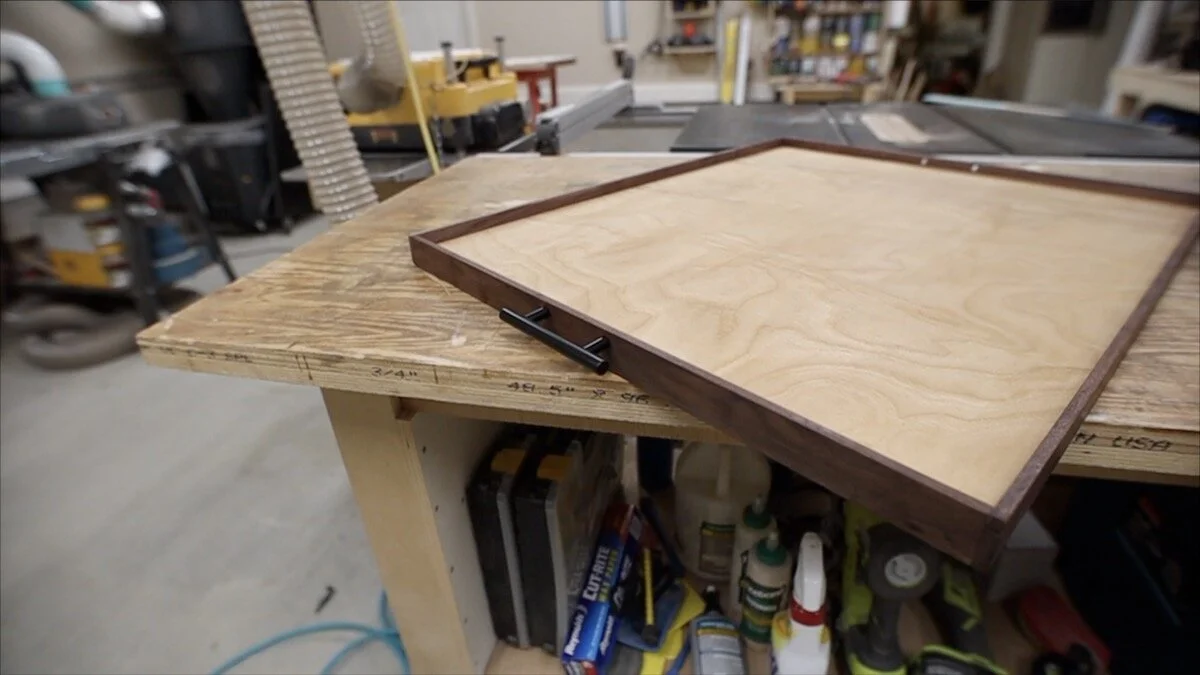
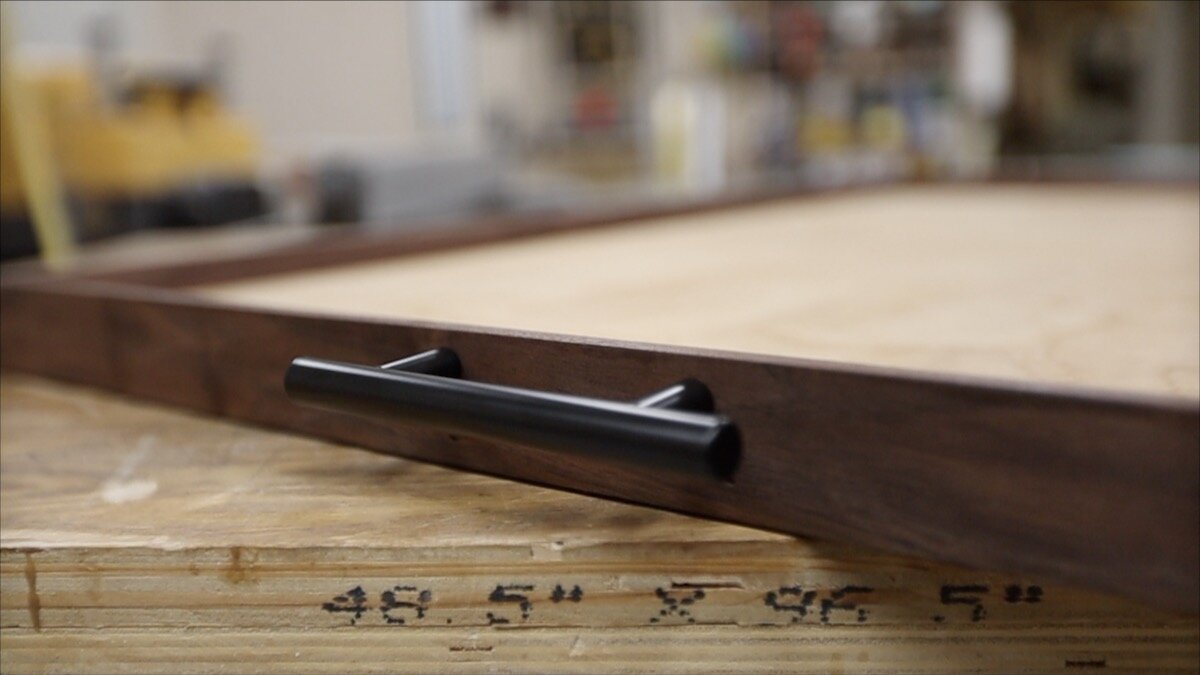
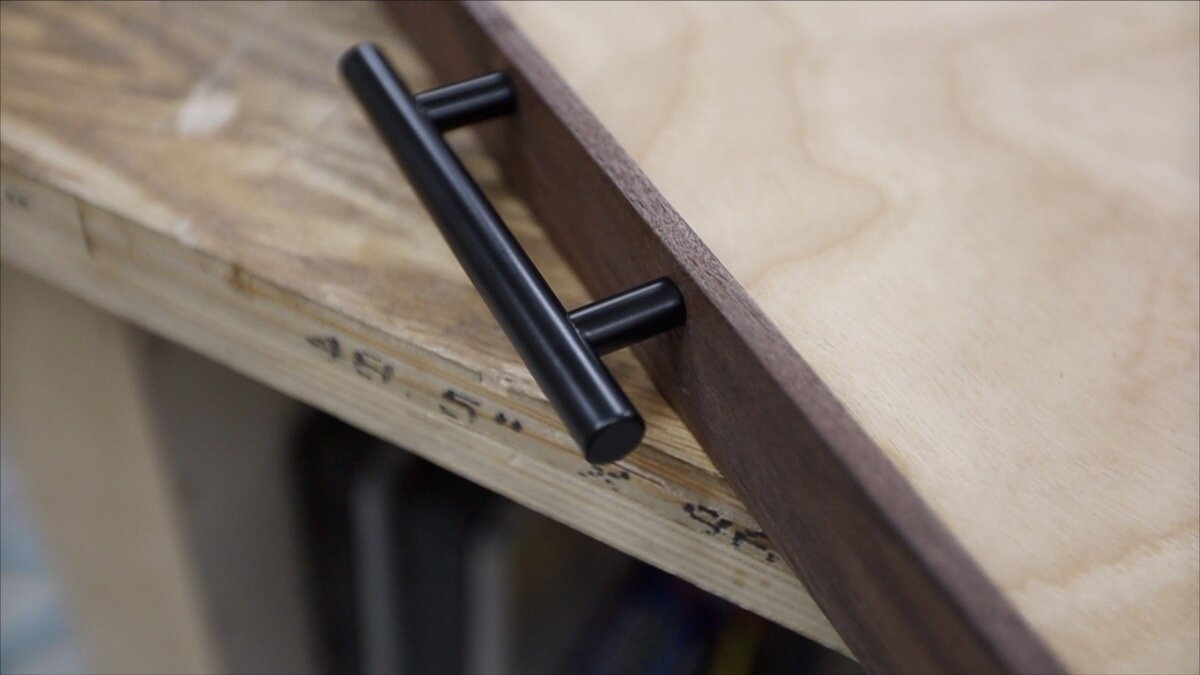
HARDWARE:
For the handles, I just picked up some basic pulls that are normally used for cabinets. These are pretty straightforward to mount. You just have to find the center of your piece and then measure to either side of that half the distance between your hardware's holes. For mine, the holes were 3” apart, so from my centerline, I measured 1 1/2” either way and made a mark. When I figured out how far down I’d like the handle to be, I drilled through with a small drill bit, going from the outside to the inside. This is to mark where I’ll need to drill out with a larger forstner bit, so the heads of the screws will sit flush on the inside. Then, after I get those countersink holes drilled on the inside, I move back to the outside with the larger bit that is the exact one the manufacturer of the hardware recommends.
I did have to cut the bolts a little shorter since the edges I’m using were so thin. I just used some pliers to nip off the ends, but you could easily do this with a hacksaw also.


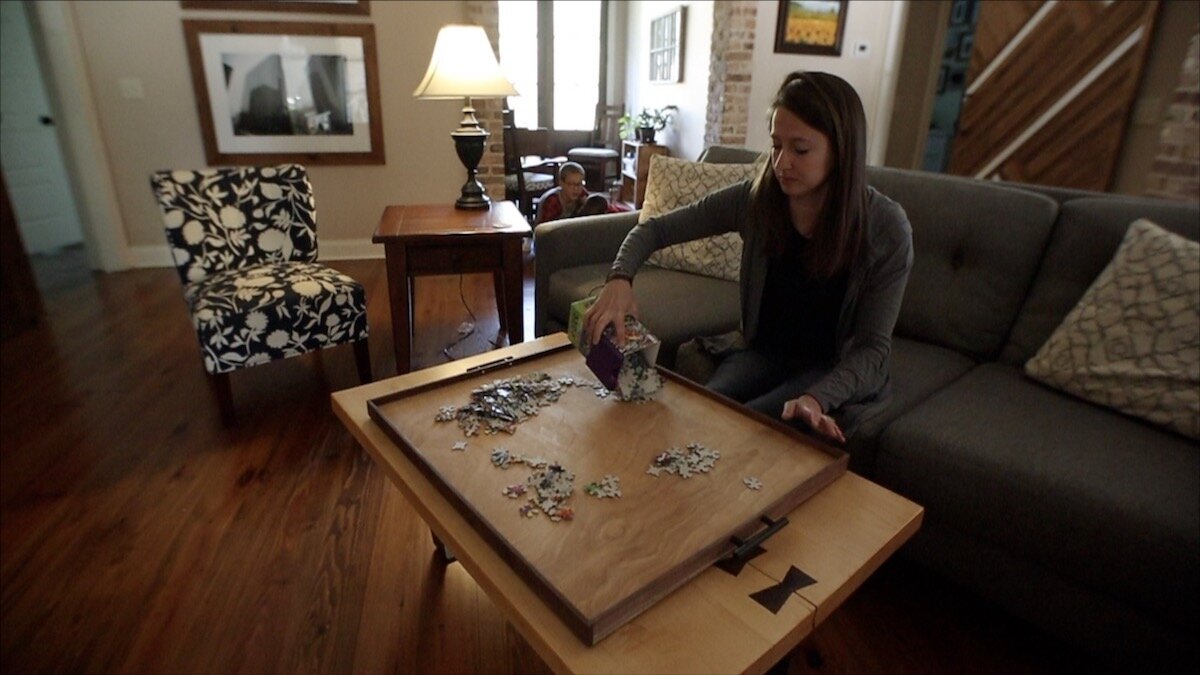
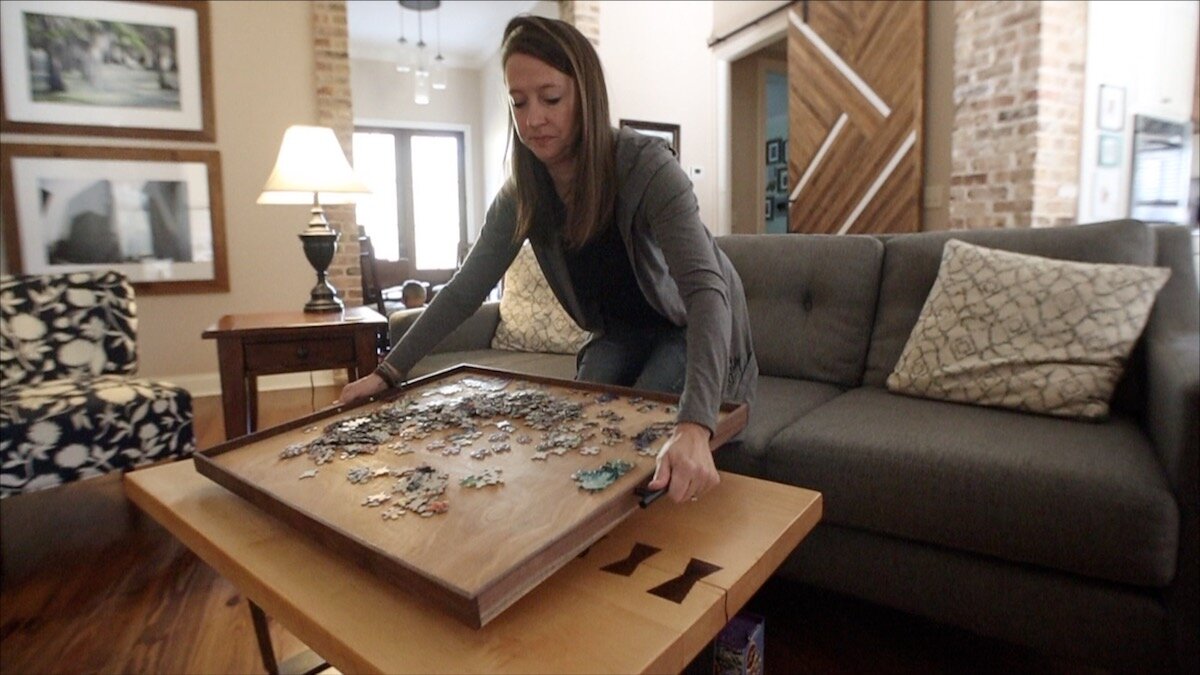
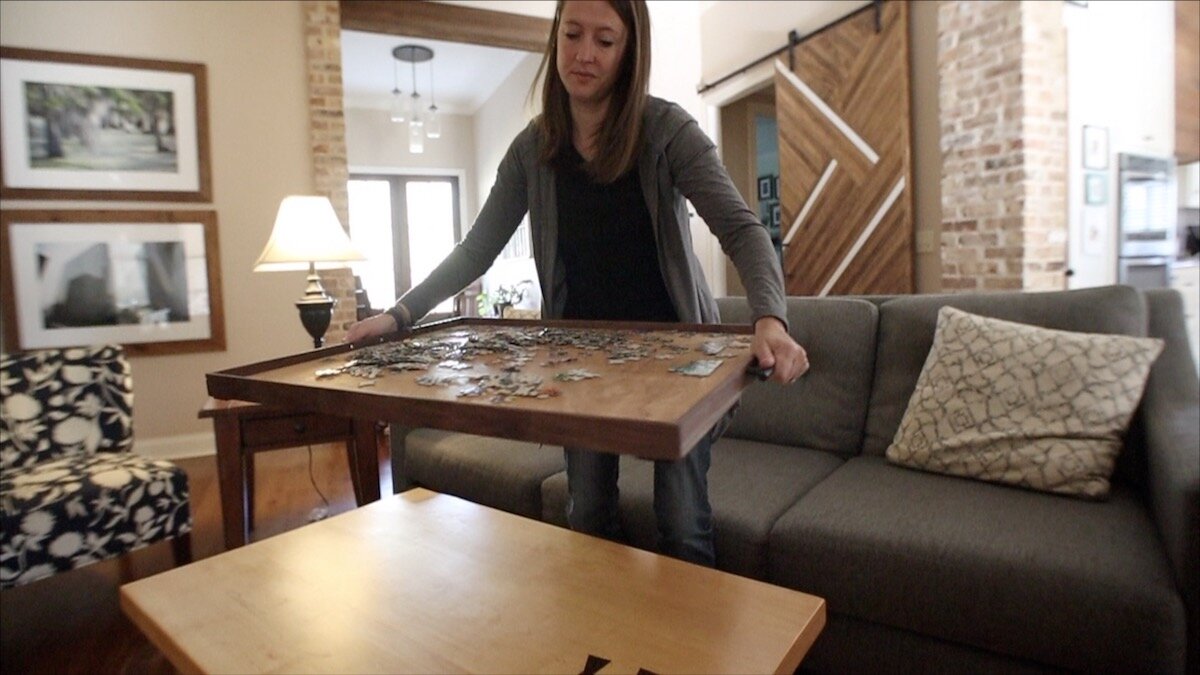
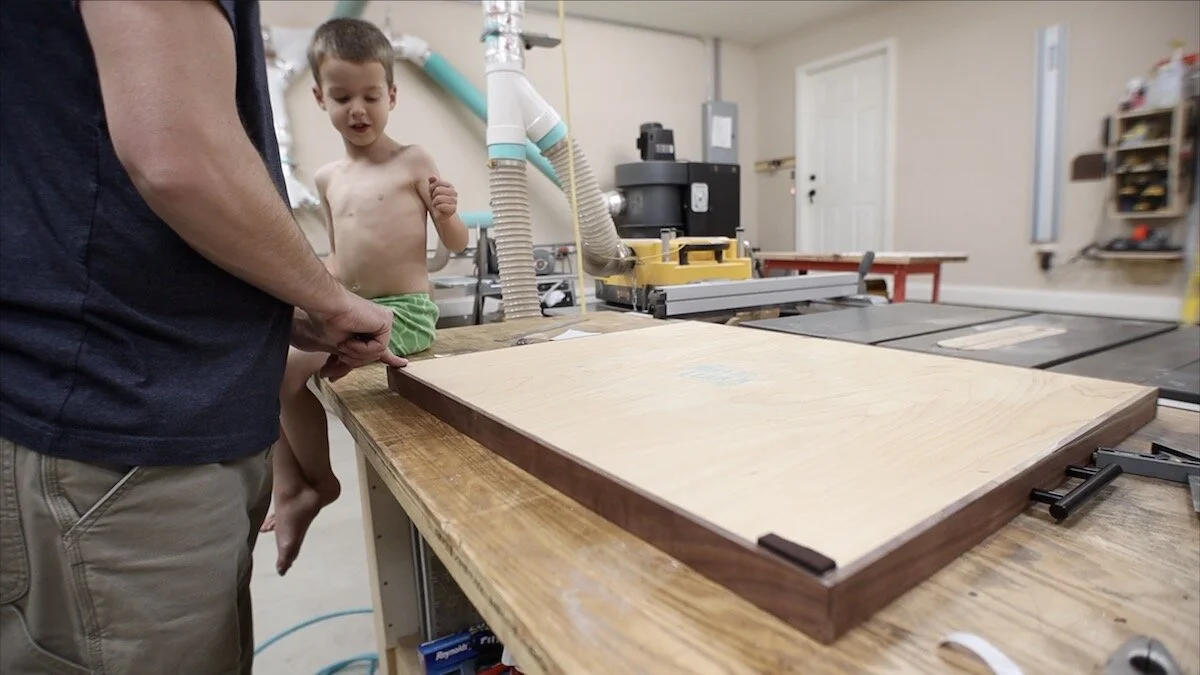
My youngest came out right before bed when I was finishing this up one night, and he wanted to help. I let him help me put some felt feet on the bottom of this, so it won’t scratch our floor or the coffee table where it will sit occasionally.
CONCLUSION:
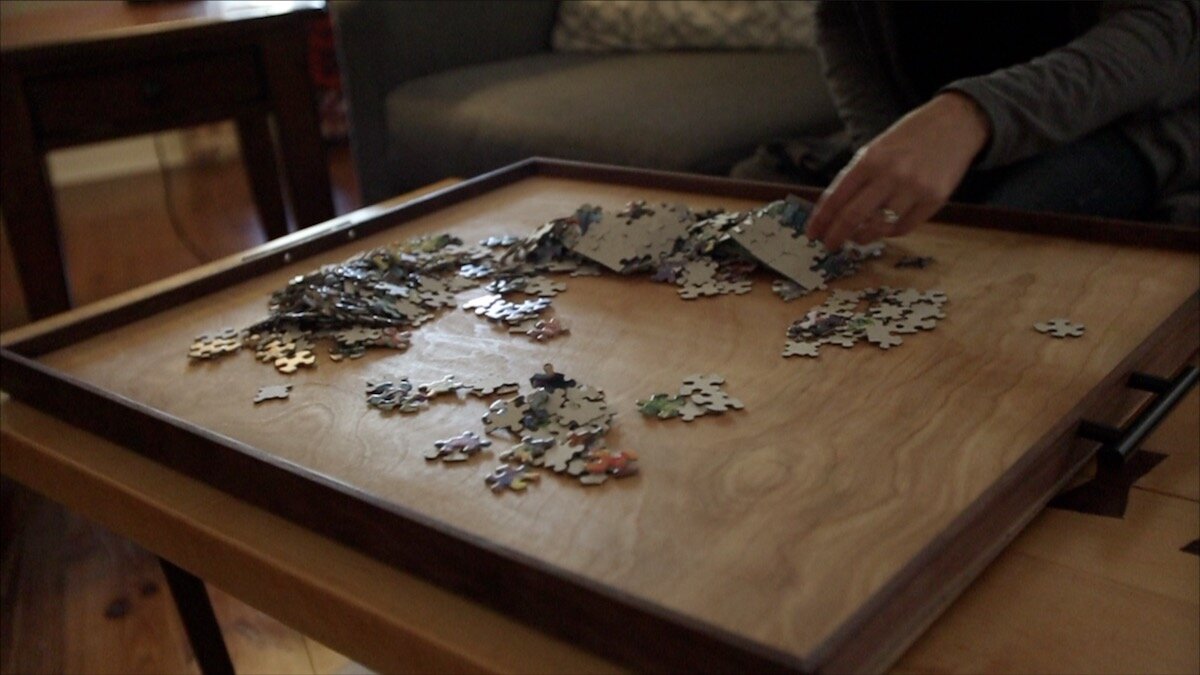
Well, that’s a wrap on this project! This was a fun, but simple one and we are already getting a ton of use out of it!
I’d love to see it if you make one. Be sure to tag me over on Instagram @Brudaddy.
Thanks for following along with this project! Be sure to watch the video if you haven’t already seen it, and I’ll see you on another project very soon!