How To Use A Branding Iron
VIDEO
This branding iron from Cranford Design Works is a great addition to my shop. This kit allowed me to turn the handle on my own. In this video, I show how to use a branding iron and answer a few questions you might have about them.
BACKGROUND
I have always liked branding irons. I've seen people mark their work with them, and have always wanted that for myself. A quality branding iron can be costly, but they can last a lifetime if cared for properly. And they can leaving a lasting impression on your pieces that will not easily be removed.
TOOLS & MATERIALS
(These are affiliate links. Clicking on them and buying anything on amazon helps support me, at no extra cost to you.)
Cranford Design Works Branding Iron Kit - t.co/fw0rpgFlTy
Table saw - http://amzn.to/2GcfFcI
Lathe - http://amzn.to/2u2QYdK
Carbide turning tools - http://amzn.to/2pucrb7
4-jaw chuck - http://amzn.to/2FWxxEZ
Drill chuck - http://amzn.to/2FXvKQc
Pull saw - http://amzn.to/2ufiJ3d
Sandpaper - http://amzn.to/2G7kaW5
5 Minute Epoxy - http://amzn.to/2pw2zxp
Lacquer - http://amzn.to/2puMrvk
Random orbit sander - http://amzn.to/2GPjaUo
STEPS
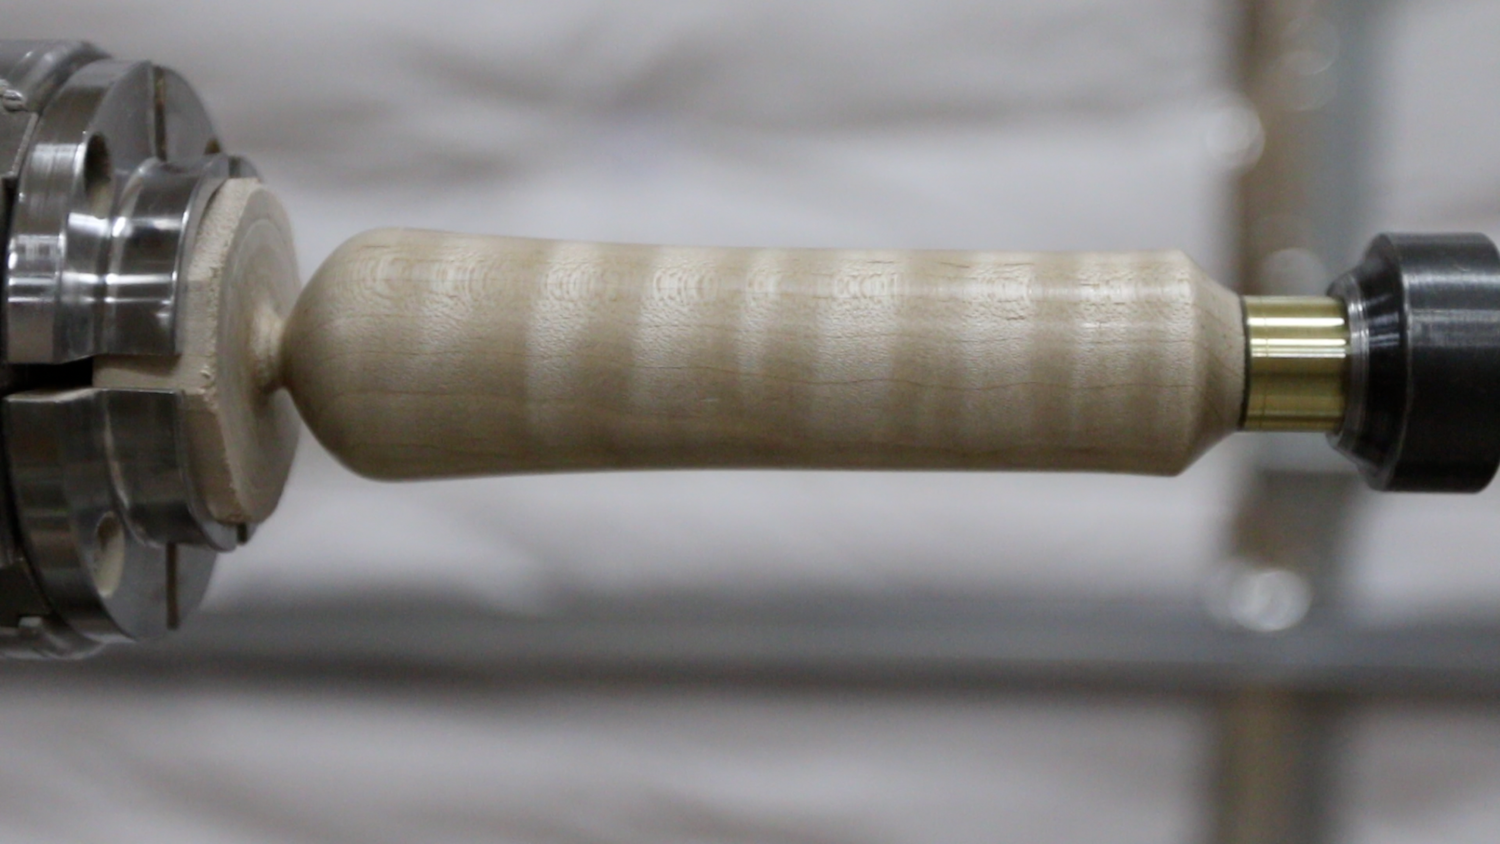
The kit I have came with a maple turning blank, a short steel rod, a long steel rod, a brass ferrule and the head of the branding iron itself.
First, I marked for center on the turning blank for the handle. Then, I took it to the table saw to rip off the sharp corners. This helps it to turn more easily.

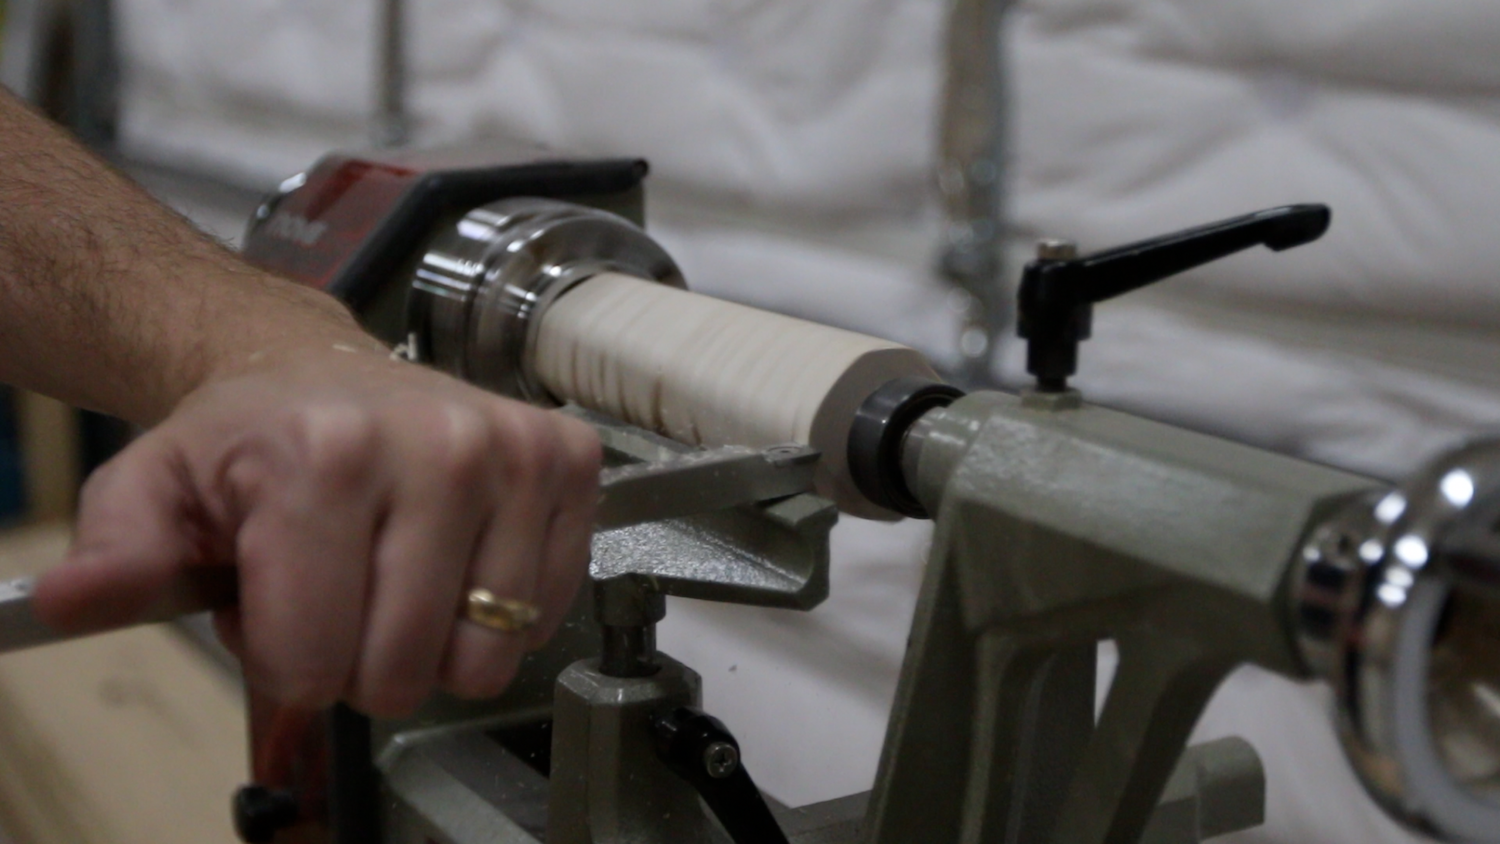
Next, I chucked one end up into the 4-jaw chuck on the lathe. I did this loosely, and brought the tailstock with the live center up to the blank tightly. Then, I secured the blank firmly into the chuck.
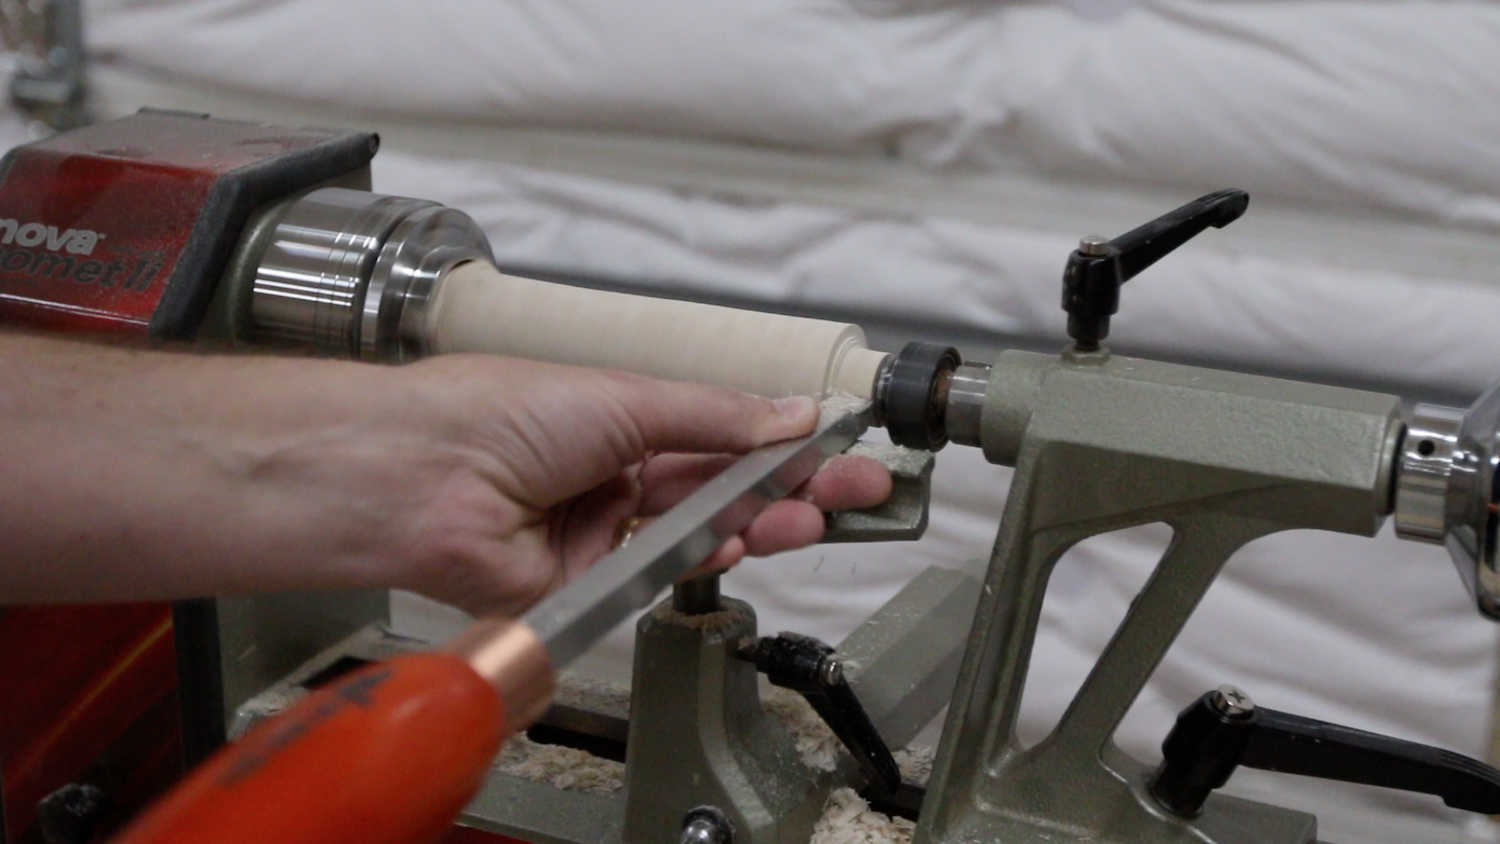
I wasn't going for any crazy shape, but just a general shape that is a bit more rounded at the back of the handle than I have done in the past. I saw an example from Cranford Design Work and liked how it looked, so I attempted to make mine look the same. Once I got the blank mostly round, I measured the size of the ferrule, and turned down the part of the blank to accept the ferrule. It is much easier to do the finish shaping of the handle after the ferrule is already on the piece.


I used some 80 grit sandpaper to scuff up the inside of the ferrule. The idea is that this gives the epoxy a bit more of a bite and it can hold even better. Once the wood blank has been turned down enough to accept the ferrule, mix up a little 5-minute epoxy. Add it to the work piece and to the inside of the ferrule. Then, slowly rotate it onto the work piece. Be sure to have a paper towel handy for any of the epoxy that squeezes out.

Now, it is time to finish shaping the handle.
After I've sanded everything starting at 150 grit and going all the way up to 600, I applied the finish to the handle. I just used a can of spray lacquer that I had, and I probably put on about 6 or 7 really light coats.

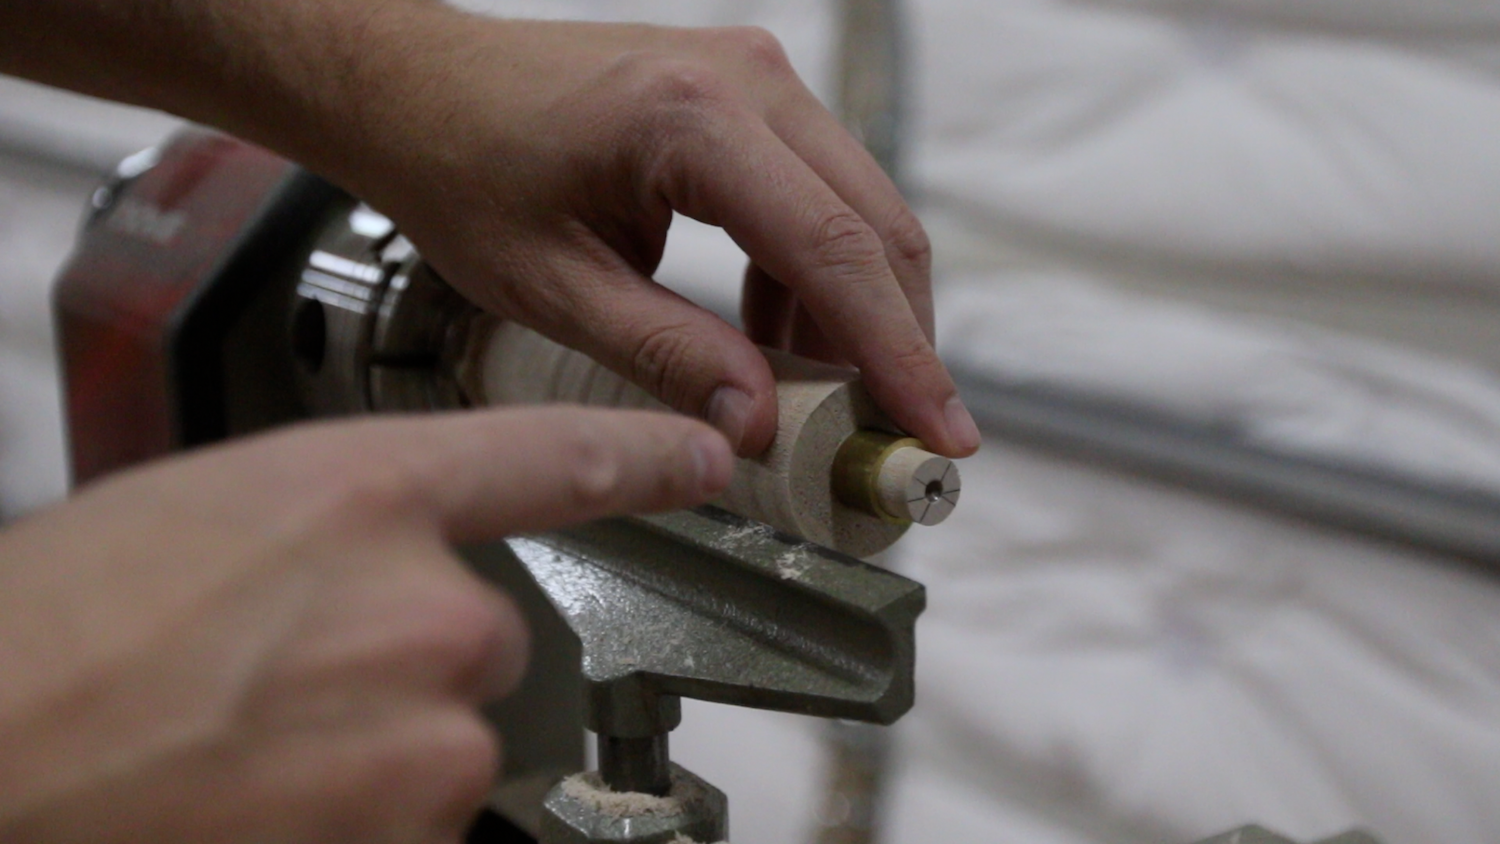
Then, I moved the tailstock back and put in the drill chuck with a 3/8" spade bit. I did some tests before I drilled into my finished piece and found that one particular brand of drill bit was a really nice fit for the steel rod. It was a tight enough vacuum fit that when I pulled it back out, it made a pop like a cork! It is recommended that you drill about half of the distance of the handle. I did a little less than this, just because I wanted a longer overall tool.

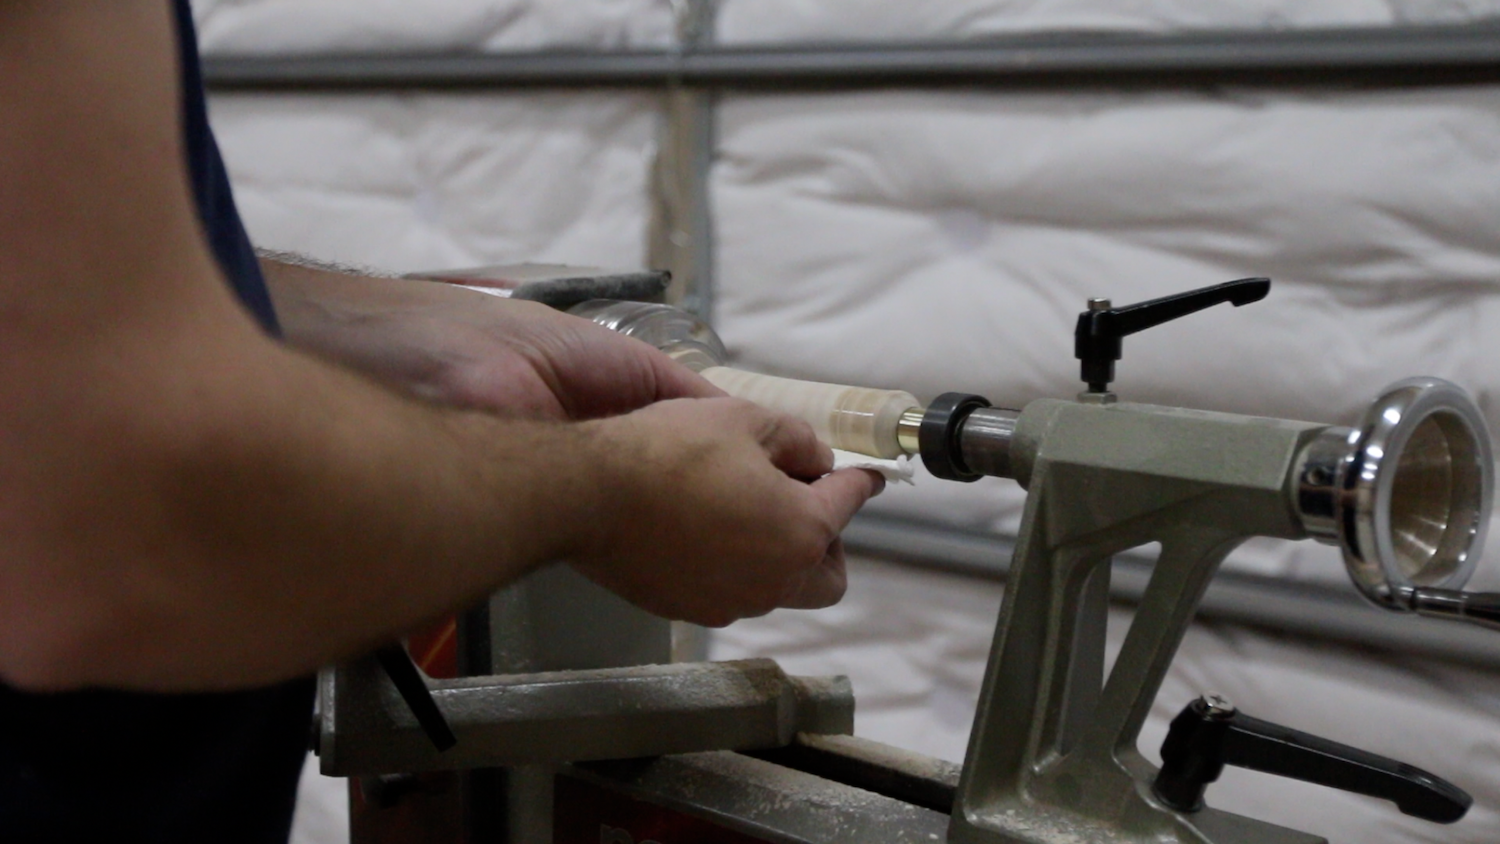
At this point, the wood blank could be removed from the lathe chuck. I left the tenon on it so that I could use that to stand this piece up in a clamp to accept the steel rod. I clamped the piece vertically, mixed up some more epoxy and put it into the hole and on the rod itself. Don't forget to scuff the rod again for that grabbing power, but don't scuff it too high...you don't want to mess up the look! I set the rod into the hole, wiping off any of the epoxy that squeezed out. Then, I left it overnight to cure fully.

After the epoxy was fully cured, all that was left was to assemble everything. The steel rod just fits into the recess on the head of the branding iron. Then, using the embedded set screw, I secured the rod tightly.
Then, it was time to brand everything! I tried it out on a variety of soft and hard woods, leather and even cardboard. The cardboard was one that Cranford Design Works told me about. I'm not sure I would have even thought of it. In fact, when they shipped the kits to me, two sides of the boxes were branded with their logo, and i thought it was a really nice touch.
CONCLUSION
Overall, this was a fun project to turn this handle and learn all about branding irons. This kit I got was the right mix of DIY, precision and fun! Let me know below if you have any questions, and if you haven't already, go watch the video. Thanks for following along with this project!